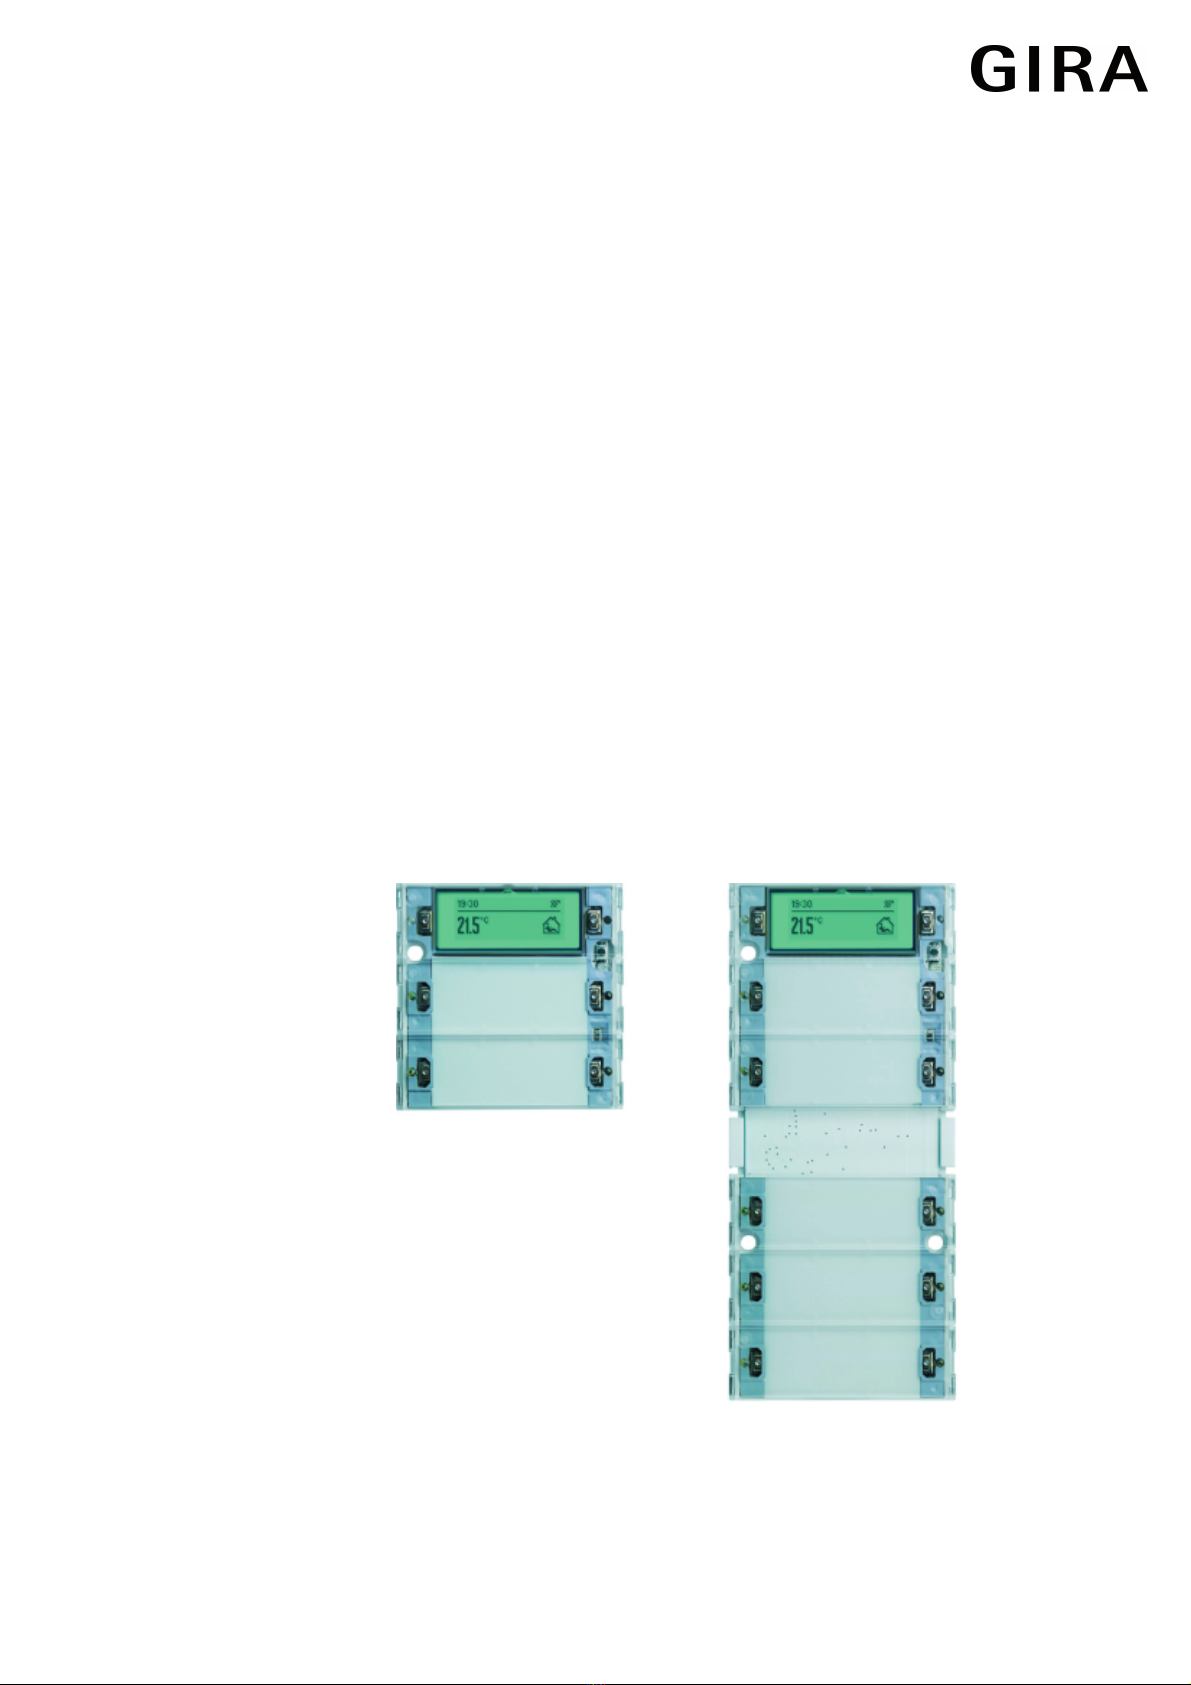
Gira 5142 00 Operator's manual

KNX
Product documentation
Issue:
23.03.2017
Push button sensor 3 Plus 2-gang
Push button sensor 3 Plus 5-gang (2+3)
Order No. 5142 00
Order No. 5145 00
51423400

Order No. 5142 00
Order No. 5145 00
Table of Contents
Product definition1 4.................................................................................................................
Product catalogue1.1 4...........................................................................................................
Function1.2 4..........................................................................................................................
Accessories1.3 7.....................................................................................................................
Installation, electrical connection and operation2 8..............................................................
Safety instructions2.1 8...........................................................................................................
Device components2.2 9........................................................................................................
Fitting and electrical connection2.3 10....................................................................................
Commissioning2.4 14.............................................................................................................
Operation2.5 15......................................................................................................................
Basic display2.5.1 16..........................................................................................................
Menu "Setpoint"2.5.2 18.....................................................................................................
Menu "Settings"2.5.3 20.....................................................................................................
Technical data3 31....................................................................................................................
Software description4 32..........................................................................................................
Software specification4.1 32...................................................................................................
Software "Push button sensor 3 plus"4.2 34...........................................................................
Scope of functions4.2.1 34.................................................................................................
Notes on software4.2.2 37..................................................................................................
Object table4.2.3 38...........................................................................................................
Object table, push button sensor function section4.2.3.1 38.........................................
Object table, controller function section4.2.3.2 52.........................................................
Display object table4.2.3.3 74........................................................................................
Functional description4.2.4 79............................................................................................
Push button sensor4.2.4.1 79........................................................................................
General settings4.2.4.1.1 79......................................................................................
Operation concept and button evaluation4.2.4.1.2 80...............................................
Switching function4.2.4.1.3 84...................................................................................
Dimming function4.2.4.1.4 85....................................................................................
Venetian blind function4.2.4.1.5 87...........................................................................
Value transmitter function4.2.4.1.6 91.......................................................................
Scene extension function4.2.4.1.7 93.......................................................................
2-channel operation function4.2.4.1.8 94..................................................................
Controller extension function4.2.4.1.9 96..................................................................
Controller operation function4.2.4.1.10 97..................................................................
Heating timer operation function4.2.4.1.11 98.............................................................
Manual fan control function4.2.4.1.12 99....................................................................
Status LED4.2.4.1.13 100............................................................................................
Brightness setting4.2.4.1.14 106.................................................................................
Disabling function4.2.4.1.15 107.................................................................................
Alarm signalling4.2.4.1.16 109....................................................................................
Room temperature controller4.2.4.2 111.......................................................................
Operating modes and operating mode change-over4.2.4.2.1 111............................
Control algorithms and calculation of command values4.2.4.2.2 115.......................
Adapting the control algorithms4.2.4.2.3 123............................................................
KNX
Product documentation
Page 2 of 281

Order No. 5142 00
Order No. 5145 00
Operating mode switchover4.2.4.2.4 126..................................................................
Temperature setpoints4.2.4.2.5 136..........................................................................
Room temperature measurement4.2.4.2.6 152.........................................................
Command value and status output4.2.4.2.7 155.......................................................
Disable functions of the room temperature controller4.2.4.2.8 162...........................
Heating timer4.2.4.2.9 163........................................................................................
Valve protection4.2.4.2.10 165....................................................................................
Room temperature controller extension4.2.4.3 166.......................................................
Connection to room temperature controller4.2.4.3.1 166..........................................
Operating functions4.2.4.3.2 171..............................................................................
Display functions4.2.4.3.3 174..................................................................................
Room temperature measurement4.2.4.3.4 176.........................................................
Behaviour after a device restart4.2.4.3.5 177............................................................
Light scene function4.2.4.4 178.....................................................................................
Display4.2.4.5 181.........................................................................................................
Display structure and information displayed4.2.4.5.1 181.........................................
Symbols4.2.4.5.2 188................................................................................................
Push button assistance function4.2.4.5.3 189...........................................................
Fault message and alarm texts4.2.4.5.4 190............................................................
Manual fan control and fan level display4.2.4.5.5 192..............................................
Display illumination4.2.4.5.6 197...............................................................................
Delivery state4.2.4.6 198...............................................................................................
Parameters4.2.5 199..........................................................................................................
General parameters4.2.5.1 199.....................................................................................
Parameters on the push button sensor function section4.2.5.2 202..............................
Parameter for the controller function section4.2.5.3 239...............................................
Parameter on scene function4.2.5.4 268.......................................................................
Parameters for the display4.2.5.5 271...........................................................................
Appendix5 279...........................................................................................................................
Index5.1 279...........................................................................................................................
KNX
Product documentation
Page 3 of 281

Order No. 5142 00
Order No. 5145 00
1 Product definition
1.1 Product catalogue
Product name: Push button sensor 3 Plus 2-gang / Push button sensor 3 Plus 5-gang (2+3)
Use: Sensor
Design: UP (concealed)
Order No. 5142 00 / 5145 00
1.2 Function
The push button sensor 3 plus combines the functions of a KNX/EIB single-room temperature
controller, a push button sensor and a display unit in just one bus subscriber. The combination
of these functions makes it possible, for example, to control the light, the blinds, and the room
temperature centrally from the entry area of a room. The room temperature controller and push
button sensor functions are each independent function sections of the device with their own
parameter blocks in the ETS.
Depending on the device variant, the device has up to 5 control surfaces that can be used to
operate the integrated room temperature controller and the push button sensor. The functions
can be configured in the ETS. In addition the push button sensor 3 plus has 2 display buttons,
which can be used to check the setpoint temperature of the room temperature controller and to
configure additional device settings.
Push button functionality:
When a rocker or button is pressed, the device transmits telegrams to the KNX/EIB, depending
on the ETS parameter settings. These can be, for instance, telegrams for switching or push
button control, for dimming or for controlling blinds. It is also possible to program value
transmitter functions, such as dimming value transmitters, light scene extensions, temperature
value transmitters or brightness value transmitters.
In connection with a room temperature controller equipped with a 1-byte object for switchover of
operating modes, the device can be used as a full-featured controller extension. The device can
also be used for presence detection or for setpoint shifting purposes and to indicate different
controller states. As a supplement to the controller extension the push button sensor has an
integrated temperature sensor that makes it possible to measure and forward the local room
temperature.
The operation concept of an operating area can be configured in the ETS either as a rocker
function or alternatively as a push button function. With the rocker function, one operating area
is divided into two actuation pressure points (left / right) with the same basic function. With the
push button function a control surface is either divided into 2 adjacent, functionally-separate
actuation pressure points (2 buttons). Alternatively a control surface can be evaluated as single-
area operation (only a single large button). If a control surface is used as a single rocker
function, then it is also possible to trigger special functions using full-surface operation.
The push button sensor 3 plus has two status LEDs per operating area. These status LEDs can
either be switched on or off permanently, or can function as a status indicator for a button or
rocker. As an alternative, the LEDs can also be activated via separate communication objects.
The LEDs can either indicate the switching status of an object statically or by flashing, signal
operating states of room temperature controllers, or indicate results of logical value comparison
operations.
The colour of the status LEDs (red, green, blue) can be configured in the ETS either globally or
separately, as required. Optionally a superposed function can be activated via the bus, in which
the colour and display information of individual status LEDs can be changed according to
priority.
Room temperature controller functionality:
The device can be used for single-room temperature control. Depending on the operating mode,
the current temperature set value and on the room temperature, a variable for heating or cooling
Page 4 of 281
Product definition

Order No. 5142 00
Order No. 5145 00
control can be sent to the KNX/EIB for up to 2 control circuits. The controller distinguishes
between different operating modes (comfort, standby, night, frost/heat protection) each with
their own temperature setpoints for heating or cooling.
Moreover, when configuring only one control circuit it is possible to use an additional heating or
cooling unit by activating an additional heater and/or cooling unit in addition to the heating or
cooling basic level. In this connection, you can set the temperature setpoint difference between
the basic and the additional level by a parameter in the ETS. For major deviations between the
temperature set value and the actual temperature, you can activate this additional stage to heat
up or cool down the room faster.
You can assign different control algorithms to the two control circuits and to the basic and
additional levels. For heating and cooling functions, you can select continuous or switching PI or
switching 2-point feedback control algorithms.
The room temperature can be recorded either by the internal or by an external temperature
sensor, or also separately for the two control circuits. The external temperature sensor is
connected to the bus coupling unit of the push button sensor 3 plus as a wired remote sensor.
In addition, a KNX/EIB communication object is available that can be used to integrate into the
temperature detection a temperature value received externally from the bus, e.g. from a
controller extension. Combined temperature recording by two of the available sensors is also
possible.
Optionally, the heating timer integrated into the device allows requirements-oriented switchover
of the controller operating mode depending on the time of day and the day of the week. For this
purpose, the device provides up to 28 separate switching times that can be preconfigured
individually in the ETS, and can be modified subsequently via the settings menu while the push
button sensor is in operation.
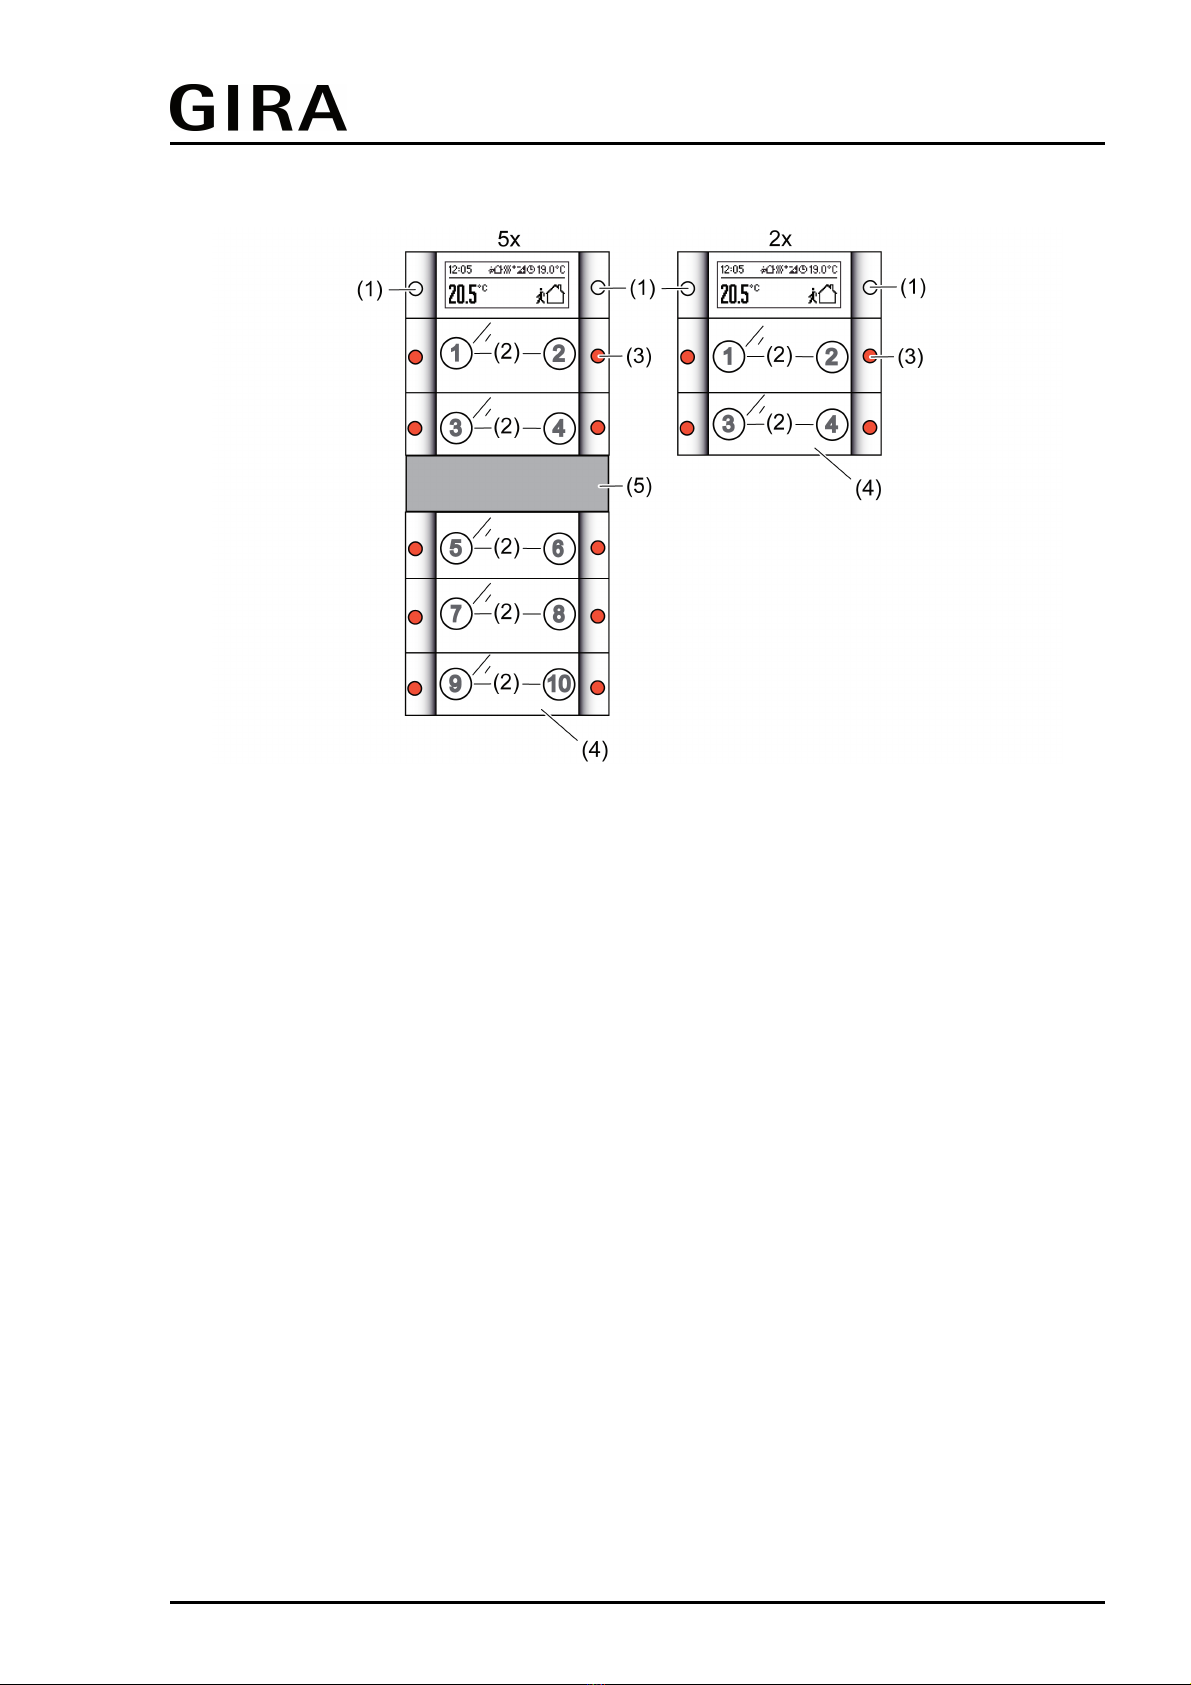
Display functionality:
The device's graphics display has 103 x 40 pixels and is equipped with switchable LED
backlighting. The display is subdivided into various display areas, depending on the
configuration in the ETS, the operating state and the specific device functions that are activated.
A general distinction can be made between 1-area and 2-area display. With two display areas,
the upper area of the normal display, also called the status line, shows symbols that indicate
various operating modes of the room temperature controller or the controller extension.
Moreover it is optionally possible to display in the status line the time (left justified) and
additional temperature values of the controller extension (right-justified).
The lower area of the display, also called the menu area, can be used to visualise various
temperature values in a single-line or two-line format. In addition it is possible to display values
that have been received by KNX/EIB via separate communication objects in various data and
depiction formats. Furthermore, display of the time and date from an external KNX/EIB system
clock in the graphics display can optionally be configured.
When only one display area is used, the simplest depiction option in the normal display is to
show temperature values and to indicate the operating mode of the room temperature
controller.
Each item of display information in the menu area can be supplemented with additional texts
that are freely definable in the ETS. The menu area of the display can optionally be used to
show alarm texts and comment text up to 14 characters long in a two-line format. These text
displays override all normal displays in this area, and thus can provide direct information about
various system states, for example the states of KNX/EIB alarm centres or facility systems.
The button help function can be enabled in the ETS especially for device control surfaces that
are not labelled. The button help shows a one-line help text on the display for a certain duration
that explains the function of the pressed button or rocker switch. The button help texts can be
configured in the ETS for each button of the device.
General:
The labelling field of the push button can be illuminated. If no or a wrong application has been
loaded into the push button sensor with the ETS, the labelling panel illumination and the
backillumination of the display flashes with a frequency of approx. 0.75 Hz to indicate an error,
and in this case the push button sensor does not work.
Alternatively, communication object control can be used to change the brightness of all status
LEDs, the labelling field illumination and the backlighting of the display. This makes it possible,
Page 5 of 281
Product definition

Order No. 5142 00
Order No. 5145 00
for example, to reduce the brightness during nighttime hours to a value configured in the ETS.
The device's programming mode is indicated by a separate programming LED, which is located
on the front below the decorative covers directly adjacent to the programming button. In this
manner the device can be commissioned easily with the ETS even in the installed state. Project
planning and commissioning of the device is performed using the ETS 3.0d with Patch A or
newer versions.
The push button sensor 3 plus must be plugged onto the flush-mounted bus coupling unit 3 (see
Accessories). Only the combination of this bus coupling unit and the push button sensor cover
results in a functional unit. Plugging the push button sensor onto a flush-mounted bus coupling
unit 1 or 2 (older generation) is not intended, and as a result the device combination will not
function.
It is also possible to use separate bus telegrams to disable the device or individual buttons, or to
display an alarm.
Integrated into the push button sensor 3 plus is a scene module that can be used to control
illumination and shading systems or various other facilities as needed by pressing just a single
button. KNX / EIB actuators can be controlled in up to 8 scenes via up to 8 outputs by means of
switching or value commands.
Page 6 of 281
Product definition

Order No. 5142 00
Order No. 5145 00
1.3 Accessories
Bus coupler 3 Order No. 2008 00
Bus coupler 3 external sensor Order No. 2009 00
Second support ring Order No. 1127 00
Remote sensor Order No. 1493 00
Inscription sheet Order No. 1090 00
Inscription sheet Order No. 1089 00
Rocker set 2-gang plus Order No. 2142 ..
Rocker set 5-gang plus Order No. 2145 ..
Page 7 of 281
Product definition

Order No. 5142 00
Order No. 5145 00
2 Installation, electrical connection and operation
2.1 Safety instructions
Electrical equipment may only be installed and fitted by electrically skilled persons. The
applicable accident prevention regulations must be observed.
Failure to observe the instructions may cause damage to the device and result in fire and
other hazards.
Make sure during the installation that there is always sufficient insulation between the
mains voltage and the bus. A minimum distance of at least 4 mm must be maintained
between bus conductors and mains voltage cores.
The device may not be opened or operated outside the technical specifications.
Page 8 of 281
Installation, electrical connection and operation

Order No. 5142 00
Order No. 5145 00
2.2 Device components
Figure 1: Device components of push button sensor 3 plus
(1) Display control surface
(Graphics display and 2 x buttons left and right)
(2) Control surfaces
(1 x rocker switch or 2 x button left and right / colours depend on design)
(3) Status LED
(2 x per control surface left and right / colour configurable)
(4) Labelling field with backillumination
(5) Central web (colours depend on design)
Dimensions (2-gang):
Width (W): 55 mm / Height (H): 55 mm / Depth (D): 10 mm
Dimensions (5-gang):
Width (W): 55 mm / Height (H): 126 mm / Depth (D): 10 mm
iSpecifications without flush-mounted bus coupling unit, without fastening brackets and
without design frame.
iNeutral inscription panels are included with the devices as part of the scope of supply. If
necessary, individual labels can be created using optionally available labelling sheets (see
Accessories) and labelling software, or on the Internet at marking.gira.com.
Page 9 of 281
Installation, electrical connection and operation

Order No. 5142 00
Order No. 5145 00
2.3 Fitting and electrical connection
Fitting and connecting the device for device variant 2gang (single height)
Figure 2: Device fitting of a push button 3 plus 2gang
(6) Flush-mounted bus coupling unit 3 with supporting frame
(7) Design frame
(8) Push button sensor cover
(9) Fit bolts for anti-theft protection (included with the push button sensor cover)
(10) Inscription panel
(11) Rocker cover
The push button sensor cover must be plugged onto a flush-mounted bus coupling unit 3. Anti-
dismantling protection is provided by screwing to the supporting frame of the bus coupling unit.
oConnect the bus coupling unit (6) with the KNX/EIB bus cable.
oOptional: When using an external temperature sensor, connect the wire
temperature/remote sensor to the 2pole screw terminal on the rear of the bus coupling unit.
Do this by using a bus coupling unit 3 with a connection for an external sensor (see
Accessories).
oFasten the bus coupling unit 3 in place in an appliance box.
oRemove the rocker covers (11) and inscription panels (10) from the push button sensor
cover (8).
oPosition the design frame (7) in front of the bus coupling unit and carefully plug the push
button sensor cover into the bus coupling unit.
oScrew the push button sensor cover to the supporting frame of the bus coupling unit. Use
the screw (9) provided.
Page 10 of 281
Installation, electrical connection and operation

Order No. 5142 00
Order No. 5145 00
oIf necessary, label the inscription signs. Optionally the separately available labelling sheets
(see Accessories) can be used.
oFinally, mount the rocker covers together with the labelling panel by snapping them on.
iBefore final fitting of the rocker covers, the physical address has to be loaded into the
device (see page 14).
Fitting and connecting the device for device variant 5gang (doubled height)
Figure 3: Device fitting of a push button 3 plus 6gang (doubled height)
(6) Flush-mounted bus coupling unit 3 with supporting frame
(7) Design frame
(8) Push button sensor cover
(9) Fit bolts for anti-theft protection (included with the push button sensor cover)
(10) Screw and anchor set for mechanical fastening and for anti-theft protection
(included with the push button sensor cover)
(11) Inscription panel
(12) Rocker cover
(13) Central web
Page 11 of 281
Installation, electrical connection and operation

Order No. 5142 00
Order No. 5145 00
The push button sensor cover must be plugged onto a flush-mounted bus coupling unit 3. Anti-
dismantling protection is provided by screwing to the supporting frame of the bus coupling unit.
In addition, the lower part of the push button sensor cover is screwed to the wall, or in the case
of mounting on 2 appliance boxes, to a second supporting frame. Mounting requires a design
frame 2gang without central web.
oConnect the bus coupling unit (6) with the KNX/EIB bus cable.
oOptional: When using an external temperature sensor, connect the wire
temperature/remote sensor to the 2pole screw terminal on the rear of the bus coupling unit.
Do this by using a bus coupling unit 3 with a connection for an external sensor (see
Accessories).
oFasten the bus coupling unit 3 in place in an appliance box.
oRemove the rocker covers (12) and inscription panels (11) from the push button sensor
cover (8).
For mounting on only one appliance box, the lower part of the push button sensor cover is
screwed to the wall with the aid of the supplied screw and anchor set (10). To do this, proceed
as follows:
oPosition the design frame 2gang without central web (7) in front of the bus coupling unit
and carefully plug the push button sensor cover into the bus coupling unit.
oMark the drill hole positions on the wall. Do this by using the push button sensor cover as a
template.
oPull the push button sensor off of the flush-mounted bus coupling unit again. Drill holes
(Ø 5mm) and insert the anchors.
iThe use of the anchors depends on the properties of the surface.
oPosition the design frame 2gang without central web in front of the bus coupling unit and
carefully plug the push button sensor cover into the bus coupling unit again.
oScrew the push button sensor cover to the supporting frame of the bus coupling unit. Use
the screw (9) provided.
oIn addition, fasten the lower part of the push button sensor cover in the predrilled holes with
the aid of the wall screws (10).
oIf necessary, label the inscription signs. Optionally the separately available labelling sheets
(see Accessories) can be used.
oFinally, mount the rocker covers together with the labelling panel by snapping them on.
For mounting on two appliance boxes, the lower part of the push button sensor cover is screwed
to a second supporting frame (see Accessories). To do this, proceed as follows:
oMount the second supporting frame on the lower appliance box.
oPosition the design frame 2gang without central web (7) in front of the bus coupling unit
and the second supporting frame and carefully plug the push button sensor cover into the
bus coupling unit.
oScrew the push button sensor cover to the supporting frame of the bus coupling unit. Use
the screw (9) provided.
oScrew the lower part of the push button sensor cover to the second supporting frame. Do
this using the screws included in the scope of supply of the supporting frame.
oIf necessary, label the inscription signs. Optionally the separately available labelling sheets
(see Accessories) can be used.
oFinally, mount the rocker covers, the central web (13) together with the labelling panel by
snapping them on.
Page 12 of 281
Installation, electrical connection and operation

Order No. 5142 00
Order No. 5145 00
2.4 Commissioning
Loading the physical address and application software
The commissioning of the device is basically confined to programming of the physical address
and the application data with the ETS.
Project planning and commissioning of the device using the ETS 3.0d with Patch A or newer
versions.
The device is connected and ready for operation.
An appropriate device must be created and configured in the ETS project.
Figure 4: Arrangement of the programming button and LED on the front of the device
The programming button is located on the front of the device behind a labelling panel (Figure 4).
Before final fitting of the rocker covers, the physical address has to be loaded into the device.
oDetach the control surface over the programming button/LED, if the rocker covers are
already fitted.
oActivating Programming mode: press the programming button (15).
The programming LED (16) lights up red.
oProgram the physical address with the help of the ETS.
The programming LED goes out.
oLoad the application data into the device using the ETS.
oMount control surface(s).
iIf the device was programmed with incorrect application data, then backillumination of the
labelling field flashes slowly. In this case, the device will not function after start-up.
Page 14 of 281
Installation, electrical connection and operation

Order No. 5142 00
Order No. 5145 00
2.5 Operation
Depending on the device variant, the device consists of up to 6 mechanically separate control
surfaces. The control surfaces are the design covers attached to the device with push button
elements underneath. A distinction is made between the display control surface (1) and the
control surfaces of the push button sensor function (2) (Figure 5).
Figure 5: Arrangement of the control surfaces on the front of the device
(1) Display control surface
Function: controller operation (setpoint shift) and menu operation
(2) Push button sensor control surfaces incl. status LEDs.
Function: Any desired push button sensor function or controller operation
The central part of the upper display control surface is transparent, and surrounds the LC
display. This control surface has two actuation pressure points on the left and right. The display
control surface can be used to preset settings for the room temperature controller (setpoint shift)
(see page 18-19). Furthermore, the display buttons can be used to make device settings (see
page 20).
The lower control surfaces are allocated to the push button sensor function. The function of
these rockers can also be configured in the ETS to any desired push button sensor function.
Alternatively it is possible to set operation of the integrated room temperature controller or of the
controller extension. The push button sensor function is an independent function section of the
device with its own parameter blocks in the ETS. Insofar as the control surfaces are to operate
the integrated room temperature controller, the following functions can be parameterised in the
push button configuration: setpoint shift, presence button, operating mode change-over. What is
more, a button-press can be used to activate or deactivate the integrated heating timer, and the
fan level can be changed over manually on a KNX/EIN fan coil actuator.
For a detailed description of all operating functions, please see Chapter 4. of this documentation
(see page 80).
The operation concept of an operating area of the push button sensor function (2) can be
configured in the ETS either as a rocker function or alternatively as a push button function. With
the rocker function, one control surface is divided into two actuation pressure points with the
same basic function. In the push button function either a control surface is divided into 2
functionally separate actuation pressure points (2 buttons), or a control surface is evaluated as
Page 15 of 281
Installation, electrical connection and operation

Order No. 5142 00
Order No. 5145 00
single-surface operation (only one large button).
If a control surface is used as a single rocker function, then it is also possible to trigger special
functions using full-surface operation.
The push button sensor 3 plus has two status LEDs per operating area. These status LEDs can
either be switched on or off permanently, or can function as a status indicator for a button or
rocker. As an alternative, the LEDs can also be activated via separate communication objects.
The LEDs can either indicate the switching status of an object statically or by flashing, signal
operating states of room temperature controllers, or indicate results of logical value comparison
operations.
The colour of the status LEDs (red, green, blue) can be configured in the ETS either globally or
separately, as required. Optionally a superposed function can be activated via the bus, in which
the colour and display information of individual status LEDs can be changed according to
priority.
The labelling field of the push button sensor can signal the switching state of its own object,
flash or be permanently on or off, or can serve as an orientation light if necessary. If no
application has been loaded into the push button sensor with the ETS, the illumination flashes
with a frequency of approx. 0.75 Hz to indicate an error.
2.5.1 Basic display
The device's graphics display has 103 x 40 pixels and is equipped with switchable LED
backlighting. The display is subdivided into various display areas, depending on the
configuration in the ETS, the operating state and the specific device functions that are activated.
A general distinction can be made between 1-area and 2-area display. With two display areas
(Figure 6), the upper area of the normal display, also called the status line, shows symbols that
indicate various operating modes of the room temperature controller or the controller extension.
Moreover it is optionally possible to display in the status line the time (left justified) and
additional temperature values of the controller extension (right-justified).
The lower area of the display, also called the menu area, can be used to visualise various
temperature values in a one-line or two-line format. In addition it is possible to display values
that have been received by KNX/EIB via separate communication objects in various data and
depiction formats. Furthermore, display of the time and date from an external KNX/EIB system
clock in the graphics display can optionally be configured.
When only one display area is used (Figure 7), the normal display shows temperature values
and indicates the operating mode of the room temperature controller. This type of display is the
clearest and simplest display function.
The form of the display areas and thus the selection of information shown on the display
depends on the parameter configuration in the ETS. For further information on the display
options in the basic display and about the display configuration, see the chapter "Display" in this
documentation (see page 181).
Figure 6: Example of a basic display with two display areas
(Time, setpoint temperature, room temperature, fan level display)
Page 16 of 281
Installation, electrical connection and operation

Order No. 5142 00
Order No. 5145 00
Figure 7: Example of a basic display with one display area
(Room temperature, operating mode display)
Page 17 of 281
Installation, electrical connection and operation

Order No. 5142 00
Order No. 5145 00
2.5.2 Menu "Setpoint"
The two display buttons of the device can be used to shift the setpoint temperature of the room
temperature controller. The temperature can be shifted in the positive or negative direction
within a specified range. The setpoint can be shifted using the display buttons both on a main
controller or also on controller extensions.
The setpoint shift is called up if the normal display is active and the left or right display button is
pressed once. After that the menu "Setpoint" is displayed (Figure 8). The selection can be
confirmed by pressing the the right-hand display button >. Pressing the left-hand display button
x aborts the setpoint shift. The display then returns to the normal display.
If the selection is confirmed, the display then shows the setpoint temperature of the active
operating mode of the room temperature controller. Depending on the parameter setting in the
ETS (see page 182), either an absolute temperature value is displayed, or the value of the
basic setpoint shift relatively as a bar graph.
By pressing the right + or left - button it is possible to shift the setpoint temperature within the
specified limits. With Version 1.2 applications, the step width of the shift in the ETS can be
configured using the parameter "Step width of the setpoint shift" in the parameter node "Room
temperature control (RTR) -> Controller general -> Setpoints" (0.1 K / 0.5 K / 1.0 K). In Version
1.1 applications, the step width is permanently defined as 0.1 K.
The application of the set setpoint shift into the controller is dependent on the application
version. With the Version 1.2 application program, the behaviour in the ETS can be configured...
- Confirm the setpoint in the display using OK:
If the ETS parameter "Confirm setpoint in the display with OK?" in the "Display" parameter
node is set to "Yes" (standard setting), then an OK command is required for valid
application of the set setpoint shift. Pressing both display buttons simultaneously triggers
the OK command. The controller then applies the setpoint shift immediately. The display
then returns to the normal display.
- Apply setpoint immediately:
If the ETS parameter "Confirm setpoint in the display with OK?" is configured to "No", then
the controller applies the set setpoint shift automatically, each time the + or - button is
pressed. The display returns to the normal display when any button of the rockers 1...n is
pressed or no entry is made via the display buttons for 15 seconds.
With the Version 1.1 application program, the behaviour in permanently defined. Here, for valid
application of the set setpoint shift, an OK command through simultaneous pressing of both
display buttons is required.
iThe function of the Version 1.2 application to apply a setpoint shift without an OK is only
possible on devices with release code I05 or higher. On older devices with earlier release
codes, application is only ever possible with OK, no matter how the parameter for setpoint
confirmation is set.
Page 18 of 281
Installation, electrical connection and operation

Order No. 5142 00
Order No. 5145 00
Figure 8: Menu operation for setpoint shift, using the example of the application of the setpoint
shift through "OK"
Representation with absolute temperature value (not as bar graph)
For a setpoint shift a distinction is made whether the setpoint presetting is relative or absolute
(see page 136).
The basic setpoint shift (temperature offset offset of the basic temperature with relative setpoint
presetting) can be set in every mode and optionally accepted in case of an operating mode
switch-over (e.g. comfort mode -> standby mode), so that the shift takes affect in all operating
modes of the controller. Alternatively the basic setpoint shift is reset in the event of a operating
mode switch-over.
With absolute setpoint presetting the setpoint shift directly affects the object "Setpoint active
operating mode" and thus directly only the specified setpoint temperature of the specific active
operating mode. The last setpoint temperature specified via the bus or by the ETS is first
overwritten by a shift. Depending on the ETS parameterisation, the controller saves the shifted
temperature value either in non-volatile memory (EEPROM), or only temporarily.
For more information about specification or shifting of setpoint temperatures with relative or
absolute setpoint presetting, see chapter 4. "Room temperature controller".
iIn case of two control circuits (also with separate setpoints), the set-temperatures of both
circuits will be shifted.
iA setpoint shift does not affect the temperature setpoints for the frost or heat protection.
iThe setpoint cannot be shifted using the display buttons if controller operation is currently
disabled.
iWith relative setpoint presetting a basic setpoint shift can optionally also be performed
using a communication object via the bus (e.g. using controller extensions). Furthermore,
with relative or absolute setpoint presetting setpoint temperatures can be specified via the
bus and thus changed. If a new shift or new setpoints are received via the bus and at the
same time the menu "Setpoint" is active, then the display shows the message "The setting
has been discarded". After that the menu is automatically exited. In this case the settings
configured via the menu are discarded!
Page 19 of 281
Installation, electrical connection and operation

Order No. 5142 00
Order No. 5145 00
2.5.3 Menu "Settings"
Main menu
Without using the ETS, the two display buttons of the device can be used to perform various
device settings and also to execute operating functions. For example, it is possible to configure
the room temperature controller (operating mode switchover, setting the setpoint temperatures)
and to set the heating timer and the display contrast. Furthermore, if a fan controller is present
the fan levels can be set manually.
In order to avoid the unintentional disruption of essential functions of the device, access to
individual settings can be prevented via the parameterisation in the ETS. When the button
disabling function is active, access to the settings is completely blocked.
The settings can be changed using the display buttons both on a main controller or also on
controller extensions. The setting options on the controller extensions are limited, however.
The configuration menu is called up if the normal display is active and at the same time the left
and right mouse buttons are pressed. After that the menu "Settings" is displayed (Figure 9). The
selection can be confirmed by pressing the the right-hand display button >. Pressing the left-
hand display button x aborts the configuration menu. The display then returns to the normal
display.
If the selection is confirmed, the display then shows the main menu. Depending on the enabling
settings in the ETS, various menu entries are shown, which can be selected using the buttons
n and o.
A selected menu entry can be opened by pressing both of the OK display buttons. The display
then goes to the corresponding submenu.
The main menu can be exited by selecting and confirming the entry "Abort". Alternatively the
main menu will be exited if no further input is made for approx. 15 seconds.
Page 20 of 281
Installation, electrical connection and operation
This manual suits for next models
4
Table of contents
Other Gira Accessories manuals

Gira
Gira CO2-Sensor User manual

Gira
Gira 5466 02 User manual

Gira
Gira System 55 Pushbutton sensor 4 Standard User manual

Gira
Gira KNX 5011 00 User manual

Gira
Gira 5112 00 Operator's manual

Gira
Gira 0551 4 Series User manual

Gira
Gira EDA 3902 F User manual

Gira
Gira Observer 110 User manual

Gira
Gira 1493 00 User manual

Gira
Gira 5111 00 User manual