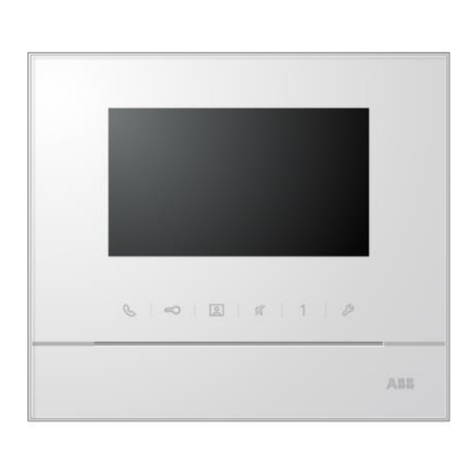
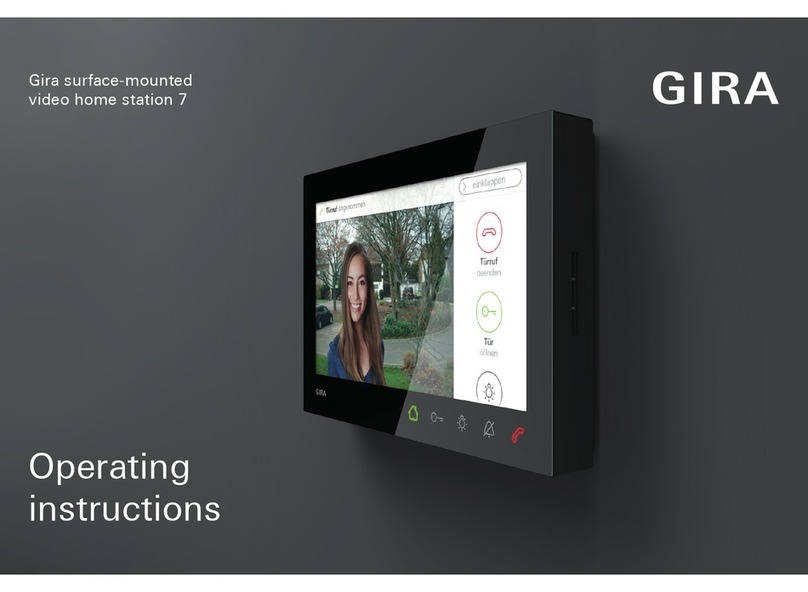
Gira Surface-mounted video home station 7 Operating instructions

Gira surface-mounted
video home station 7
Assembly
and start-up
intructions For electricians only

2
Table of contents
Table of contents
Product features ............................. 4
Features ......................................................... 4
Contents included ......................................... 4
Accessories ................................................... 4
Device description .......................... 5
Device description – details ........................... 5
Mounting the home station ............ 6
Wiring the plug terminal ................................ 6
Wall mounting ............................................... 7
Taking down the home station ....... 9
Input screen .................................. 10
First start-up ................................. 11
Initialising .................................................... 11
First steps – basic configuration .................. 12
Settings ........................................ 14
Functions .......................................... 16
Cameras ............................................................ 16
Image memory ................................................. 18
Door calls .......................................................... 20
Internal calls ..................................................... 21
Floor calls ......................................................... 23
Switching actions ............................................. 24
Managing favourites 25
Enabling automatic internal call acceptance .... 26
Enabling automatic door opener ...................... 27
Device ............................................... 28
Activating 30s screen lock ................................ 28
Ring tone melodies and key tones ................... 29
Device parameters ............................................ 30
PIN protection ................................................... 33
Update .............................................................. 34
Data backup ..................................................... 35
Resetting the settings ....................................... 36

3
Table of contents
Information ................................... 37
System version ............................................ 37
EULA ............................................................ 37
Legal information ........................................ 37
Contact details ............................................. 37
microSD card ................................ 38
General information ..................................... 38
Inserting a microSD card ............................. 40
Removing a microSD card ........................... 40
Technical data .............................. 41
Warranty ....................................... 42

4
Product features
Product features
The surface-mounted video home station 7
from the Gira door communication system is a
fully pre-assembled unit with a 17.78 cm (7")
colour TFT display and convenient
speakerphone function. It is operated using the
touch-screen and the five capacitive operating
buttons. Only a light touch is required for
operation. When a button is pressed correctly,
a deactivatable confirmation tone sounds or
the user can also select tactile feedback
(vibration) for this.
Features
• Full-surface glass panel with touch
functionality
•Touchkeys
• Wall-mounted with or without flush-
mounted device box
• Assembly with pedestal for use on furniture
(requires accessories)
Included contents
• 1x surface-mounted video home station 7
• 1x assembly and start-up instructions
• 1x operating instructions
Ensure the package contents are complete and
undamaged. Please see “Warranty” in the case
of any defects.
Accessories
• Surface-mounted video home station 7 base
foot (art no. 1282 ..)
• Power supply for door communication DC 24 V
300 mA (art. no. 1296 00)
• Power supply for door communication DC 24 V
700 mA (art. no. 2570 00)

5
Device description
Device description
1 Surface-mounted video home station 7
2 Speaker opening
3 Mounting plate with plug terminal
4 Operating buttons, capacitive
5 Screen with touch function
6 Microphone opening
7 Insert for memory card
1
3
4
5
7 6
2
Device description – details
1Menu bar, can be expanded or collapsed
2Accept/end door call
3Enable/disable ring tone
4Switch on light
5Open door
6Switch screen on or off.
When navigating in the menu: Back to home screen.
7Screen with touch function
collapse
change
Ringtone volume
access
Settings
GIRA
Door communication
Device
1
23456
7
access
Cameras
Functions
call up
Oce

6
Mounting the home station
Mounting the home station
Additional power supply
When connecting an additional power supply,
the power supply unit must be EN 61558-
compliant.
In addition, ensure a short-circuit current value
of < 1.5 A.
Do not bridge the BUS and AS
terminals.
The BUS and AS terminals must not be bridged.
The home station automatically detects whether
an additional power supply is connected.
Wiring the plug terminal
Wire the plug terminal as follows:
• BUS terminals for 2-wire bus,
• Additional supply (AS) terminals for any
additional power supply required (one
additional power supply per device is required
for more than three surface-mounted home
stations video 7 called in parallel),
• FC terminals for floor call button.

7
Mounting the home station
The following mounting options are available:
• Wall mounting. You can use the mounting plate
to cover an existing flush-mounted device box
or cavity box.
• Assembly on pedestals for placement on furni-
ture (see accessories).
The section below describes how to mount the
device on a wall.
For setting up the device on pedestals, refer to the
separate installation instructions.
Wall installation
Installation note
Recommended mounting height: 1.60 m to
1.70 m (centre of screen).
Make sure the wall surface is smooth. An irregular
wall surface may result in the mounting plate
warping during installation. This can prevent the
home station from being correctly clipped onto
the mounting plate.

8
Mounting the home station
Klick
1. Mark the hole positions (for four oval-head
screws Ø 4 mm), drill the holes and insert wall
plugs. Select the installation spot so that the
mounting plate is centred over the cable outlet.
2. Fasten the mounting plate to the wall.
3. Strip the supply cable and wire the plug
terminal. Stow any surplus cable.
4. Place the home station on the mounting plate
and push it down until you feel and hear (click)
the home station snap into place.

9
Taking down the home station
Taking down the home station
Klick
Detach the home station from the mounting plate
as follows.
1. Hold the home station with both hands,
supporting the housing from below with your
thumbs and holding the home station's sides
with your fingers.
2. Give the home station a firm push upwards
with your thumbs until you feel and hear (click)
it release from the catch.
3. Detach the home station from the mounting
plate.

10
Input screen
Input screen
w
s
e
d
y
r
f
x
t
g
c
z
h
v
u
j
n
i
k
m
o
l
@
p
b.
_-123ä.?
q
a
Camera 1
HH:MM
1
4
7
2
5
8
3
6
9
0
A
B
The surface-mounted video home station 7 has
two input screens:
• A numerical input screen (A) for entering date
and time.
• Alphabet input screen (B) for spelling out
designations.
To make any changes, always tap the
corresponding input field. Use to delete
characters. Each character is deleted separately.
Use to confirm new entries.
Tap to abort an entry and keep the previous
value or name.

11
First start-up
First start-up
Once all devices have been installed (door and
home stations, control unit etc.), you can start up
the door communication system.
Initialising
After switching on the power supply, tap to call
up the basic config screen.
If you are using an additional power supply, the
basic config screen appears automatically.
Starting up the door communication system
Refer to the system manual for instructions on how
to start up the system and for notes on major start-
up procedures (manual included with the respective
control unit or available for download from
www.download.gira.de).

12
First start-up
next
Deutsch
English
Select language
Select the desired menu and display language.
back
next
Date and time
Date
Select date format
Date
03.01.2014
Time
Activate 12-hour format
Time
12:12
1.
3.
4.
TT.MM.JJJJ
1
4
7
2
5
8
3
6
9
0
HH:MM
1
4
7
2
5
8
3
6
9
0
back
Date and time
Select date format
TT.MM.JJJ
JJJJ.MM.TT
TT.MM.JJJJ
JJJJ.MM.TT
TT/MM/JJJJ
JJJJ/MM/TT
accept
License agreement
2.
I have read and accept the
license agreement.
Read and accept the license agreement by scrollingto the end
of the page, ticking the box and then clicking on "accept"
back
Start
Date and time
Basic configuration of the home station is
complete.
You will now be taken to the settings menu.
There you can configure the home station
(e.g. configure cameras, enable the image
memory, assign door calls, internal calls and
switching actions, set button tones, select
ringtone melodies, and much more).
back
Espagnol
Francais
Italiano
Nederlands
中國
First steps – basic configuration
1. Set screen and menu language.
Factory default: German
2. Read and accept EULA. To do so, scroll down
to the end of the licence agreement, confirm
and tap “Accept”. You have to accept the
EULA. The surface-mounted video home
station 7 cannot be started otherwise.
3. Choose a date format and set the date.
Time format (12- or 24-hour clock) and set the
time. Then tap “Next”.
4. Tap "Start". You have completed basic
configuration. The settings menu opens and
you can apply additional settings for start-up.

13

14
Settings
Settings
Once you have completed the basic config, the settings menu opens automatically.
Otherwise:
1. Enable programming mode (press and hold “Systemprog.” on the control unit for 3 seconds).
2. Tap and select “Settings access” in the menu bar. Navigate the settings menu by scrolling with
your finger.
All settings shown below are for programming mode only (indicated by the header “System
programming mode” beside ).
Assigning home station and door station
The call buttons must be assigned via the light
button of the home station as specified in the
system manual.
System programming mode
exit
Functions
Image memory
Internal calls
Floor calls
Cameras
Switching actions
Door calls
Manage favourites

15
Settings
Area Selection Settings
Functions
Cameras Activate cameras manually and parametrise switch-off time. Show and rename cameras; set
brightness, contrast, colour, frequency.
Image memory Enable image memory Enable automatic image capture upon door call. Select number of images
upon door call and adjust pause between image capture.
Door calls/internal calls/floor
calls
Show and rename calls. Select ring tone melodies or replace with own ring tone melodies. Restore
default ring tone melody. Internal calls only: Add new internal call.
Switching actions Add, rename or delete new switching action.
Manage favourites Show or block favourite and parameterise.
Enable automatic internal call
acceptance
Enable function for user.
Enable automatic door opener Enable function for user.
Device
Activate 30 s screen lock Activate when cleaning the screen.
Ring tone melodies and key
tones
Play back ring tone melodies or replace with own ring tones. Restore default ring tone melody.
Enable/disable key tones. Adjust type and volume.
Device parameters Activate resistance. Parametrise screen settings (home screen and brightness). Enable or disable
key vibration and adjust intensity. Select screen and menu language, adjust date and time.
PIN protection Unlock PIN protection. Enable PIN protection and enter PIN.
Update Enable update function and run update.
Data backup Enable and perform data backup, data restore and image memory lock.
Reset the settings Delete cameras, reset call assignments, factory defaults.
Information
System version Find details regarding the firmware and hardware versions, bus address and index version here.
You can also review the EULA and legal information here. You can save the EULA to a microSD
card. This is also where to find the Gira hotline's contact details which can be changed using your
own contact details.
EULA text
Legal information
Contact details entered

16
Functions
Functions
System programming mode
exit
Cameras
Switch o camera after
20
s
40 60 80 100 120
Camera 1
Enable cameras manually
Functions
Image memory
Internal calls
Floor calls
Cameras
Switching actions
Enable image memory
Door calls
Cameras
You can assign and rename up to 20 cameras for
the surface-mounted video home station 7.
Activate camera manually
You can set whether users can activate assigned
cameras manually. If the function is disabled, the
camera image only comes on when there is a door
call.
Camera switch-off time
The slider sets the duration for which the camera
relays footage when activated manually (20 to 120
seconds).
Factory default: 30 seconds
Rename cameras
1. Select a camera and tap the name field. The
input screen for renaming appears.
2. Change the name in the input screen and tap
to confirm.

17
Functions
Camera 1
Name
Camera 1
Brightness
Contrast
Colour
System programming mode
Camera lighting
Colour
Frequency
Reset settings
16
back
back
System programming mode
Adjust cameras
Adjust the brightness, contrast, colour and
frequency using the corresponding slider. The set
value is stored automatically.
Switch on/off camera lighting
Adjust frequency to fine-tune video signal
Resetting the settings only resets the camera
settings. No assignments are deleted.
Settings for multiple surface-mounted video
home station 7 and colour cameras
The brightness, contrast, colour and frequency
settings always only apply to the connection
between the active surface-mounted video home
station 7 and colour camera. This means that if
there are multiple home stations or cameras, the
parameters need to be adjusted separately for
each camera in every home station.

18
Functions
System programming mode
Functions
Cameras
Door calls
Internal calls
Floor calls
Switching actions
exit
Configure image memory
Activate automatic image
capture upon door call
Number of images upon door opening
Pause between images captured
12 3
2345
Image storage
s
Enable image memory
Manage favourites
Image memory
Enable image memory
Enable or disable access to image memory via
switch.
Factory default: approved
If enabled, users will have access to the image
memory through the settings menu and menu bar.
Data protection law
Please note that, in the EU, surveillance of publicly
accessible spaces using opto-electronic technology
and recording of the obtained data is subject to the
General Data Protection Regulation (GDPR) and
other national laws and that a variety of legal
requirements must be met to make such
surveillance legally admissible. All applicable
national laws, most notably those governing data
protection, should be observed outside of the EU as
well.

19
Functions
Image memory settings
Select image memory and adjust the following
parameters:
• Enable automatic image capture upon door
call
• Number of images per door call (1 to 3)
• Pause between image captures (2 to 5 s)
Note the following:
The home station’s internal image memory
stores up to 200 images. Therefore:
1 image per call = max. 200 savable door calls
3 images per call = max. 66 savable door calls
Image 201 automatically overwrites image 1,
image 202 overwrites image 2 and so on.
Once the image memory reaches 170 images, a
message displays prompting you to save the
images to external storage and/or delete
images.
Once image 200 is reached, an additional
message displays noting that any additional
images will now overwrite the images already
present.
Delete images
use this to permanently delete all images from the
image memory.
This does not apply to any images stored on the
microSD card. These images must be deleted
separately on a PC.
Archiving behaviour
Captured images are saved in the home station’s
internal image memory.
With automatic image capture upon door call
enabled, any new images captured for an
unanswered door call are archived automatically.
Images are not automatically saved in the internal
image memory when door calls are answered or
the door opener button is pressed.

20
Functions
Name
Door call 1
System programming mode
Functions
Cameras
Image memory
Internal calls
Floor calls
Switching actions
exit
Door call 1
Door calls
Manage favourites
Door calls
You can assign and manage a maximum of 24
calls (door calls, internal calls or floor calls) to the
surface-mounted video home station 7. Please
observe this when assigning the call types.
Rename door calls
1. Select a door call and tap the name field. The
input screen for renaming appears.
2. Change the name in the input screen and tap
to confirm (example: door call 1 -> Front
door).
Other manuals for Surface-mounted video home station 7
1
Table of contents
Other Gira Intercom System manuals
Gira
Gira 1264 00 User manual
Gira
Gira 1250 Series Service manual

Gira
Gira 1288 00 User manual
Gira
Gira 1281 Series Service manual
Gira
Gira 2600 Series User manual
Gira
Gira 5919 Series User manual

Gira
Gira 2551 20 User manual
Gira
Gira 1269 65 User manual
Gira
Gira Surface-mounted video home station 7 User manual
Gira
Gira 1279 series User manual
