Gira 1250 Series Service manual

Mounting and
operating instructions
Surface-mounted hands-free feature
home station
1250 ..


3
Device description
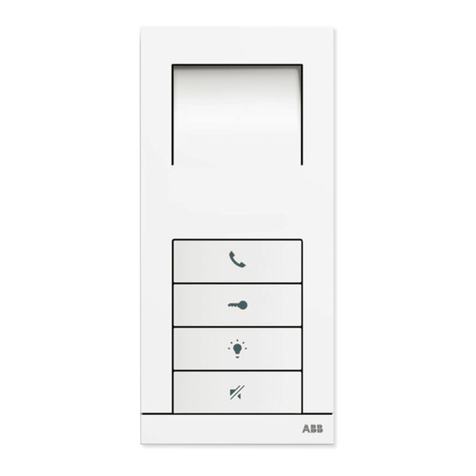
The surface-mounted hands-free feature home
station is a prefabricated unit and is part of the
Gira door communication system.
1. Mounting plate
2. Fixing holes for wall mounting
3. 2-gang cover frame without crossbar
(frameless installation only possible with
wall mounting)
4. Fixing holes for box mounting
5. Housing, top section
6. Operating buttons
3
2
1
4 5 6

4
Mounting
You can mount the surface-mounted home
station
• on a flush-mounted or hollow-wall box (only
with cover frame)
• directly onto the wall or on a wall lighting
connection box (with or without cover
frame)
Mounting with a cover frame is described in
the following. Simply leave out the cover frame
if mounting without a frame.
Box mounting
1. Place the mounting plate and cover frame
onto the flush-mounted box.
2. Fasten the base plate to the support ring
of the flush-mounted box with two
screws.
Wall mounting
1. Strip the supply line up to the wall.
2. Select the mounting site so that the
mounting plate is located centrally over
the cable outlet and draw the drill holes.
3. Drill the two mounting holes and insert
the plugs.
4. Fasten the base plate and cover frame to
the wall with two screws.
Electrical devices may only be
installed and connected by a
qualified electrician!

5
Connection
If you have fastened the mounting plate to the
wall, the home station is connected as follows:
1. Connect the 2-wire bus to the BUS
terminals and the cables of the floor call
button at the ET terminals of the connector
if necessary.
2. Push the connector onto the contacts of the
device PCB on the back of the surface-
mounted home station.
3. Now close the home station by placing the
housing top section on the mounting plate
and snapping it in.
Note polarity
Ensure that the BUS and ET names match on
the connector and PCB.

6
Commissioning
Once you have installed all of the devices (door
and home stations, control device etc.), you
can start up the door communication system.
Commissioning is described in the system
manual included with the control device.
Removal
Opening the device
To open the home station, carefully press the
lower snap clip upward vertically with a
screwdriver.
Pulling off plug terminal
The label on the rear of the device specifies the
direction for pulling off the plug terminal.
i
Max. number of call buttons
Note that up to 15 call buttons can be
assigned to a surface-mounted home station.

7
Assigning surface-mounted home station video via floor-call
button
If you cannot access the flat during start-up, you
can also assign the surface-mounted home sta-
tion video via a connected floor-call button:
1. Control device: press the "Systemprogr."
button for 3 s to start the programming
mode.
2. Press the call button on the door station for
3 s. Release the call button following the
brief acknowledgement tone sounds.
3
The door station outputs a long
acknowledgement tone.
3. Press the floor-call button of the home
station to be asseigned for 3 s. Release the
floor-call button after the brief acknowl-
edgement tone sounds.
3
A long acknowledgement tone indicates
successful assignment.
4. Briefly press the "Systemprogr." button on
the control device to exit the programming
mode.
i
Only possible with home
station connected directly
With several parallel home stations, only the
home station connected directly to the floor-
call button can be taught in via the floor call
button.
3s
3s
3s
1x

8
Deleting all call button assignments via floor-call button
If necessary, the assignments to the surface-
mounted home station video can also be
deleted via a connected floor-call button:
1. Control device: press the "Systemprogr."
button for 3 s to start the programming
mode.
2. Press the floor-call button of the home
station with the assignments to be deleted
for 9 s.
A short acknowledgement tone sounds
after 3 s and 6 s. Continue to press the
floor-call button until a long acknowledge-
ment tone (9 s) sounds.
3
All assignments of the surface-mounted
home station video are deleted.
3. Briefly press the "Systemprogr." button on
the control device to exit the programming
mode.
3s
9s
1x

9
Operation
Operating buttons
The following functions are executed via the
four operating buttons of the surface-mounted
hands-free feature home station:
Accepting a call
The button flashes for 2 min for an
incoming call.
Briefly press the button to start intercom
communication with the person at the door
station. The button illuminates
continuously during the call.
Enforcement function
If the background noises at the door station are
so loud that automatic switching of the speech
direction is not guaranteed, you can use the
enforcement function at the home station.
For this purpose, press and hold the button
while speaking. While the button is being
pressed, only the person at the home station
can speak and be heard.
To release the voice control to the door station,
release the button again.
i
Maximum conversation time
The maximum conversation time is 2 min.
When this time expires, the conversation is
automatically ended.

10
Ending the call
To end the voice connection, briefly press the
button.
The illumination of the button goes out.
Setting the speech volume
The speech volume is changed to one of four
levels during intercom communication.
Press the button briefly to increase the
speech volume during the call.
There are four volume levels in total. The next-
highest volume is set with each button press.
When the loudest level is reached, the next
button press sets the quietest volume level.
Opening the door
Press the button.
If several doors are present, the door opener
whose door station made the door call is
operated within 2 min. It switches to the main
door 2 min after the start of the call or 30 s
after the door call is ended.
Switching light on
(only in conjunction with a switching
actuator)
Press the button to switch the light (e.g.
the outdoor or staircase illumination) on.

11
Setting the call tone volume
The call tone volume is changed to one of four
levels when no intercom communication is in
effect.
Press the button for approx. 3 s.
There are four volume levels in total. The next-
highest volume is set with each button press
(3 s). When the loudest level is reached, the
next button press sets the quietest volume
level.
Deactivating/activating the call tone
You can deactivate the call tone of the home
station when there is no intercom
communication.
Briefly press the button to deactivate the
call tone.
The button illuminates continuously while
the call tone is deactivated.
Press the button briefly again to reactivate
the call tone.
The illumination of the button goes out.
Only deactivate the call tone if
necessary
Deactivate the call tone in special cases only.
Otherwise, you run the risk of not hearing the
ringing in an emergency, for example.

12
Setting the call tone melody
The surface-mounted hands-free feature home
station offers five call tone melodies, which
can be individually assigned to the floor call
button, the call buttons of the door station or
the internal call buttons of other home
stations. This allows, for example, a different
door station call button with an individual call
tone melody to be assigned to each person
(e.g. parents, children) in a household with
several people.
The call tone melody is set as follows:
1. Trigger the call tone whose melody you
would like to change by pressing the
corresponding call button which was
previously taught in.
2. To change the melody of the last triggered
call tone, press and hold the button on
the home station.
3. Then press and hold the button within
3 s as well until the new call tone melody is
heard.
4. To select the next call tone melody, repeat
Steps 2 and 3.
3
Each time the and buttons are
pressed, a new call tone melody is set.
When the last call tone melody is reached,
the next button press starts over at the first
melody.
i
Note
When deleting a call button assignment to a
home station, the relevant call tone melody is
reset to the factory setting.

13
Acceptance of guarantee
The warranty is provided in accordance with
statutory requirements via the specialist trade.
Please submit or send faulty devices postage
paid together with an error description to your
responsible salesperson (specialist trade/
installation company/electrical specialist
trade).
They will forward the devices to the Gira
Service Center.

Gira
Giersiepen GmbH & Co. KG
Elektro-Installations-
Systeme
Postfach 1220
42461 Radevormwald
Deutschland
Tel +49 (0) 21 95 / 602 - 0
Fax +49 (0) 21 95 / 602 - 191
www.gira.de
19/17

15

16
Table of contents
Other Gira Intercom System manuals
Gira
Gira 1264 00 User manual

Gira
Gira Surface-mounted video home station 7 Operating instructions
Gira
Gira 1281 Series Service manual
Gira
Gira 5919 Series User manual
Gira
Gira 1279 series User manual

Gira
Gira 1288 00 User manual
Gira
Gira 2600 Series User manual
Gira
Gira 1269 65 User manual
Gira
Gira Surface-mounted video home station 7 User manual

Gira
Gira 2551 20 User manual
Popular Intercom System manuals by other brands
SSS Siedle
SSS Siedle in-home bus: audio System manual
Chamberlain
Chamberlain LiftMaster ELITE EL25 instruction manual

urmet domus
urmet domus Miwi Matibus SE manual
FingerTec
FingerTec i-Kiosk 100 Plus installation guide
Akuvox
Akuvox E18C Administrator's guide
Fermax
Fermax CITYMAX BASIC 4+N installation instructions
