manuals.online logo
Brands
  1. Home
  2. •
  3. Brands
  4. •
  5. Fermax
  6. •
  7. Intercom System
  8. •
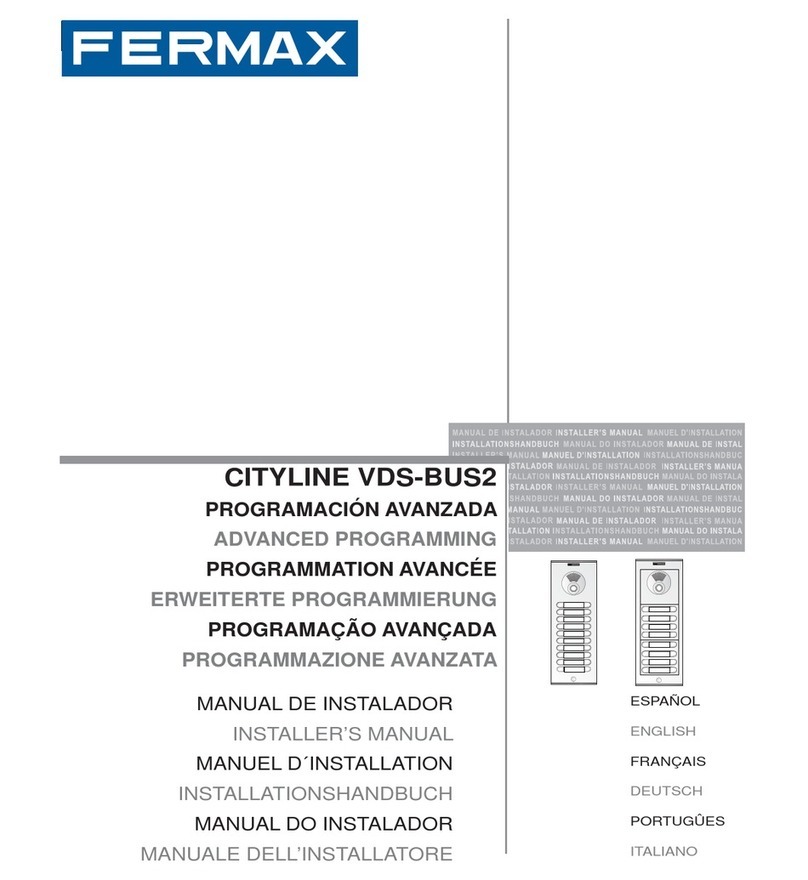
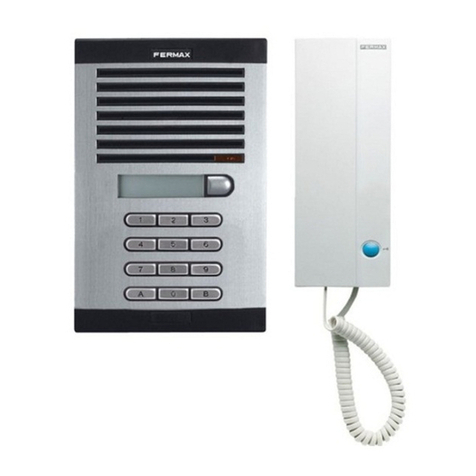
  9. Fermax CITY 4+N OUTDOOR PANEL User guide

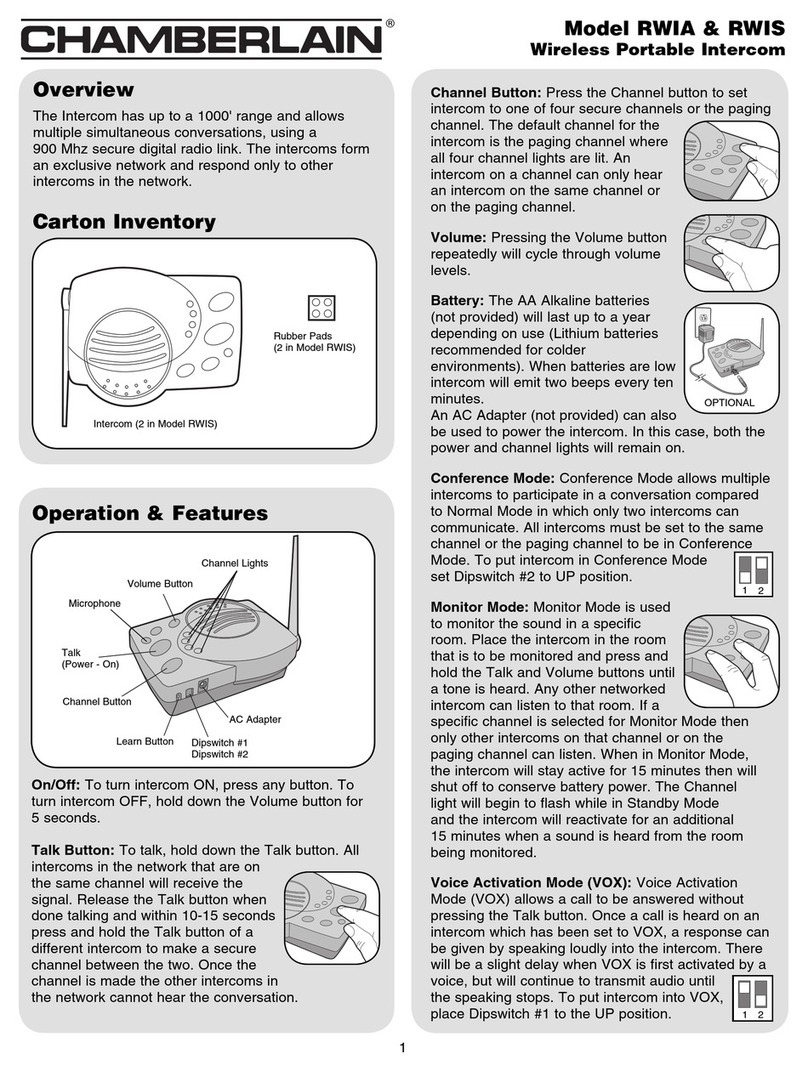
Fermax CITY 4+N OUTDOOR PANEL User guide

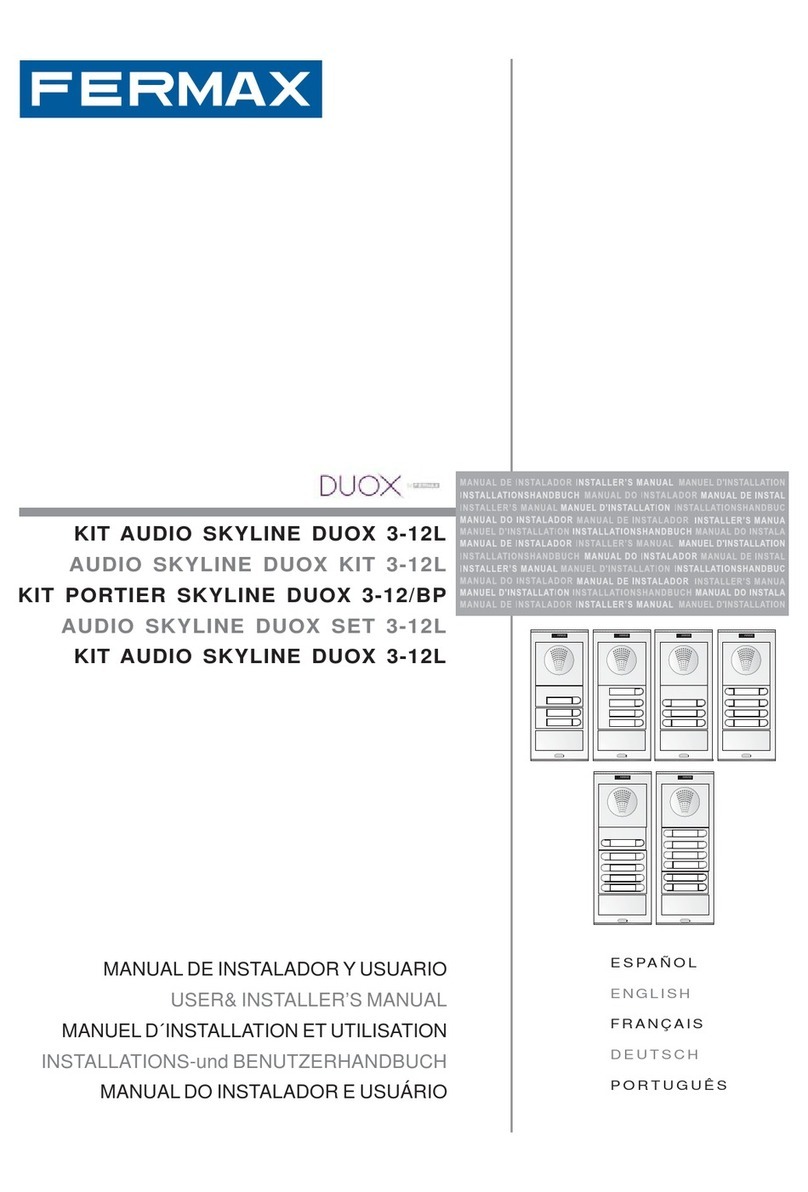
MANUAL DE INSTALADOR
INSTALLER’S MANUAL
MANUELD´INSTALLATION
INSTALLATIONSHANDBUCH
MANUAL DO INSTALADOR
ESPAÑOL
ENGLISH
FRANÇAIS
DEUTSCH
PORTUGUÊS
PLACA 4+N
4+N OUTDOOR PANEL
PLATINE 4+N
4+N TÜRSTATION
PLACA 4+N
MANUAL DE INSTALADOR
INSTALLER’S MANUAL
MANUELD´INSTALLATION
INSTALLATIONSHANDBUCH
MANUAL DO INSTALADOR
ESPAÑOL
ENGLISH
FRANÇAIS
DEUTSCH
PORTUGUÊS
PLACA 4+N
4+N OUTDOOR PANEL
PLATINE 4+N
4+N TÜRSTATION
PLACA 4+N
Pag 2
4+n Panels
4+n Panels
Pag 2
4+n Panels
4+n Panels
Cod. 97619 V11_10
ENHORABUENA POR DISPONER DE UN PRODUCTO DE CALIDAD!
Fermax electrónica desarrolla y fabrica equipos de prestigio que cumplen los más
altos estándares de diseño y tecnología. Esperamos disfrute de sus funcionalidades.
CONGRATULATIONS ON PURCHASING THIS QUALITY PRODUCT!
Fermax Electronics develops and manufactures reputable equipment which fulfils the
highest design and technology standards.We hope you enjoy its range of functions.
FÉLICITATIONS ! VOUS VENEZ D’ACQUÉRIR UN VÉRITABLE PRODUIT DE QUALITÉ!
Fermax Electrónica développe et fabrique des équipements de prestige qui répondent
aux normes de design et technologie les plus développées.Nous espérons que vous
profiterez pleinement de toutes ses fonctions.
WIR GRATULIEREN IHNEN ZUM KAUF DIESES QUALITÄTSPRODUKTS!
Fermax Electrónica entwickelt und fabriziert hochwertige Anlagen, die den höchsten
Technologie- und Designstandards entsprechen. Überzeugende Funktionalität für Ihr
Eigenheim!
PARABÉNS POR DISPOR DE UM PRODUTO DE QUALIDADE!
Fermax electrónica desenvolve e fabrica equipamentos de prestígio que cumprem
com os mais altos padrões de desenho e tecnologia. Esperamos que desfrute das
suas funcionalidades.
E
EN
F
D
P
Pag 3
4+n Panels
4+n Panels
Pag 3
4+n Panels
4+n Panels
INDICE - INDEX - SOMMAIRE - INHALT - INDICE
4+N AMPLIFIER ..................................................................................... 4
Amplifier installation.................................................................. 4
Connectors / adjustment / Reset a valores de fábrica .......... 6
Internal wiring / Wiring .............................................................. 10
Technical Features .................................................................... 24
EN
AMPLIFIACDOR 4+N ............................................................................. 4
Instalación del amplificador ..................................................... 4
Conectores / Ajustes / Reset a valores de fábrica ................. 6
Precableado / Cableado ........................................................... 10
Características Técnicas .......................................................... 24
E
AMPLIFICATEUR 4+N ............................................................................ 4
Installation du amplificateur ..................................................... 4
Connecteurs / Réglages / Reset a valores de fábrica ......... 6
Precâblage / Câblage ............................................................... 10
Caractéristiques techniques.................................................... 24
F
4+N-VERSTÄRKER ................................................................................ 4
Installation des Netzgeräts ...................................................... 4
Anschlüsse / Einstellungen / Nullstellung auf werksseitige
Parameter................................................................................... 6
Vorverkabelung / Verkabelung .................................................. 10
Technische Eigenschaften ....................................................... 24
D
AMPLIFICADOR 4+N ............................................................................. 4
Instalação do amplificador ....................................................... 4
Conectores / Ajustes / Reset para valores de fábrica ........... 6
Pré-cablagem / Cablagem ....................................................... 10
Características Técnicas .......................................................... 24
P
Pag 4
4+n Panels
4+n Panels
Pag 4
4+n Panels
4+n Panels
E
AMPLIFICADOR 4+N
EN
4+N AMPLIFIER
F
AMPLIFICATEUR 4+N
D
4+N VERSTÄRKER
P
AMPLIFICADOR 4+N
E
INSTALACIÓN AMPLIFICADOR Y PULSADORES
EN
AMPLIFIERAND BUTTON INSTALLATION
F
INSTALLATION AMPLIFICATEUR ET BOUTONS-POUSSOIRS
D
INSTALLATION VERSTÄRKER UND TASTEN
P
INSTALAÇÃO DO AMPLIFICADOR E BOTÕES
E
INSTALACIÓN AMPLIFICADOR Y PULSADORES
EN
AMPLIFIER AND BUTTON INSTALLATION
F
INSTALLATION AMPLIFICATEUR ET BOUTONS-POUSSOIRS
D
INSTALLATION VERSTÄRKER UND TASTEN
P
INSTALAÇÃO DO AMPLIFICADOR E BOTÕES
E
AMPLIFICADOR 4+N
EN
4+N AMPLIFIER
F
AMPLIFICATEUR 4+N
D
4+N VERSTÄRKER
P
AMPLIFICADOR 4+N
VIDEOAUDIO
ON
D
C
B
A
E
JP3
MIC
NO
C
~
CT
VM
+18 -
PAN & TILT
JP4
JP1 CN1
4+N VERSTÄRKER
AMPLIFICATEUR 4+N
4+N AMPLIFIER
AMPLIFICADOR 4+N
NO C
~
~
- + 18
Vdc
1
1
N
PULSADORES
PUSHBUTTONS
U
F
JP4
CN4
JP1
JP3
MIC
CN4
TEST
ALIMENTACION
POWER SUPPLY
12 Vac/Vdc
MÓDULO PULSADOR
PUSH-BUTTON MODULE
MODULE BOUTON-POUSSOIR
TASTEMODUL
REF.7369
REF.7365
OUTPUT
UP
INPUT
CN1
MÓDULO PULSADOR
PUSH-BUTTON MODULE
MODULE BOUTON-POUSSOIR
TASTEMODUL
REF.7369
REF.7365
OUTPUT
UP
INPUT
CN1
Cp1
~
1236
Cp2
VIDEOAUDIO
ON
D
C
B
A
E
JP3
MIC
NO
C
~
CT
VM
+18 -
PAN & TILT
JP4
JP1
CN1
4+N VERSTÄRKER
AMPLIFICATEUR 4+N
4+N AMPLIFIER
AMPLIFICADOR 4+N
NO C
~
~
- + 18
Vdc
1
1
N
PULSADORES
PUSHBUTTONS
U
F
JP4
CN4
JP1
JP3
MIC
CN4
TEST
ALIMENTACION
POWER SUPPLY
12 Vac/Vdc
MÓDULO PULSADOR
PUSH-BUTTON MODULE
MODULE BOUTON-POUSSOIR
TASTEMODUL
REF.7369
REF.7365
OUTPUT
UP
INPUT
CN1
MÓDULO PULSADOR
PUSH-BUTTON MODULE
MODULE BOUTON-POUSSOIR
TASTEMODUL
REF.7369
REF.7365
OUTPUT
UP
INPUT
CN1
Cp1
~
1236
Cp2
Pag 5
4+n Panels
4+n Panels
Pag 5
4+n Panels
4+n Panels
Pag 6
4+n Panels
4+n Panels
Pag 6
4+n Panels
4+n Panels
U
F
JP3
MIC
NO
C
~
CT
VM
+18 -
PAN & TILT
JP4
JP1
CN1
4+N VERSTÄRKER
AMPLIFICATEUR 4+N
4+N AMPLIFIER
AMPLIFICADOR 4+N
NO C
~
~
- + 18
Vdc
1
1
N
PULSADORES
PUSHBUTTONS
U
F
JP4
CN4
JP1
JP3
ON
D
C
B
A
E
CN4
TEST
ALIMENTACION
POWER SUPPLY
12 Vac/Vdc
Cp1
~
1236
Cp2
E
CONECTORES/AJUSTES
EN
CONNECTORS/ADJUSTMENT
F
CONNECTEURS/RÉGLAGES
D
ANSCHLÜSSE/EINSTELLUNGEN
P
CONECTORES/ AJUSTES
E
EN
F
D
P
A)
JP1
eléctrónica
electric
électronique
elektronische Ruf
electrónica
Selección llamada electrónica / llamada zumbador
Select Electronic Call / Buzzer Call
Sélection appel électronique / appel vibreur
Auswahl elektronischer Ruf / Summerruf
Selecção de chamada electrónica / chamada por zumbido
zumbador
buzzer
vibreur
Summerruf
zumbido
(*) Configuración por defecto: Llamada electrónica - Default Configuration: Electronic Call - Configuration par défaut : appel électronique
Standardkonfiguration: Elektronischer Ruf - Configuração por defeito: chamada electrónica
(*)
E
EN
F
D
P
masa común
common earth
masse commune
gemeinsame Erdung
massa comum
JP3
masas separadas
separate earth
masses séparées
getrennte Erdung
massas separadas
Selección para terminal masas separadas / masa común
Select separate earth / common earth terminals
Sélection pour terminal masses séparées / masse commune
Auswahl für Sprechstellen mit getrennter / gemeinsamer Erdung
Selecção para terminal de massas separadas / massa comum
C)
A)
D)
B)
E) F)
G)
H)
I)
(*) Configuración por defecto: terminal masas separadas - Default Configuration: separate earth terminal - Configuration par défaut : terminal
masses séparées - Standardkonfiguration: Sprechstelle mit getrenner Erdung - Configuração por defeito: terminal de massas separadas
J)
K)
U
F
JP3
MIC
NO
C
~
CT
VM
+18 -
PAN & TILT
JP4
JP1
CN1
4+N VERSTÄRKER
AMPLIFICATEUR 4+N
4+N AMPLIFIER
AMPLIFICADOR 4+N
NO C
~
~
- + 18
Vdc
1
1
N
PULSADORES
PUSHBUTTONS
U
F
JP4
CN4
JP1
JP3
ON
D
C
B
A
E
CN4
TEST
ALIMENTACION
POWER SUPPLY
12 Vac/Vdc
Cp1
~
1236
Cp2
E
CONECTORES/AJUSTES
EN
CONNECTORS/ADJUSTMENT
F
CONNECTEURS/RÉGLAGES
D
ANSCHLÜSSE/EINSTELLUNGEN
P
CONECTORES/ AJUSTES
E
EN
F
D
P
A)
JP1
eléctrónica
electric
électronique
elektronische Ruf
electrónica
Selección llamada electrónica / llamada zumbador
Select Electronic Call / Buzzer Call
Sélection appel électronique / appel vibreur
Auswahl elektronischer Ruf / Summerruf
Selecção de chamada electrónica / chamada por zumbido
zumbador
buzzer
vibreur
Summerruf
zumbido
(*) Configuración por defecto: Llamada electrónica - Default Configuration: Electronic Call - Configuration par défaut : appel électronique
Standardkonfiguration: Elektronischer Ruf - Configuração por defeito: chamada electrónica
(*)
E
EN
F
D
P
masa común
common earth
masse commune
gemeinsame Erdung
massa comum
JP3
masas separadas
separate earth
masses séparées
getrennte Erdung
massas separadas
Selección para terminal masas separadas / masa común
Select separate earth / common earth terminals
Sélection pour terminal masses séparées / masse commune
Auswahl für Sprechstellen mit getrennter / gemeinsamer Erdung
Selecção para terminal de massas separadas / massa comum
C)
A)
D)
B)
E) F)
G)
H)
I)
(*) Configuración por defecto: terminal masas separadas - Default Configuration: separate earth terminal - Configuration par défaut : terminal
masses séparées - Standardkonfiguration: Sprechstelle mit getrenner Erdung - Configuração por defeito: terminal de massas separadas
J)
K)
Pag 7
4+n Panels
4+n Panels
Pag 7
4+n Panels
4+n Panels
N
1
C)
E
EN
F
D
P
CN1
Conexión para placas digitales
Connection for digital panels
Connexion pour platines numériques
Anschluss für digitale Türstationen
Ligação para placas digitais
D
P
Común de pulsadores
Common Button Wire
Connecteur commun de
boutons-poussoirs
Gemeinsamer Draht der Klingeltasten
Comum de botões
CN2
Luz tarjetero pulsador
Cardholder Backlight
Lumière porte-étiquettes
bouton-poussoir
Beleuchtung Taste Infomodul
Luz do porta-cartões do botão
Conexión iluminación tarjeteros y pulsadores
Connection card holder and button lighting
Connexion éclairage boutons-poussoirs et porte-
étiquettes
Anschluss Tasten- und Infomodul-Beleuchtung
Ligação de iluminação dos porta-cartões e botões
D) L+ / L- CP
E
EN
F
E)
E
Selección del idioma del mensaje de «puerta abierta».
EN
Select language for «open door» message.
F
Sélection de la langue du message « porte ouverte ».
D
Sprachwahl der Meldung «Tür offen».
P
Selecção da língua da mensagem de «porta aberta».
E
EN
F
D
P
B)
JP4
1 Placa
1 Panel
1 Platine
1 Türstation
1 Placa
Placas instaladas
Panels installed
Platines installées
Installierte Türstation
Placas instaladas
varias placas (con cambiadores automáticos)
various panels (with automatic switchers)
plusieurs platines (avec commutateurs automatiques)
mehrere Türstationen (mit automatischen Umwandlern)
várias placas (com conversores automáticos)
(*)Configuración por defecto: 1 Placa - Default Configuration: 1 Panel - Configuration par défaut : 1 Platine - Standardkonfiguration:1 Türstation
Configuração por defeito: 1 Placa
E
Ajuste audio
EN
Adjust the audio
F
Réglez le volume
D
Audioeinstellung
P
Ajuste o áudio
F)
E
“puerta abierta”
EN
“open door”
F
« porte ouverte »
D
“Tür offen”
P
“porta aberta”
N
1
C)
E
EN
F
D
P
CN1
Conexión para placas digitales
Connection for digital panels
Connexion pour platines numériques
Anschluss für digitale Türstationen
Ligação para placas digitais
D
P
Común de pulsadores
Common Button Wire
Connecteur commun de
boutons-poussoirs
Gemeinsamer Draht der Klingeltasten
Comum de botões
CN2
Luz tarjetero pulsador
Cardholder Backlight
Lumière porte-étiquettes
bouton-poussoir
Beleuchtung Taste Infomodul
Luz do porta-cartões do botão
Conexión iluminación tarjeteros y pulsadores
Connection card holder and button lighting
Connexion éclairage boutons-poussoirs et porte-
étiquettes
Anschluss Tasten- und Infomodul-Beleuchtung
Ligação de iluminação dos porta-cartões e botões
D) L+ / L- CP
E)
E
Selección del idioma del mensaje de «puerta abierta».
EN
Select language for «open door» message.
F
Sélection de la langue du message « porte ouverte ».
D
Sprachwahl der Meldung «Tür offen».
P
Selecção da língua da mensagem de «porta aberta».
E
EN
F
D
P
B)
JP4
1 Placa
1 Panel
1 Platine
1 Türstation
1 Placa
Placas instaladas
Panels installed
Platines installées
Installierte Türstation
Placas instaladas
varias placas (con cambiadores automáticos)
various panels (with automatic switchers)
plusieurs platines (avec commutateurs automatiques)
mehrere Türstationen (mit automatischen Umwandlern)
várias placas (com conversores automáticos)
(*)Configuración por defecto: 1 Placa - Default Configuration: 1 Panel - Configuration par défaut : 1 Platine - Standardkonfiguration:1 Türstation
Configuração por defeito: 1 Placa
E
Ajuste audio
EN
Adjust the audio
F
Réglez le volume
D
Audioeinstellung
P
Ajuste o áudio
F)
E
“puerta abierta”
EN
“open door”
F
« porte ouverte »
D
“Tür offen”
P
“porta aberta”
E
EN
F
ON
D
C
B
A
E
Ver CODIFICACIÓN al final de este manual. See CODIFICATION at the end of this manual. Voir
CODIFICATION à la fin de ce manuel. Siehe KODIERUNG am Ende dieses Handbuchs. Ver CODIFICAÇÃO
no final deste manual.
ON
D
C
B
A
E
Ver CODIFICACIÓN al final de este manual. See CODIFICATION at the end of this manual. Voir
CODIFICATION à la fin de ce manuel. Siehe KODIERUNG am Ende dieses Handbuchs. Ver CODIFICAÇÃO
no final deste manual.
Pag 8
4+n Panels
4+n Panels
Pag 8
4+n Panels
4+n Panels
10º
10º
10º
10º
G)
E
Enfoque la telecámara
EN
Focus the camera
F
Réglez la caméra vidéo
D
Richten Sie die Kamera aus
P
Foque a telecâmara.
Pan&Tilt (
±
10º)
F
Connecteurs platine:
•Bornes vidéo (câble coaxial).
V : vif
M : maille
Ct : activation caméra (10 Vdc)
•Bornes de raccordement du système.
~, ~ : alimentation (12 Vac/Vdc).
+, - : alimentation (18 Vcc).
1, 2, 3, 6 : communs d’audio
Cp1 : fil commun des boutons-poussoirs
double tonalité
Cp2 : fil commun des boutons-poussoirs
une seule tonalité
C, No: connexion gâche électrique
•: raccordement bouton-poussoir
H)
Conectores Placa:
•Bornas de video, (coaxial).
V: vivo
M: malla
Ct: activación telecamara (10 Vdc)
•Bornas de Conexión del sistema:
~, ~: alimentación (12 Vac/Vdc).
+18, -: alimentación (18 Vdc).
1, 2, 3, 6: comunes audio
Cp1: común de pulsadores doble tono
Cp2: común de pulsadores simple tono
C, No: conexión abrepuertas.
•: conexión Pulsador.
E
Panel Connectors:
•Video terminals (coaxial):
V: live
M: shield
Ct: camera activation (10 Vdc)
•System connection terminals:
~, ~: power supply (12 Vac/Vdc).
+18, -: power supply (18 Vdc).
1, 2, 3, 6: commons for audio
Cp1: double tone button common wire
Cp2: single tone button common wire
C, No: door-opener connection
•: Button Connection.
EN
D
Anschlüsse Türstation:
•Video-Klemmen (Koaxial)
V: Kern
M: Schirm
Ct: Aktivierung der Kamera (10 VDC)
•Anschlussklemmen des Systems:
~, ~: Stromversorgung (12 Vac/Vdc).
+18, - : Stromversorgung (18 VDC)
1, 2, 3, 6: gemeinsame
Cp1: Gemeinsamer Leiter Tasten mit
Doppelton
Cp2: Gemeinsamer Leiter Tasten mit
Einfachton
C, No: Verbindung Türöffner
•: Anschluss Taste
10º
10º
10º
10º
G)
E
Enfoque la telecámara
EN
Focus the camera
F
Réglez la caméra vidéo
D
Richten Sie die Kamera aus
P
Foque a telecâmara.
Pan&Tilt (
±
10º)
F
Connecteurs platine:
•Bornes vidéo (câble coaxial).
V : vif
M : maille
Ct : activation caméra (10 Vdc)
•Bornes de raccordement du système.
~, ~ : alimentation (12 Vac/Vdc).
+, - : alimentation (18 Vcc).
1, 2, 3, 6 : communs d’audio
Cp1 : fil commun des boutons-poussoirs
double tonalité
Cp2 : fil commun des boutons-poussoirs
une seule tonalité
C, No: connexion gâche électrique
•: raccordement bouton-poussoir
H)
Conectores Placa:
•Bornas de video, (coaxial).
V: vivo
M: malla
Ct: activación telecamara (10 Vdc)
•Bornas de Conexión del sistema:
~, ~: alimentación (12 Vac/Vdc).
+18, -: alimentación (18 Vdc).
1, 2, 3, 6: comunes audio
Cp1: común de pulsadores doble tono
Cp2: común de pulsadores simple tono
C, No: conexión abrepuertas.
•: conexión Pulsador.
Panel Connectors:
•Video terminals (coaxial):
V: live
M: shield
Ct: camera activation (10 Vdc)
•System connection terminals:
~, ~: power supply (12 Vac/Vdc).
+18, -: power supply (18 Vdc).
1, 2, 3, 6: commons for audio
Cp1: double tone button common wire
Cp2: single tone button common wire
C, No: door-opener connection
•: Button Connection.
Anschlüsse Türstation:
•Video-Klemmen (Koaxial)
V: Kern
M: Schirm
Ct:Aktivierung der Kamera (10 VDC)
•Anschlussklemmen des Systems:
~, ~: Stromversorgung (12 Vac/Vdc).
+18, - : Stromversorgung (18 VDC)
1, 2, 3, 6: gemeinsame
Cp1: Gemeinsamer Leiter Tasten mit
Doppelton
Cp2: Gemeinsamer Leiter Tasten mit
Einfachton
C, No: Verbindung Türöffner
•: Anschluss Taste
EN
D
E
Pag 9
4+n Panels
4+n Panels
Pag 9
4+n Panels
4+n Panels
J)
MIC
Conexión micrófono (micrófono ubicado en el perfil inferior de la placa)
Microphone connection (microphone located in the lower panel profile)
Connexion microphone (microphone placé sur le profil inférieur de la platine)
Mikrofonanschluss (Mikrofon befindet sich am unteren Profil der Türstation)
Ligação do microfone (microfone localizado no perfil inferior da placa)
E
EN
F
D
P
P
Conectores de Placa:
•Terminais de vídeo (coaxial).
V: vivo
M: malha
Ct: activação telecâmara (10 Vdc)
•Terminais de ligação do sistema:
~, ~: alimentação (12 Vac/Vdc).
+18, - : alimentação (18 Vdc).
1, 2, 3, 6: comuns de áudio
Cp1: comum para botões de som duplo
Cp2: comum para botões de som simples
C, No: ligação do trinco
•: ligação do botão
E
Modelo del amplificador
EN
Amplifier model
F
Modèle d’amplificateur
D
Lautsprechermodell
P
Modelo do amplificador
I)
E
EN
F
D
P
TEST
Conector de test y progarmación de monitores
Test and monitor programming connector
Connecteur de test et programmation d’écrans
Testanschluss und Monitorprogrammierung
Conector de teste e programação de monitores
Video Test monitor
Video test monitor
Écran de Test Vidéo
Video Testmonitor
Video Test monitor
K)
Pag 10
4+n Panels
4+n Panels
Pag 10
4+n Panels
4+n Panels
ON
D
C
B
A
E
JP3
MIC
NO
C
~
CT
VM
+18 -
PAN & TILT
JP4
JP1 CN1
4+N VERSTÄRKER
AMPLIFICATEUR 4+N
4+N AMPLIFIER
AMPLIFICADOR 4+N
NO C
~
~
- + 18
Vdc
1
1
N
PULSADORES
PUSHBUTTONS
U
F
JP4
CN4
JP1
JP3
MIC
CN4
TEST
ALIMENTACION
POWER SUPPLY
12 Vac/Vdc
MÓDULO PULSADOR
PUSH-BUTTON MODULE
MODULE BOUTON-POUSSOIR
TASTEMODUL
REF.7369
REF.7365
OUTPUT
UP
INPUT
CN1
MÓDULO PULSADOR
PUSH-BUTTON MODULE
MODULE BOUTON-POUSSOIR
TASTEMODUL
REF.7369
REF.7365
OUTPUT
UP
INPUT
CN1
Cp1
~
1236
Cp2
E
Al siguiente módulo
de pulsadores
EN
To the next button
module
F
Vers le module de
boutons-poussoirs
suivant
D
Zum nächsten
Tastenmodul
P
Para o módulo de
botões seguinte
E
PRECABLEADO
EN
INTERNAL WIRING
F
PRECÂBLAGE
D
VERKABELUNG
P
PRE-CABLAGEM
Pag 11
4+n Panels
4+n Panels
Pag 11
4+n Panels
4+n Panels
CN4
TEST
ALIMENTACION
POWER SUPPLY
12 Vac/Vdc
15 16
13 14
1211
910
JP3
MIC
NO
C
~
CT
VM
18 -
PAN & TILT
JP4
JP1
CN1
4 N VERSTÄRKER
AMPLIFICATEUR 4 N
4 N AMPLIFIER
AMPLIFICADOR 4 N
NO C
~
~
- 18
Vdc
10
1
N
PULSADORES
PUSHBUTTONS
U
F
JP4
CN4
JP1
JP3
17 18
ON
D
C
B
A
E
REF.7369
OUTPUT
REF.7369
REF.7365
OUTPUT
INPUT
CN1
7
5
3
1
8
6
4
2
MÓDULO PULSADOR
PUSH-BUTTON MODULE
MODULE BOUTON-POUSSOIR
TASTEMODUL
REF.7365
UP
INPUT
CN1
MÓDULO PULSADOR
PUSH-BUTTON MODULE
MODULE BOUTON-POUSSOIR
TASTEMODUL
UP
Cp1
~
1236
Cp2
Detalle de cableado de los Pulsadores de la placa a los teléf./monit. de las viviendas
Panel’s pushbuttons wiring details to the telephones/monitors on the dwellings
Détail de câblé des Boutons de la platine aux téléphones/monitors des maisons
Detail der Verdrahtung vom Taster von der Türstation zu den Telef./Monit. der Wohnung
Detalhe de cablagem dos botões da placa aos telefone/monitores das vivendas.
E
Hilo de Llamada:cablear al conector nº 4 del terminal de la vivienda correspondiente.
EN
Call Wire: to be wired to connector nº 4 of the corresponding residence’s terminal.
F
Fil d’appel : câbler au connecteur nº 4 du terminal du logement correspondant.
D
Rufdraht: Mit Anschluss Nr. 4 der entsprechenden Wohnungssprechstelle verkabeln.
P
Fio de Chamada: ligar por cabo ao conector nº 4 do terminal da vivenda correspondente.
(*)
12
11
9
10
8 7
6 5
4 3
2 1
14
13
16
15
18
17
CN4
TEST
ALIMENTACION
POWER SUPPLY
12 Vac/Vdc
15 16
13 14
1211
910
JP3
MIC
NO
C
~
CT
VM
18 -
PAN & TILT
JP4
JP1
CN1
4 N VERSTÄRKER
AMPLIFICATEUR 4 N
4 N AMPLIFIER
AMPLIFICADOR 4 N
NO C
~
~
- 18
Vdc
10
1
N
PULSADORES
PUSHBUTTONS
U
F
JP4
CN4
JP1
JP3
17 18
ON
D
C
B
A
E
REF.7369
OUTPUT
REF.7369
REF.7365
OUTPUT
INPUT
CN1
7
5
3
1
8
6
4
2
MÓDULO PULSADOR
PUSH-BUTTON MODULE
MODULE BOUTON-POUSSOIR
TASTEMODUL
REF.7365
UP
INPUT
CN1
MÓDULO PULSADOR
PUSH-BUTTON MODULE
MODULE BOUTON-POUSSOIR
TASTEMODUL
UP
Cp1
~
1236
Cp2
Detalle de cableado de los Pulsadores de la placa a los teléf./monit. de las viviendas
Panel’s pushbuttons wiring details to the telephones/monitors on the dwellings
Détail de câblé des Boutons de la platine aux téléphones/monitors des maisons
Detail der Verdrahtung vom Taster von der Türstation zu den Telef./Monit. der Wohnung
Detalhe de cablagem dos botões da placa aos telefone/monitores das vivendas.
E
Hilo de Llamada:cablear al conector nº 4 del terminal de la vivienda correspondiente.
EN
Call Wire: to be wired to connector nº 4 of the corresponding residence’s terminal.
F
Fil d’appel : câbler au connecteur nº 4 du terminal du logement correspondant.
D
Rufdraht: Mit Anschluss Nr. 4 der entsprechenden Wohnungssprechstelle verkabeln.
P
Fio de Chamada: ligar por cabo ao conector nº 4 do terminal da vivenda correspondente.
(*)
12
11
9
10
8 7
6 5
4 3
2 1
14
13
16
15
18
17
Pag 12
4+n Panels
4+n Panels
Pag 12
4+n Panels
4+n Panels
E
CABLEADO
EN
WIRING
F
CÂBLAGE
VIDEO
E
CABLEADO
EN
WIRING
F
CÂBLAGE
VIDEO
nn-1
8 COAX8 COAX
nn-1
8 COAX8 COAX
Pag 13
4+n Panels
4+n Panels
Pag 13
4+n Panels
4+n Panels
D
VERKABELUNG
P
CABLAGEM
D
VERKABELUNG
P
CABLAGEM
12 Vac
1
2
3
4
Vac
2
12 Vac 18 Vdc
......
...
2
4
8 COAX8 COAX
7 n COAX
8 COAX8 COAX
....................
12 Vac
1
2
3
4
Vac
2
12 Vac 18 Vdc
......
...
2
4
8 COAX8 COAX
7 n COAX
8 COAX8 COAX
....................
Pag 14
4+n Panels
4+n Panels
Pag 14
4+n Panels
4+n Panels
JP3
PAN & TILT
JP4
JP1 CN1
4 N VERSTÄRKER
AMPLIFICATEUR 4 N
4 N AMPLIFIER
AMPLIFICADOR 4 N
10
JP1
ON
D
C
B
A
E
6
3
2
1
-
CT
CN4
JP3
PAN & TILT
JP4
JP1 CN1
4 N VERSTÄRKER
AMPLIFICATEUR 4 N
4 N AMPLIFIER
AMPLIFICADOR 4 N
10
JP1
ON
D
C
B
A
E
6
3
2
1
-
CT
CN4
VIDEO
VIDEO
Pag 15
4+n Panels
4+n Panels
Pag 15
4+n Panels
4+n Panels
12 Vac
MIC
NO
C
~
CT
VM
18 -
1N
PULSADORES
PUSHBUTTONS
U
F
JP4
CN4
JP3
12 Vac
n-1 n
18 Vdc
4
12
3
6
5
8
7
VacVac
8
6
4
21
3
7
5
n
n-1
-
Cp1
~
1236
Cp2
Aliment.
P.Supply
18 Vdc TEST
MÓDULO PULSADOR
PUSH-BUTTON MODULE
MODULE BOUTON-POUSSOIR
TASTEMODUL
REF.7369
REF.7365
OUTPUT
UP
INPUT
CN1
12 Vac
MIC
NO
C
~
CT
VM
18 -
1N
PULSADORES
PUSHBUTTONS
U
F
JP4
CN4
JP1
JP3
12 Vac
n-1 n
18 Vdc
4
12
3
6
5
8
7
VacVac
8
6
4
21
3
7
5
n
n-1
-
Cp1
~
1236
Cp2
Aliment.
P.Supply
18 Vdc TEST
MÓDULO PULSADOR
PUSH-BUTTON MODULE
MODULE BOUTON-POUSSOIR
TASTEMODUL
REF.7369
REF.7365
OUTPUT
UP
INPUT
CN1
Pag 16
4+n Panels
4+n Panels
Pag 16
4+n Panels
4+n Panels
E
Monitores
EN
Monitors
F
Moniteurs
2 OUTPUTS VIDEO DISTRIBUTOR
DISTRIBUIDOR VIDEO 2 SALIDAS
V
5
V
1
M
18
75
M
R1
34
V
2
REF.2448
6
VM M
(-)
R
M
-
V
4
3
2
1
CT
6
CN1
F2
F1
V
M
M
-
V
4
3
2
1
CT
6
CN1
F2
F1
V
M
nn-1
nn-1
E
Monitores
EN
Monitors
F
Moniteurs
2 OUTPUTS VIDEO DISTRIBUTOR
DISTRIBUIDOR VIDEO 2 SALIDAS
V
5
V
1
M
18
75
M
R1
34
V
2
REF.2448
6
VM M
(-)
R
M
-
V
4
3
2
1
CT
6
CN1
F2
F1
V
M
M
-
V
4
3
2
1
CT
6
CN1
F2
F1
V
M
nn-1
nn-1
Pag 17
4+n Panels
4+n Panels
Pag 17
4+n Panels
4+n Panels
D
Monitore
P
Monitores
2 OUTPUTS VIDEO DISTRIBUTOR
DISTRIBUIDOR VIDEO 2 SALIDAS
V
5
V
1
M
18
75
M
R1
34
V
2
REF.2448
6
VM M
(-)
R
1
-
23
6
M
-
V
4
3
2
1
CT
6
CN1
F2
F1
CT
V
M
M
-
V
4
3
2
1
CT
6
CN1
F2
F1
V
M
1
1
2
2
D
Monitore
P
Monitores
2 OUTPUTS VIDEO DISTRIBUTOR
DISTRIBUIDOR VIDEO 2 SALIDAS
V
5
V
1
M
18
75
M
R1
34
V
2
REF.2448
6
VM M
(-)
R
1
-
23
6
M
-
V
4
3
2
1
CT
6
CN1
F2
F1
CT
V
M
M
-
V
4
3
2
1
CT
6
CN1
F2
F1
V
M
1
1
2
2
Pag 18
4+n Panels
4+n Panels
Pag 18
4+n Panels
4+n Panels
E
CABLEADO
EN
WIRING
F
CÂBLAGE
AUDIO
n
55
4 n
n-1
E
CABLEADO
EN
WIRING
F
CÂBLAGE
AUDIO
n
55
4 n
n-1
Pag 19
4+n Panels
4+n Panels
Pag 19
4+n Panels
4+n Panels
D
VERKABELUNG
P
CABLAGEM
4 n
12
34
55
12 Vac
...
12 Vac
Vac
22
55
2
.................
......
D
VERKABELUNG
P
CABLAGEM
4 n
12
34
55
12 Vac
...
12 Vac
Vac
22
55
2
.................
......
Pag 20
4+n Panels
4+n Panels
Pag 20
4+n Panels
4+n Panels
6
3
2
1
AUDIO
AUDIO
6
3
2
1

Other Fermax Intercom System manuals

Fermax iLOFT VDS Extra User manual

Fermax

Fermax iLOFT VDS Extra User manual

Fermax DUOX User guide

Fermax

Fermax DUOX User guide

Fermax Olympo Basic Series User manual

Fermax

Fermax Olympo Basic Series User manual

Fermax Way-Fi User guide

Fermax

Fermax Way-Fi User guide

Fermax CITY 5190 User manual

Fermax

Fermax CITY 5190 User manual

Fermax LOFT COMPACT ADS User manual

Fermax

Fermax LOFT COMPACT ADS User manual

Fermax CITYMAX BASIC DUOX User manual

Fermax

Fermax CITYMAX BASIC DUOX User manual

Fermax DUOX iLOFT Assembly instructions

Fermax

Fermax DUOX iLOFT Assembly instructions

Fermax VDS User manual

Fermax

Fermax VDS User manual

Fermax Lynx Series Owner's manual

Fermax

Fermax Lynx Series Owner's manual

Fermax 9002 User manual

Fermax

Fermax 9002 User manual

Fermax LOFT BUS2 User manual

Fermax

Fermax LOFT BUS2 User manual

Fermax MARINE 1 L User guide

Fermax

Fermax MARINE 1 L User guide

Fermax MDS Digital Guard Unit User manual

Fermax

Fermax MDS Digital Guard Unit User manual

Fermax DUOX VIDEO MARINE KIT 1-2 L Instruction Manual

Fermax

Fermax DUOX VIDEO MARINE KIT 1-2 L Instruction Manual

Fermax MEET DIGITAL VIDEO PANEL User manual

Fermax

Fermax MEET DIGITAL VIDEO PANEL User manual

Fermax FVQ-6020APP User guide

Fermax

Fermax FVQ-6020APP User guide

Fermax KIT VIDEOCHALET CITYMAX User manual

Fermax

Fermax KIT VIDEOCHALET CITYMAX User manual

Fermax LOFT BUS2 User manual

Fermax

Fermax LOFT BUS2 User manual

Fermax DUOX SKYLINE 7391 User guide

Fermax

Fermax DUOX SKYLINE 7391 User guide

Fermax CITY LINE User manual

Fermax

Fermax CITY LINE User manual

Fermax CITYLINE 4+n User manual

Fermax

Fermax CITYLINE 4+n User manual

Fermax WAY SLIM Instruction Manual

Fermax

Fermax WAY SLIM Instruction Manual

Fermax 1 WAY VDS CITY AUDIO KITS Instruction Manual

Fermax

Fermax 1 WAY VDS CITY AUDIO KITS Instruction Manual

Popular Intercom System manuals by other brands

Bpt Agata C user manual

Bpt

Bpt Agata C user manual

Toa VS-900AL Specifications

Toa

Toa VS-900AL Specifications

2N Indoor View user manual

2N

2N Indoor View user manual

Alcad 972 Series user manual

Alcad

Alcad 972 Series user manual

GRD Sting user manual

GRD

GRD Sting user manual

Aiphone HOME INTERCOM LAF-1B installation manual

Aiphone

Aiphone HOME INTERCOM LAF-1B installation manual

Freund FE-IPDS-28A Admin guide

Freund

Freund FE-IPDS-28A Admin guide

Aiphone GH-1KD specification

Aiphone

Aiphone GH-1KD specification

RTS BP-325 user manual

RTS

RTS BP-325 user manual

Tynetec Entel Ultra user guide

Tynetec

Tynetec Entel Ultra user guide

Indexa DVT67 operating instructions

Indexa

Indexa DVT67 operating instructions

Elvox Vimar 8000 Series instruction manual

Elvox

Elvox Vimar 8000 Series instruction manual

ChinaPST PST-WIFI001A user manual

ChinaPST

ChinaPST PST-WIFI001A user manual

Talkaphone ETP-120 Series Installation & operation manual

Talkaphone

Talkaphone ETP-120 Series Installation & operation manual

Data Video ITC-100 KF1000 instruction manual

Data Video

Data Video ITC-100 KF1000 instruction manual

TCS Carus Adapto instruction manual

TCS

TCS Carus Adapto instruction manual

Toa VS-900TI Specifications

Toa

Toa VS-900TI Specifications

GVI Security GV-VP410Y Installation and operation manual

GVI Security

GVI Security GV-VP410Y Installation and operation manual

manuals.online logo
manuals.online logoBrands
  • About & Mission
  • Contact us
  • Privacy Policy
  • Terms and Conditions

Copyright 2025 Manuals.Online. All Rights Reserved.