Page 6 Page 7
Safety Instructions
Non-compliance with the operating instructions can have serious
consequences. go-e GmbH does not assume any liability for damage caused
by disregarding operating instructions or other warnings on the device itself.
Attention! High voltage, fire hazard! Never use the device if the housing is
damaged or opened!
Do not use the go-eCharger if the cables attached or connected to the device
are damaged.
Never use wet or dirty plugs in conjunction with the go-eCharger.
Make sure that the connection to which the go-eCharger is to be connected has
been properly installed and is undamaged.
The go-eCharger has a built-in RCD protection module with direct current
detection (30 mA AC and 6 mA DC). This switches off the charging station in the
event of a fault current generated by the EV. Therefore, only a type A RCD must
be installed on the building side, unless local regulations deviate from this. In
addition, a miniature circuit breaker (MCB), characteristic B or C, has to be
installed upstream of each charger.
Any modification or repair of hardware or software may only be carried out by
qualified personnel of go-e GmbH or personnel trained for this purpose. The
removal of warnings attached to the go-eCharger or the opening of the device
will result in the loss of any liability by go-e GmbH.
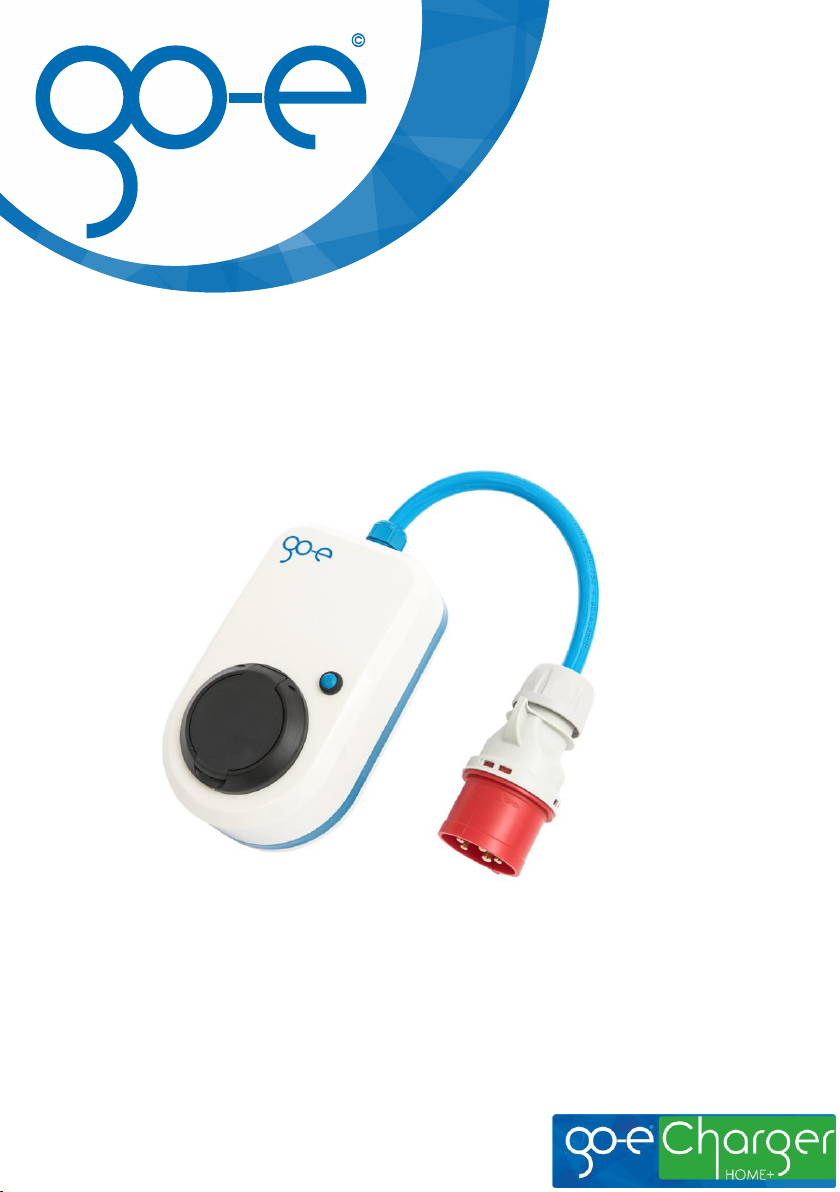
The go-eCharger may only be used for the purpose of charging EV batteries in
conjunction with the appropriate adapters and cables.
It‘s important to observe the maximum permissible charging current of the
connection at which you are charging. If you don't known this, charge with the
lowest charge current. When using adapters, the maximum current for the
adapter has to be observed. If this is not known, use the lowest charging
current. Attention: The go-eCharger HOME+ 22 kW automatically reduces the
charging current to 16 A by plugging in the adapter only in conjunction with the
original go-e adapters. The go-eCharger HOME+ 11 kW always charges with a
maximum of 16 A, regardless of the adapter. Never use adapters whose
technical suitability is unclear!
Never unplug by pulling the cable.
We recommend a maximum charging current of 10A for use with domestic
plugs. Take care of a mechanical relief of the domestic plug by supporting the
weight of the go-eCharger and the connected charging cable!
Observe the specifications of the electricity network operator with regard to
single-phase charging and the resulting asymmetrical grid load.
WARNING
ATTENTION
Safety Instructions
WARNING
ATTENTION
Never cover the go-eCharger during charging. Heat accumulation can lead to
permanent damage or even fire.
In the event of unusual heat generation, the charging process has to be stopped
immediately.
If you notice discoloration or deformation of the plastic due to heat generation, it
is imperative that you contact the customer service.
Use your go-eCharger exclusively hanging or in the wall mount. Never use the
charging box lying down! The type 2 connectors are not waterproof and water
could penetrate to the contacts while lying down!
The go-eCharger is suitable for charging gassing vehicle traction batteries only
in well ventilated rooms. In case of uncertainty, please contact your vehicle
manufacturer.
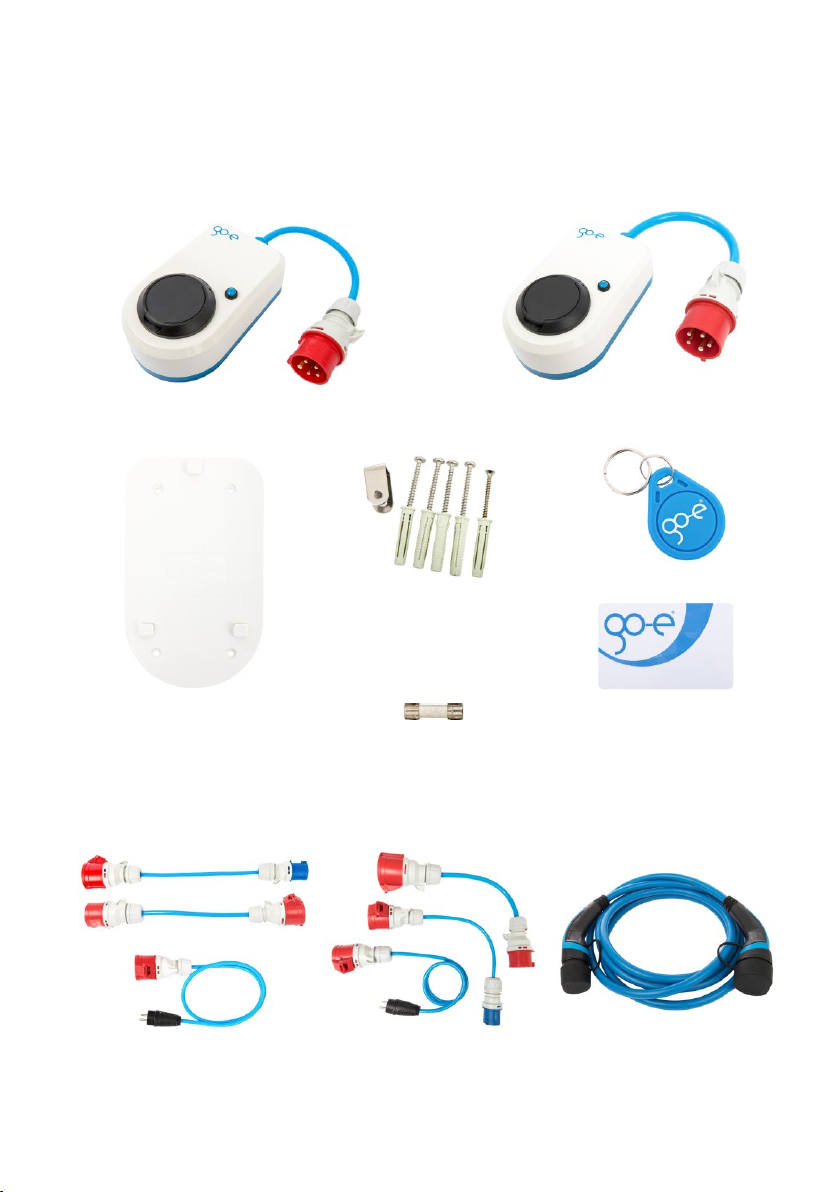
The go-eCharger HOME+ 11 kW may only be operated on the following
connections:
¡CEE red 16 A 3-phase 400 V 50 Hz
With go-eCharger adapter for HOME+ 11 kW:
¡CEE red 32 A 3-phase 400 V 50 Hz (limited by Charger to 16 A 3-phase)
¡CEE blue 16 A 1-phase 230 V 50 Hz
¡multiple domestic plugs 16 A 1-phase 230 V 50 Hz
The go-eCharger HOME+ 22 kW may only be operated on the following
connections:
¡CEE red 32 A 3-phase 400 V 50 Hz
With go-eCharger adapter for HOME+ 22 kW:
¡CEE red 16 A 3-phase 400 V 50 Hz
¡CEE blue 16 A 1-phase 230 V 50 Hz
¡CEE blue 32 A 1-phase 230 V 50 Hz
¡multiple domestic plugs 16 A 1-phase 230 V 50 Hz
The original go-e adapters for the go-eCharger HOME+ 11 kW and go-
eCharger HOME+ 22 kW may only be used in conjunction with the respective
go-eCharger.
The go-eCharger HOME+ has the communication interfaces WiFi 802.11b/g/n
2.4GHz and RFID. WiFi is operated on a frequency of 2.4Ghz, channels 1-13
with the frequency band 2412-2472Mhz. The maximum transmission power of
the WiFi is 20dBm. RFID is operated on a frequency of 13.56MHz with a
maximum radiated power of 60dBµA/m at 10m.