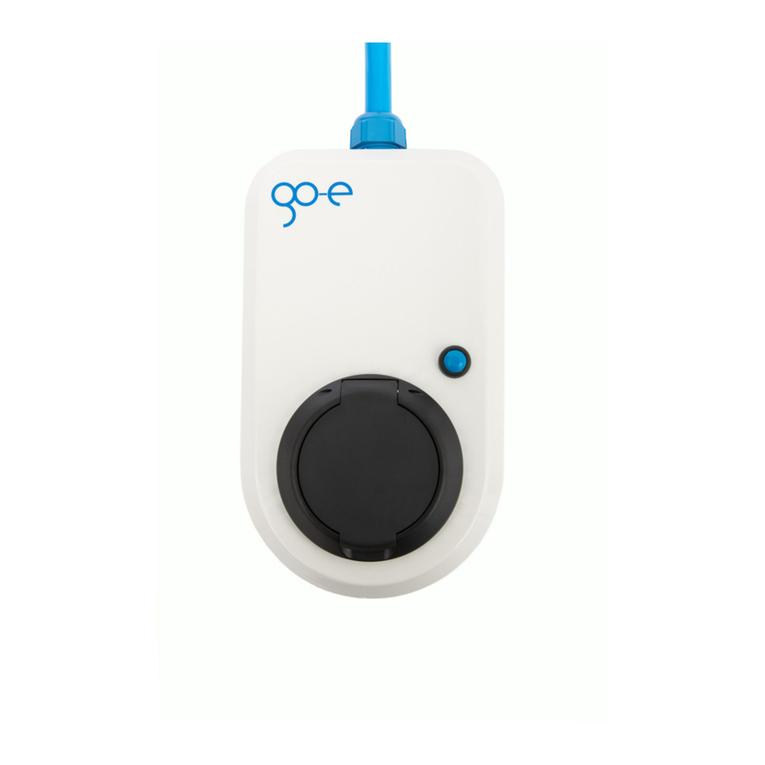
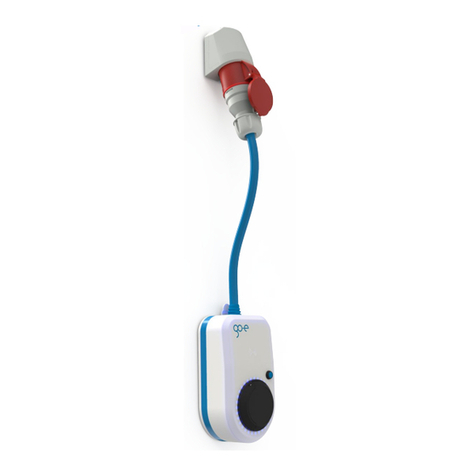
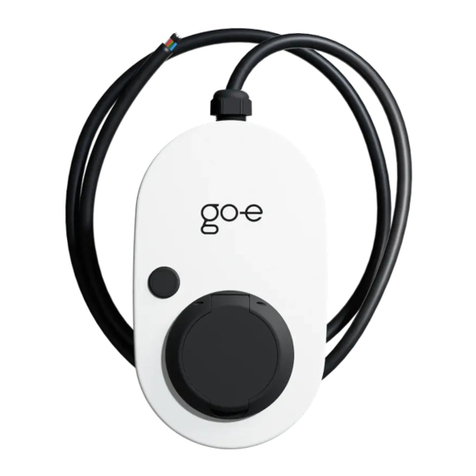
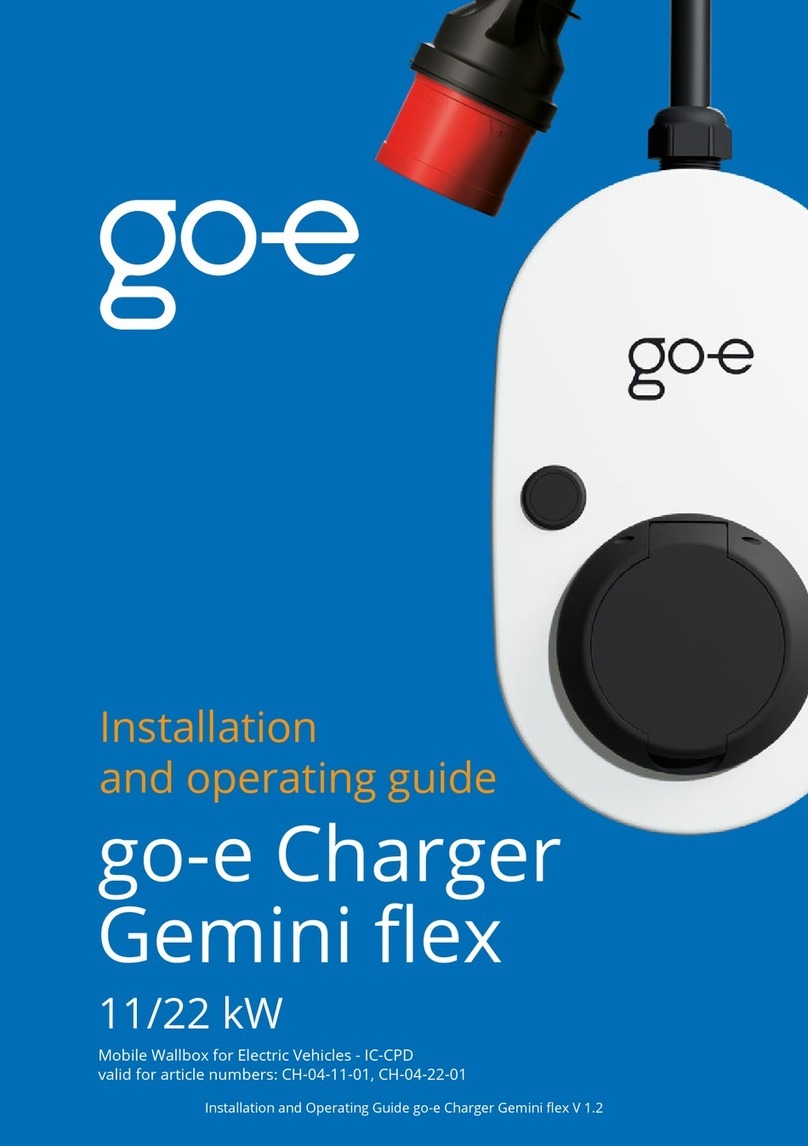
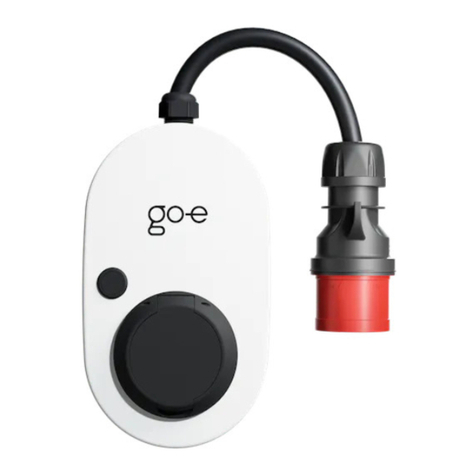
go-e Gemini flex User manual

V 1.4
go-e Charger
Gemini ex
11/22 kW
Mobile wallbox/charging station for electric vehicles (IC-CPD), according to
EN IEC 61851-1:2019, EN IEC 62752:2016/A1:2020, valid for article numbers:
CH-04-11-01, CH-04-22-01
Installation
and operating manual

2233
Installation and operating manual go-e Charger Gemini ex V 1.4Installation and operating manual go-e Charger Gemini ex V 1.4
Content
Symbols
page 4
Sustainable charging
page 4
Before installation and commissioning/download
page 6
Safety regulations/notes
page 7
Product overview
page 10
Scope of delivery
page 11
Technical data
page 12
Installation
page 15
Commissioning/charging
page 18
LED status display/troubleshooting
page 20
Reset card/RFID chip
page 24
App
page 26
Guarantee, warranty and exclusions
page 33
CE Declaration of Conformity
page 34
Contact and support
page 35
1
2
3
4
5
6
7
8
9
10
11
12
13
14
15
Discover the go-e YouTube Channel
Here you can nd HOW-TO videos and product videos.
Our videos are available with subtitles in dierent languages!

4455
Warning of a hazardous situation that may
result in damage to health, fatal injuries or
damage to property if the safety regulati-
ons are not followed.
The activity may only be carried out by a
qualied electrician.
Note regarding the adaptation of the
product or product functions to individual
needs.
Hint for a more ecological or economical
use of the product.
1. Important symbols
Installation and operating manual go-e Charger Gemini ex V 1.4Installation and operating manual go-e Charger Gemini ex V 1.4
Thank you for your purchase
decision
2. Sustainable charging
With the go-e Charger Gemini ex you
have chosen an extremely compact and
versatile charging station for EVs. Smart
and intelligent solutions that make char-
ging electric vehicles even more conve-
nient are already integrated in the go-e
Charger Gemini ex.
The charging unit was developed with
the objective of extreme exibility and,
in addition to the advantages of a con-
ventional wallbox, oers you the possi-
bility of charging anywhere where there
is alternating and three-phase current,
provided that you have the appropriate
socket adapter.
The go-e Charger was developed and
tested by electric car drivers for electric
car drivers. To ensure that it remains up-
to-date in the future, we are constantly
developing the rmware and adapting
the app to the state of the art. So let us
surprise you with future functions.
Sustainable charging
Electric vehicles also need energy, which
has to be generated. If we use the availa-
ble energy carefully, we will not need to
expand fossil fuel power plants or nucle-
ar power plants for electric mobility.
An important contribution we can all
make is to use surplus energy. So if pos-
sible, do not charge your car when you
come home after work, as this is the time
when the electricity grid is at its peak an-
yway. In order to save energy and thus
also to charge in an environmentally
conscious way, you should, if possible,
postpone your charging with the go-e
Charger „Scheduler“ function to
Even more interesting could be an elec-
tricity contract with a provider oering
exible energy taris, where you can
benet from the highly uctuating elec-
tricity prices quoted at the electricity
price exchange. With the go-e Charger,
you only charge when the electricity is
cheapest.
The technology for this is already in-
tegrated in each of our charging sta-
tions. All you need to do is sign a
contract with an electricity provider
whose exible electricity tari is in-
tegrated in the go-e app. Several 100
taris are available. The number of
taris is constantly being expanded.
By the way, in combination with the
go-e Controller (separate product)
you can easily charge with photovol-
taic surplus power. Due to the open
interfaces of our chargers, this also
works with other energy management
systems.
We wish you lots of fun with your go-e
Charger and enough electricity at all
times.
Your

6677
Installation and operating manual go-e Charger Gemini ex V 1.4Installation and operating manual go-e Charger Gemini ex V 1.4
Depending on the country, the require-
ments of the authorities and electricity
grid operators have to be observed, such
as a registration or approval requirement
for charging stations, or the limitation of
single-phase charging.
Please contact your electricity grid opera-
tor to nd out whether the go-e Charger
is subject to registration or approval and
whether other restrictions must be obser-
ved.
Registration information
Observe all safety regulations and
instructions in this manual!
Read the manual and the data sheet care-
fully and keep them for future reference.
The documents are intended to help you:
•To use the product safely and properly
•Increase the durability and reliability
•To avoid damage to the device or
property
•To prevent a threat to life and limb
Note before installation and
commissioning
Download the data sheet:
www.go-e.com
Instructions and downloads
3. Before installation and commissioning 4. Safety regulations/notes
General safety regulations
The go-e Charger may only be
used for charging battery electric
vehicles (BEV) and plug-in hybrids
(PHEV) with the adapters and cables inten-
ded for this purpose.
Disregarding the safety regulations can
have serious consequences. go-e GmbH
declines any liability for damage caused
by disregarding the operating instructions,
safety regulations or warnings on the unit.
High voltage - danger to life! Never use the
go-e Charger if the housing is damaged or
open.
In case of unusual heat development, do
not touch the go-e Charger, the charging
cable or adapter and stop the charging
process as soon as possible. If the plastic
is discoloured or deformed, contact custo-
mer support.
Never cover the go-e Charger during char-
ging. Heat build-up can lead to re.
Persons wearing electronic implants
should keep at least 60 cm away from
the go-e Charger due to electromagnetic
elds.
The go-e Charger Gemini ex has the com-
munication interfaces WiFi 802.11b/g/n
2.4GHz and RFID. WiFi is operated on a
frequency of 2.4Ghz, channels 1-13 with
the frequency band 2412-2472Mhz. The
maximum transmission power of the WiFi
is 20dBm. RFID is operated on a frequen-
cy of 13.56MHz with a maximum radiated
power of 60dBμA/m at 10m.
Any information regarding elec-
trical installation is intended ex-
clusively for a qualied electrician
whose training allows all electrical
work to be carried out in accor-
dance with the applicable national regu-
lations.
Before carrying out electrical connection
work, you need to de-energise the circuit.
Installation must be carried out in accor-
dance with local, regional and national re-
gulations.
Observe the permissible ambient condi-
tions from the data sheet. A location wit-
hout direct sunlight is recommended.
The Charger is only suitable for charging
gassing vehicle traction batteries in well-
ventilated rooms.
The unit must not be operated indoors if
there is an increased danger from ammo-
nia gases.
The Charger should not be operated in
the immediate vicinity of ammable or ex-
plosive substances, running water or he-
at-emitting equipment.
The go-e Charger has to be used hanging
vertically or must be mounted vertically in
Electrical protective measures, installation, operation

8899
Connection, plug, adapter
Opening, conversions,
repair, maintenance
Registration/approval
obligation, legal information
The go-e Charger Gemini ex 11
kW may only be operated at the
following connections:
CEE red 16 A, 3-phase, 400 V or with
original go-e Charger adapter for Gemini
ex 11 kW at:
•CEE red 32 A, 3-phase, 400 V (limited
by Charger to 16 A, 3-phase)
•CEE blue 16 A, 1-phase, 230 V
•domestic plugs 16 A, 1-phase, 230 V
The go-e Charger Gemini ex 22 kW may
only be operated at the following connec-
tions:
CEE red 32 A, 3-phase, 400 V or with ori-
ginal go-e Charger adapter for Gemini
ex 22 kW at:
•CEE red 16 A, 3-phase, 400 V
•CEE blue 16 A, 1-phase, 230 V
•domestic plugs 16 A, 1-phase, 230 V
With the go-e Charger Gemini ex 22 kW,
the charging current is automatically re-
duced to 16 A in connection with the origi-
nal go-e adapter CEE red 16 A.
Always use original go-e adapters. Due to
legal regulations, all adapter cables may
not be used in Switzerland.
Observe the maximum permissible char-
ging current of the connection at which
you are charging. If this is unknown, char-
ge with the lowest charging current.
Fire hazard! A maximum charging current
of 10 A is recommended for use at domes-
tic sockets (with protective earth plug), as
very few domestic sockets/electrical in-
stallations are designed for continuous
operation with 16 A! National regulations
may prescribe lower charging currents.
Any modication or repair of the
hardware or software of a go-e
Charger may only be carried out
by specialist personnel of go-e GmbH.
Before dismantling an allegedly defective
product, always contact go-e‘s technical
customer support and wait for its decision
on the further procedure for handling the
service case.
Removing and damaging warning notices
attached to the go-e Charger or opening
the device will result in the loss of any
liability by go-e GmbH. The warranty also
expires in the event of any modication or
opening of a go-e product.
The go-e Charger is maintenance-free.
According to directive 2012/19/EU (WEEE
directive), electrical devices must not be
disposed of in household waste after the
end of use. Take the product in accordan-
ce with national legal requirements to a
collection point specially set up for waste
electrical equipment. Also dispose of the
product packaging properly so that it can
be recycled.
Depending on the country, the require-
ments of the authorities and electricity
grid operators must be observed, such
as the obligation to register or obtain
approval for ev charging stations or the
limitation of single-phase charging. Con-
tact your grid operator/electricity provi-
der to nd out whether the go-e Charger
requires registration or approval (e.g. in
Germany) and whether other limitations
must be observed.
The copyright for these operating inst-
ructions is owned by go-e GmbH.
All texts and illustrations correspond to
the technical status at the time of writing.
go-e GmbH reserves the right to make
unannounced changes. The content of
the operating instructions does not jus-
tify any claims against the manufacturer.
Pictures are for illustration purposes and
may dier from the actual product.
Single-phase adapters are therefore limi-
ted to 6 A at the factory. Therefore, check
the country settings in the go-e app be-
fore using a single-phase adapter (CEE
blue, safety plug). If a domestic socket
overheats, reduce the charging current.
Take care of a mechanical relief of the do-
mestic plug by supporting the weight of
the go-e Charger and the connected char-
ging cable!
Do not use go-e Charger if any cable
attached to or plugged into the unit is
damaged.
Never use wet or dirty plugs in connection
with the go-e Charger.
Never pull plugs out of the connector by
the cable!
The device may be cleaned with a damp
cloth. Do not use cleaning agents or sol-
vents. Do not clean the device with a high-
pressure cleaner or under running water.
Disposal
Installation and operating manual go-e Charger Gemini ex V 1.4Installation and operating manual go-e Charger Gemini ex V 1.4
the wall bracket on a at wall.
Make sure that the power connection lea-
ding to the go-e Charger is properly instal-
led and undamaged.
The go-e Charger is equipped with a DC
protection module that protects the buil-
ding installation from possible DC faults
that could be caused by an electric car. On
the building side, an RCD type A and a mi-
niature circuit breaker must be installed.
The go-e Charger also provides additional
protection against AC faults (6 mA DC, 20
mA AC). The local installation regulations
must be observed.
The go-e Charger may only be operated
at fully functional protective devices. Con-
nection cables must be suciently di-
mensioned.
An electric shock can be fatal. Do not
reach into sockets and plug systems by
hand or with technical aids.
The go-e Charger has a safety function
called „ground check“, which prevents
charging in TT/TN power grids (common
in most European countries) if the power
connection is not grounded. This func-
tion is activated by default. It may only
be deactivated via the go-e Charger app
if you are sure that the power grid does
not have an earth connection (IT grid, e.g.
in many regions of Norway) so that char-
ging can also take place here. The go-e
Charger visualises a deactivated „ ground
check“ by 4 red LEDs (3, 6, 9, 12 o‘clock).
1010 1111
Adapter cable for Gemini flex 11 kW*:
• to CEE 32 A red
• to CEE 16 A blue (camping plug)
• to 16 A multiple domestic plugs
Adapter cable for Gemini flex 22 kW*:
• to CEE 16 A red
• to CEE 16 A blue (camping plug)
• to 16 A multiple domestic plugs
16/32 A CEE red plug
(Gemini flex 11/22 kW)
Connection to red CEE socket or original go-e adapter
RFID chip
Release of charging processes (can be activated via app)
Reset card
Required for using the app and for resetting the charger to
factory settings
RFID reader
Release of charging processes with RFID chips or cards
(can be activated via app)
Button
Change of charging strength (5 levels - adjustable via app)
LED ring
Display of charging strength (1 LED = 1 ampere) and char-
ging status
Rating plate
With serial number of the charger
Sealed screws
Opening leads to loss of guaranty/warranty
Type 2 socket
Connection for type 2 plug of the charging cable
(with weather protection)
Back
i
j
c
d
e
g
f
h
i
j
a
b
d
e
f
g
h
c
ab
11 or 22 kW charging box
with 16 A or 32 A CEE red plug
Wall bracket
Mounting material
5x Dowel 8 x 40 mm
4x Screws for wall bracket 4.5 x 50 mm
1x Screw for U-piece 4 x 50 mm
1x U-piece (optional anti-theft device)
• go-e Controller
• go-e Case
• Type 2 cable (up to 22 kW) 2.5 m | 5 m | 7.5 m
• Type 2 cable holder
• RFID chips, pack of 10
• Additional go-e Charger wall bracket
RFID chip
Reset card
4x 1x5x 1x
Optional accessories
*Due to legal requirements, all adapter cables may not be used
in Switzerland.
Housing
Impact-resistant and UV-resistant high-performance plastic
Installation and operating manual go-e Charger Gemini ex V 1.4Installation and operating manual go-e Charger Gemini ex V 1.4
5. Product overview 6. Scope of delivery

1212 1313
Product specications
Gemini ex 11 kW Gemini ex 22 kW
Mobile wallbox/charging station IC-CPD, according to EN IEC 61851-1:2019, EN IEC 62752:2016/A1:2020
Dimensions Approx. 15.5 x 26 x 11 cm
Weight 1.63 kg 1.82 kg
Connection cable 30 cm + plug, 5 x 2.5 mm²
(type H07BQ-F)
30 cm + plug, 5 x 6 mm²
(type H07BQ-F)
Connection Single-phase or three-phase
Rated voltage 230 V / 240 V (single-phase) / 400 V / 415 V (three-phase)
Norminal frequency 50 Hz
Power grid types TT / TN / IT
Standby power 3.1 W (LEDs dark) to 5.2 W (LEDs bright)
RFID 13.56 MHz
WiFi 802.11b/g/n 2.4 GHz / frequency band 2412-2472 Mhz
Safety functions
Gemini ex 11 kW Gemini ex 22 kW
DC protection module with DC
current detection and additional
AC detection
6 mA DC, 20 mA AC
(An RCD type A must be installed on the building side and a miniature
circuit breaker must be connected upstream. The local installation regulati-
ons must be observed).
Protection class I
Pollution degree II
Anti-theft device Charging cable locking device
Access control Can be activated if required. Authentication via RFID or APP possible.One
learned RFID chip is already included.
Input voltage Phase and voltage testing
Switching functions Testing of the switching functions
Ground check For TT, TN grids
(deactivatable ground check for IT grid - Norway mode)
Current sensor 3-phase
Temperature sensors Regulation of the charging current in case of overtemperature
IP65 Protected against dirt and water,
suitable for permanent outdoor operation
go-e network operator API For authorised access by the electricity grid operator to the go-e Charger
for grid-serving power control
Modbus TCP e.g. for grid-serving power control by the electricity grid operator
Permissible ambient conditions
Gemini ex 11 kW Gemini ex 22 kW
Installation site Indoors and outdoors
Operating temperature -25 °C to +40 °C
Storage temperature
-40 °C to +85 °C
Average temperature in hours Maximum 35 °C
Altitude Maximum 2,000 m above sea level
Relative humidity Not more than 95 % (non-condensing)
Impact resistance IK08
Charging capacity
Gemini ex 11 kW Gemini ex 22 kW Remark
Single-phase
charging car¹
1.4 kW
to 3.7 kW
1.4 kW
to 7.4 kW
Country-specic limitations
need to be observed
Two-phase
charging car¹
2.8 kW
to 7.4 kW
2.8 kW
to 14.8 kWC
Two-phase connection of the charger is
not possible
Three-phase
charging car¹
4.2 kW
to 11 kW
4.2 kW
to 22 kW
go-e Charger switches through the pow-
er that is available at the connection
¹Charging power depending on the number of phases of the car‘s onboard charger
Charging capacity
Gemini ex 11 kW Gemini ex 22 kW
Maximum charging power 11 kW
(16 A, 3-phase)
22 kW
(32 A, 3-phase)
Ampere and status display Readable via LED ring and app
By button and app
Adjusting charging power
Via charging current in steps of 1
ampere between
6 A and 16 A
Via charging current in steps of 1
ampere between
6 A and 32 A
Connection to vehicle
Gemini ex 11 kW Gemini ex 22 kW
Type 2 socket (acc. to EN 62196-2) with mechanical locking device
(own type 2 cable required, available as accessory)
Vehicles with type 1 can be charged with adapter cable type 2 to type 1
(available as accessories)
7. Technical data 7. Technical data
Installation and operating manual go-e Charger Gemini ex V 1.4Installation and operating manual go-e Charger Gemini ex V 1.4

1414 1515
Enclosed mounting material
It is not necessary to open the go-e Charger as part of the installation process.
The device must also never be opened in other respects.
Connection to infrastructure
Gemini ex 11 kW Gemini ex 22 kW
CEE red 16 A (3-phase) CEE red 32 A (3-phase)
With original go-e adapters (not included in the scope of delivery, available as accessories)*:
to CEE red 32 A
(three-phase - limitation by charging station to 16 A)
to CEE red 16 A
(three-phase)
to CEE blue 16 A (single-phase) to CEE blue 16 A (single-phase)
to multiple domestic plugs 16 A
(domestic socket - single-phase)
to multiple domestic plugs 16 A
(domestic socket - single-phase)
go-e Charger app and connectivity
Gemini 11 ex kW Gemini ex 22 kW
Local (WiFi hotspot) or worlwide* (WiFI) controlling and monitoring
Adjustment/check of the charge (voltage, current, power, energy)
Adjusting the current level in 1 ampere steps
Start/stop function and Scheduler
Management of RFID chips/cards (up to 10 users per charger) / Access control (RFID/App)
OCPP 1.6*
Electricity meter (total kWh and total amount per RFID chip)
kWh limit mode / ECO mode* / Next Trip Mode*
Push notications*
Cable unlock functions
Flexible energy tarifs with intelligent charging management*/**
Static load balancing*
Photovoltaic connection via go-e Controller (separate product) or
open API interface (programming required)*
LED adjustment
Management of the charging levels via button on the charging station
Updateable for later functions (Smart home, etc.)*
Automatic unlocking of the charging cable in the event of a power failure
1-/3-phase switching via app - even during the charging process
Synchronisation of charging processes with the cloud and display of the past charging processes*
Documented public API interfaces: HTTP , MQTT, Modbus TCP
*Internet connection of the Charger required
**Contract with an electricity provider whose exible electricity tari is integrated in the go-e app is required. Several 100 taris are
stored. The number of taris is constantly being expanded.
*Due to legal regulations, all adapter cables must not be used in Switzerland.
7. Technical data 8. Installation
Required tools
a c e
b d f
4X5X 1X
i k mj l
Pencil
Spirit level
Measuring tape
Drilling machine
Screwdriver
Hammer
a
c
d
e
f
b
Dowel 8 x 40 mm
Screws for wall bracket 4.5 x 50 mm
Screw for U-piece 4 x 50 mm
U-piece (optional anti-theft device)
Wall bracket
i
k
l
m
j
Installation and operating manual go-e Charger Gemini ex V 1.4Installation and operating manual go-e Charger Gemini ex V 1.4

1616 1717
8. Installation 8. Installation
1. Mount the go-e Charger approx. 1.00 to 1.45 meters
above the ground, depending on your personal fee-
ling of well-being. When determining the optimum
installation position, ensure that there is a proper
distance to the three-phase socket so that the CEE
plug of the charging station can be plugged in easily.
The go-e Charger has to be mounted exactly below
the CEE socket so that little pressure is exerted on
the supply line.
Place the wall bracket in the desired mounting posi-
tion. Use a spirit level to align it straight. Mark the
four drill holes with a pencil by using the wall bracket
as a template.
4X
1 M – 1,45 M
2. Drill holes at the four marked positions.
4x
3. Attach the wall bracket with four screws and dowels
each. Drive the dowels into the wall with a hammer.
Make sure that the surface is not warped. The device
may not be attached if the wall bracket is distorted.
Compensate possible unevenness of the wall with
spacers (not included in the scope of delivery).
4X
5. The go-e Charger is equipped with an integrated DC
protection module with DC detection and additional
AC detection (6 mA DC, 20 mA AC).
On the building side, an RCD type A must be instal-
led and a miniature circuit breaker must be installed
upstream. The local installation regulations must be
observed.
Miniature circuit breakers with characteristic B or C
for 16 or 32 amperes are permissible:
•3- or 4-pole for three-phase connection
•2-pole for single-phase connection
4. Hook the go-e Charger into the wall bracket.
Optional: If required, attach the supplied U-piece di-
rectly above the charger, making it impossible to re-
move the device from the wall bracket. In addition, a
padlock (not included in the scope of delivery) can be
attached.
6. When installing multiple units, activate static load
balancing via the go-e Charger app (WiFi required).
When using the go-e Controller, you can activate dy-
namic load balancing, which takes into account the
electricity consumption in the entire house.
Installation and operating manual go-e Charger Gemini ex V 1.4Installation and operating manual go-e Charger Gemini ex V 1.4

1818 1919
Starting the charging process
Connect the go-e Charger and the vehicle by using a
type 2 charging cable (or if the car has a type one so-
cket by using a type 2 to type 1 adapter cable). Make
sure that the type 2 plug is inserted as far as possible
into the type 2 socket of the charger.
The Charger is ready for charging and is waiting for
the car to release it. The LEDs light up yellow in the
number of the preset charging current.
Charging
After the car has enabled charging, the LEDs rotate
clockwise around the type 2 socket during the char-
ging process.
The number of „tails“ corresponds to the number of
connected phases or the number of phases set in the
app:
•1 rotating tail = 1-phase charging (230 V)
•3 rotating tails = 3-phase charging (400 V)
The speed of rotation and length of the tails indicate
the amount of charging current.
4.
5.
9. Commissioning/charging
3.
2.
Ready to charge
The go-e Charger is ready for operation. The number
of blue LEDs corresponds to the set charging current.
Five predened charging levels can be selected via
the but ton.
You can adjust the charging levels individually
in the go-e Charger app („Current levels“). It does not
matter whether the go-e Charger is connected single-
phase or three-phase.
1 LED = 1 A
Gemini ex 11 kW = 6 A - 16 A
Gemini ex 22 kW = 6 A - 32 A
1.
Start of the charger
The go-e Charger performs a self-test during initial
start-up or after a restart, during which the LEDs light
up in rainbow colours.
9. Commissioning/charging
Plugging in the charger
Connect the go-e Charger Gemini ex directly to a red
CEE socket or to a suitable socket using an original go-e
adap ter.
Gemini ex 11 kW = 16 A
Gemini ex 22 kW = 32 A
Installation and operating manual go-e Charger Gemini ex V 1.4Installation and operating manual go-e Charger Gemini ex V 1.4

2020 2121
6. Stop charging
The charging process is completed when the LEDs
light up green.
If you want to stop charging prematurely, use the
„cable release“ function of your vehicle or the large
round button of the go-e Charger app (tab „Char-
ging“).
The cable remains locked in the type 2 socket in the
standard setting after the charging process has en-
ded (adjustable via the app) until it is removed from
the vehicle (theft protection).
If the power supply is interrupted, the charging ca-
ble remains locked in the charging box for reasons
of theft protection. To unlock it, it is necessary to re-
energise the charging station. The cable can also be
unlocked automatically after a power failure, provi-
ded the function has been activated in advance via
the „Cable unlock“ setting in the app. However, it is
then no longer theft-protected in the event of a pow-
er failure.
The go-e Charger displays the charging status via dif-
ferent colours and positions of the LEDs. In addition,
it executes a whole series of safety queries to check
the used power source for possible errors. For this
reason, the go-e Charger may display an error and
refuse to charge, especially with unknown power
sources.
The device visualises the cause of the error by certain
colours and positions of the LEDs. You can also nd
the error message within the „Status“ information of
the app. (The following colour codes correspond to
the factory setting).
9. Commissioning/charging
Ground check deactivatedGround check deactivated
4 LEDs light up red (3, 6, 9 and 12 o‘clock).
The go-e Charger has the safety function „ground
check“, which prevents the charging process in TT/
TN power grids (common in most European count-
ries) in case of insucient grounding of the pow-
er connection. This function is enabled by default
and can be disabled via the go-e Charger app.
However, the „Ground check“ should only be disa-
bled if you are sure that the electricity grid has no
grounding (IT grid, e.g. in many regions of Norway),
so that charging can also be carried out here. If you
are not sure, you must leave the setting in the app at
„Enabled“!
WaitingWaiting
The LEDs ash blue in the number of preset charging
power.
The go-e Charger waits to charge based on a preset
sheduler or to obtain cheap electricity when charging
with a exible electricity tari.
10. LED status display/troubleshootingoting
Activation required
The LEDs light up blue and two white LEDs move
from the top and bottom to the centre.
The „Access control“/“Charging mode“ is not set to
„Open“. Use a learned RFID chip or the app to activate
the charging process.
RFID chip detected
5 LEDs light up green.
The go-e Charger has recognised an RFID chip autho-
rised for charging and releases the charge.
10. LED status display/troubleshooting
Installation and operating manual go-e Charger Gemini ex V 1.4Installation and operating manual go-e Charger Gemini ex V 1.4

2222 2323
10. LED status display/troubleshooting 10. LED status display/troubleshooting
Firmware update
The LEDs ash pink and turn yellow with increasing
progress of the update.
A rmware update was started via the go-e Charger
app. This may take a few minutes. Do not disconnect
the charger from the power supply during this time.
Firmware update successful
The LEDs light up alternately green and pink.
The rmware update has been successfully comple-
ted.
Vehicle is not recognised
The LEDs light up blue in the standby mode.
However, the charging process does not start.
Check the charging cable and the tight t of the plugs.
Internal error
The LEDs ash red.
The go-e Charger has detected a general communica-
tion error. Check the error code in the go-e Charger
app.
Grounding fault
The LEDs ash red at the top and glow green/yellow
statically at the bottom.
Check whether the supply line to the go-e Charger is
properly grounded.
Unknown RFID chip
5 LEDs light up red.
An unknown RFID chip was used. Use a learned RFID
chip to activate charging.
Fault current detected
The LEDs ash red at the top and light up pink at the
bottom.
The Charger has detected a DC fault current >= 6 mA
Increased temperature
The LEDs light up yellow at the bottom and ash red
at the top.
The temperature in the go-e Charger is increased.
Therefore, the charging current is automatically re-
duced.
Phase error
The LEDs light up blue at the bottom and ash red at
the top.
Check whether the phase/s of the go-e Charger are
connected properly. It is possible that only 2 phases
are connected. If no function occurs, contact the go-e
Support.
Error unlocking or locking
The LEDs briey light up red at the top and yellow at
the bottom.
The charging cable could not be unlocked or locked
properly. The unit tries to repeat the process every
ve seconds. The type 2 plug may not be inserted
completely. Try to insert it into the type 2 socket as
far as possible.
or AC fault current >= 20 mA. To acknowledge the
fault, press „Reboot“ in the app or disconnect the
Charger from the power supply for a short time. If
necessary, the charging current can be reduced, but
also check the connection used. (The charging sys-
tem in your vehicle may also be defective).
Installation and operating manual go-e Charger Gemini ex V 1.4Installation and operating manual go-e Charger Gemini ex V 1.4

2424 2525
10. LED status display/troubleshooting
Connection cable/fuse
The LEDs do not light up despite a power connection.
Check the overload protection of the connection.
Start of the charger does not end
The LEDs light up permanently in rainbow colours.
If the charger does not leave this mode, the WiFi
signal may be disturbed. Please remove possible
sources of interference (e.g. devices with a WiFi mesh
network).
Firmware update failed
The LEDs light up alternately red and pink.
The rmware update could not be completed suc-
cessfully. Please try again.
11. Reset card/RFID chip
Reset to factory settings
You can also use the reset card to reset the go-e
Charger to factory settings:
•Hold the reset card in front of the chargers RFID
reader
• All LEDs light up red briey to conrm
The stored RFID chips and assigned consumption
data are not deleted during this process.
go-e Charger reset card
On the back of the reset card you will find important
access data which you need to set up the app control
of the charger:
•“Serial number“: Serial number of the go-e Charger
• “Hotspot SSID“: WiFi hotspot name of the charger
• “Hotspot key“: WiFi hotspot password of the device
• “QR-Code“: Automatically connection to the hotspot
Ideally, leave the reset card at a secure location where
you can quickly access it in case you need it.
If you install the go-e Charger outdoors, you can
protect the device against use by unauthorised
persons by means of an RFID chip. In the settings of
the go-e Charger app, „Authentication required“ or
„RFID/App required“ needs to be selected for this.
The delivered RFID chip is already learned.
To authenticate a person authorised for charging,
the chip needs to be held in front of the RFID reader
(below the logo of the charger)before each charging
process. Alternatively, authentication can be done by
tapping the round button of the tab „Charging“ of the
go-e Charger app.
11. Reset card/RFID chip
Consumption overview for several users
Furthermore, additional user accounts can be created
with additional RFID chips (available as accessories).
This is useful if several people share the unit and the
charged current should be displayed separately for
each user in the app.
Additional RFID chips can be learned via the app
(„Settings“/“RFID chips“). Simply select one of the free
slots and follow the instructions in the app. The chips
can be renamed individually in the app.
Any RFID chip/card that transmits on a frequency
of 13.56 MHz (e.g. also many credit cards) can be
learned.
Protection against unauthorised charging
RFID chip
Installation and operating manual go-e Charger Gemini ex V 1.4Installation and operating manual go-e Charger Gemini ex V 1.4

2626 2727
12. App - connection setup
The go-e Charger can also be used without an app.
Download the go-e Charger app if you want to change
basic settings, use comfort functions, read the inter-
nal electricity meter or control the charger remotely.
The go-e Charger app is available for download on
the platforms listed opposite, depending on the ope-
rating system of your mobile device.
Set up connection via hotspot
1. Some smartphones require deactivating mobile
data and terminating active WiFi connections.
2. Either scan the QR code of the reset card (an ex-
ternal app may be required for this) or manually
search for the charger‘s network (displayed as
go-e-xxxxxx) in the settings of your mobile device
to connect to the charger‘s hotspot. If you con-
nect manually, you need to enter the password
that you will nd on the reset card under „Hot-
spot key“.
3. Now launch the go-e Charger app.
4. If the „Charging“ page is already displayed, you
can already operate the charger locally via the
app. Otherwise, you need to select your go-e
Charger in the app beforehand.
12. App - connection setup
Set up connection via WiFi
For remote control of the charger and for some com-
fort functions, a WiFi connection of the charger is es-
sential.
1. To connect to the WiFi network, you have to esta-
blish an active hotspot connection to the Charger
(as described above).
2. Then tap the „+“ icon in the app.
3. On the following screen, select „Initial setup for
new go-e Charger“. As soon as the hotspot con-
nection has been detected, tap on „Next“. On the
next screen, the connection to WiFi needs to be
activated.
4. Enter the name of your WiFi („SSID“) or select
your WiFi (if displayed). You also need to enter
the „password“ of this WiFi network. As soon as
the connection has been established, a „Next“
button appears, which you have to tap. Follow
the subsequent instructions of the app until the
„Done“ button appears. Tap this button.
5. Check whether the connection to the go-e Cloud
is allowed under „Advanced settings“ (in the „In-
ternet“ tab of the go-e Charger app).
6. Disconnect the hotspot connection to the Char-
ger, establish a smartphone internet connection
to control the Charger remotely via mobile data
or WiFi.
3.3.
3.
Installation and operating manual go-e Charger Gemini ex V 1.4Installation and operating manual go-e Charger Gemini ex V 1.4

2828 2929
b
f
The „Charging“ tab of the go-e Charger app gives you
direct access to the most important functions for
starting, stopping and monitoring charging proces-
ses.
Do you have several go-e Chargers? Tap the picture
of the Charger or its name to go to the selection page
with the list of available devices. Select the Charger
you want to operate.
Tap the „+“ icon at the top right to connect a new or
existing go-e Charger to the app.
Use the 3 tabs to switch between the screens „ Pow-
er“, „Details“ and „Data“.
The tab „Power“ shows the current charging power
in the large circle (if charging is in progress). You can
start and stop the charging process by tapping this
circle. In this case, you are charging in standard char-
ging mode, which does not take into account e. g. e-
xible energy taris.
Use the 3 round icons below to access the settings for
„Mode“, „Current“ and „Planned charge“.
You are also able to change the charging current du-
ring the charging process via the „Current“ icon, even
in steps of 1 ampere using the slider.
Under the headings „Status“, „Energy“ and „Informa-
tion“ you will nd further details regarding the char-
ging process.
If you tap „Energy per user“, a list with the charged
electricity quantities of all learned RFID chips is di-
splayed. You can also download the charging history
or meter readings here.
Use the 3 tabs to switch between the screens „Char-
ging“, „Settings“ and „Internet“.
a
c
d
e
b
a
c
d
e
f
12. App - charging 12. App - settings
You can adjust the basic and comfort settings of the
charger via the „Settings“ tab of the app. You are pro-
vided with help notes in the app for the setting opti-
ons, which is why you will only nd basic information
below.
Current levels
When delivered, the black button of the go-e Charger
is predened with 5 amperage levels for selecting the
charging current. You can switch between the levels
step by step by pressing the button. You are able to
adjust the current intensity of the ve levels to your
personal needs via the „Current levels“ setting option
of the go-e Charger app.
With lower amperages, you charge more sustainably,
which can have a positive eect on the stability of
the power grid. With high amperages, you charge the
battery faster.
Save energy with kWh limit
The „kWh Limit“ function is practical if you do not
want to fully charge the battery because, for exam-
ple, you live on a mountain and want to recuperate
when driving downhill. Set in the „kWh Limit“ menu
how much energy should be charged until the next
trip.
Flexible energy taris - charge cheaper
If you have a contract with your electricity provider
about a exible electricity tari with changing taris
every hour or at certain times of a day, you can con-
gure the Charger so that it charges your car at the
cheapest hours. To do this, we have integrated exib-
le energy taris in the app to provide you with a sus-
tainable and money-saving way of charging. The list
of energy providers you can see in the go-e Charger
app is constantly expanding, as dynamic electricity
pricing is a relatively new concept. Check in the go-e
app under „Mode“ whether your energy tari is al-
Installation and operating manual go-e Charger Gemini ex V 1.4Installation and operating manual go-e Charger Gemini ex V 1.4

3030 3131
12. App - settings
Scheduler
The „Scheduler“ option allows you to postpone the
charging process to a time when electricity is avai-
lable in abundance (often at night). In this way, you
act in a particularly sustainable way, as you do not
increase the load peaks that are common at the end
of the working day and take electricity that could ot-
herwise not be used sensibly. In this way, you ensure
grid stability.
After activating the scheduler, you can dene when
the go-e Charger may charge or not charge. For
weekdays, Saturday and Sunday, 2 time periods can
be dened separately.
Combine cheap electricity taris and
photovoltaic surplus charging
In combination with the Controller, you can even
combine charging with PV surplus and favourable
electricity taris in „Eco Mode“ and „Next Trip Mode“.
The Charger rst tries to use as much solar power
as possible and then continues charging with cheap
electricity rates.
For charging with PV surplus power with go-e Char-
ger and go-e Controller, customisations have to be
made in the app under „Settings“ in „ECO Mode“ or
„Next Trip Mode“. There you will nd a slider „Charge
with PV surplus“, which you need to activate. You can
then adjust the exact settings via the link „PV surplus“
below the slider. Here you can also opt for automatic
phase switching in order to be able to charge even
when the PV system‘s output is low. Afterwards, you
need to activate the respective mode in the „Char-
ging“ tab. How charging works in conjunction with
the go-e Controller is explained in detail in its inst-
ructions.
12. App - settings
Photovoltaic surplus charging
Basically, the go-e Charger allows you to charge
your car easily and automatically with surplus elec-
tricity from your photovoltaic system (PV). However,
this requires an energy management system (EMS).
The go-e Controller (separate product) is an exam-
ple of such an EMS . The open interfaces of the go-e
Charger also allow you to use other EMS. For these,
however, you usually need to have programming
knowledge or check in advance whether the EMS you
want to use already has the go-e Charger integrated.
ready integrated. Select the country you live in, your
energy provider and the tari you have signed up for
with your energy provider. Then activate „ECO Mode“
or „Next Trip Mode“ under Mode and set a price, time
or kWh limit at which the go-e Charger should start or
nish charging for the selected charging mode in the
„Settings“ tab.
In „ECO mode“, you can set a price limit per kWh. As
soon as the electricity price falls below the threshold
you set, the wallbox charges your electric car.
In „Next Trip Mode“, you can set a time and a kWh
amount to charge your vehicle without a price limit.
The go-e Charger automatically selects the cheapest
hours for charging according to your electricity tari
until the specied kWh amount is reached within the
set time limit. If you wish, you can continue charging
in ECO mode by manually setting the charging price
limit.
A cloud connection (WiFi) is required for this functio-
nality. The current prices are automatically transfer-
red to the charger and displayed in the „Data“ tab on
the „Charging“ screen.
Installation and operating manual go-e Charger Gemini ex V 1.4Installation and operating manual go-e Charger Gemini ex V 1.4

3232 3333
Load balancing
If you operate several go-e Chargers at one power
connection, you should use the „load balancing“ (sta-
tic) function so that the building power connection is
not overloaded. A cloud connection (WiFi) is required
for this function. If the cloud connection is tempora-
rily interrupted, the go-e Charger will continue char-
ging with reduced charging current in fallback mode,
provided a charging current value greater than 0 A
has been entered for this purpose. When using the
go-e Controller, you can activate dynamic load ba-
lancing, which takes into account the electricity con-
sumption in the entire house.
Cable unlock functions
The default setting under „Cable unlock“ is that the
charging cable should remain locked in the charger
after the charging process until it is released at the
vehicle (theft protection). Alternatively, you can lock
the cable permanently. This is useful if you rarely
take it with you in the car and the go-e Charger has
been installed outdoors. The function serves as a per-
manent protection against theft of the cable. Further-
more, you can have the cable automatically unlocked
after the charging process. This is convenient if you
share the charging station with several people and
want to allow them to use the charger at the end of
your charging session.
1. go-e GmbH grants a guarantee for go-e chargers of the Gemini series against material and func-
tional defects in accordance with the following conditions. The warranty period is 36 months from
receipt of the goods after the rst purchase of the product from go-e or a reseller. This warranty
is in addition to the statutory warranty of 2 years (from receipt of the goods) and does not limit it.
2. The guarantee is only valid on presentation of proof of purchase stating the date of purchase.
3. In the event of a guarantee claim, the customer has to inform go-e GmbH immediately in text
form to complain about the defect. In the event of a justied notice of defect, go-e is obli¬ged
to improve or replace the goods as soon as possible or to arrange this. In the (justied) case of
the return of the defective product to go-e, go-e will bear the costs incurred. If, in the event of a
guarantee claim, it becomes apparent that the device needs to be replaced, the customer waives
ownership of the previous device from the date of return shipment and the new device simulta-
neously becomes the property of the buyer. This transfer of ownership also applies if, as a gesture
of goodwill, a device is replaced outside the guarantee period at reduced conditions. If a defect
that is justiably notied within the guarantee peri¬od concerns a permanently installed charging
station, go-e GmbH will send the customer a replacement box and will pay a total of up to 70 euros
of the electrician’s costs incurred in uninstalling the defective charging station and installing the
replacement unit. In any case, evidence in the form of an invoice has to be provided. For safety
reasons, the disassembly of an allegedly defective, permanently installed go-e product may only be
carried out by a qualied electrician. Before dismantling the product, always contact go-e’s techni-
cal custo¬mer support and wait for its decision on the further procedure for handling the service
case. Repairs may only be carried out by the manufacturer go-e. For repairs not carried out by go-e,
there shall be no claim to reimbursement of costs under the guarantee.
4. In the event of incorrect storage, use or installation/mounting by the buyer/installer and resul-
ting damage to the product or other technical defects caused by the buyer/installer, the guarantee
and statutory warranty shall expire. In this case the buyer bears the shipping costs. This applies
especially if the product is not operated with a special original adapter manufactured by go-e
GmbH or is used for other purposes than those specied by the manufacturer.
5. The guarantee and warranty also expires in the event of any modication or opening of a go-e
product or if there is no proof of installation by a qualied professional. (e.g. commissioning cer-
ticate)
6. go-e GmbH shall make every reasonable eort to provide the operation of all free digital sup-
plementary services in accordance with the representations in the operating instruc¬tions of the
products, including but not limited to app and cloud functions. go-e does not, however, guarantee
that these will always function error-free, fully available and without interruption. go-e GmbH does
not provide any guarantee, warranty or assurance for these digital ad¬ditional functions, but will
endeavor to provide a workaround or update to rectify errors or eliminate faults free of charge
within a reasonable period of time following an error/fault report by the customer. The customer’s
by using the contact form on the go-e web¬site. go-e shall be entitled to apply restrictions for the
elimination of errors/malfunctions and/or workarounds, as well as to postpone the elimination of
errors/malfunctions until the release of an update. In order to full this obligation, go-e GmbH is
entitled to suspend the digital supplementary services due to planned or unplanned maintenance
work, which is why go-e does not guarantee that the digital services will be available without res-
triction at any given time.
7. Claims arising from this guarantee shall be governed exclusively by Austrian law, excluding the
conict of laws provisions, in particular the UN Convention on Contracts for the International Sale
of Goods.
12. App - settings 13. Guarantee, warranty and exclusions
Installation and operating manual go-e Charger Gemini ex V 1.4Installation and operating manual go-e Charger Gemini ex V 1.4

3434 3535
Do you still have questions about the go-e Charger?
You can nd helpful answers concerning the most frequently
asked questions, help for technical problems and troubleshooting on:
www.go-e.com
If you cannot nd an answer to your question in this guide,
on our website or in the app, please feel free to contact us:
CE Declaration of Conformity: Hereby go-e GmbH declares that the radio equipment
type go-e Charger Gemini ex 11 kW and go-e Charger Gemini ex 22 kW is in com-
pliance with Directive 2014/53/EU. The full text of the EU Declaration of Conformity is
available at the following internet address: www.go-e.com
go-e GmbH
Satellitenstraße 1
9560 Feldkirchen
AUSTRIA
+43 4276 6240010
www.go-e.com
SupportSupport
15. Contact and support14. CE Declaration of Conformity
Installation and operating manual go-e Charger Gemini ex V 1.4Installation and operating manual go-e Charger Gemini ex V 1.4

Other manuals for Gemini flex
3
This manual suits for next models
2
Table of contents
Other go-e Batteries Charger manuals

go-e
go-e Charger HOME+ User manual

go-e
go-e go-eCharger HOMEfix User manual

go-e
go-e Charger HOME+ User manual

go-e
go-e Charger HOME+ Manual

go-e
go-e Charger Gemini 11 kW User manual

go-e
go-e Gemini flex Installation guide

go-e
go-e Gemini flex Installation guide

go-e
go-e Charger HOME+ User manual

go-e
go-e Charger HOMEfix User manual

go-e
go-e Charger HOMEfix Manual