Godex EZ-DT-2 User manual

P/N. 920-012511-04
Rev. B, 05.2010
UserManual
EZDT2/EZDT4

EZDT2 / EZDT4 User Manual
1
Safety instructions
Please read the following instructions carefully.
1. Keep the equipment away from humidity.
2. Before you connect the equipment to the power outlet, please check the voltage of the
power source.
3. Make sure the printer is off before plugging the power connector into the power jack.
4. It is recommended that you connect the printer to a surge protector to prevent possible
transient overvoltage damage.
5. Be careful not to get liquid on the equipment to avoid electrical shock.
6. For safety and warranty reasons, ONLY qualified service personnel should open the
equipment.
7. Do not repair or adjust energized equipment under any circumstances.

EZDT2 / EZDT4 User Manual
2
1. BARCODE PRINTER...................................................................3
1-1. Box content.....................................................................................................................3
1-2. Specifications..................................................................................................................3
1-3. Interfaces ........................................................................................................................5
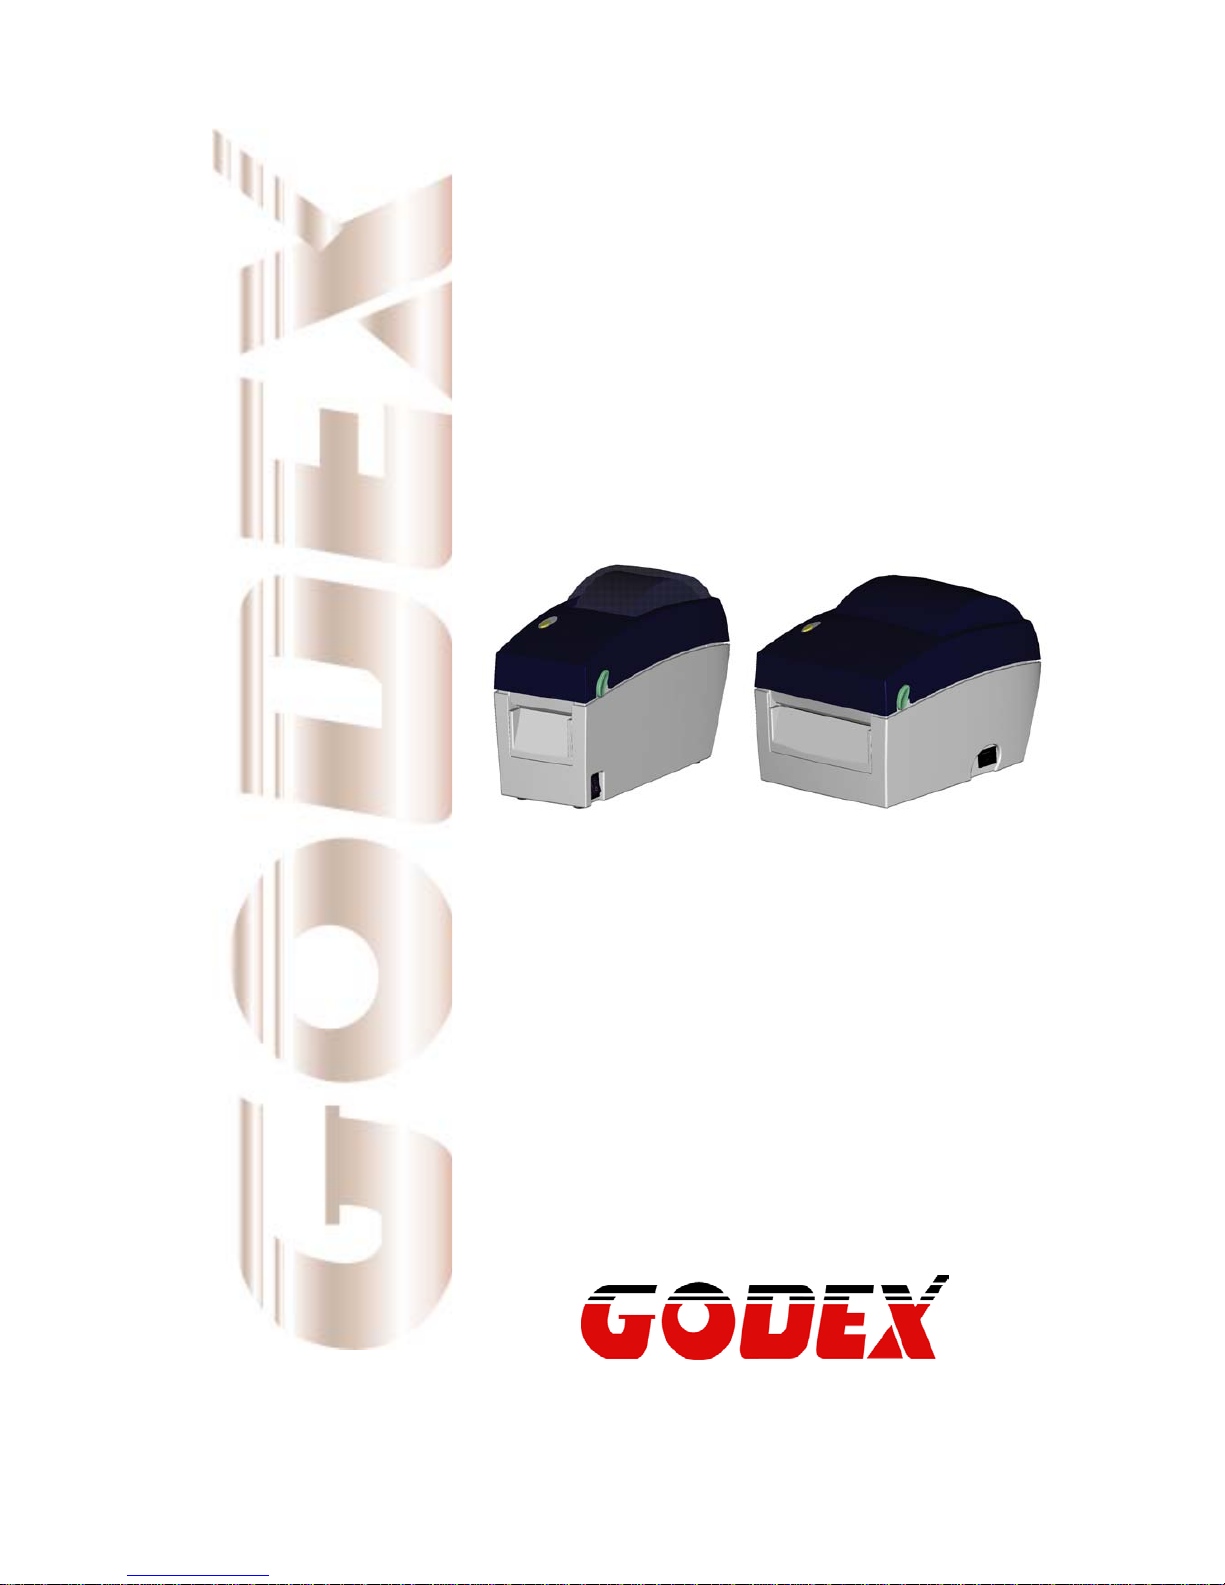
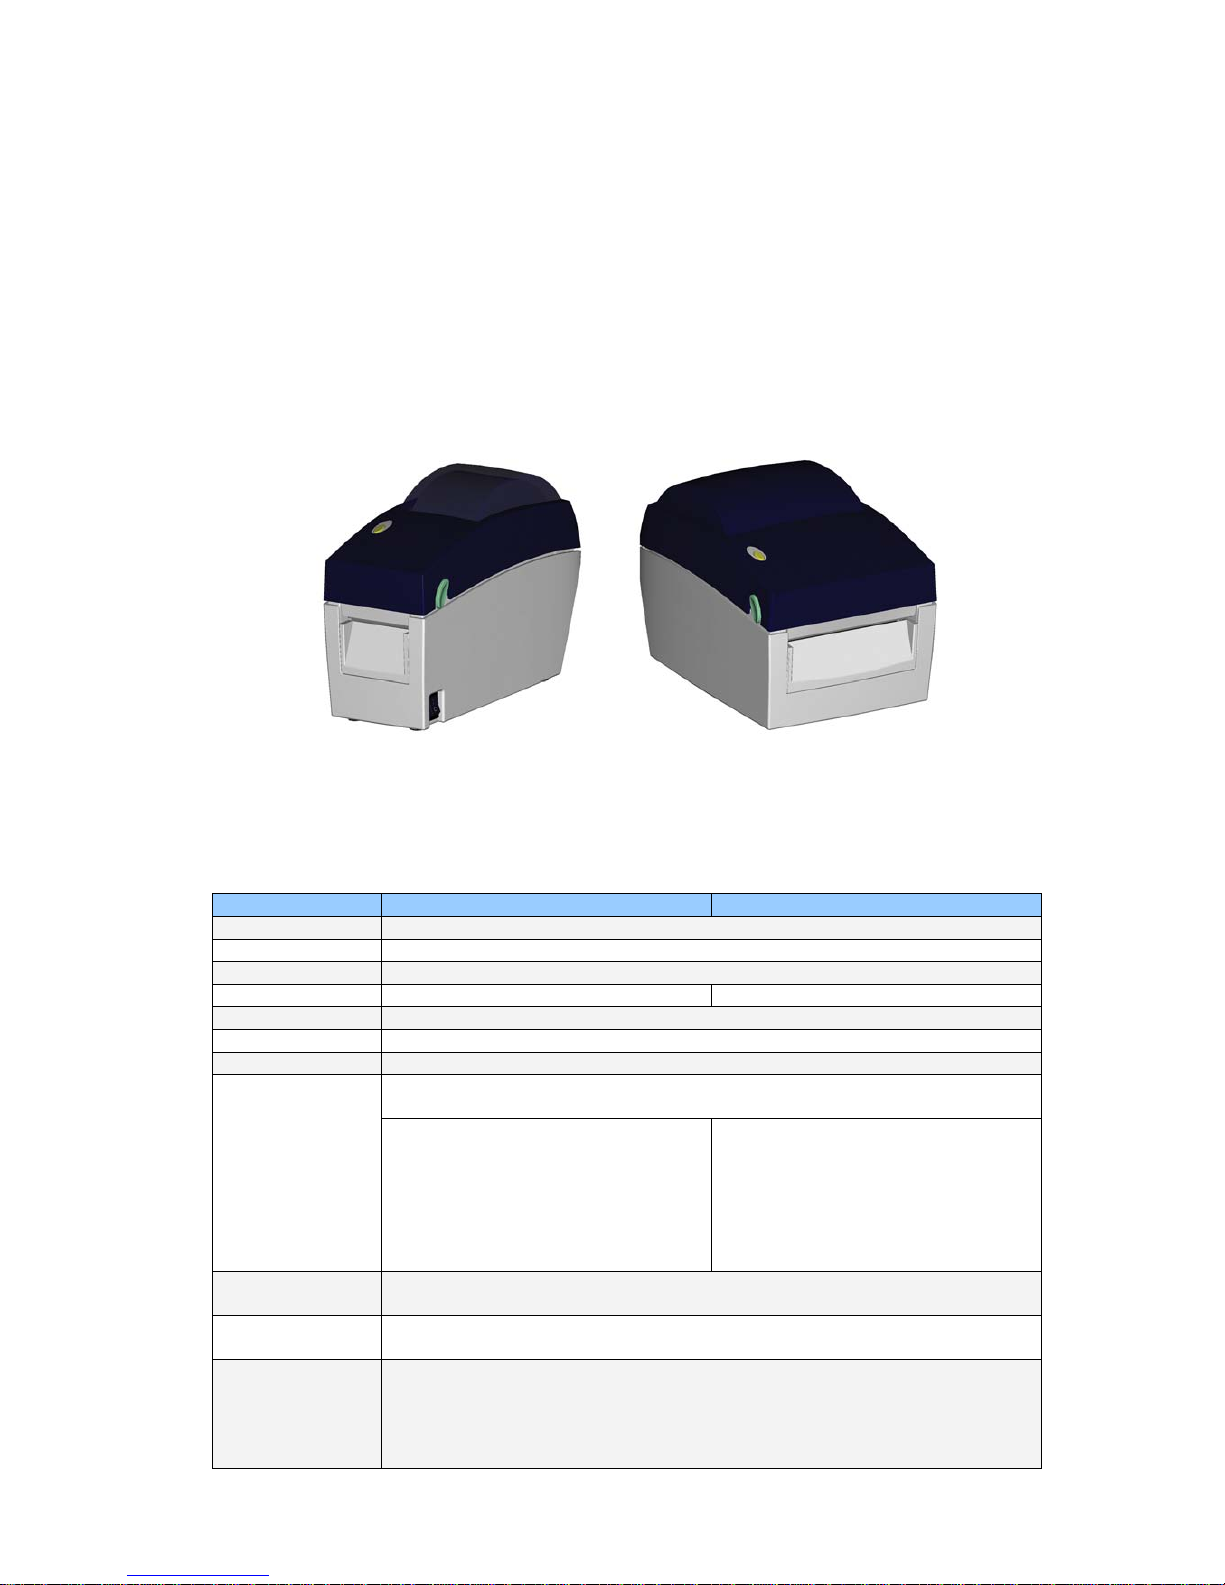
1-4. Getting to know your printer............................................................................................6
2. PRINTER SETUP ...................................................................... 8
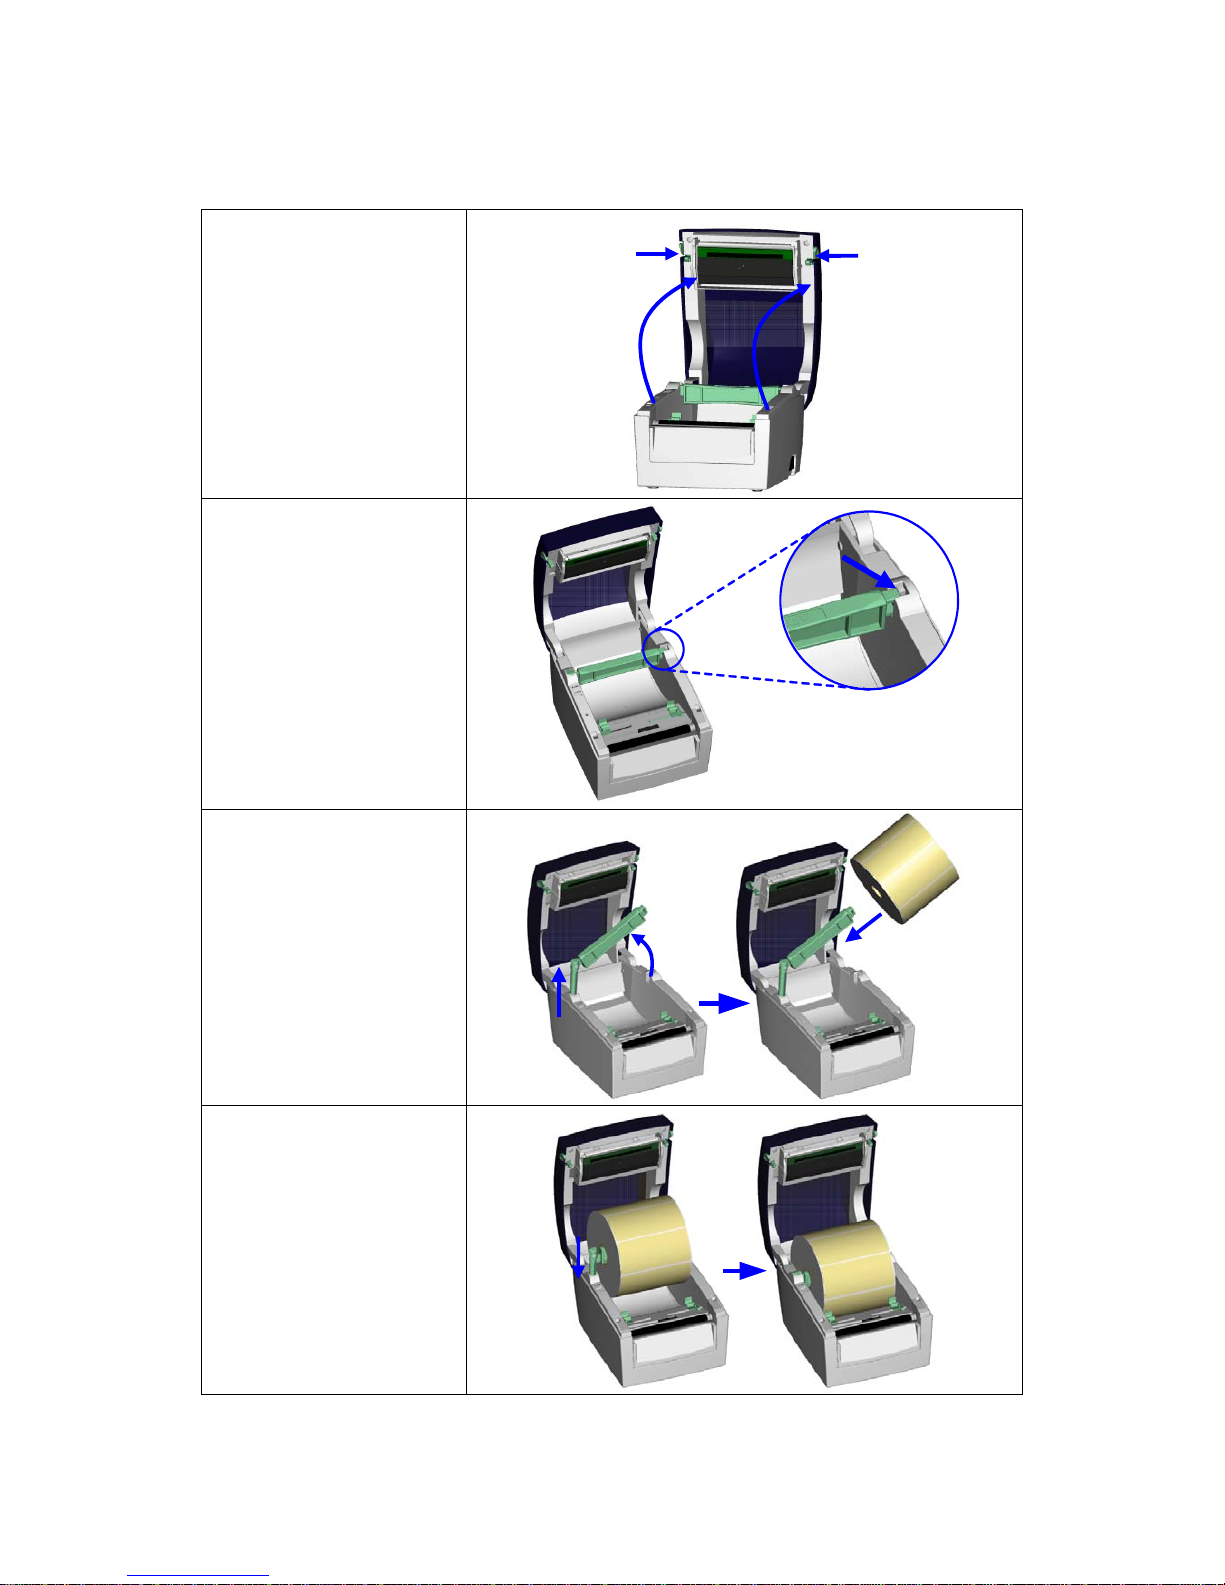
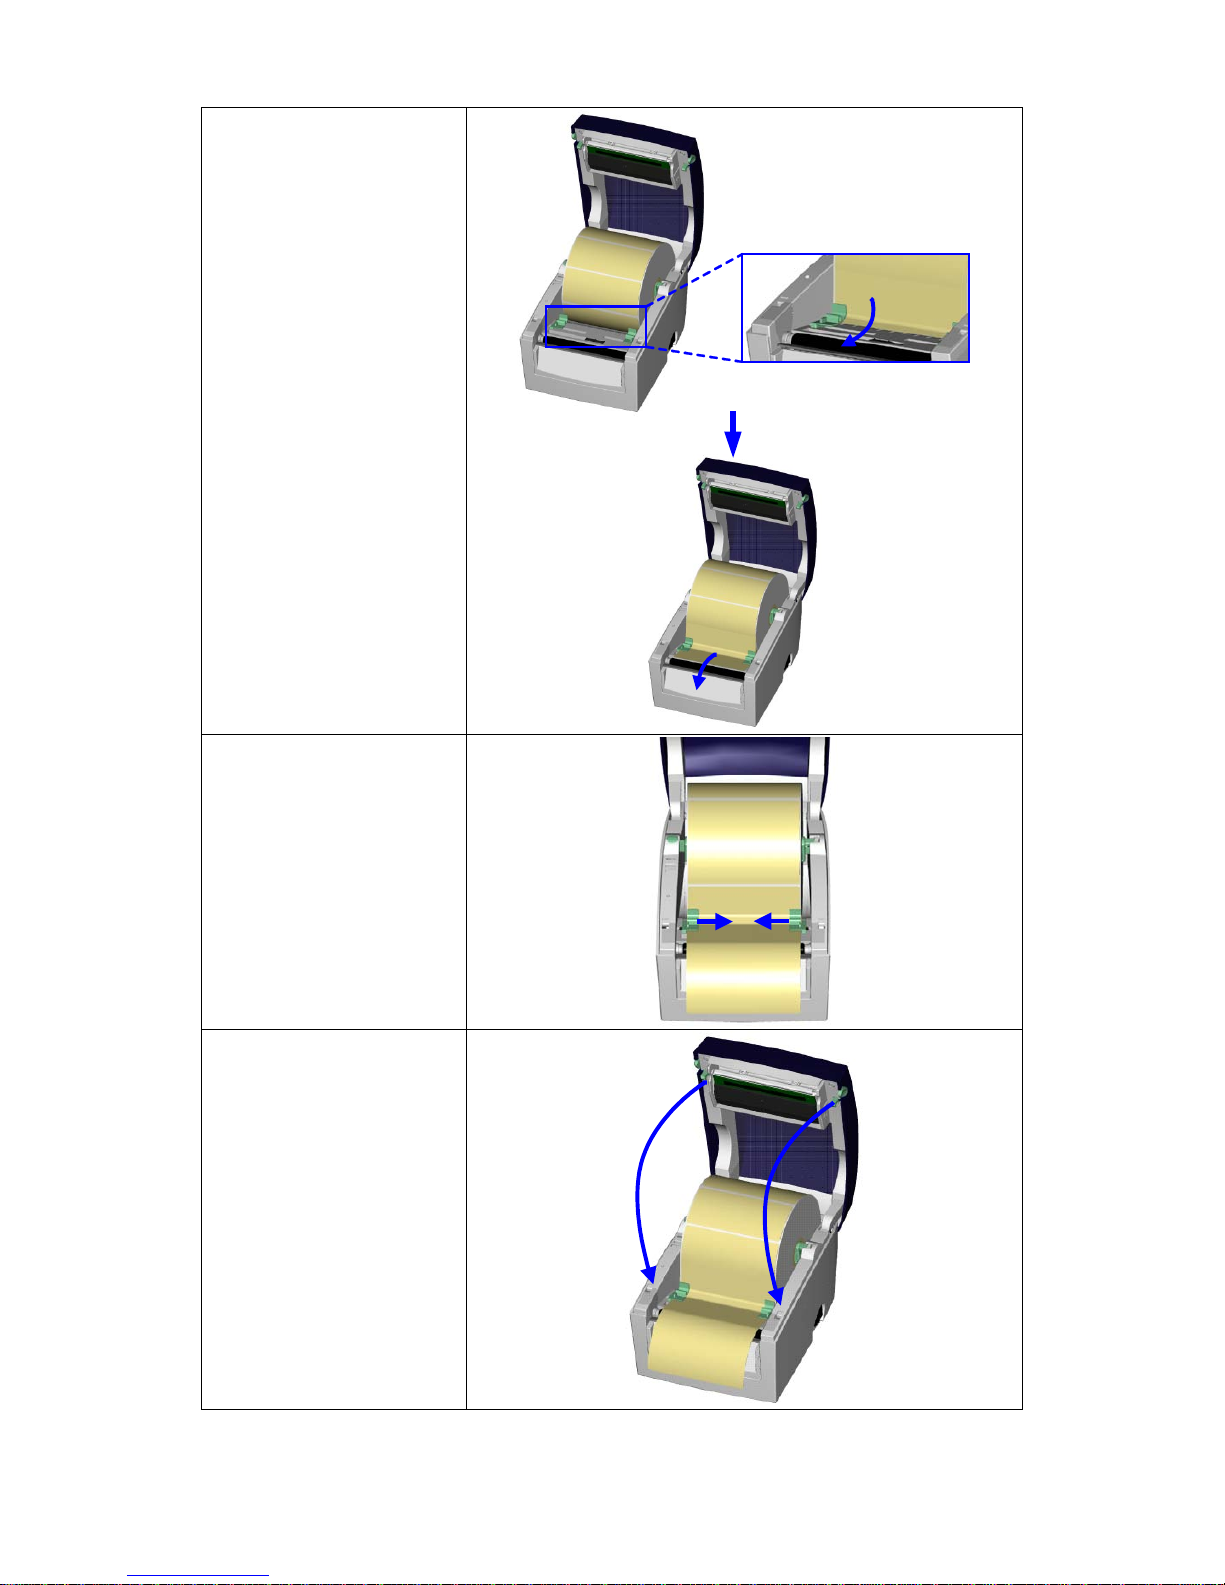
2-1. Loading the label roll.......................................................................................................8
2-2. Installing the label roll holder ........................................................................................10
2-3. Connecting the printer to the host computer.................................................................11
2-4. Installing the driver........................................................................................................12
3. OPERATOR PANEL ..................................................................14
3-1. FEED button .................................................................................................................14
3-2. LED status ....................................................................................................................14
3-3. Label size calibration ....................................................................................................14
3-4. Self test.........................................................................................................................15
3-5. Error alerts ....................................................................................................................16
4. ACCESSORIES..........................................................................17
4-1. Installing the label dispenser ........................................................................................17
4-2. Installing the cutter........................................................................................................20
4-3. Installing the Ethernet module – EZDT2 thermal printer ..............................................23
4-4. Installing the Ethernet module – EZDT4 thermal printer ..............................................27
5. MAINTENANCE AND ADJUSTMENT....................................... 30
5-1. Cleaning the print head.................................................................................................30
5-2. Adjusting the cutter.......................................................................................................30
5-3. Labels with black marks................................................................................................31
5-4. Troubleshooting............................................................................................................32

EZDT2 / EZDT4 User Manual
3
1. Barcode printer
1-1. Box content
Please check that all of the following items are included with your printer:
Barcode printer
Power cord
AC adapter
USB cable
Label stock
Quick reference guide
CD (with QLabel label software / user manual)
EZDT2 EZDT4
1-2. Specifications
Model
EZDT2
EZDT4
Print Method
Direct Thermal
Resolution
203 dpi (8 dot/mm)
Print Speed
4 IPS (102 mm/s)
Print Width
2.12” (54 mm)
4.25” (108 mm)
Print Length
Min. 0.16” (4 mm)** ; Max. 68” (1727 mm)
Memory
4MB Flash (2MB for user storage) ; 8MB SDRAM
Sensor Type
Adjustable reflective sensor. Fixed transmissive sensor, central aligned
Media
Types: Continuous form, gap labels, black mark sensing, and punched hole;
label length set by auto sensing or programming
Width: 0.6” (15 mm) Min. - 2.36” (60
mm) Max.
Thickness: 0.003” (0.06 mm) Min. -
0.008” (0.20 mm) Max.
Label roll diameter: Max. 5” (127 mm)
Core diameter: 1”, 1.5” (25.4 mm, 38.1
mm)
Width: 1” (25.4 mm) Min. - 4.64” (118
mm) Max.
Thickness: 0.003” (0.06 mm) Min. -
0.008” (0.20 mm) Max.
Label roll diameter: Max. 5” (127 mm)
Core diameter: 1”, 1.5” (25.4 mm, 38.1
mm)
Printer Language EZPL, GEPL (Godex Eltron® Printer Language), GZPL (Godex Zebra®
Printer
Language)
Software
Label design software: QLabel-IV (for EZPL only)
Driver & DLL: Windows 2000, XP and Vista
Resident Fonts
Bitmap fonts: 6, 8, 10, 12, 14, 18, 24, 30, 16X26 and OCR A & B
Bitmap fonts 90°, 180°, 270° rotatable, single characters 90°, 180°, 270°
rotatable
Bitmap fonts 8 times expandable in horizontal and vertical directions
Scalable fonts 90°, 180°, 270° rotatable

EZDT2 / EZDT4 User Manual
4
Download Fonts
Bitmap fonts 90°, 180°, 270° rotatable, single characters 90°, 180°, 270°
rotatable
Asian fonts 90°, 180°, 270° rotatable and 8 times expandable in horizontal and
vertical directions
Scalable fonts 90°, 180°, 270° rotatable
Barcodes
1-D Bar codes:
Code 39, Code 93, Code 128 (subset A, B, C), UCC/EAN-128 K-Mart,
UCC/EAN-
128, UPC A / E (add on 2 & 5), I 2 of 5, I 2 of 5 with Shipping Bearer
Bars, EAN 8 / 13 (add on 2 & 5), Codabar, Post NET, EAN 128, DUN 14, HIBC,
MSI (1 Mod 10), Random Weight, Telepen, FIM, China Postal Code, RPS 128
and GS1 DataBar
2-D Bar codes:
PDF417, Datamatrix code, MaxiCode, QR code and Micro QR code
Code Pages
CODEPAGE 437, 850, 851, 852, 855, 857, 860, 861, 862, 863, 865, 866, 869,
737
WINDOWS 1250, 1251, 1252, 1253, 1254, 1255
Unicode (UTF8, UTF16)
Graphics
Resident graphic file types are BMP and PCX, other graphic formats are
downloadable from the software
Interfaces
USB port (default on)
Serial port: RS-232 (DB-9)
Control Panel
One Tri-color LED: Power (Green, Orange and Red)
Control key: FEED
Real Time Clock
Standard
Power
Auto Switching 100-240VAC, 50-60Hz
Environment
Operation temperature: 41°F to 104°F (5°C to 40°C)
Storage temperature: -4°F to 122°F (-20°C to 50°C)
Humidity
Operation: 30-85%, non-condensing.
Storage: 10-90%, non-condensing.
Agency
Approvals
CE(EMC), FCC Class A, CB, CCC
Dimension
Length: 8.58” (218 mm)
Height: 6.77” (172 mm)
Width: 3.94” (100 mm)
Length: 8.58” (218 mm)
Height: 6.53” (166 mm)
Width: 6.61” (168 mm)
Weight
2.65 lbs (1.2Kg) ,excluding
consumables
3.3 lbs (1.5Kg) ,excluding
consumables
Options
Ethernet 10/100Mbps print server
(default off; disables USB when in use)
Cutter Module
Label Dispenser (peel)
External label roll holder for 10” (250
mm) O.D. label rolls
External label rewinder
Parallel port (Centronics 36-pin)
Ethernet 10/100Mbps print server
(default off; disables USB when in use)
Cutter Module
Label Dispenser (peel)
External label roll holder for 10” (250
mm) O.D. label rolls
External label rewinder
*Specifications are subject to change without notice. All company and/or product names are
trademarks and/or registered trademarks of their respective owners.
** Minimum print height specification compliance can be dependent on non-standard material
variables such as label type, thickness, spacing, liner construction, etc. Godex is pleased to test
non-standard materials for minimum height printing capability.

EZDT2 / EZDT4 User Manual
5
1-3. Interfaces
Serial port
Default
setting
:
Baud rate 9600, no parity, 8 data bits, 1 stop bit, XON/XOFF protocol and
RTS/CTS
RS232 housing (9-pin to 9-pin)
DB9 socket DB9 plug
--- 1 1 +5V, max 500mA
RXD 2 2 TXD
TXD 3 3 RXD
DTR 4 4 N/C
GND 5 5 GND
DSR 6 6 RTS
RTS 7 7 CTS
CTS 8 8 RTS
RI 9 9 N/C
Computer
Printer
【
Note
】
The total current to the serial port may not exceed 500 mA.
USB port
Connector type : Type B
Pin No. 1 2 3 4
Function VBUS D- D+ GND
Internal interface
UART1 wafer Ethernet module
N.C
11
N.C
TXD
22
RXD
RXD
33
TXD
CTS
44
RTS
GND
55
GND
RTS
66
CTS
E_MD
77
E_MD
RTS
88
CTS
E_RST
9
E_RST
9
+5V
10
+5V
10
GND
11
GND
11
+5V
12
+5V
12

EZDT2 / EZDT4 User Manual
6
1-4. Getting to know your printer
2
4
1
5
3
1.
LED indicator
2.
FEED function button
3.
Printer cover
4.
On/off switch
5.
Release buttons
1
2
3
6
5
4
1.
Print head release lever
2.
Label roll holder
3.
Print mechanism
4.
Label supply hub
5.
Label guides
6.
Front cover

EZDT2 / EZDT4 User Manual
7
3
2
1
1.
Platen cover
2.
Label sensor
3.
Platen roller
1
3
2
4
1.
Power jack
2.
USB port
3.
Feed slot for continuous labels
4.
Serial port (RS-232)
12
1.
Cover on bottom of printer
2.
Mounting points

EZDT2 / EZDT4 User Manual
8
2. Printer setup
2-1. Loading the label roll
1. Place the printer on a
flat surface and open
the printer cover.
2. Release the label
supply hub.
3. Lift the label roll holder
and pull it out as far as
possible.
4. Install the label roll on
the label supply hub.
5. Now press the label roll
holder down until it
clicks into place.
6. Return the label roll
holder to its original
position.

EZDT2 / EZDT4 User Manual
9
7. Pass the label under
the paper guides and
pull it forward.
8. Adjust the paper guides
to the width of the label
liner.
9. Close the printer cover
to finish loading the
labels.

EZDT2 / EZDT4 User Manual
10
2-2. Installing the label roll holder
1. Pull the label roll
holder out as far as
it will go.
2. Fold out the label
supply hub as
shown in the
illustration.
3. Now rotate the
label roll holder to
return the label
supply hub to its
original position.
Press down the
label supply hub
until it clicks into
place.
A. To load label stock
with a 1" core, the
locking notch must
be at the top of the
label supply hub.
B. To load label stock
with a 1.5" core, the
locking notch must
be at the bottom of
the label supply
hub.
【
Note
】
The hub is also marked
on both sides to indicate
the core size, as shown
in the illustration.
1" core
1.5" core

EZDT2 / EZDT4 User Manual
11
2-3. Connecting the printer to the host computer
1. Please make sure that the printer is switched off.
2. Connect the power cord to the power supply and to the AC adapter, then connect the
adapter to the printer.
3. Connect the printer with the host computer via the USB port or serial port.
4. Switch on the printer. The LED indicator should light up.

EZDT2 / EZDT4 User Manual
12
2-4. Installing the driver
1. Insert the product CD
in the CD/DVD drive of
the host computer and
open the "Windows
Drivers" folder on the
CD.
2. Execute the file with
the same icon as the
file selected in the
illustration on the right.
3. Follow the instructions
in the installation
wizard.
4. Select "Install printer
drivers" to start with
the driver installation.
5. Specify your printer
model and continue
with the installation.

EZDT2 / EZDT4 User Manual
13
6. Specify the port used
to connect the printer
to the host computer.
7. Enter a printer name.
The printer will be
listed under this name
in the "Printers and
Faxes" folder.
8. Specify whether or not
you want to share the
printer with other
network users and
assign the printer a
share name.
9. When you have
configured all the
settings, a summary of
the printer settings is
displayed, which you
should check.
10. If all settings are
correct, click Finish to
start copying the driver
files.
11. Once copying is
complete, the new
printer should be
visible in the "Printers
and Faxes" folder.

EZDT2 / EZDT4 User Manual
14
3. Operator panel
3-1. FEED button
When you press the FEED button, the printer moves the label to the defined stop position. If you
are using continuous labels, pressing the FEED button will move label stock until you release the
button again. If you are using individual labels, pressing the FEED button will move only one
label. If the label does not stop at the correct position, you need to run the auto-detection function
on the label stock (see Section 3-3).
3-2. LED status
*Note: This description applies only to firmware versions G3.000 or higher.
Press the FEED button and keep it pressed, then switch on the printer. You will hear two beeps
and the LED lights up red. Release the FEED button. The printer will now automatically measure
the label size (see Section 4-3.) and then print a test page (see Section 4-4.)
LED
indicator Status Description
Green Standby mode The printer is ready for operation.
Red
(flashing) Error mode The printer has detected an error.
(see Section 3-5. Error alerts)
3-3. Label size calibration
The printer can automatically detect and store label height.
That means the host computer does not need to transmit the label height to the printer.
1. Check that the label sensor is positioned correctly.
2. Check that the label stock is loaded correctly.
3. Switch off the printer.
4. Switch on the printer, keeping the FEED button pressed. When the LED starts to flash red,
release the FEED button. The printer will now measure the label stock and store the label
height.
5. Once the printer has successfully measured the label stock, it will print a self-test label.

EZDT2 / EZDT4 User Manual
15
3-4. Self test
The self-test function helps you find out whether the printer is functioning normally.
The printer prints the following test page:

EZDT2 / EZDT4 User Manual
16
3-5. Error alerts
LED
indicator
Beeps Description Solution
Red 2 x 4 beeps
The print mechanism is not
correctly closed.
Open the print mechanism and close
it again.
Red
(flashing) None High temperature at the print
head.
Once the print head has cooled
down, the printer switches to
standby mode.
Red 2 x 2 beeps No paper is detected.
Make sure that the label sensor is
positioned correctly. If the sensor
still does not detect the paper, run
the auto-detection function
again.
The paper is finished.
Replace the label roll.
Red 2 x 2 beeps Paper feed problem.
Possible reasons: the print medium
has become trapped around the
rubber roll; the sensor cannot detect
a gap or black mark between the
labels; there is no paper. Please
reset the sensor.
Red 2 x 2 beeps
The memory is full. The printer
prints the message "Memory
full".
Delete unnecessary data or install
additional memory.
Red 2 x 2 beeps Unable to find file. The printer
prints the message "Filename
cannot be found".
Use the "~X4" command to print all
files. Then check whether the files
exist and whether the names are
correct.
Red 2 x 2 beeps
A file of the same name already
exists. The printer prints the
message "Filename is repeated".
Change the name of the file and try
storing it again.

EZDT2 / EZDT4 User Manual
17
4. Accessories
4-1. Installing the label dispenser
1
Label dispenser
2
1
2
Screws (set of 2)
【
Note1
】
Remember to switch
off the printer before installing
the label dispenser.
【
Note 2
】
A label liner
thickness of 0.006 mm ± 10%
and a weight of 65 g/m2± 6%
are recommended.
【
Note3
】
The label dispenser
will take labels up to a max.
width of 110 mm (DT4) or 54
mm (DT2).
1. Place the printer on a flat
surface and open the
printer cover.
2. Remove the front cover.
【
Note
】
You can use a coin or
screwdriver to open the cover.
3. Pass the dispenser cable
through the opening as
shown in the illustration.
4. Fit the label dispenser in
the recess provided.

EZDT2 / EZDT4 User Manual
18
EZDT4
EZDT2
5.
Turn the
printer upside
down and
tighten the
screws to
secure the
label
dispenser.
5.
Turn the
printer upside
down and
remove the
screw that
secures the
cover on the
bottom of the
printer.
6.
Open the
cover on the
bottom of the
printer to
access the
motherboard.
6.
Tighten the
screws to
secure the
label
dispenser.
【
Note
】
You can use a coin or screwdriver to open the
cover.
7. Connect the cable to the
motherboard.
【
Note
】
The motherboard has two
connectors, one for the cutter
and the other for the dispenser.
Please make sure that you are
using the correct connector.
8. Close the cover again
(EZDT2: and secure it with
the screw).
9. Place the printer the right
way up again.

EZDT2 / EZDT4 User Manual
19
10. Open the dispenser by
folding it out.
11. Load the labels, following
the instructions in Section
2-1.
12. Remove the first label and
pass the label liner over
the roller and the tear-off
plate.
【
Note
】
The label stock should be at
least 25 mm high.
【
Suggestion
】
When using the label dispenser,
set the stop position to 9 mm
(DT2: 8 mm).
13. Pass the label liner
through the printer and
dispenser as shown in the
illustration.
14. Fold up the dispenser
cover to close it.
15. Switch on the printer and
press the FEED button to
measure the label stock.
Other manuals for EZ-DT-2
2
This manual suits for next models
1
Table of contents
Other Godex Printer manuals

Godex
Godex EZPi-1200 User manual

Godex
Godex EZ-1105P series User manual

Godex
Godex HD830i User manual

Godex
Godex RT860i User manual

Godex
Godex EZ-2 User manual

Godex
Godex BP2250i User manual

Godex
Godex EZPi-1200 User manual

Godex
Godex EZ-2000 PLUS Operating and maintenance manual

Godex
Godex CI-4040 User manual

Godex
Godex EZ-2200 Operating and maintenance manual