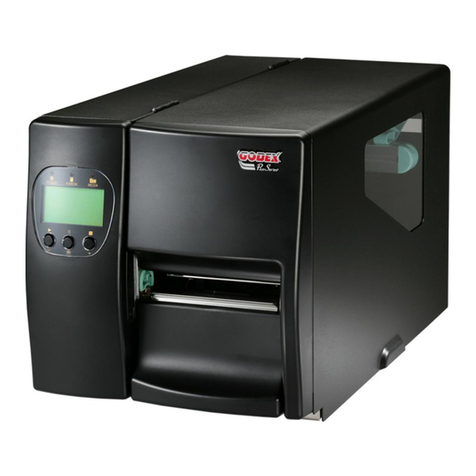
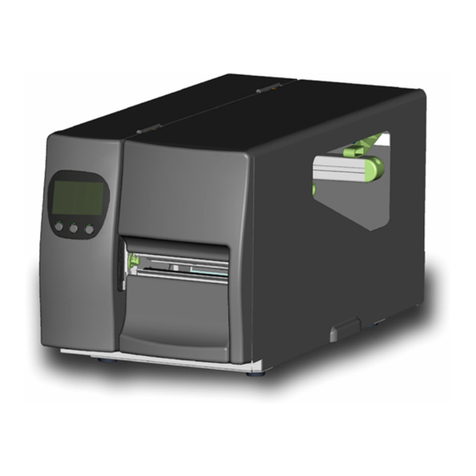
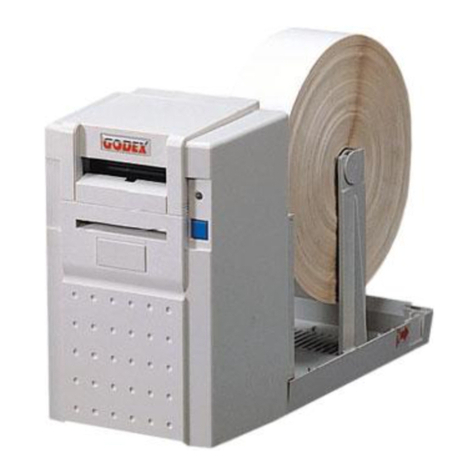
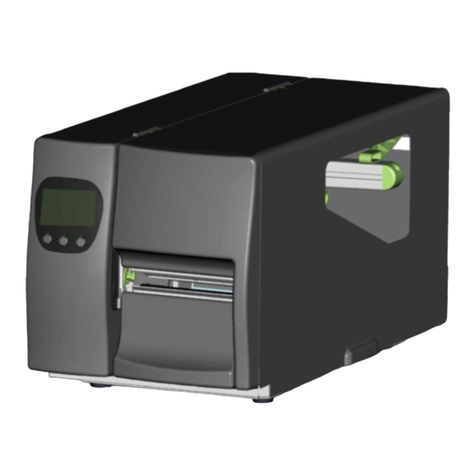
Godex EZ-2P User manual

P/N. 920-010311-00
Edition 0
JUN. 19
EZ-2P/4P
User's Manual
PDF created with FinePrint pdfFactorytrial version http://www.fineprint.com

1
EZ-2P/EZ-4PSERIESPRINTER............................................................................2
1. ABOUTTHE PRINTER.....................................................................................................................2
1-1. Introduction........................................................................................................................................................ 2
1-2. General Specifications ....................................................................................................................................... 2
1-3. Contents ............................................................................................................................................................. 3
1-4. EZ2P/4PPage mode Printer Parts...................................................................................................................... 3
2. SETTING UPTHE PRINTER..............................................................................................................4
2-1. Loadingthe Label Roll....................................................................................................................................... 4
2-2. Connecting the Printertoan Interface................................................................................................................ 4
2-3. Replacing the Label Roll.................................................................................................................................... 5
2-4. RS-232JumperSet............................................................................................................................................. 5
2-5. Self Test ............................................................................................................................................................. 6
3. MAINTENANCE AND ADJUSTMENTS ..............................................................................................7
3-1. Howto cleanthe printer head ............................................................................................................................ 7
3-2. Howto clear label jam ....................................................................................................................................... 7
3-3. Label gapsensor adjustment .............................................................................................................................. 7
4. STRIPPER AND CUTTER..................................................................................................................9
4-1. EZ- 2PC/4PC Optionwithcutter........................................................................................................................ 9
4-2. EZ- 2PS/4PS OptionwithStripper..................................................................................................................... 9
APPENDIX A. TROUBLESHOOTING...................................................................................................11
PDF created with FinePrint pdfFactorytrial version http://www.fineprint.com

2
EZ-2P/EZ-4P Series Printer
1. About the Printer
1-1. Introduction
A. 2 Printer model description
EZ-2P 2 print width direct thermal label printer.
Applications: P.O.S. printer, ElectronicScale printer, Data recorder, Ticket printer...etc.
EZ-2PC EZ-2P with papercutter. Cutter life expectancy100,000 cuts.
EZ-2PS EZ-2P with Auto Label Stripper.(Label on Demand)
B. 4 Printer model description
EZ-4P 4 print width direct thermal label printer.
Applications: P.O.S. printer, ElectronicScale printer, Data recorder, Ticket printer...etc.
EZ-4PC EZ-4P with papercutter. Cutter life expectancy100,000 cuts.
EZ-4PS EZ-4P with Auto Label Stripper.(Label on Demand)
1-2. General Specifications
EZ-2P EZ-4P
Dimension Internal label roll:144Wx215H x127D mm
External label roll: 144 Wx215 H x 320 D
mm
Internal label roll: 198Wx 215H x127D
mm
External label roll: 198Wx 215H x 320D
mm
Print method Direct thermal
Max. paper width 2.36" (60 mm) 4.64" (118 mm)
Max. printing width 2.20" (56 mm) 4.09" (104 mm)
Max. print speed 2" per second (50.8 mm/Sec)
Dot density 203 DPI
Power requirement AC 13.5V ~ 16.0V; 4A~ 5A. DC 18.0V~ 24.0V; 4A ~ 5A
Standard RAM 256K of SRAMbuilt in. For maximumlabel printing length 8“(203 mm)
Expandable RAM
(option; factoryinstall)
256K of SRAM. Together with built-in RAM, total SRAM can be exp
anded to 512K, and
for maximumlabel printing length 18 (457mm).
Expandable Memory
(option; factoryinstall)
• 1MB& 2MB Flash card for download label formats, graphicand fonts.
• Font card: Pleasecheckwith your local dealerfor availablefont cards.The
font card
can be custom-made.
Bar codes
Code 39, Code 93, Code 128 (subset A,B,C),UCC 128, UPC A/E(add on 2&5), I2of
5, EAN 8 / 13 (add on 2 & 5), CODABAR, POSNET, EAN 128, RPS 128, DUN 14
2D Barcodes MAXICODE, PDF417
Papersensor types • Plain paper detector.
• Label gap size detector.
• Black-line reflect sensor detector. (option)
Printer head life 50Kmetersprinting distance when applyon plain thermal paper.
Working Environment
Operating Temperature: 40°F to 104°F (5°C to 40°C)
Storage Temperature: -40°F to 140°F (-40°C to 60°C)
Humidity: 10% to 90% non condensing, free air
Time / Date clock Option
PDF created with FinePrint pdfFactorytrial version http://www.fineprint.com
3
1-3. Contents
1-4. EZ2P/4P Page modePrinter Parts
No.
Parts Function
1. Top cover Used to protect the printer head.
2. Label tear line Used to tearoffprinted labels.
3. Liner paper output
Used to strip out the label fromthe liner paper. Liner paper will be stripped out
through thiswindow.
4. Power light Used to indicate power condition. When poweron, the light isgreen or red.
5 Feed button Used for manuallyfeeding out labels oradjusting labelposition.
6 Rearcover Used to protect the roller and labels.
7 Lockswitch Used to lock the rearcover.
8 Printermechanism The engine of the printer.
9 Label guide Label guide
10 Label spindle hole Used to locate the label roller in position
11 Standsforbig roll of label
The big label roll holder stands
12 Parallel printer connector
The printerport connector
13 Serial interface connector
Connect with host serial port
14 Power jack Connect the power cord to the unit
15 Power switch Turn printer power on/off
16 Print head release level To release label oradjust the label position.
17 Platen Roller Used to feed out paper
PDF created with FinePrint pdfFactorytrial version http://www.fineprint.com
4
2. Setting up the Printer
2-1. Loading the Label Roll
To load a small label roll
Fig. 2.1.1
1. Power on.
2.
Pressthe twolockswitches (part 7) and lift up alittle to
open the rear cover (see figure 2.1.1).
3. Insert the labelrollonto the core shaft (see figure
2.1.2).
4. Place the roll into the groove.
5. Insert the edge of labelsinto the labelguide.
6. Press feed button to drive label.
Fig. 2.1.2
To load a large label roll
1. Power on.
2.
Pressthe twolockswitches (part 7) and lift up alittle to
open the rear cover. (see figure 2.1.1)
3. Remove the label roll stand
s. Vertically place the two
standsalong the left and right sides ofthe rear cover
(see figure 2.1.3).
4. Place the label roll on the stands (see figure 2.1.3).
5. Insert the edge of labelsinto the labelguide.
6. Press feed button to drive label.
Fig. 2.1.3
2-2. Connectingthe Printer to an Interface
1. Be sure the powerisoff.
2. Plug the power adapterinto the printerpowerjack.
3. Connect the printerto an interface (parallel or serial port)
4. Power on. The LED light will be red orgreen.
PDF created with FinePrint pdfFactorytrial version http://www.fineprint.com
5
2-3. Replacingthe Label Roll
A. EZ-2P
1. Open the rear cover.
2. Turn around the printer and face the front side ofthe
printer.
3. Place yourthumbson the top cover and the other
fingers on the left and right sidesofthe printer.
4. Gently pressdownthe top cover with your thumbs, and
pull it toward you to remove the top cover. (See figure
2.3.1 & 2.3.2)
5. Lift the print head release level (part 16), and then you
can feed out or adjust the labelroll.
Fig. 2.3.1 Fig. 2.3.2
B. EZ-4P
1. Open the rear cover.
2. Lift the print head release
level, and then you can feed
out oradjust the label roll (see figure 2.3.3).
Fig. 2.3.3
2-4. RS-232 Jumper Set
RS-232 jumper set onlyforqualified technician. Please followthe steps.
1. Poweroff the printer.
2. Remove the front coverand the backcover.
3. Remove the label roll and the label spindle.
4. Place the printer facedown. Loose the fourcorner screws in the hollow.
5. Remove the mechanismassembly(see figure 2.4.1.).
6. Facing the PC Board(the board with RS-232 port),around the bottomof the leftside there locates JUMP1,
2*8 pin-set.
7. The way to setup Switch On/Offdependson the Jumperasbelow (refer figure 2.4.2). The SW1isPin 1 &
2, the rest can be done in the same manner.
SW1 SW2 baud rate SW3 SW4 parity
off off 4800 off off non parity
on off 9600 on off odd parity
off on 19200 off on even parity
on on 38400 on on no used
SW5 data length
SW6 stop bit SW7
cutter SW8
off 7 bit off 1 off disable
on 8 bit on 2 on enable Invalid
Warning: Power off before setting DIP switch.
PDF created with FinePrint pdfFactorytrial version http://www.fineprint.com

6
Fig. 2.4.1
ON
OFF
JUMP1
1 2
Fig. 2.4.2
2-5. Self Test
The self-test function helpsyou check if the printer works correctly. To use the self-testfunction; please follow
these steps.
1. Load the paper.
2. Hold down the feed button when powering on.
3. Release the feed button. Wait a minute, the printerwill print the self-test contents.
Note: To disable the Self-test, please power off the printer for at least 2 seconds, then
poweron again.
PDF created with FinePrint pdfFactorytrial version http://www.fineprint.com
7
3. Maintenance and Adjustments
3-1. Howtocleanthe printer head
1. Remove the top cover.
2. Press your finger on Retainer bracket, move out
the two Fastenersfromthe Retainerbracket, and
take out the Retainer bracket and the print head
unit. (see figure 3.1.1)
3.
Use soft cloth soaked in isopropyl alcohol, to rub
offcaught labels and cleans the surfa
ce. Reinstall
the Fastenersand Retainer bracket.
Fig. 3.1.1
3-2. Howtoclear label jam
1. Power offthe printer.
2. Remove the front cover and the back cover.
3. Remove the label roll and the label spindle.
4. Close the two label guides the wayas Figure
3.2.1(1).
5. Move apart the two retaining clips fromthe
assemblybygentlypressing the clipsin the
direction as in figure 3.2.1(2), and afterward by
lifting thema little.
6. Lift the guide board in the direction as in figure
3.2.1(3).
7. Clean, with alcoholiccloth, the labeljamon the
bottomofthe assembly.
8. Reassemble the printer.
Fig. 3.2.1
3-3. Label gap sensor adjustment
Any adjustment of the gap sensor must be made onlybytrained personnel, and it ishighlyrecommended that
adjustment be made in a well-lit room.
1. Remove top cover.
2. The top view shows the circuit board asindicated on figure 3.3.1. The Variable Resistor (VR) can be
adjusted the wayseither counter-clockwise forlowertransmit power (lesssensitivity) or clockwise for
highertransmit power(higher sensitivity). Each slight adjustment ofthe VR hasto be verified bypressing
the feed button at least 7 times.
less
sensitivity
higher
sensitivity
Fig. 3.3.1
If you are using plain thermal paper
1. Load the paper under the sensor. Watch thefeed LED (poweron LED)as it mayturn redor green. Ifgreen,
go straight to step 3.
2. Adjust the VR slowlyand pressthe paper feed button (at least 7 times), until the LED light turnsgreen.
3. Remove the paper fromthe sensor, and press the feed button. If LED turnsred, the adjustment is done.
Otherwise, reverse the adjusting direction slowlyuntil the LED light turnsred, then repeat step 1.
PDF created with FinePrint pdfFactorytrial version http://www.fineprint.com
8
If you are using thermal label paper
1. Remove the label fromthe liner. Load the liner paper underthe sensor.
2. Slowlyadjust the Variable resistorand press the paper feed switch (at least 7 times), until the LED light
turns red.
3. Put the labels (with labelson the liner)under the sensor,then pressthe feed button afewtimes.If the LED
light turns green, you have finished the adjustment. Ifthe LEDlight isred, repeat step 2and 3untilthe LED
light turnsgreen.
PDF created with FinePrint pdfFactorytrial version http://www.fineprint.com
9
4. Stripper and Cutter
4-1. EZ- 2PC/4PC Option with cutter
EZ-2PC, EZ-4PC are model EZ-2P/4P with cutterinstalled. The
cutterissituated at the front of the printerhead. Figure 4.1.1 shows
the inside view of EZ-2PC. Rememberthat the cutterisable to cut
onlythermal receipt or Fax type of paper (maximumcutting
thickness 0.06 mm).
** The cutterlife expectancy100,000 cuts. **
Note:
When you insertthe paper to the label guide, please aim at t
he
center of guide.
Fig.4.1.1
Warning! Do not use cutterto cut the label and/orliner.
Adjusting the EZ-4PC cutter
Ifyou need anyhelp in installation and maintenance, please consult your supplier ordealer.
Adjusting the EZ-2PC cutter
1. Poweroff.
2. Remove the top cover.
3. Remove the backcover.
4. Remove the label roll and rollcore.
5. Laydown the printer on itsfront.
6. Loosen the four screws at the corners in the hollow.
7. Remove the structure assembly(including the printer head).
8. On the leftside ofthe cutter, thereis acutter pressurescrew. Gently loosen the screw in acounter-
clock
direction until the cutter bladesare released.
9. Reassemble the printer.
10. Poweron and trythe cutter again.
4-2. EZ- 2PS/4PS Option withStripper
EZ-2PS / EZ-4PS are modelEZ-2P/4P with stripper
installed. Figure 1.2.1 shows the inside components of
EZ-2PS. The self-strip rollerisjust belowthe platen
roller. The printer separatesthe label fromthe label
liner.
Note:
Although the stripperfunction can even support a
label as short as 15mm, we suggest that the
minimumlabel height be more than 20mm.
Fig. 4.2.1
Howto use stripper
The label sensor is hidden inside the top cover. Thissensor keepsthe printer fromprinting the next label until
you remove the previouslystripped label. The liner paper is going out fromthe lineroutput bar. Please follow
these steps.
1. Remove the top cover carefully, not to breakthe electrical wires connected with auto strip reflect sensor
PDF created with FinePrint pdfFactorytrial version http://www.fineprint.com
10
and the printer mechanism.
2. Remove a fewlabelsfromyour label roll. Load the paper and press the feed button until the liner paper
comesout ofthe platen roller at least 4 incheslong (show in figure4.2.2a).
3. Feed the edge ofthe liner paper into the backof stripper guide, and pressthe feed button. The liner paper
will passthrough between the platen and stripperroller (see figure4.2.2b).
4. Lift the print head release level, pull the label paperfromthe label roll direction until the labelis tight and
smooth.
5. Place backthe top cover. The printerisreadyto print. When you start to print the label, the label will
auto-stripfromthe linerpaper.The printer will waitto print until the printed label hasbeen taken away(see
figure 4.2.2c).
Fig. 4.2.2
PDF created with FinePrint pdfFactorytrial version http://www.fineprint.com
11
Appendix A. Troubleshooting
Problems Recommended Solution
Powerswitchalreadyturned on but
the LED doesnot light. l CheckPower connector.
Printing stopsand LED goesred. l Software setting or programming problem.
l Checkto use the correct paper
l Label jam, remove the stuck label
l Tryadjusting the gap sensor to less sensitivity.
Printing no stopsor skip label l Tryadjusting the gap sensorto higher sensitivity.
Printer appearsto be working but
nothing isprinted on label. l Checkthe rolloflabel is loaded with labels facing up and the paper
you use isthermal paper.
l Checkto choose the correct printer driver.
l Make sure to use the correct model of printeron platen.
Label caught l Remove the stucklabel and use soft cloth soaked with alcohol to
clean the adhesive glue.
Only part of the label is printed l Label iscaught on print head.
l Software problem.
l Margins are not set properly
l Printer head isnot fixed in properposition, re-positing printerhead
screws orclipper
Difficult to load label roll l Checklabels stuck in the printer.
l Remove the caught label.
l Make sure the width and thickness oflabel is within the
specification.
When printing out, some dots
missing l Clean printer head with alcohol (Ifthe label glue is attached to
printerhead, please applyalcoholto printer head, wipe with soft
cloth softly).
l Replace printer head forpossible damage.
Printing position not correct. l Checkthe Label Transmit sensor, it maybe covered with dust.
l Checkwith yourlabel supplier, make sure theyuse the qualified
labellinermaterial.
l Adjust the label transmit sensor if you are an experienced printer
user.
l Checkthe label guide, it maynot be in the properposition.
Label printing jumps to next label l Checkifthe label height setting isthe same as actual label height.
l Checkthe Label Transmit sensor, it maybe covered with dust.
Print out is not veryclear l Checkthe printer darkness setting.
Paperisnot properlycut l Checkthe cutter, it maybe covered with paper dust in the blade
holder shaft.
Label peeling is not working
correctly. l Checkthe printer strip sensor, it maybe covered with dust.
l Checklabel installation.
Please contact your agent for help ifthe above information can not help you.
PDF created with FinePrint pdfFactorytrial version http://www.fineprint.com

Other manuals for EZ-2P
1
This manual suits for next models
1
Table of contents
Other Godex Printer manuals

Godex
Godex EZ-1000 Plus User manual

Godex
Godex RT700i User manual

Godex
Godex AG4000T User manual

Godex
Godex RT860i User manual

Godex
Godex EZ-4206 Operating and maintenance manual

Godex
Godex EZ-4TKP User manual

Godex
Godex EZ-4206 User manual

Godex
Godex HD830i User manual

Godex
Godex EZ-2000 PLUS Operating and maintenance manual

Godex
Godex EZ-2200 Operating and maintenance manual