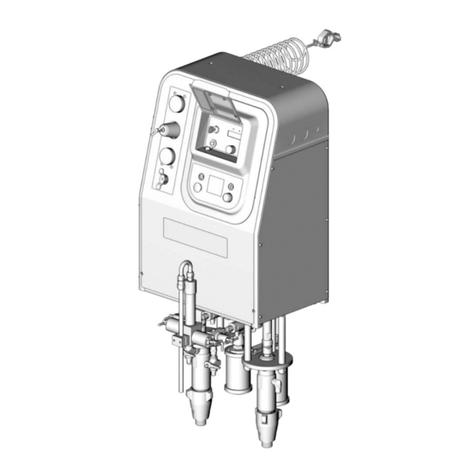
Graco ProMix II User manual

Contents ◆
2310633C
Contents
Contents . . . . . . . . . . . . . . . . . . . . . . . . . . . . . . . . . . 2
Manual Conventions . . . . . . . . . . . . . . . . . . . . . . . . 2
ProMix™ II Models . . . . . . . . . . . . . . . . . . . . . . . . . 3
Related Manuals . . . . . . . . . . . . . . . . . . . . . . . . . . . 4
Warnings . . . . . . . . . . . . . . . . . . . . . . . . . . . . . . . . . 6
Overview . . . . . . . . . . . . . . . . . . . . . . . . . . . . . . . . . . 8
Usage . . . . . . . . . . . . . . . . . . . . . . . . . . . . . . . . . 8
Component Identification and Definition . . . . . . . 8
ProMix™ II General Operating Cycle . . . . . . . . . 10
Adaptive Overrun Correction . . . . . . . . . . . . . . . 10
Air Flow Switch Function . . . . . . . . . . . . . . . . . . 11
Installation . . . . . . . . . . . . . . . . . . . . . . . . . . . . . . . 12
Typical Installation . . . . . . . . . . . . . . . . . . . . . . . 12
Installation Requirements . . . . . . . . . . . . . . . . . 14
Location Requirements . . . . . . . . . . . . . . . . . . . 15
Fluid Supply . . . . . . . . . . . . . . . . . . . . . . . . . . . 15
Mounting . . . . . . . . . . . . . . . . . . . . . . . . . . . . . . 16
Air Supply Connections . . . . . . . . . . . . . . . . . . . 17
Fluid Supply Connections . . . . . . . . . . . . . . . . . 19
Cable Connections . . . . . . . . . . . . . . . . . . . . . . 20
Grounding . . . . . . . . . . . . . . . . . . . . . . . . . . . . . 23
Check Resistance . . . . . . . . . . . . . . . . . . . . . . . 25
Operator Controls . . . . . . . . . . . . . . . . . . . . . . . . . 26
Operator Station . . . . . . . . . . . . . . . . . . . . . . . . 26
EasyKey™ Display . . . . . . . . . . . . . . . . . . . . . . 28
Run Mode . . . . . . . . . . . . . . . . . . . . . . . . . . . . . . . . 30
Power Up Screens . . . . . . . . . . . . . . . . . . . . . . 30
Run Screen . . . . . . . . . . . . . . . . . . . . . . . . . . . . 30
Setup Mode . . . . . . . . . . . . . . . . . . . . . . . . . . . . . . . 31
Entering Setup . . . . . . . . . . . . . . . . . . . . . . . . . . 31
Setup Screen Menu . . . . . . . . . . . . . . . . . . . . . . 31
Key Commands . . . . . . . . . . . . . . . . . . . . . . . . . 31
Color Screen . . . . . . . . . . . . . . . . . . . . . . . . . . . 32
Report Screen . . . . . . . . . . . . . . . . . . . . . . . . . . 34
Calibrate Screen . . . . . . . . . . . . . . . . . . . . . . . . 34
Advanced Screens . . . . . . . . . . . . . . . . . . . . . . 35
Operation . . . . . . . . . . . . . . . . . . . . . . . . . . . . . . . . 38
Pressure Relief Procedure . . . . . . . . . . . . . . . . 38
Trigger Lock . . . . . . . . . . . . . . . . . . . . . . . . . . . . 38
Start Up . . . . . . . . . . . . . . . . . . . . . . . . . . . . . . . 39
Color Change . . . . . . . . . . . . . . . . . . . . . . . . . . 42
Printing Job Log . . . . . . . . . . . . . . . . . . . . . . . . 43
Shutdown . . . . . . . . . . . . . . . . . . . . . . . . . . . . . . 43
Purging . . . . . . . . . . . . . . . . . . . . . . . . . . . . . . . . . . 44
Purging Mixed Material . . . . . . . . . . . . . . . . . . . 44
Using Color 0 . . . . . . . . . . . . . . . . . . . . . . . . . . . 45
Purging Fluid Supply System . . . . . . . . . . . . . . 46
Purging Sampling Valves and Tubes . . . . . . . . . 48
Meter Calibration . . . . . . . . . . . . . . . . . . . . . . . . . . 49
Alarm Troubleshooting . . . . . . . . . . . . . . . . . . . . . 51
ProMix™ II Alarms . . . . . . . . . . . . . . . . . . . . . . 51
ProMix™ II Warnings . . . . . . . . . . . . . . . . . . . . 55
Technical Data . . . . . . . . . . . . . . . . . . . . . . . . . . . . 56
Graco Standard Warranty . . . . . . . . . . . . . . . . . . . 58
Graco Information . . . . . . . . . . . . . . . . . . . . . . . . . 58
Manual Conventions
Note
WARNING
WARNING: a potentially hazardous situation which, if
not avoided, could result in death or serious injury.
Warnings in the instructions usually include a symbol
indicating the hazard. Read the general Warnings
section for additional safety information.
Hazard Symbol
CAUTION
CAUTION: a potentially hazardous situation which, if
not avoided, may result in property damage or
destruction of equipment.
Additional helpful information.

ProMix™ II Models ◆
310633C 3
ProMix™ II Models
WARNING
Do not install equipment approved only for a non-haz-
ardous location in a hazardous area. Substitution of
components may impair intrinsic safety. See page 6.
WARNING
Changing the fluid manifold configuration may change
its pressure rating. Do not exceed the pressure rating
of the lowest rated component. See page 6.
PM
Enter Model number here
ProMix™ II
Unit A Meter B Meter Color Change
Gun Flush
Box
PM 0None 0None 0None, Single Color 0No
1G3000 1G3000 12 Color, Low Pressure 1Yes
2G3000HR 2G3000HR 24 Color, Low Pressure
3Coriolis 3Coriolis 36 Color, Low Pressure
42 Color, High Pressure
54 Color, High Pressure
66 Color, High Pressure
Hazardous Location Approval
Only models with a G3000 (1) or G3000HR (2) for both A and
B meters are approved for installation in a Hazardous Loca-
tion - Class I, Div I, Group D, T3.
Non-hazardous Location Approval
Maximum Working Pressure
Maximum working pressure rating is dependent on the A and B meter and color change option selected. The pres-
sure rating is based on the rating of the lowest rated fluid manifold component. Refer to the component pressure
ratings below. Example: Model PM1140 has a maximum working pressure of 3000 psi (21 MPa, 207 bar).
Check the ID plate on your EasyKey™ Display or fluid panel for its maximum working pressure. See FIG. 6,
page 15.
ProMix™ II Fluid Manifold Components Maximum Working Pressure
Color Change Option 1, 2, or 3. . . . . . . . . . . . . . . . . . . . . . . . . . . . . . . . . . . . . . . . . . . . . 300 psi (2.1 MPa, 21 bar)
Color Change Option 4, 5, or 6. . . . . . . . . . . . . . . . . . . . . . . . . . . . . . . . . . . . . . . . . . . . 3000 psi (21 MPa, 207 bar)
Coriolis A and B Meters Option 3 . . . . . . . . . . . . . . . . . . . . . . . . . . . . . . . . . . . . . . . . . . 2300 psi (16 MPa, 159 bar)
No Meters or G3000 or G3000HR A and B Meters Option 0, 1, or 2 . . . . . . . . . . . . . . . 4000 psi (28 MPa, 276 bar)
Flow Meter Fluid Flow Rate Range
G3000 Meter. . . . . . . . . . . . . . . . . . . . . . . . . . . . . . . . . . . . . . . . . . . . . . . . . . 75-3000 cc/min. (0.02-0.79 gal./min.)
G3000HR Meter . . . . . . . . . . . . . . . . . . . . . . . . . . . . . . . . . . . . . . . . . . . . . . . 38-1500 cc/min. (0.01-0.40 gal./min.)
Coriolis Meter . . . . . . . . . . . . . . . . . . . . . . . . . . . . . . . . . . . . . . . . . . . . . . . . 20-3800 cc/min. (0.005-1.00 gal./min.)
#53
Conforms to FM std 3600 & 3610
for use in Class I Div 1 Group D T3
Hazardous locations
CAN/CSA 22.2 No. 157 & 1010.1-92
EEx ib IIA T3
ISSeP 04 ATEX 008
SYST
#53
CAN/CSA
22.2 No. 1010.1

Related Manuals ◆
4310633C
Related Manuals
Component Manuals in English This manual available in following languages:
Manual Description
310633 ProMix™ II Operation
310653 ProMix™ II Service - Parts
310654 Fluid Mix Manifold
310655 Dispense Valve
308778 G3000, G3000HR Flow Meter
310696 Coriolis Flow Meter
310656 Color Change Kit
307731 Color Change Valve Assembly,
Low Pressure
307941 Color Change Valve, Low Pressure
308291 Color Change Valve Assembly, High
Pressure
308977 Color Change Valve, High Pressure
310695 Gun Flush Box
308818 Printer
310669 ProMix™ II Data Download Kit
310745 Gun Air Shutoff Kit
Manual Language Manual Language
310633 English 310636 German
310634 French 310637 Chinese
310635 Spanish 310638 Japanese
310670 Italian

Related Manuals ◆
310633C 5

Warnings ◆
6310633C
Warnings
The following warnings include general safety information for this equipment. More specific warnings are included in
the text where applicable.
WARNING
FIRE AND EXPLOSION HAZARD
Flammable fumes, such as solvent and paint fumes, in work area can ignite or explode. To help prevent
fire and explosion:
• Use equipment only in well ventilated area.
• Eliminate all ignition sources; such as pilot lights, cigarettes, portable electric lamps, and plastic drop
cloths (potential static arc).
• Keep work area free of debris, including solvent, rags and gasoline.
• Do not plug or unplug power cords or turn lights on or off when flammable fumes are present.
• Ground equipment and conductive objects in work area. See Grounding instructions.
• Use only grounded hoses.
• Hold gun firmly to side of grounded pail when triggering into pail.
• If there is static sparking or you feel a shock, stop operation immediately. Do not use equipment
until you identify and correct the problem.
INTRINSIC SAFETY
Only models with a G3000 (1) or G3000HR (2) for both A and B meters are approved for installation in a
Hazardous Location - Class I, Div I, Group D, T3. To help prevent fire and explosion:
• Do not install equipment approved only for non-hazardous location in a hazardous area. See the ID
label for the intrinsic safety rating for your model.
• Do not substitute system components as this may impair intrinsic safety.
ELECTRIC SHOCK HAZARD
Improper grounding, setup, or usage of the system can cause electric shock.
• Turn off and disconnect power at main switch before disconnecting any cables and before servicing
equipment.
• Connect only to grounded power source.
• All electrical wiring must be done by a qualified electrician and comply with all local codes and regu-
lations.
SKIN INJECTION HAZARD
High-pressure fluid from gun, hose leaks, or ruptured components will pierce skin. This may look like just
a cut, but it is a serious injury that can result in amputation. Get immediate surgical treatment.
• Do not point gun at anyone or at any part of the body.
• Do not put your hand over the spray tip.
• Do not stop or deflect leaks with your hand, body, glove, or rag.
• Do not spray without tip guard and trigger guard installed.
• Engage trigger lock when not spraying.
• Follow Pressure Relief Procedure in this manual, when you stop spraying and before cleaning,
checking, or servicing equipment.

Warnings ◆
310633C 7
EQUIPMENT MISUSE HAZARD
Misuse can cause death or serious injury.
• Do not exceed the maximum working pressure or temperature rating of the lowest rated system
component. See Technical Data in all equipment manuals.
• Use fluids and solvents that are compatible with equipment wetted parts. See Technical Data in all
equipment manuals. Read fluid and solvent manufacturer’s warnings.
• Check equipment daily. Repair or replace worn or damaged parts immediately.
• Do not alter or modify equipment.
• For professional use only.
• Use equipment only for its intended purpose. Call your Graco distributor for information.
• Route hoses and cables away from traffic areas, sharp edges, moving parts, and hot surfaces.
• Do not use hoses to pull equipment.
• Comply with all applicable safety regulations.
MOVING PARTS HAZARD
Moving parts can pinch or amputate fingers and other body parts.
• Keep clear of moving parts.
• Do not operate equipment with protective guards or covers removed.
• Pressurized equipment can start without warning. Before checking, moving, or servicing equipment,
follow the Pressure Relief Procedure in this manual. Disconnect power or air supply.
TOXIC FLUID OR FUMES HAZARD
Toxic fluids or fumes can cause serious injury or death if splashed in the eyes or on skin, inhaled, or
swallowed.
• Read MSDS’s to know the specific hazards of the fluids you are using.
• Store hazardous fluid in approved containers, and dispose of it according to applicable guidelines.
PERSONAL PROTECTIVE EQUIPMENT
You must wear appropriate protective equipment when operating, servicing, or when in the operating
area of the equipment to help protect you from serious injury, including eye injury, inhalation of toxic
fumes, burns, and hearing loss. This equipment includes but is not limited to:
• Protective eyewear
• Clothing and respirator as recommended by the fluid and solvent manufacturer
•Gloves
• Hearing protection
WARNING

Overview ◆ Usage
8310633C
Overview
Usage
The Graco ProMix™ II is an electronic two-component paint proportioner. It can blend most two-component solvent
and waterborne epoxy, polyurethane, and acid-catalyzed paints. It is not for use with “quick-setting” paints (those with
a potlife of less than 15 minutes).
• Can proportion at ratios from 0.1:1–30:1 in 0.1
increments.
• Has user selectable ratio assurance and can main-
tain up to +/-1% accuracy, depending on materials
and operating conditions.
• Models are available to operate air spray,
air-assisted, or airless systems with a capacity of up
to 3800 cc/min.
• Color change options are available for low pressure
(300 psi [2.1 MPa, 21 bar]) air spray and high pres-
sure (3000 psi [21 MPa, 207 bar]) systems with 2, 4,
or 6 color change valves.
• Gun Flush Box option is also available.
Component Identification and Definition
See FIG. 1 for the ProMix™ II system components.
Component Description
EasyKey™ Display Used to set up, display, operate, and monitor the ProMix™ II system. The EasyKey™
Display accepts 85-250 VAC, 50/60 Hz line power and converts that power to accept-
able low voltage and optical signals used by other system components.
Smart Fluid Panel Includes air control solenoids, pressure and flow switches, fluid flow meters, and the
fluid manifold assembly to control and monitor fluid dispensing.
Fluid Manifold Fluid component assembly mounted on the Smart Fluid Panel. It includes:
•Pneumatically Operated Dispense Valves for component A and B
•Purge Valves for solvent and air purge
•Sampling Valves for calibrating the flow meters
•Shutoff Valves for component A and B to close their fluid passages to the mix
manifold
•Mix Manifold, which includes the fluid integrator and static mixer.
➜Fluid Integrator is the chamber where component A and B align at the
selected ratio and begin to mix.
➜Static Mixer has 24 elements to uniformly blend the materials downstream of
the fluid integrator.
Color Change Valves An optional component of the Fluid Manifold assembly. It is available as a color
change valve stack for either low or high pressure with 2, 4, or 6 color change valves.
Each stack includes one additional valve for solvent to clean the fluid line between
color changes.

Overview ◆ Component Identification and Definition
310633C 9
Flow Meters Three optional flow meters are available from Graco:
•G3000 is a general purpose gear meter typically used in flow ranges of 75-3000
cc/min. (0.02–0.79 gal/min.), pressures up to 4000 psi (28 MPa, 276 bar), and
viscosities of 20–3000 centipoise. The K-factor is approximately 0.119 cc/pulse.
•G3000HR is a high resolution version of the G3000 meter. It is typically used in
flow ranges of 38–1500 cc/min. (0.01–0.4 gal/min.), pressures up to 4000 psi (28
MPa, 276 bar), and viscosities of 20–3000 centipoise. The K-factor is approxi-
mately 0.061 cc/pulse.
•Coriolis is a specialty meter capable of a wide range of flow rates and viscosities.
Dual Fiber Optic Cable Used to communicate between the EasyKey™ Display and Smart Fluid Panel.
Fluid Panel Power
Supply Cable
Used to provide power to the Smart Fluid Panel.
Operator Station Used by the operator for daily painting functions including: choosing color, initiating
report printing, reading/clearing alarms, and placing the system in Standby, Mix, or
Purge mode. It is typically mounted inside the booth or near the painter.
Gun Flush Box
(not shown)
Used to automatically flush manual guns into an enclosed waste container. By flush-
ing with the exact amount of solvent required to clean your system within an enclo-
sure, the gun flush box reduces the amount of solvent used, VOCs (volatile organic
compounds) emissions, and operator exposure to hazardous chemicals.
See Operator Controls, page 26, for detailed information on the EasyKey™ Display and Operator Station.
FIG. 1
Component Description
EasyKey™
Display
Operator Station
Dual Fiber
Optic Cable
Fluid Panel Power
Supply Cable
Color Change Valves
Smart Fluid Panel
Flow Meters
Fluid Manifold

ProMix™ II General Operating Cycle ◆
10 310633C
ProMix™ II General Operating Cycle
Refer to FIG. 2
2. The operator presses the Mix key to begin
operation.
3. The controller sends signals to activate the sole-
noid valves. The solenoid valves activate Dispense
Valves A and B. Fluid flow begins when the gun is
triggered.
4. Components A and B are introduced into the inte-
grator chamber (K) one at a time, through separate
fluid lines, check valves, and flow meters.
a. Dispense Valve A opens, and fluid flows into
the integrator chamber.
b. Flow Meter A (C) monitors the fluid volume
dispensed and sends electrical pulses to the
controller. The controller monitors these
pulses and signals.
c. When the target volume dispenses, Dispense
Valve A closes.
d. Dispense Valve B opens, and fluid flows into
the integrator chamber (K) and is aligned pro-
portionately with component A.
e. Flow Meter B (G) monitors the fluid volume
dispensed and sends electrical pulses to the
controller.
f. When the target volume is dispensed, Dis-
pense Valve B closes.
5. The components are pre-mixed in the integrator
(K), then uniformly blended in the static mixer
tube L).
6. Components A and B are alternately fed into the
integrator (K) as long as the gun is triggered.
7. If the gun is not triggered for two minutes, the sys-
tem switches to Idle mode, which closes off the mix
manifold dispense valves.
8. When the gun is triggered again, the ProMix™ II
continues the process where it left off.
Adaptive Overrun Correction
The actual volume of fluid dispensed each cycle can
vary slightly from the calculated target. However, the
controller monitors this variance and makes adjustments
to keep the ratio of component B to A within a user spec-
ified tolerance.
1. The spray gun operator enters and loads the
desired color. The color change LED blinks while
color is loading, then turns solid when complete.
Operator Station Screen
The dispense volume of component A and B is
based on the mix ratio and dose size set by the
user and calculated by the controller.
Color
LED
An optional fluid pressure regulator can be installed
to control output from the static mixer tube to the
spray gun.
Operation can be stopped at any time by pressing
the Standby key or shutting off the main power
switch.

ProMix™ II General Operating Cycle ◆ Air Flow Switch Function
310633C 11
Air Flow Switch Function
Air or Air-assisted Airless Guns
The air flow switch detects air flow to the gun and sig-
nals the ProMix™ II controller when the gun is being
triggered. The switch functions with the flow meters to
ensure that the system components are functioning cor-
rectly.
For example, if a flow meter fails or clogs, pure resin or
catalyst could spray indefinitely if the ProMix™ II does
not detect the condition and intervene, which is why the
air flow switch is so important.
If the ProMix™ II controller detects through the air flow
switch signal that the gun is triggered, yet there is no
fluid flow through the meter, a Dose Time Alarm (page
54) occurs after 40 seconds and the system shuts down.
Operating Without Air Flow Switch
It is possible to operate the ProMix™ II without the air
flow switch, such as when a switch fails or when using
an airless gun.
Airless Gun
If using an airless gun or operating without the air flow
switch (not recommended), the dose time alarm will not
function. Instead, two minutes after a meter fails, the
system generates an Idle Time Warning and the dis-
pense valves turn off. What this means is:
• It is possible to spray pure resin or catalyst for up to
2 minutes before the system shuts down.
• Since the Idle Time Warning can occur during nor-
mal operation, you may not immediately realize that
a meter failed and may continue painting.
Idle Time Warning
This warning occurs if the ProMix™ II is set to Mix ,
and 2 minutes have elapsed since the system received
a flow meter pulse.
In applications using the air flow switch, triggering the
gun clears the warning and the operator can start spray-
ing again.
Without the air flow switch, triggering the gun does not
clear the alarm. To start spraying again, you must press
Mix , then trigger the gun.
FIG. 2 Fluid Manifold Cutaway
H
D
CA
F
E
G
J
K
L
M
Key:
A Dispense Valve A
B Dispense Valve B
C Flow Meter A
D Component A Supply Line
E Air Purge Valve
F Shutoff Valve A
G Flow Meter B
H Component B Supply Line
J Solvent Purge Valve
K Integrator
L Static Mixer
M Fluid Supply to Gun
B
If a switch fails, replace it as soon as possible.

Installation ◆ Typical Installation
12 310633C
Installation
Typical Installation
Key - FIG. 3
A Color Change Valve Lines (Component A)
B Component B Line
C EasyKey™ Display
D Display
E Keypad
F Main Air Line
G Air Regulator
H Air Shutoff Valve
JOperatorStation
K Operator Station Cable
L Power Cable
M Fiber Optic Cable
N Smart Fluid Panel
PSprayGun
Q Gun Air Line
R Gun Fluid Line
S Solvent Line
T Fluid Shutoff Valve
• Reference numbers and letters in parentheses in the text refer to numbers and letters in the illustrations.
• Icons in the text refer to icons on the equipment or keypad.
•F
IG. 4 and FIG. 5, page 14, show typical installations. Contact your Graco distributor for actual system
designs.
• Be sure all accessories are adequately sized and pressure-rated to meet system requirements.
• For maintenance and safety, you must have a shutoff valve between each fluid supply line and the ProMix™
II system.
• A 100 mesh minimum fluid filter must be installed on component A and B fluid supply lines.
• See page 16 for dimensions.
• To protect the Operator Station and EasyKey™ Display screens from paints and solvents, clear-plastic pro-
tective shields are available in packs of 10. See the ProMix™ II Service and Parts manual to order. Clean
the screens with a dry cloth if necessary.

Installation ◆ Typical Installation
310633C 13
FIG. 3
J
G
F
H
C
D
E
N
A
B
P
LM
K
Q
R
S
S
GH
H
T
T
TI4658A

Installation ◆ Installation Requirements
14 310633C
Installation Requirements
FIG. 4: Non-intrinsically Safe Installation
FIG. 5 Intrinsically Safe Installation
NON-HAZARDOUS LOCATION ONLY
HAZARDOUS (CLASSIFIED) LOCATION
ProMix™ II
EasyKey
Interface
234443
Safety
Barrier ProMix™ II Smart
Fluid Panel
Flow
Meter
Flow
Meter
Operator
Station
234441
Gun
Flush
Box
250 VAC Maximum
Supply Voltage
Power Cable
Fiber Optic
Communication
Cable Pneumatic
Interface
Power and
Communication Cable
NON-HAZARDOUS
LOCATION ONLY HAZARDOUS (CLASSIFIED) LOCATION
CLASS I, DIV I, GROUP D (FM & CSA ONLY)
CLASS I, ZONE I GROUP IIA (ATEX ONLY)
ProMix™ II
EasyKey
Interface
234443
Safety
Barrier ProMix™ II Smart
Fluid Panel
Flow
Meter
Flow
Meter
Operator
Station
234441
Gun
Flush
Box
250 VAC Maximum
Supply Voltage
I/S Power Cable
Fiber Optic
Communication
Cable Pneumatic
Interface
I/S Power and
Communication Cable
1. Nonintrinsically safe terminals (power rail) must not be con-
nected to any device which uses or generates more than
250 VRMS or DC unless it has been determined that the
voltage has been adequately isolated.
2. The installation must meet the requirements of the National
Electric Code, Canadian Electrical Code Part I, NFPA 70,
Article 504 Resp., Article 505 and ANSI/ISA 12.06.01.
3. Multiple earthing of components is allowed only if high
integrity equipotential system is realized between the
points of bonding
4. Do not operate system with safety barrier cover removed.
WARNING: Substitution of components may impair intrinsic
safety. For installation, maintenance or operation instructions,
read instruction manuals.
ADVERTISSEMENT: La substitution de composants peut
compromettre la securite intrinseque.
IS Control Drawing 234557

Installation ◆ Location Requirements
310633C 15
Location Requirements
EasyKey™ Display: Install in the non-hazardous area
at a convenient location for the operator to view and
operate.
Smart Fluid Panel: Install according to requirements for
: Non-intrinsically Safe Installation (FIG. 4) or Intrinsically
Safe Installation (FIG. 5) and at a convenient location to
connect to paint and solvent supplies.
Operator Station: Install according to requirements for :
Non-intrinsically Safe Installation (FIG. 4) or Intrinsically
Safe Installation (FIG. 5) and at a convenient location for
the operator to use.
Gun Flush Box: Install in the spray booth as far away
as possible from the application point to avoid getting
over-spray on it.
Flow Meters: If you have Coriolis Flow Meters, refer to
the Coriolis manual for installation instructions. The cor-
rect orientation of the flow meter is critical to its opera-
tion.
Fluid Supply
ProMix™ II models are available to operate air spray,
air-assisted, or airless systems with a capacity of up to
3800 cc/min.
• Fluid supply pressure tanks, feed pumps, or circulat-
ing systems can be used.
• Materials can be transferred from their original con-
tainers or from a central paint recirculating line.
Contact your Graco distributor for additional information.
WARNING
Do not install equipment approved only for non-haz-
ardous location in a hazardous area. See the identifi-
cation (ID) label (FIG. 6) on the EasyKey™ Display for
the intrinsic safety rating for your model. Refer to Pro-
Mix™ II Models, page 3. Read warnings, page 6.
• Refer to FIG. 4 or FIG. 5, page 14, for non-haz-
ardous or hazardous location equipment
requirements.
• Mount EasyKey™ Display and Smart Fluid
Panel within 50 ft. (15.2 m) of each other.
FIG. 6: EasyKey™ Display and Smart Fluid Panel
ID
For an Intrinsically Safe Installation, the Smart Fluid
Panel may be located inside or outside the hazard-
ous location. Install according to appropriate elec-
trical codes.
IMPORTANT: Do not substitute or modify system
components as this may impair intrinsic safety.
The fluid supply must be free of pressure spikes,
which are commonly caused by pump stroke
changeover. If necessary, install pressure regula-
tors or a surge tank on the ProMix™ II fluid inlets to
reduce pulsation.

Installation ◆ Mounting
16 310633C
Mounting
1. Follow Location Requirements, page 15.
2. Ensure that the wall and mounting hardware are
strong enough to support the weight of the equip-
ment (see Technical Data, page 56), fluid, hoses,
and stress caused during operation.
3. Using the equipment as a template, mark the
mounting holes on the wall at a convenient height
for the operator and so equipment is easily accessi-
ble for maintenance. FIG. 7.
4. Drill mounting holes in the wall. Install anchors as
needed.
5. Bolt equipment securely.
FIG. 7
EasyKey™ Display
Smart Fluid Panel
Di
mens
i
ons
Operator Station
12 in.
(304.8 mm)
12.75 in.
(323.9 mm)
13.47 in.
(342.1 mm)
14 in.
(355.6 mm)
.3 in.
(7.6 mm)
Depth: 6.38 in.
(161.9 mm)
26.5 in.
(673.1 mm)
12 in.
(304.8 mm)
16.5 in.
(419.1 mm) .5 in.
(12.7 mm)
23.25 in.
(590.6 mm)
Depth: 11.5 in.
(292.1 mm)
with G3000/
G3000H meters
6.75 in
(171.5 mm)
5 in.
(127 mm)
7 in.
(177.8 mm)
7.5 in
(190.5 mm)
.343 in.
(8.7 mm)

Installation ◆ Air Supply Connections
310633C 17
Air Supply Connections
Required
•Compressed air supply pressure: 75-100 psi
(517-700 kPa, 5.2-7 bar).
•Air hoses: use grounded hoses that are correctly
sized for your system.
•Air regulator and bleed-type shutoff valve:
include in each air line to fluid supply equipment.
Install an additional shutoff valve upstream of all air
line accessories to isolate them for servicing.
Recommended
•Air line filter: 10 micron or better air filter to filter oil
and water out of the air supply and help avoid paint
contamination and clogged solenoids.
Connect Air Supply Lines
1. Tighten all ProMix™ II system air and fluid line con-
nections as they may have loosened during ship-
ment.
2. Install a bleed-type shutoff valve (L) into the air filter
inlet on the Smart Fluid Panel. FIG. 8.
3. Connect a clean air supply line to the shutoff valve
(L). This air line supplies air to operate the gun,
solenoids, and dispense valves.
4. lnstall a bleed-type shutoff valve (X) into the air
purge valve inlet on the Smart Fluid Panel.
FIG. 8.
5. Connect an air supply line to the shutoff valve (X) to
supply air for the solvent and air purge sequence.
Use a clean, dry air supply (install filters/dryers as
needed),
WARNING
Trapped air can cause a pump or dispense valve to
cycle unexpectedly, which could result in serious injury
from splashing or moving parts. Use bleed-type shut-
off valves.
Use separate air supply lines for the following two
connections (X and L) to avoid contaminating the
purge air line (X) with fluid if the air purge valve and
a check valve failed.
See Technical Data, page 56, for additional air
supply/consumption information.
FIG. 8
L
X

Installation ◆ Air Supply Connections
18 310633C
6. For air spray, HVLP, and air-assist airless gun appli-
cations:
•Systems without a Gun Flush Box, connect
the gun air supply line between the Smart Fluid
Panel gun air outlet (N - FIG. 9) and the
spray gun air inlet (AA - FIG. 10).
•Systems with a Gun Flush Box, connect the
gun air supply line between the Smart Fluid
Panel gun air outlet (N - FIG. 9) and the
atomizing air safety shutoff valve. See Gun
Flush Box Manual 310695.
CAUTION
The ProMix™ II potlife timer will not function properly
when used with multiple guns operating simultane-
ously. To avoid having mixed material set in the equip-
ment, carefully monitor potlife by some other means.
Install a bleed-type air shutoff valve (Z) in the gun
air supply line or at the gun air inlet (AA). FIG. 10,
FIG. 11.
WARNING
If using a Graco electrostatic PRO™Gun, a shutoff
valve must be installed in the gun air line. Contact your
Graco distributor for information on air shutoff valves
for electrostatic applications.
FIG. 9
FIG. 10
FIG. 11
N
Z
AA
AA
U
CC BB

Installation ◆ Fluid Supply Connections
310633C 19
Fluid Supply Connections
1. Connect the solvent supply lines.
a. Connect the solvent supply line (P) to the 1/4
npt(f) solvent purge valve inlet. FIG. 12.
b. Multiple color system: also connect a sol-
vent supply line to the color change valve (Q),
marked “CC SOLVENT”. FIG. 13.
2. Connect the component A supply line(s).
➜Single color system: connect component sup-
ply line to the component A flow meter inlet (R).
FIG. 13.
➜Multiple color system: connect component A
supply lines to the color change valve stack (S)
inlets. FIG. 13. The color number is marked on
the valve air supply line.
3. Connect the component B line to the component B
flow meter inlet (DD). FIG. 12.
4. Connect the gun fluid supply line (CC) between the
fluid manifold static mixer (U) outlet and the gun
fluid inlet (BB). FIG. 11.
WARNING
Do not exceed the pressure rating of the lowest rated
component. Refer to the product ID Label. Read Pro-
Mix™ II Models information, page 3.
WARNING
To reduce the risk of injury, including fluid injection,
you must install a shutoff valve (T) between each fluid
supply line and the fluid manifold assembly. FIG. 12.
Use the valves to shut off fluid during maintenance
and service.
Paint Recirculating System
The color change valves have two fluid ports for
each individual valve. If you are recirculating paint:
1. Remove the color change valve stack from the
fluid panel and mount it separately.
2. Plumb the valves in one port and out the other.
Another option is to use a tee fitting to recirculate.
CAUTION
Verify that all unused fluid ports on the color change
valve stack are plugged before operation. An open
port will leak fluid.
The component A and B fluid meter inlets (R, DD)
have fluid check valves to prevent backflow from
fluid supply pressure fluctuations. Backflow can
cause ratio inaccuracies.
FIG. 12
FIG. 13
P
T
R
T
DD
Q
R
S
1
2
4
6
5
3

Installation ◆ Cable Connections
20 310633C
Cable Connections
Power Requirements
The ProMix™ II operates with 85-250 VAC, 50/60 Hz
input power, with a maximum of 2 amp current draw.
The power supply circuit must be protected with a 15
amp maximum circuit breaker.
Not included with system:
• Power supply cord compatible to your local power
configuration. Wire gauge size must be 8-14 AWG.
• Bulkhead strain relief sized for 22.4 mm (0.88 in.)
hole that will hold the power supply cord in the
EasyKey™ Display port (V). FIG. 14.
1. Provide power to the EasyKey™ Display. Use con-
duit to protect wiring.
2. Install the strain relief and power cord or conduit
bulkhead through the EasyKey™ Display port
(V). FIG. 14.
3. See FIG. 21 for the L1, L2, and ground wiring con-
nections inside the EasyKey™ Display.
4. Ground the Display to a true earth ground. See
Grounding, page 23.
Connect EasyKey™ Display to
Smart Fluid Panel
There are two 50 ft.(15.2 m) cables to route between the
EasyKey™ Display and Smart Fluid Panel: the Fluid
Panel Power Cable (A) and the Fiber Optic Cable (C).
1. Connect the appropriate Fluid Panel Power Cable
(A) end to the EasyKey™ Display connector .
FIG. 14.
2. Connect the other cable end to the Smart Fluid
Panel connector (B). FIG. 15.
3. The Fiber Optic Cable (C) is shipped from the fac-
tory attached to the EasyKey™ Display connector
. FIG. 14.
• All electrical wiring must be done by a qualified
electrician and comply with all local codes and
regulations.
• Enclose all cables routed in the spray booth
and high traffic areas in conduit to prevent
damage from paint, solvent, and traffic.
• All options ordered on the ProMix™ II system
are electrically tested at the factory.
FIG. 14
If you need to detach the Fiber Optic Cable (C)
from the EasyKey Display, note how the cable is
routed inside the enclosure. Ensure that the door
can swing open and close without catching or pull-
ing wires.
V
A
C
VDC
VDC
Other manuals for ProMix II
1
Table of contents
Other Graco Mixer manuals

Graco
Graco 24C728 Parts list manual

Graco
Graco 25C539 Parts list manual

Graco
Graco XTREME MIX 309521J User manual

Graco
Graco Xtreme Mix OEM User manual

Graco
Graco 26C150 User manual

Graco
Graco 222695 User manual

Graco
Graco ToughTek CM20 User manual

Graco
Graco ProMix II Series Guide

Graco
Graco 25C483 Parts list manual

Graco
Graco ProMix 3KS User manual

Graco
Graco ProMix Easy Series User manual

Graco
Graco DataTrak kit User manual

Graco
Graco 226086 User manual

Graco
Graco Hydra-Cat 207-388 F Datasheet

Graco
Graco Twistork A Series Operation manual

Graco
Graco 236661 User manual

Graco
Graco ProMix 2KS User manual

Graco
Graco PrecisionMix ii Datasheet

Graco
Graco ToughTek CM20 Instruction Manual