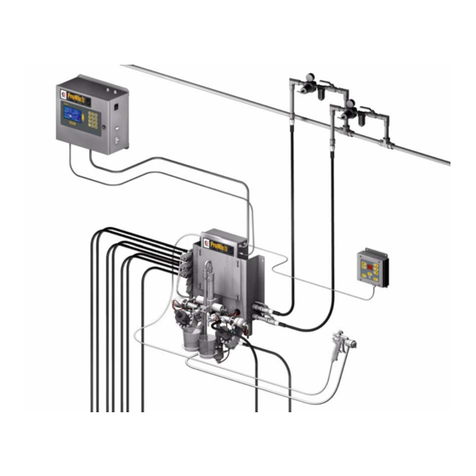
Graco ProMix II Series Guide

310653D
Service - Parts
ProMix™ II
For proportional mixing of plural component coatings
Important Safety Instructions
Read all warnings and instructions in this manual.
Save these instructions.

Contents ◆
2310653D
Contents
Contents . . . . . . . . . . . . . . . . . . . . . . . . . . . . . . . . . . 2
Manual Conventions . . . . . . . . . . . . . . . . . . . . . . . . 2
ProMix™ II Models . . . . . . . . . . . . . . . . . . . . . . . . . . 4
Related Manuals . . . . . . . . . . . . . . . . . . . . . . . . . . . 5
Warnings . . . . . . . . . . . . . . . . . . . . . . . . . . . . . . . . . 6
Pressure Relief Procedure . . . . . . . . . . . . . . . . . . . 8
Shutdown . . . . . . . . . . . . . . . . . . . . . . . . . . . . . . . . . 9
Troubleshooting . . . . . . . . . . . . . . . . . . . . . . . . . . . 11
ProMix™ II Alarms . . . . . . . . . . . . . . . . . . . . . . 11
Solenoid Troubleshooting . . . . . . . . . . . . . . . . . 12
Operator Station Troubleshooting . . . . . . . . . . . 12
Fluid Panel Control Board Diagnostics . . . . . . . 13
Service . . . . . . . . . . . . . . . . . . . . . . . . . . . . . . . . . . 14
Before Servicing . . . . . . . . . . . . . . . . . . . . . . . . 14
After Servicing . . . . . . . . . . . . . . . . . . . . . . . . . . 14
Replacing Air Filter Element . . . . . . . . . . . . . . . 14
EasyKey™ Display . . . . . . . . . . . . . . . . . . . . . . 15
Operator Station . . . . . . . . . . . . . . . . . . . . . . . . 19
Smart Fluid Panel . . . . . . . . . . . . . . . . . . . . . . . 19
Connecting to a PC . . . . . . . . . . . . . . . . . . . . . . . . 25
Connect Cable 118342 . . . . . . . . . . . . . . . . . . . 25
Updating Software . . . . . . . . . . . . . . . . . . . . . . . 26
Software Troubleshooting . . . . . . . . . . . . . . . . . 29
Schematics . . . . . . . . . . . . . . . . . . . . . . . . . . . . . . . 30
Pneumatic Diagram . . . . . . . . . . . . . . . . . . . . . . 30
ProMix™ II Electrical Schematic . . . . . . . . . . . . 31
Parts . . . . . . . . . . . . . . . . . . . . . . . . . . . . . . . . . . . . 32
ProMix™ II Assembly . . . . . . . . . . . . . . . . . . . . 32
Flow Meter Kits . . . . . . . . . . . . . . . . . . . . . . . . . 34
Operator Station . . . . . . . . . . . . . . . . . . . . . . . . 35
EasyKey™ Display . . . . . . . . . . . . . . . . . . . . . . 36
Smart Fluid Panel . . . . . . . . . . . . . . . . . . . . . . . 38
Technical Data . . . . . . . . . . . . . . . . . . . . . . . . . . . . 39
Graco Standard Warranty . . . . . . . . . . . . . . . . . . . 40
Graco Information . . . . . . . . . . . . . . . . . . . . . . . . . 40
Manual Conventions
Note
WARNING
WARNING: a potentially hazardous situation which, if
not avoided, could result in death or serious injury.
Warnings in the instructions usually include a symbol
indicating the hazard. Read the general Warnings
section for additional safety information.
Hazard Symbol
CAUTION
CAUTION: a potentially hazardous situation which, if
not avoided, may result in property damage or
destruction of equipment.
Additional helpful information.

Manual Conventions ◆
310653D 3

ProMix™ II Models ◆
4310653D
ProMix™ II Models
WARNING
Do not install equipment approved only for non-haz-
ardous location in a hazardous area. Substitution of
components may impair intrinsic safety. See page 6.
WARNING
Changing the fluid manifold configuration may change
its pressure rating. Do not exceed the pressure rating
of the lowest rated component. See page 6.
PM
Enter Model number here
ProMix™ II
Unit A Meter B Meter Color Change
Gun Flush
Box
PM 0None 0None 0None, Single Color 0No
1G3000 1G3000 12 Color, Low Pressure 1Yes
2G3000HR 2G3000HR 24 Color, Low Pressure
3Coriolis 3Coriolis 36 Color, Low Pressure
42 Color, High Pressure
54 Color, High Pressure
66 Color, High Pressure
Hazardous Location Approval
Only models with a G3000 (1) or G3000HR (2) for both A and
B meters are approved for installation in a Hazardous Loca-
tion - Class I, Div I, Group D, T3.
Non-hazardous Location Approval
Maximum Working Pressure
Maximum working pressure rating is dependent on the A and B meter and color change option selected. The pres-
sure rating is based on the rating of the lowest rated fluid manifold component. Refer to the component pressure
ratings below. Example: Model PM1140 has a maximum working pressure of 3000 psi (21 MPa, 207 bar).
Check the ID plate on your EasyKey™ Display or fluid panel for its maximum working pressure. See FIG. 1,
page 5.
ProMix™ II Fluid Manifold Components Maximum Working Pressure
Color Change Option 1, 2, or 3 . . . . . . . . . . . . . . . . . . . . . . . . . . . . . . . . . . . . . . . . . . . . 300 psi (2.1 MPa, 21 bar)
Color Change Option 4, 5, or 6 . . . . . . . . . . . . . . . . . . . . . . . . . . . . . . . . . . . . . . . . . . . 3000 psi (21 MPa, 207 bar)
Coriolis A and B Meters Option 3. . . . . . . . . . . . . . . . . . . . . . . . . . . . . . . . . . . . . . . . . . 2300 psi (16 MPa, 159 bar)
No Meters or G3000 or G3000HR A and B Meters Option 0, 1, or 2. . . . . . . . . . . . . . . 4000 psi (28 MPa, 276 bar)
Flow Meter Fluid Flow Rate Range
G3000 Meter . . . . . . . . . . . . . . . . . . . . . . . . . . . . . . . . . . . . . . . . . . . . . . . . . 75-3000 cc/min. (0.02-0.79 gal./min.)
G3000HR Meter . . . . . . . . . . . . . . . . . . . . . . . . . . . . . . . . . . . . . . . . . . . . . . . 38-1500 cc/min. (0.01-0.40 gal./min.)
Coriolis Meter . . . . . . . . . . . . . . . . . . . . . . . . . . . . . . . . . . . . . . . . . . . . . . . . 20-3800 cc/min. (0.005-1.00 gal./min.)
Conforms to FM std
3600 & 3610 for use in Class I Div 1
Group D T3 Hazardous locations
CAN/CSA 22.2 No.157 & No. 1010.1-92
EEx ib IIA T3
ISSeP 04 ATEX 008
SYST
#53
CAN/CSA
22.2 No.1010.1
#53

Related Manuals ◆
310653D 5
ProMix™ II ID Plate Locations Related Manuals
Component Manuals in English
This manual available in following languages:
FIG. 1: EasyKey™ Display and Smart Fluid Panel
ID
Manual Description
310633 ProMix™ II Operation
310653 ProMix™ II Service-Parts
310654 Fluid Mix Manifold
310655 Dispense Valve
308778 G3000, G3000HR Flow Meter
310696 Coriolis Flow Meter
310656 Color Change Kit
307731 Color Change Valve Assembly,
Low Pressure
307941 Color Change Valve, Low Pressure
308291 Color Change Valve Assembly, High
Pressure
308977 Color Change Valve, High Pressure
310695 Gun Flush Box Kit
308818 Printer
310669 ProMix™ II Data Download Kit
310745 Gun Air Shutoff Kit
Manual Language Manual Language
310653 English 310735 Chinese
310731 French 310736 Japanese
310732 Spanish 310807 Dutch
310733 Italian 310808 Finnish
310734 German 310809 Swedish

Warnings ◆
6310653D
Warnings
The following warnings include general safety information for this equipment. More specific warnings are included in
the text where applicable.
WARNING
FIRE AND EXPLOSION HAZARD
Flammable fumes, such as solvent and paint fumes, in work area can ignite or explode. To help prevent
fire and explosion:
• Use equipment only in well ventilated area.
• Eliminate all ignition sources; such as pilot lights, cigarettes, portable electric lamps, and plastic drop
cloths (potential static arc).
• Keep work area free of debris, including solvent, rags and gasoline.
• Do not plug or unplug power cords or turn lights on or off when flammable fumes are present.
• Ground equipment and conductive objects in work area. See Grounding instructions.
• Use only grounded hoses.
• Hold gun firmly to side of grounded pail when triggering into pail.
• If there is static sparking or you feel a shock, stop operation immediately. Do not use equipment
until you identify and correct the problem.
INTRINSIC SAFETY
Only models with a G3000 (1) or G3000HR (2) for both A and B meters are approved for installation in a
Hazardous Location - Class I, Div I, Group D, T3. To help prevent fire and explosion:
• Do not install equipment approved only for non-hazardous location in a hazardous area. See the ID
label for the intrinsic safety rating for your model.
• Do not substitute system components as this may impair intrinsic safety.
ELECTRIC SHOCK HAZARD
Improper grounding, setup, or usage of the system can cause electric shock.
• Turn off and disconnect power at main switch before disconnecting any cables and before servicing
equipment.
• Connect only to grounded power source.
• All electrical wiring must be done by a qualified electrician and comply with all local codes and regu-
lations.
SKIN INJECTION HAZARD
High-pressure fluid from gun, hose leaks, or ruptured components will pierce skin. This may look like just
a cut, but it is a serious injury that can result in amputation. Get immediate surgical treatment.
• Do not point gun at anyone or at any part of the body.
• Do not put your hand over the spray tip.
• Do not stop or deflect leaks with your hand, body, glove, or rag.
• Do not spray without tip guard and trigger guard installed.
• Engage trigger lock when not spraying.
• Follow Pressure Relief Procedure in this manual, when you stop spraying and before cleaning,
checking, or servicing equipment.

Warnings ◆
310653D 7
EQUIPMENT MISUSE HAZARD
Misuse can cause death or serious injury.
• Do not exceed the maximum working pressure or temperature rating of the lowest rated system
component. See Technical Data in all equipment manuals.
• Use fluids and solvents that are compatible with equipment wetted parts. See Technical Data in all
equipment manuals. Read fluid and solvent manufacturer’s warnings.
• Check equipment daily. Repair or replace worn or damaged parts immediately.
• Do not alter or modify equipment.
• For professional use only.
• Use equipment only for its intended purpose. Call your Graco distributor for information.
• Route hoses and cables away from traffic areas, sharp edges, moving parts, and hot surfaces.
• Do not use hoses to pull equipment.
• Comply with all applicable safety regulations.
MOVING PARTS HAZARD
Moving parts can pinch or amputate fingers and other body parts.
• Keep clear of moving parts.
• Do not operate equipment with protective guards or covers removed.
• Pressurized equipment can start without warning. Before checking, moving, or servicing equipment,
follow the Pressure Relief Procedure in this manual. Disconnect power or air supply.
TOXIC FLUID OR FUMES HAZARD
Toxic fluids or fumes can cause serious injury or death if splashed in the eyes or on skin, inhaled, or
swallowed.
• Read MSDS’s to know the specific hazards of the fluids you are using.
• Store hazardous fluid in approved containers, and dispose of it according to applicable guidelines.
PERSONAL PROTECTIVE EQUIPMENT
You must wear appropriate protective equipment when operating, servicing, or when in the operating
area of the equipment to help protect you from serious injury, including eye injury, inhalation of toxic
fumes, burns, and hearing loss. This equipment includes but is not limited to:
• Protective eyewear
• Clothing and respirator as recommended by the fluid and solvent manufacturer
•Gloves
• Hearing protection
WARNING

Pressure Relief Procedure ◆
8310653D
Pressure Relief
Procedure
I
1. Engage the trigger lock.
2. Press Standby key on Operator Station.
3. Shut off air at the spray gun.
4. Relieve fluid and air pressure at component A and
B and solvent feed pumps or pressure pots as
instructed in their separate manuals. Close all fluid
supply shutoff valves.
5. Press Mix on Operator Station.
6. Disengage trigger lock.
7. Hold a metal part of the gun
firmly to a grounded metal
pail. Trigger the gun to relieve
pressure.
8. Engage trigger lock.
9. Press Standby on Operator Station.
10. If you suspect that the spray tip or hose is clogged
or that pressure has not been fully relieved after
following the steps above, very slowly loosen tip
guard retaining nut or hose end coupling to relieve
pressure gradually, then loosen completely. Clear
hose or tip obstruction.
WARNING
Follow Pressure Relief Procedure when you stop
spraying, before changing spray tips, and before
cleaning, checking, or servicing equipment. Read
warnings, page 6.
WARNING
If using an electrostatic gun, shut off electrostatics
before flushing.
Shut
off
WARNING
Pressure upstream of component A and B dispense
valves (A, B) may not be fully relieved.
11. Before servicing or disconnecting flow meters, color
change valves, or other components between the
fluid supply shut off valves (T) and dispense valves
A and B, very slowly loosen swivel fitting (HH) to
relieve pressure gradually.
T
T
HH
HH
AB

Shutdown◆
310653D 9
Shutdown
1. To stop production at any time, press Standby
on the Operator Station.
2.
3. If you have a gun flush box, place the gun inside
the box when the gun is not in use.
4. If shutdown time WILL exceed the pot life, purge
the ProMix™ II of mixed material. See ProMix™ II
Operation manual.
If shutdown time WILL NOT exceed the pot life,
you do not need to purge the system, but you must
relieve system pressure.
WARNING
If using an electrostatic gun with a gun flush
box, shut off the electrostatics before placing the
gun in the box.
WARNING
Follow Pressure Relief Procedure on page 8 when
you stop spraying, before changing spray tips, and
before cleaning, checking, or servicing equipment.
Read warnings, page 6.

Shutdown ◆
10 310653D

Troubleshooting ◆ ProMix™ II Alarms
310653D 11
Troubleshooting
ProMix™ II Alarms
The ProMix™ II has alarms to alert you of a problem
and prevent off-ratio spraying. If an alarm occurs, opera-
tion stops and the following occurs:
• A red LED illuminates steadily or flashes on the
Operator Station.
• Operator Station displays an alarm E-Code, E1 to
E9.
• Alarm sounds.
• Status bar on the EasyKey™ Display shows the
alarm E-Code with a description.
Alarms E-Codes
To Clear Alarm and Restart
Except for Potlife Exceeded (E3) Alarm and Purge Error
(E2) Alarm, all alarms can be cleared by pressing the
Error Clear key on the Operator Station.
To clear Pot Life Exceeded alarm, the system must be
purged. Press the Purge key on the Operator Sta-
tion. The system purges until the preset purge time is
complete. Refer to purging procedure in ProMix™ II
Operation manual.
For Additional Information
See ProMix™ II Operation manual for additional alarm
troubleshooting information.
WARNING
Follow Pressure Relief Procedure, page 8, before
cleaning, checking, or servicing equipment. Read
warnings, page 6.
CAUTION
Do not use the fluid in the line that was dispensed off
ratio as it may not cure properly.
Operator Station
E-Code
Red LED
Description E-Code
Communication Error E1
Purge Error E2
Potlife Exceeded Alarm E3
Ratio Alarm E4
Overdose Alarm E5
Dose Time A Alarm E6
Dose Time B Alarm E7
Autodump Complete Alarm E8
EasyKey in Setup Mode E9
When an alarm occurs, determine the E-Code
before clearing it. You can use the EasyKey™
Report screen (FIG. 2) to view the last 10 alarms
with date and time stamps.
FIG. 2: Setup Mode - Report Screen

Troubleshooting ◆ Solenoid Troubleshooting
12 310653D
Solenoid Troubleshooting
If the dispense or purge valves are not turning on or off correctly, it could be caused by one of the following.
Operator Station Troubleshooting
Refer to the Pneumatic Diagram, page 30.
Cause Solution
1. Air regulator pressure set too
high or too low.
Check air pressure. 80 psi (550 kPa, 5.5 bar) is commonly used. Do not go
below 75 psi (517 kPa, 5.2 bar) or above 100 psi (0.7 MPa, 7 bar),
2. Air or electrical lines damaged
or connections loose.
Visually inspect air and electrical lines for kinks, damage, or loose connec-
tions. Service as needed.
3. Solenoid failure Manually operate the valves by removing the Smart Fluid Panel cover and
pressing and releasing solenoid valve override buttons. FIG. 3.
Use the control board diagnostics to check the signals (page 13). If signals
do not occur correctly, go to Cause 4.
Valves should snap open and shut quickly. If the valves actuate slowly, it
could be caused by:
• Air pressure to the valve actuators is too low. See Cause 1.
• Solenoid is clogged. Make sure air supply has 10 micron filter installed.
• Something is restricting the solenoid or tubing. Check for air output from
air line for corresponding solenoid when valve is actuated. Clear restric-
tion.
• Packings on the mix manifold dispense valves are too tight. Torque
should be 25 in-lbs (2.8 N•m).
• A dispense valve is turned in too far. See ProMix™ II Operation manual
for settings,
• Fluid pressure is high and air pressure is low.
4. Solenoid, cable, or fluid panel
control board failure.
Check voltage level to solenoid by pulling solenoid connector and checking
voltage between pins.
If voltage is 9-15 VDC, the solenoid is damaged. Replace solenoid or correct
electrical line problem.
If there is no voltage, replace the board.
Dispense A
Dispense B
Purge Air
Purge
Solvent
FIG. 3
Problem Cause Solution
Nothing displayed Power is off Turn on power
Faulty cable Check or replace cable
Circuit board failure Replace circuit board
Error code E1 Faulty fiber optic cable between
EasyKey™ and fluid panel
Check or replace cable

Troubleshooting ◆ Fluid Panel Control Board Diagnostics
310653D 13
Fluid Panel Control Board Diagnostics
FIG. 4
LED Signal Description Diagnosis
A Dispense Valve A LED turns on when ProMix™ II sends a signal to actuate related
solenoid valve
B Dispense Valve B
C Air Purge Valve
D Solvent Purge Valve
E Gun Flush Box Trigger
F Color Change Solvent
GColor1
HColor2
JColor3
KColor4
LColor5
MColor6
N Board OK LED blinks during normal operation
P Gun Flush Box Pressure Switch LED turns on when a gun is in Gun Flush Box
Q Air Flow Switch LED turns on when paint gun is triggered.
A B C D E F G H J K L M
N PQ

Service ◆ Before Servicing
14 310653D
Service
Before Servicing
1. Follow Shutdown procedure, page 9, if service
time may exceed pot life time and before servicing
fluid components.
2. Close main air shutoff valve on air supply line and
on ProMix™ II.
3. Shut off ProMix™ II power (0 position). FIG. 5.
4. If servicing EasyKey™ Display, also shut off power
at main circuit breaker.
After Servicing
After servicing the system, be sure to follow the
Start Up checklist and procedure in the ProMix™ II
Operation manual.
Replacing Air Filter Element
Check the 5 micron air manifold filter daily and replace
element (part no. 114228) as needed.
1. Close main air shutoff valve on air supply line and
on unit. Depressurize air line.
5. Screw filter bowl (B) on securely. Install cover (A).
WARNING
• To avoid electric shock, turn off EasyKey™ power
before servicing.
• Servicing EasyKey™ display exposes you to high
voltage. Shut off power at main circuit breaker
before opening enclosure.
• All electrical wiring must be done by a qualified
electrician and comply with all local codes and reg-
ulations.
• Do not substitute system components as this may
impair intrinsic safety.
• Read warnings, pages 6-7.
FIG. 5
0 = OFF
WARNING
Removing a pressurized air filter bowl could cause
serious injury. Depressurize air line before servicing.
2. Remove filter cover (A).
3. Unscrew filter bowl (B).
4. Remove and replace element (C).
A
B
C

Service ◆ EasyKey™ Display
310653D 15
EasyKey™ Display
• Before Servicing
• Updating Software
• Replacing Display Board or Display Backlight
• Replacing Keypad
• Replacing Power Supply Board
• Replacing Power Supply Fuses
Updating Software
There are 2 ways to update software:
• Upload new software from your PC: Requires Graco
RS-232 cable 118342 and software update file
obtained from your distributor. Follow Updating
Software procedure, page 26.
• Install new software chip: Requires Graco ProMix™
II Software Update Kit 234671. Kit includes display
board flash memory chip, chip extractor tool, and
grounding wrist strap. Follow Installing New Soft-
ware Chip procedure.
Installing New Software Chip
1. Follow Before Servicing procedure, page 14.
2. Unlock and open EasyKey™ door with its key.
3. Remove display board chip (C - FIG. 6) with
removal tool.
a. Press removal tool into flash chip socket open
holes.
b. Squeeze the tool to grip the chip and carefully
pull it straight out of the socket.
4. Align beveled corner of new chip with beveled
corner of socket and press chip into place. Make
sure the pins are not bent or touching.
5. Close and lock EasyKey™ door with key.
6. Turn EasyKey™ power on to test circuit boards.
CAUTION
To avoid damaging circuit board when servicing, wear
grounding strap on wrist and ground appropriately.
FIG. 6
C

Service ◆ EasyKey™ Display
16 310653D
Replacing Display Board or Display
Backlight
Kits available:
1. Follow Before Servicing procedure, page 14.
2. Unlock and open EasyKey™ door with its key.
3. Note position of all connections (J2, J5, J6, J8, J9)
to display board then unplug the connectors. FIG. 7.
4. Remove 4 screws (508e) and display board
assembly (508b, 508c). FIG. 8.
5. Separate graphic display (508b) from circuit board
(508c).
6. If replacing display backlight, using Backlight
Kit 118337:
Before replacing the backlight, check the inverter
(D - FIG. 7) on the display board for proper voltage.
a. Turn EasyKey™ power on.
b. Carefully measure AC voltage across the 2
pins of the inverter (D).
c. Voltage should be about 700 VAC. If not,
replace the circuit board.
Part No. Description
118337 Backlight Repair Kit
234447 Display Interface Replacement Kit
Includes membrane switch, graphic display,
display board, mounting plate, and screws.
WARNING
Servicing the EasyKey™ Display exposes you to high
voltage. To avoid electric shock, turn off EasyKey™
power and shut off power at main circuit breaker
before servicing.
FIG. 7
J6 (RS232)
J5 (power)
J8
J9
J2
508e
508c
D
(F.O. in - black)
(F.O. out - blue)
(membrane
switch)
FIG. 8
a. Unplug inverter connector (X).
b. Remove the two small screws and nuts (AA) -
be careful not to drop them.
508e
508b
508c
TI4862a
X
(backlight power)
AA

Service ◆ EasyKey™ Display
310653D 17
7. Align display board (508c) and graphic display
(508b). FIG. 8. Press them together.
8. Mount display board with screws (508e).
9. Plug all connectors into display board (508c). FIG.
7.
10. Close and lock EasyKey™ door with key.
11. Turn EasyKey™ power on to test circuit board.
Replacing Keypad
1. Follow Before Servicing procedure, page 14.
2. Unlock and open EasyKey™ door with its key.
3. Disconnect keypad ribbon cable (J2) from the
display board. FIG. 7.
4. Peel keypad (508a) off plate (508d) and carefully
slide ribbon cable through slot in plate. FIG. 9.
5. Remove adhesive liner from back of new keypad.
6. Slide the ribbon cable through the plate (508d) slot,
align the keypad (508a) with the recessed area on
the plate, and press it into place.
7. Connect the ribbon cable (J2) to the display board.
FIG. 7.
8. Close and lock EasyKey™ door with key.
9. Turn EasyKey™ power on to test operation.
c. Slide the backlight (F) out of the display board
(508b). Install new backlight (F)
F508b
FIG. 9
508a
508d
E3
TI4881a

Service ◆ EasyKey™ Display
18 310653D
Replacing Power Supply Board
1. Follow Before Servicing procedure, page 14.
2. Unlock and open EasyKey™ door with its key.
3. Disconnect cables (G1, G2, G3). FIG. 10.
4. Remove 2 screws (H) and remove cover (J).
5. Noting their location, remove 5 screws (Y) from
power supply board (521a). Remove board.
6. Apply thermal compound to the heatsink (Z) on the
back of the new power supply board (521a).
7. Install the new power supply board with the 5
screws (Y).
8. Install cover (J) with 2 screws (H).
9. Connect cables (G1, G2, G3).
10. Close and lock EasyKey™ door with key.
11. Turn on power at main circuit breaker.
12. Turn EasyKey™ power on to test operation.
Replacing Power Supply Fuses
1. Follow Replacing Power Supply Board, steps
1-4.
2. Remove the fuse (F1, F2, F3, or F4) from its fuse
holder. FIG. 10.
3. Snap new fuse into holder.
4. Follow Replacing Power Supply Board, steps
8-12.
WARNING
Servicing the power supply board exposes you to high
voltage. To avoid electric shock, turn off EasyKey™
power and shut off power at main circuit breaker
before servicing.
WARNING
Servicing the power supply board exposes you to high
voltage. To avoid electric shock, turn off EasyKey™
power and shut off power at main circuit breaker
before servicing.
Fuse Part No. Description
F1, F2 114788 2 amp, time lag
F3, F4 15D979 .4 amp, quick acting
FIG. 10
G1
G2*
H
521a
Do not remove
this screw
Y
F3, F4
F1, F2
J
Back of Board (521a)
Z
G2
H
TI4887a
(line in fuses)
(power out fuses)
(power to
fluid plate)
(power
in)
(power to
display board)

Service ◆ Operator Station
310653D 19
Operator Station
Replacing Circuit Board
1. Follow Before Servicing procedure, page 14.
2. Remove 4 screws (212) and lockwasher (213), and
remove cover (202).
3. Disconnect cable connector (219) from circuit
board (206).
4. Remove 4 screws (210) and circuit board (206).
5. Install new circuit board (206) with 4 screws (210).
6. Connect cable (219).
7. Install cover (202) with 4 screws (212).
8. Turn EasyKey™ power on to test operation.
Smart Fluid Panel
• Preparation
• Replacing Control Board
• Replacing Air Flow or Pressure Switch
• Replacing Solenoids
• Reassemble Smart Fluid Panel
Preparation
1. Follow Pressure Relief Procedure, page 8.
2. Close main air shutoff valve on air supply line and
on ProMix™ II.
3. Shut off ProMix™ II power (0 position). FIG. 12.
4. Loosen the 4 screws (16), then remove the Smart
Fluid Panel cover (15). FIG. 13.
CAUTION
To avoid damaging circuit board when servicing, wear
grounding strap on wrist and ground appropriately.
FIG. 11
210
202
219
206
212
213
TI4869a
WARNING
Read warnings, page 6.
FIG. 12
FIG. 13
0 = OFF
15
16

Service ◆ Smart Fluid Panel
20 310653D
5. Slide the panel (14) until its bottom slots (KK) align
with the top screw holes and secure the box in
place with the 2 screws. FIG. 14.
Replacing Control Board
1. Follow Preparation procedure, page 19.
2. Disconnect fiber optic wires and all cables (J1, J3,
J4, J5, J6, J8, J9, J10) from control board (706).
FIG. 14.
3. Fluid Panels with Color Change: Carefully
remove color change EEPROM (U25) from the
control board with a chip puller. FIG. 16. Save it to
install in the new board.
4. Remove 4 screws (707). Remove control board
(706). FIG. 15.
5. Install new control board (706) with 4 screws (707).
6. Connect cables to control board (706). FIG. 14.
Insert fiber optic cable connectors (J4, J6) into
board connectors (E), matching blue with blue,
black with black, and hand-tighten connectors (E).
FIG. 16.
7. Fluid Panels with Color Change: Orient the
EEPROM (U25) so its notch lines up with the notch
marked on the fluid control board and install it in
the board. The EEPROM leads may need to be
bent slightly inward to fit in the socket.
8. Reassemble Smart Fluid Panel (page 22).
9. Turn EasyKey™ power on to test operation.
FIG. 14
CAUTION
To avoid damaging circuit board when servicing, wear
grounding strap on wrist and ground appropriately.
Panels without color change do not include the
EEPROM.
14
KK
J10 J5 J3 J1J6J4
J9 J8
706
TI4886a
FIG. 15
FIG. 16
707
706
TI4868a
E
U25
Table of contents
Other Graco Mixer manuals

Graco
Graco 24C728 Parts list manual

Graco
Graco Hydra-Cat 207-388 F Datasheet

Graco
Graco 26C150 User manual

Graco
Graco ProMix 3KS User manual

Graco
Graco 25C539 Parts list manual

Graco
Graco ProMix Easy Series User manual

Graco
Graco 25C483 Parts list manual

Graco
Graco 222695 User manual

Graco
Graco Xtreme Mix OEM User manual

Graco
Graco PrecisionMix ii Datasheet

Graco
Graco 236661 User manual

Graco
Graco ProMix 2KS User manual

Graco
Graco XTREME MIX 309521J User manual

Graco
Graco Twistork A Series Operation manual

Graco
Graco ToughTek CM20 User manual

Graco
Graco ToughTek CM20 Instruction Manual

Graco
Graco ProMix II User manual

Graco
Graco 226086 User manual

Graco
Graco DataTrak kit User manual