Gram S3 SERIES User manual

SERIES / SERIE / SÉRIE /SERIES
S3
OPERATION MANUAL
MANUAL DE UTILIZACIÓN
MANUEL D´UTILISATION
MANUAL DE UTILIZAÇAO

2
INDEX English
Safety warnings 8
Features 9
Options 9
Product package 10
Keypad and display description 10
Keypad 10
Connections 12
Basic function operation 12
Zero adjust 12
Tare function 12
TARE memory 13
Auto-Tare 15
Current weighing 16
Accumulative weighing 17
Piece counting function 18
Sampling
18
Counting
18
Piece counting Preset 19
Weight limit function (+/-) 20
Weight limit saving and reply mode 21
Advice mode selection 22
Type of advice selection 22
Limit function activation(+/-) 23
Second platform (double version platform) 24
Advanced functions 25
Backlight activation 25
Auto Hold Mode Function 26
Auto Power off 27
Auto Tare 27

3
Function activation 27
Auto Tare Function 28
Stability Filter 28
Sound activation 29
Activation of auxiliary units 29
Keypad lock 30
AD Conversor verification function 31
RS-232C data output configuration 31
Print Formats 32
Guarantee 36

4
ÍNDICE Español
Precauciones 37
Características 38
Opciones 39
Embalaje 39
Descripción del display 39
Descripción del teclado 40
Conexiones 41
Uso básico 41
Puesta a cero 41
Utilización de la tara 42
Memorias de TARA 42
Función Auto-Tara 44
Pesada normal 46
Acumulación de pesadas 46
Función de cuentapiezas 47
Muestreo
48
Contaje
48
Memorias de peso unitario (Cuentapiezas) 49
Límites de peso (Control +/-) 50
Memorización de los limites de peso y modo de respuesta 51
Selección del modo de aviso 52
Selección del tipo de aviso 52
Activación de la función de Limites (+/-) 53
Segunda plataforma (versión doble plataforma) 54
Funciones avanzadas 55
Activación de la iluminación del display 55
Mantenimiento de ultima pesada (Auto Hold) 56
Autodesconexión
57
Auto Tara 57

5
Activación de la función 57
Utilización de Auto Tara 58
Filtro de estabilidad 58
Activación del sonido 59
Función de verificación del convertidor AD 59
Configuración de la salida de datos RS-232C 60
Formato de impresión 61
Calibración 64
Garantía 66

6
SOMMAIRE Français
Conseils de securite 67
Caracteristiques 68
Options 69
Emballage 69
Description de l’écran 69
Description du clavier 70
Connexions 71
Utilisation de base 72
Remise à zéro 72
Mode Tare 72
Mémoire de TARE 73
Fonction auto-tare 74
Pesée normale 76
Fonction compte-pièces 77
Echantillonnage 78
Comptage 78
Mémoires de poids unitaire (compte-pièces) 79
Limites de poids (control +/-) 80
Mémorisation des limites de poids et mode réponse 81
Sélection du mode d’avertissement 82
Sélection du type d’avertissement 82
Activation de la fonction de Limites (+/-) 83
Deuxieme plateforme (Version doublé plateforme) 84
Fonctions avancées 85
Activation de l’éclairage de l’écran 85
Maintenance de la dernière pesée (Auto Hold) 86
Autodéconnexion 86
Auto Tare 87
Activation de la fonction 87

7
Utilisation de l’Auto Tare 87
Filtre de stabilité 88
Activation du son 89
Activation d’unités auxiliaires 89
Blocage du clavier 90
Fonction de vérification du convertisseur AD 90
Configuration de la sortie de données RS-232C (optionnelle) 91
Format d’ impression 92
Sortie de données RS-232C pour PC ou POS 96
Garantie 97

8
ÍNDICE Português
Precauções 100
Características 101
Opções 102
Embalagem 102
Descrição do visor 102
Descrição do teclado 103
Ligações 104
Utilização básica 104
Colocação a zero do visor 104
Função de tara 105
Memorização de TARA 105
Função Tara Automática 107
Pesagem normal 109
Acumulação de pesagens 109
Função de contagem de peças 111
Amostragem
111
Contagem
111
Memorização de peso unitário (Contador de peças) 112
Limites de peso (control +/-) 113
Memorização dos limites de peso e modo de resposta. 114
Seleção do modo de aviso 115
Seleção do tipo de aviso 115
Ativação da função de limites (+/-) 116
Segunda plataforma (versão plataforma dupla) 117
Funções avançadas 118
Ativação da iluminação do visor 118
Manter a última pesagem (Auto Hold) 119
Desligar automaticamente 120
Tara Automática 120

9
Ativação da função 120
Utilização da Tara Automática 121
Filtro de estabilidade 121
Ativação de som 122
Função de verificação do conversor AD 123
Configuração da saída de dados RS-232C 123
Formato de impressão 124
Calibração 127
Garantia 129

10
ENGLISH
SAFETY WARNINGS
• Disconnect from supply befor installation or disassembly.
• Before start using it, check if the voltage in the characteristics label corresponds
with the network you are going to connect it with. If not, do not connect the scale
in the network
• Do not rest the scale over its plate or underplate because it can damage the
load cell. To manipulate the low part (external platform connection, charger or
to change battery) the scale should rest over its sides, but never over its plate.
• Do not hit the plate or underplate neither frontal nor on its sides, because the load
cell could get damaged. It is a precision instrument, and it should be treaten carefully.
• Before start using it, check the charger cable is not stucked or under pressure.
It should be out from any pressure.
• The scale should only be used under proper environmental conditions indicated
in this operation manual.
• Do not use this scale in places where there are unstable conditions or explosive danger.
• Do not place the scale near heat sources or under direct solar radiation influence
• Keep the scale far away from other electromagnetic radiation sources. Its
influence could affect the weighting precision.
• When low-battery advertisement appears, the battery should be charged. If the
battery remains discharged for a long time, it deteriorates and could stop working.
• When changing battery, check if (+) and (-) terminals do connect to its
corresponding terminals.

11
IMPORTANT! In case of breakdown or inappropriate operation working due
to an inadequate following of the instructions given before, the guarantee
right will be lost.
FEATURES
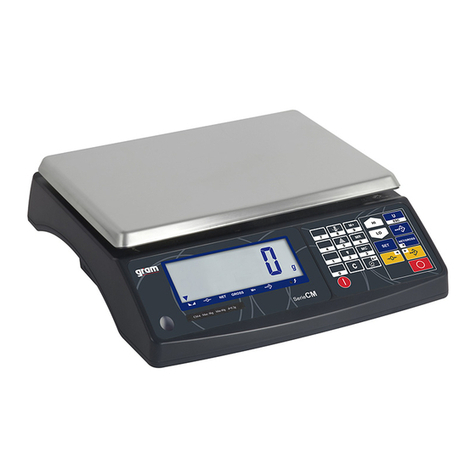
• Liquid glass display with backlight.
• Cross keypad for intuitive menu use.
• 4 weighting units.
• IP-67 protection against liquids and dust.
• Cell, supply and options hermetic connectors.
• 20 numeric tares memory.
• 20 limit weights for +/- control memory.
• 100 products memory for piece counting.
• Checking function for Hi/OK/Low with optical and acoustic indication.
• 220V/9V 800 mA Network adapter.
• Automatic disconnection.
OPTIONS
• Double RS-232C data output ( PC and printer).
• External Tare input (pedal or button).

12
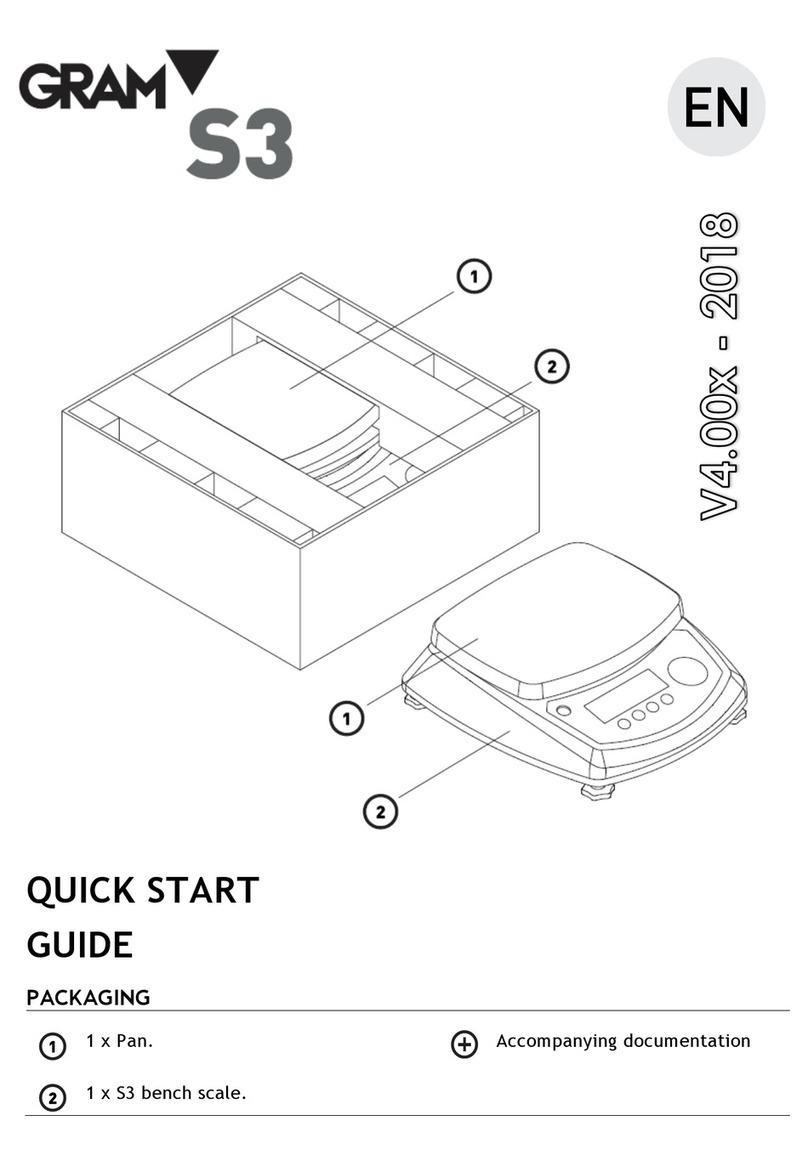
PRODUCT PACKAGE
• 1 scale.
• 1 stainless steel plate.
• 1 220V/9V Network adapter.
• 1 Operation manual.
• Battery rechargeable.
KEYPAD AND DISPLAY DESCRIPTION
KEYPAD
Turn on/off key. Press button to turn it on. To turn it off, press and
hold the button for one second.
Change unit key. Press it to change unit. In menu mode, press it to
MC
MR M+
B/N
H-L
PLU
M
0
TEST
U
ESC
T
S3

13
escape from menu and return to normal mode.
Gross/Net key. When using tare mode, press it to show total weight,
press it again and it will show net weight. To select “weight limit”
mode, press and hold it for a few seconds.
PLU key. Press it to enter menu, it has access to limit memories, piece
counting, tare mode and other utility functions.
Zero key. It adjusts scale to zero, correcting its deviations. Do it always
when plate is empty. If you press it longer than a second, it shows
display test.
Tare key. Press it to deduce the weight of any container or box placed
over scale plate. Keep pressing to access tare memory.
MR and left arrow key. Press it to show accumulated total weight. In
menu mode, confirm the selected adjust value, and return to previous
menu.
M+ and right arrow key. Press it to save the value shown on the
display. In menu mode, it shows the next function.
1-2 and up arrow key. Press it to change from scale plate to external
plate (only for double platform function scales). In menu mode, it
increases the value (number) on display.
MC and down arrow key. Press it to erase accumulated weight
memory. In menu mode, it decreases the value (number) on display.
Enter key. To confirm the selection done in programming mode.

14
CONNECTIONS
AC/DC: Supply connector.
RS-232C: Double RS-232C data output RS-232C and tare (optional)
BASIC FUNCTION OPERATION
Zero adjust
When scale plate is empty and it does not show zero value, press key to
correct it.
Tare function
Place a container over the plate. Display will show tare value. Press
and it will show “0” value, deducting object weight. Now you can place other
objects on the container, and display will show its net weight.
You can see the total value (gross weight) pressing key. Press it again to
return to net weight.

15
To cancel tare, remove all objects from the plate, and press . Display will
show zero value.
Advice: If there is instability or temperature differences, display may not
show “0” value. In this case, press key to correct it.
Max tare range: Tare value cannot exceed the maximum scale capacity. The
real scale capacity is the sum of maximum capacity minus the tare done.
Real cap. = max cap. – tare.
TARE memory
The scale has available 20 numeric tares. To memorize it, follow the
procedure below:
Memory programming
1. Press key. Display will show “PLUPro”. Press key several times
till display shows “TLUPro”.
2. Press key. Display will show the memory used last time (for instance
“lLU 01”). Last digits indicate the memory number.

16
Once memory position desired is selected, press and display will show
one number. To modify it and introduce a tare value, use and to
select the desired digit.
To go to right digit, press to modify it use and . To modify any
digit on the left, press still the desired digit sparks, then follow the same
procedure explained before.
To finish, press key and tare will be saved. If we wish to keep saving tares,
press again and follow the same procedure.
To finish, after confirming the last tare saved, display will show “ILUPro”.
Press to escape to weighting mode.
TARE memory use
In weighting mode, with empty plate, press longer than a second till
“TLU XX” is shown, where XX is the last digit of the TARE memory saved.
To access to another memory position, press and to surf along
the tare memories still you find the desired memory number.
To confirm, press . Display will show tare memory value with negative
sign. Now you can place the object in the plate, and the tare value will be
deducted from weighting value (shows net weight).
You can operate with the object in the plate, then the display indicates the net
weighting value.

17
Auto-Tare
This function allows tare function with recipient or box to be done
automatically, without pressing button. Display detects the first weight
(recipient or box), then operates tare function (sets to 0), and gets ready to
weight the product in the box or recipient. Afterwards, it sets to 0 and you
can start again the same procedure repeatedly without pressing any button.
Function activation
To enable Auto Tare, follow these instructions:
1. Press . Display will show “PLUPro”. Press several times, still
display shows “AUT-t”.
2. Press . Display will show in the last position one digit, in accordance
with the following meaning:
0. Unable function.
1. Enabled Function.
3. Press to confirm. Press to return to weighting mode.
Function use
1. Place the recipient or box over the plate. Scale will operate the tare
function and display will show 0 and tare symbol will be on.

18
2. Place the object or objects inside the recipient or box. Display will show
net weight, deducting the tare (recipient/box weight).
3. Remove all objects from the plate. Display will cancel tare and set to 0.
4. To weight again, repeat the same operation. You can use it indefinitely
without pressing any button.
Current weighing
Switch on the scale pressing button.
Display will be on in a few seconds, afterwards it will show zero value.
If there is any object in the plate, display will show the object weight, except
from the case its weight is very low, then scale will start next zero following.
Press to select desired weighting unit (default unit is “g or kg”,
depending on its configuration).
Place the object you desire to weight over the plate. Screen will indicate
object weight value, it should be ready when “stability” symbol is shown at
the top left side on the display.

19
Accumulative weighing
This function adds up all weighting values accumulated, and shows its total
value.
To use it, place the object you desire to weight, when display show stabilized
weight value (stability symbol on), press . Then, weight value adds to total.
Place another object, assure between new and previous object plate sets to
0 with stability symbol on.
Press again and the second weight will be added to total.
You can weight several objects following this procedure.
To know accumulated sum value, press and display will show total
accumulated value.
You can check accumulated weight value when you desire, and keep on
accumulating weight values. To erase memory, press and accumulated
value will be deleted.

20
Piece counting function
The use of this mode is to count pieces of homogeneous weight. After doing
a simple sampling, scale saves the piece weight, and indicate the number of
pieces placed in the plate.
Sampling
To do the sampling, when scale shows 0 and plate is empty, press and hold for
longer than a second button, still display shows “10” or other value flashing.
This value is the quantity of pieces you can place on the plate as sampling.
If pieces are small, to increase the precision of counting it is recommended
to place a number larger than 10. To do it, press , then increase the
sampling value to 20, 30, 50 or 100. To decrease, press .
Once desired value is selected, count the number of pieces indicated on the
display and press . Display will stop flashing and will show sampling value.
Counting
Other manuals for S3 SERIES
1
Table of contents
Languages:
Other Gram Scale manuals

Gram
Gram K3X Series User manual

Gram
Gram WHITE MEL SERIES User manual

Gram
Gram AHV Series User manual

Gram
Gram EK Series User manual

Gram
Gram XFOC+ User manual

Gram
Gram ZFOC Series User manual

Gram
Gram S5i SERIES User manual

Gram
Gram EH 500 User manual

Gram
Gram Xtrem F User manual

Gram
Gram AHV Series User manual