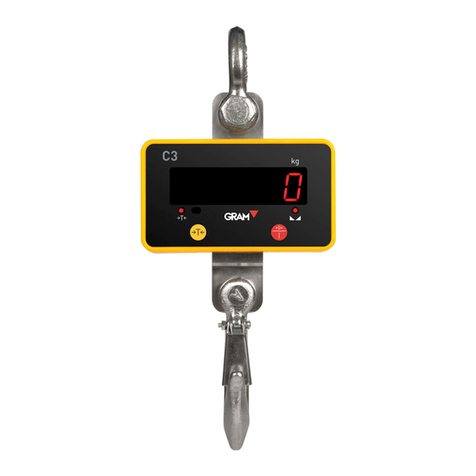
Gram CM-3 User manual

1
USER MANUAL
MANUAL DE UTILIZACION
MANUEL D´UTILISATION
BEDIENERHANDBUCH
SERIES/SERIE/SÉRIE/SERIE CM
Models / Modelos / Modèles / Modelle:
CM-3
CM-6
CM-15
CM-30
REV. 1A11M06


3
INDEX
Power source, power consumption and rechargeable battery
4
Scale’s version number display
4
Display description
4
Keyboard description
5
Keys functions description
5
Preset Tara Value
7
Preset the high weight value
7
Preset the low weight value
7
Check-weighing Function configuration
8
Weights accumulation
8
How to enter the sample for piece counting
9
Piece counting function
9
Standard calibrations
9
Functions setup
10
- Internal value
10
- Check weighing
11
- Auto Power off
11
- Backlight
11
- HOLD Function
12
- RS-232 Output
12
- Zero weight Display Condition
15
Standard Gravitational Pre-Calibration
16
Guarantee
17
ENGLISH INDEX…………………………….Page 3
INDICE CASTELLANO……….................…Página 18
SOMMAIRE FRANÇAIS………...................Page 33
DEUTSCHES INHALTSVERZEICHNIS......Seite 48

4
POWER SOURCE
Input: 100
~
240V 50/60
h
z
Output: 12
V/
1A D
C
12
W
Lead-acid rechargeable battery: 6
V/
4AH
POWER CONSUMPTION
Appro
x.
12
m
A
Appro
x.
36
m
A
w
i
t
h
b
ac
k
li
g
h
t
Appro
x.
48
m
A
w
i
t
h
b
ac
k
li
g
h
t
an
d
RS
232
i
n
t
e
r
f
ac
e (optional)
BATTERY HOURS PER CHARGE
Appro
x.
320
ho
u
r
s
(
b
ac
k
li
g
h
t
o
ff
)
SCALE’S VERSION NUMBER DISPLAY
1. Turn on the scale.
2. Press and hold the ZERO key until the countdown sequence has completed.
3. The LCD display will show “1001”. The shown number is the main-board
version of the scale.
4. Release the ZERO key and the scale will start the functions setup.
DISPLAY DESCRIPTION

5
KEYBOARD DESCRIPTION
KEY FUNCTIONS DESCRIPTION
To turn off the scale, press and hold the OFF key and the display will show
“Off” for 2 seconds.
Press the key to turn on the scale.
Function 1. To select desired weighing unit.
Function 2. To escape (exit) setting in setup mode.
Function 1. To reset the weight to 0, but the displayed weight value has
to be less than
±
2% of maximum capacity.
Function 2. To move one space to the left or downward in setup mode
Function 1. To subtract the container weight.
Function 2. To move one space to the right or upward in setup mode.
Function 1. To see gross and net weight when the scale is on tare status.
All other keys will be disabled when gross weight is activated
Function 2. To increase values upward in setup mode.
Function 1. To select internal backlight mode of the display.
Function 2. Works as numeric number 2 in setup mode.
Function 1. Manual transmitting data through RS-232 to computer or

6
printer at normal weighing mode (RS-232 must be set up keyboard
transmission 232 3 or 232 6).
Function 2. Works as enter key in setup mode.
To preset Tare value
To preset High Weight value
To preset Low Weight value
To program check weighing parameters
Function 1. To accumulate weights
Function 2. Works as numeric number 9 in setup mode
Function 1. To display total accumulation count and total accumulated
weight.
Function 2. Works as numeric number 6 in setup mode.
Function 1. To clear all accumulated weight data.
Function 3. Works as numeric number 3 in setup mode.
Function 1. To enter the samplefor piece counting
Function 2. Works as numeric number 8 in setup mode.
Function 1. To actívate counting mode
Function 2. Works as numeric number 5 in setup mode
To clear an entry.

7
PRESET TARA VALUE
1. Press the key.
2. Use numeric keys from 0 to 9 to enter the required Tara value.
3. Press the key to confirm, the indicators Net and PT will appear.
4. The scale will return to normal weighing mode automatically.
Clear a preset Tare value.
1. Press the key.
2. Press the key to clear the previously entered value.
3. Press the key to continue.
4. The scale will return to normal weighing mode automatically.
PRESET THE HIGH WEIGHT VALUE
1. Press the key.
2. Use the numeric keys from 0 to 9 to set the required HI weight value.
3. Press the key to confirm.
4. The scale will return to normal weighing mode automatically.
PRESET THE LOW WEIGHT VALUE
1. Press the key.
2. Use the numeric keys from 0 to 9 to set the required LO weight value
3. Press the key to confirm.
4. The scale will return to normal weighing mode automatically.

8
CHECK-WEIGHING FUNCTION CONFIGURATION
o
0
0
0
A
B
C
A: Acoustic signal.
Option 0=stability is not required
Option 1= stability is required
B: LCD indicator and Relay activated
Option 0=stability is not required
Option 1= stability is required
C: Acoustic signal conditions
Option 0=acoustic signal deactivated
Option 1=OK
Option 2= LO and HI
1. Press the key.
2. Use the numeric keys 0, 1 and 2 to select the required function (A, B, C)
3. Press the key to confirm.
4. The scale will return to normal weighing mode automatically.
WEIGHTS ACCUMULATION
1. Place the product onto the scale and press the key.
2. During 2 seconds the screen will display the number of weights carried out (1).
3. During 2 seconds the screen will display the total accumulated weight and the M+
symbol.
4. Place another product onto the scale and press the key.
5. During 2 seconds the screen will display the number of weights carried out (2).
6. During 2 seconds the screen will display the total accumulated weight and the M+
symbol.
7. Repeat the process as many times as it is necessary.
HOW TO DISPLAY TOTAL ACCUMULATED WEIGHT
1. Press the key.
2. During 2 seconds the screen will display the number of total weights carried out.
3. During 2 seconds the screen will display the total accumulated weight.

9
HOW TO CLEAR WEIGHT ACCUMULATIONS
1. Press the key and all the weight accumulations which were carried out will
be erased.
HOW TO ENTER THE SAMPLE FOR PIECE COUNTING
1. Press the key.
2. Use the numeric keys from 0 to 9 to enter desired sample quantity.
3. Place the same amount of pieces as sample pieces entered.
4. Press the key.
5. The scale will be ready to count.
6. To exit counting mode, press the key.
• The screen will display the message
U.
--
when the sample unit weight is less
than 0.2 d
• The screen will display the message
S.
--
when the sample weight is less than
20 d.
• The screen will display the message
U.
--S
.
--
if the unit weight and sample
weigh are less than 0.2 and 20 d
PIECE COUNTING FUNCTION
1. Press the key to activate counting mode.
2. If the scale has no previous sample count saved, it will display
U.
—
for 2 seconds
and will activate counting functions. In this moment, please proceed to enter the
sample as it is described in the previous chapter.
STANDARD CALIBRATIONS
Press the and the key in weighing mode to start Standard
Calibrations.
ECF-1 Weight Calibration (Zero and Span)
ECF-2 Zero Calibration
ECF-3 Span Calibration

10
Weight Calibration ECF-1
1. Press the key to start ECF-1 mode or the ESC key to exit menu and back
to weighing mode.
2. The display will show CALZ, press the key.
3. Use ◄, ►, ▲, 0 ~ 9 keys to enter the calibration weight value and then confirm with
the key.
4. Place the required weight mass onto the scale as indicated on display and press
the to calibrate the scale.
5. The scale will complete the calibration automatically and will return back to
weighing mode.
Zero Calibration ECF-2
1. Press the key to start Zero Calibration ECF-2 or the key to exit the
menu and return back to weighing mode.
2. The display will show CALZ, press the key.
3. The scale will complete the zero calibration automatically and will return back to
weighing mode.
Span Calibration ECF-3
1. Press the key to start Span Calibration ECF-3 or the key to exit the
menu and return back to weighing mode.
2. Use ◄, ►, ▲, 0 ~ 9 keys to enter the calibration weight value and then confirm with
the key.
4. Place the required weight mass onto the scale as indicated on display and press
the to calibrate the scale.
5. The scale will complete the calibration automatically and will return back to
weighing mode.
FUNCTIONS SETUP
In order to access functions setup, keep pressed the and without release it,
press the key.
UF-1 Internal value
1. Press the key to see the internal value.
2. To continue with other setups use the ► key.
3. To exit menu and return back to weighing mode, press the key.
11
UF-2 Check weighing
1. Press the key to start check weighing setup.
2. The display will show the message “0000.0L”
3. Use ◄, ►, ▲, 0 ~ 9 keys to set LO weight value.
4. Press the key to confirm.
5. The display will show the message “0000.0H”
6. Use the ◄, ►, ▲, 0 ~ 9 keys to set HI weight value.
7. Press the key to confirm.
8. The display will show the message “O 000”
9. Use the ◄, ►, ▲, 0 ~ 9 keys to set I/O SET value.
10. Press the key to confirm.
11. To continue with other setups use the ► key.
12. To exit menu and return back to weighing mode, press the key.
UF-3 Auto Power-off
Modes:
- AoFF 00 – Auto Power-off disable
- AoFF 01 – The scale turns off automatically in 1 minute when the scale is not in
operation and weight at 0.
Auto power-off timer up to 99 minutes (AoFF01~AoFF99), the factory default is
AoFF10 (10 minutes)
1. Press the key to setup Auto Power-off.
2. Use ◄, ►, ▲, 0 ~ 9 keys to enter Auto Power-off time.
3. Press the key to confirm.
4. To continue with other setups use the ► key.
5. To exit menu and return back to weighing mode, press the key.
UF-4 Backlight
Modes:
- Lit Off: Backlight off
- Lit A: Auto light up
- Lit on: Backlight on
Factory default is: Lit A (automatical)
1. Press the key to access the backlight setup.
2. Use the ▲ key to select the desired mode.
3. Press the key to confirm.
4. To continue with other setups use the ► key.

12
5. To exit menu and return back to weighing mode, press the key.
UF-5 Function HOLD (keep displaying the weight on the screen during several
seconds after having removed the weight from the scale)
Modes:
- HOLD 0 : HOLD Function off.
- HOLD 1 : Animal Hold function.
- PCtXXX: To set the range from 001~100 of the animal hold
- timEXX: To set 1 2 4 8 16 32 64 times within the hold range (for HOLD 1 only)
Factory default: HOLD 0
1. Press the to setup the HOLD function.
2. Use the ▲ key to select the desired mode.
3. Press the key to confirm.
4. To continue with other setups use the ► key.
5. To exit menu and return back to weighing mode, press the key.
UF-5 RS-232 Output
232 0 RS-232 disable
232 1 Stable Output – Format 1
232 2 Stream Output – Format 1
232 3 Manual Output – Format 1
232 4 Stable Output – Format 2
232 5 Stream Output – Format 2
232 6 Manual Output – Format 2
RS232 Baud rate:
b 1200 Baud rate 1200
b 2400 Baud rate 2400
b 4800 Baud rate 4800
b 9600 Baud rate 9600
b 19200 Baud rate 19200
b 38400 Baud rate 38400
Communication Protocol:
UART signal of EIA-RS232 C
Format:
1. Serial output: 1200/2400/4800/9600/19200/38400 BPS
2. Data Bits: 8 bits
3. Parity Bits: None
4. Stop Bits: 1 bit

13
Start bit
D
a
ta
bi
ts Stop
bi
t
s
FORMAT 1 (232 1~3)
Head 1 (2 bytes)
Head 2 (2 bytes)
OL – Over Load
ST – Stable
NT – Net Weight
US - Unstable
GS – Gross Weight
Fixed 18 BYTES ASCII (kg g t lb)
1
2
1
1
2
1
1
2
3
4
5
6
7
8
1
2
1
2
H
E
AD1
,
H
E
AD2
,
DA
T
A U
N
IT
CR
LF
Fixed 21 BYTES ASCII (tl. T lboz)
1 21 1 2112345 6 789 1 2 3412
H
E
AD1
,
H
E
AD2
,
DA
T
A U
N
IT
CR
L
F
Fixed 19 BYTES ASCII (pcs)
1
2
1
1
2
1
1
2
3
4
5
6
7
8
1
2
3
1
2
H
E
AD1
,
H
E
AD2
,
DA
T
A U
N
IT
CR
L
F

Output examples:
Example 1.
+
0.876
k
g
Stable net weight
:
S
T
,
N
T
,
+
0
0
0
.
8
7
6
k
g
0D
0A
Example 2
-
1.568
lb
unstable gross weight
:
U
S
,
G
S
,
-
0
0
1
.
5
6
8
l
b
0D
0A
Example 3
-
20. 5.40
lb
o
z
unstable gross weight
:
S
T
,
G
S
,
-
1
0
﹒
0
5
﹒
4
0
l
b
o
z
0
D
0
A
Example 4
+
1000
p
c
s
stable net weight
:
S
T
,
N
T
,
+
0
0
0
1
0
0
0
p
c
s
0D
0A
F
or
mat
2 (232 4
~
6)
:
12
B
Y
T
E
S
ASC
II
(
k
g
g
t
lb
)
1
2
3
4
5
6
7
8
1
2
1
2
Data Unit
CR
LF
15
B
Y
T
E
S
ASC
II
(
t
l.
T
lbo
z)
1
2
3
4
5
6
7
8
9
1
2
3
4
1
2
Datos Unit
CR
LF
13
B
Y
T
E
S
ASC
II
(
p
c
s
)
1 2 3 4 5 6 7 8 1 2 3 1 2
Datos Unit
CR
L
F
Output examples:
Example1.
+
0.876
k
g
stable net weight
:
+
0
0
0
.
8
7
6
k
g
0D
0A
Example 2.
-
1.568
lb
unstable gross weight
:
-
0
0
1
.
5
6
8
l
b
0D
0A
Example 3.
-
20. 5.40
lb
o
z
unstable gross weight
:
-
1
0
﹒
0
5
﹒
4
0
l
b
o
z
0D
0A
Example 4.
+
1000
p
c
s
:
stable net weight
:
+
0
0
0
1
0
0
0
p
c
s
0D
0A

15
UF-6 Transmission Format RS-232
1. Press the key.
2. Use the ▲ key to select the desired mode and press the key.
3. Use the ▲ key to select baud rate and the key to confirm.
4. To continue with other setups use the ► key.
5. To exit menu and return back to weighing mode, press the key.
UF-7 ADC Update Rate
SPEEd 1 Standard speed 15 hz
SPEEd 2 High Speed 30 hz
SPPEd 3 Low speed 7.5 hz
• This function is locked when the function HOLD is set as HOLD 1
Factory default: SPEEd 1
1. Press the key to start setting up.
2. Use the ▲ to select the desired ADC speed.
3. To continue with other setups use the ► key.
4. To exit menu and return back to weighing mode, press the key.
UF-8 Zero Weight Display Condition
ZP 0 Function Off
ZP 1 1 division not to display at zero
ZP 2 2 divisions not to display at zero
ZP 3 3 divisions not to display at zero
ZP 4 4 divisions not to display at zero
ZP 5 5 divisions not to display at zero
• This function is locked when the function HOLD is set as HOLD 1
Factory default: ZP 0

16
1. Press the key to access the setting up.
2. Use the ▲ key to select the desired mode.
3. Press the key to confirm.
4. To continue with other setups use the ► key.
5. To exit menu and return back to weighing mode, press the key.
UF-9 Standard Gravitational Pre-calibration (G Value)
Even the scale allows doing the Standard Calibration, Gravitational Calibration can
help to provide higher accuracy to the scale. This pre-calibration is allowed when the
switch CAL is at ADJ position. Gravitational value will be saved at -00- and will be
replaced each time a new value has been entered.
Sender G value: set it before Weight Calibration
Recipient G value: set if after Weight Calibration
The G value will be denied when the value is greater than 9.83217 (Polar G value) or
less than 9.78031 (Equator G value)
Factory Default: 9.79423
1. Press the key to setup.
2. Le display will show the last value for 1 second.
3. Use ◄, ► keys to see previous entered values. The display will stay at 00 if no
value has been entered.
4. The display will show the last value for 1 second.
5. Use ◄, ► keys to see previous entered values. The display will stay at 00 if no
value has been entered.
6. Press the key.
7. Use ◄, ►, ▲, 0 ~ 9 keys to enter the desired value.
8. Press the key.
9. Press the ► key to continue with other setups or the key to exit and return
back to normal weighing mode.

17
GUARANTEE
This scale is guaranteed for one year from the delivery date. Te guarantee covers any
fabrication defect of the material.
During this period GRAM PRECISION, covers the manpower and the spare parts for
the reparation of the scale.
This guarantee does not cover the failures caused by an inappropriate use or
overcharge.
The guarantee does not cover the freight cost (transport) necessary to repair the
scale.

18
INDICE
Alimentación, consumo y batería recargable
19
Visualización de la versión de la balanza
19
Descripción del display
20
Descripción del teclado
20
Función de la teclas
20
Predeterminar el valor de una Tara
22
Predeterminar el valor del límite superior
22
Predeterminar el valor del límite inferior
22
Configuración de la función límites de peso
23
Acumulación de pesadas
23
Introducción de la muestra para función cuentapiezas
24
Función cuentapiezas
24
Calibración
24
Configuración de funciones
25
- Valor interno
25
- Límites de peso
26
- Autodesconexión
26
- Iluminación del display
26
- Función HOLD
27
- Salida RS-232
27
- Configuración del cero
30
Pre-Calibración de la Gravedad
31
Garantía
32
Declaración de Conformidad CE
47

19
ALIMENTACION
Entrada: 100
~
240V 50/60
h
z
Salida: 12
V/
1A D
C
12
W
Batería recargable: 6
V/
4AH
CONSUMO
Apro
x.
12
m
A
Apro
x.
36
m
A con la iluminación interna del display
Apro
x.
48
m
A con la iluminación interna del display y el interface RS-232 (opcional)
DURACION DE LA BATERIA
Apro
x.
320
horas
, con la iluminación del display desactivada
VISUALIZACION DEL NUMERO DE VERSION DE LA BALANZA
5. Conectar la balanza.
6. Pulsar y mantener la tecla ZERO hasta que la cuenta-atrás inicial finalice.
7. El display mostrará el mensaje “1001”. Este número es el número de versión
de la balanza.
8. Liberar la tecla y la balanza inicializará la configuración de funciones.
DESCRIPCION DEL DISPLAY

20
DESCRIPCION DEL TECLADO
FUNCION DE LAS TECLAS
Para apagar la balanza, mantener pulsada la tecla OFF hasta que el
display visualice “Off” durante 2 segundos.
Pulsar esta tecla para conectar la balanza.
Función 1. Para seleccionar la unidad de pesada deseada.
Función 2. Para salir del modo programación.
Función 1. Para poner a cero la lectura del display, siempre y cuando el
valor del peso sea menor al
±
2% de la capacidad máxima.
Función 2. Para desplazarse hacía la izquierda ó hacía abajo dentro del
modo de programación.
Función 1. Para sustraer el peso de un recipiente u objeto.
Función 2. Para desplazarse hacía la derecha ó hacía arriba dentro del
modo de programación.
Función 1. Para visualizar el peso bruto ó neto tras efectuar una Tara.
Cuando el display muestra el peso bruto, las demás teclas
quedan inactivas.
Función 2. Para incrementar los valores introducidos en el modo
programación.
Función 1. Para seleccionar el modo de iluminación interna del display.
Función 2. Actúa cómo el número 2 dentro del modo de programación.
This manual suits for next models
3
Table of contents
Languages:
Other Gram Scale manuals

Gram
Gram K3 SERIES User manual

Gram
Gram FH 100 User manual

Gram
Gram CR-30 User manual

Gram
Gram GEC Series User manual

Gram
Gram Xtrem F User manual

Gram
Gram AC 500 Series Installation manual

Gram
Gram SILK ISLAND User manual

Gram
Gram AHV Series User manual

Gram
Gram SBZ-600 User manual

Gram
Gram AHV Series User manual
Popular Scale manuals by other brands

cecotec
cecotec SURFACE PRECISION 9500 SMARTH HEALTHY instruction manual

Drive DeVilbiss Healthcare
Drive DeVilbiss Healthcare Bambus user manual

Gallagher
Gallagher SmartScale 700 user manual

Doran
Doran 300 Quick start user guide

Rice Lake
Rice Lake 350-10-8S Technical manual

Goddess
Goddess SCA 619 instruction manual