manuals.online logo
Brands
  1. Home
  2. •
  3. Brands
  4. •
  5. GRAPHTEC
  6. •
  7. Plotter
  8. •
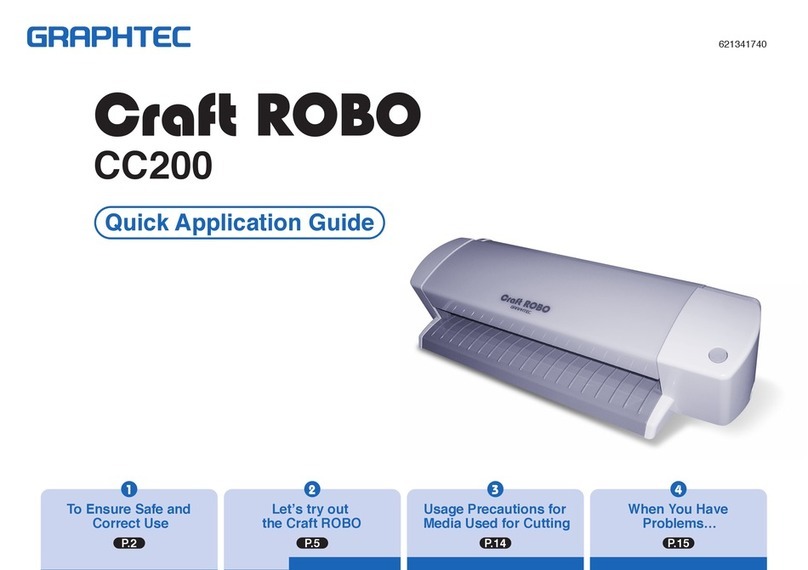
  9. GRAPHTEC Craft ROBO CC200 User manual

GRAPHTEC Craft ROBO CC200 User manual

PREFACE
PREFACE CH 1. PRIOR TO USE
CH 1. PRIOR TO USE
CH 3. CRAFT ROBO CONTROLLER
INDEX
INDEX
CONTENTS
CONTENTS
CH 2. CONNECTION AND PREPARATION
Appendix A. Standard Specifications
USER’S MANUAL
MANUAL NO. CC200m-UM-152
CC200
Preface i
PREFACE
PREFACE CH 1. PRIOR TO USE
CH 1. PRIOR TO USE
CH 3. CRAFT ROBO CONTROLLER
INDEX
INDEX
CONTENTS
CONTENTS
CH 2. CONNECTION AND PREPARATION
Appendix A. Standard Specifications
PREFACE
Thank you for purchasing the Craft ROBO CC200.Based on cutting-plotter technology developed by
Graphtec over many years, CC200 provides outstanding flexibility in operation. It can be used for cutting
heavy cardstock, paper and sticker film as well as pen plotting. Please read this manual thoroughly and
assure proper use of the equipment.
Warning
Only computers or peripherals (computer input/output devices, terminals, printers, etc.) certified as
complying with the limits for a Class B digital device, pursuant to Part 15 of the FCC Rules, may be attached
to this product when this product is operated in a residential environment. Operation with non-certified
peripherals is likely to result in interference to radio and TV.
Federal Communications Commission Radio Frequency Interference Statement
"This equipment has been tested and found to comply with the limits for a Class B digital device pursuant to
Part 15 of the FCC Rules.These limits are designed to provide reasonable protection against harmful
interference in a residential installation.This equipment generates, uses, and can radiate radio frequency
energy and, if not installed and used in accordance with the instructions, may cause harmful interference to
radio communications. However, there is no guarantee that interference will not occur in a particular
installation. If this equipment does cause harmful interference to radio or television reception, which can be
determined by turning the equipment off and on, the user is encouraged to try to correct interference by one
or more of the following measures:
• Reorient or relocate the receiving antenna.
• Increase the separation between the equipment and receiver.
• Connect the equipment into an outlet on a circuit different from that to which the receiver is connected.
• Consult the dealer or an experienced radio/TV technician for help."
Notes on this Manual
(1) No part of this publication may be reproduced, stored in a retrieval system, or transmitted, in any form or
by any means, without the prior written permission of Graphtec Corporation.
(2) The product specifications and other information in this manual are subject to change without notice.
(3) While every effort has been made to provide complete and accurate information, please contact your
sales representative or nearest Graphtec vendor if you find any unclear or erroneous information or wish
to make other comments or suggestions.
(4) Notwithstanding the stipulations in the preceding paragraph, Graphtec Corporation assumes no liability
for damages resulting from either the use of the information contained herein or the use of the product.
RegisteredTrademarks
All names of companies, brands, logotypes, and products appearing in this manual are the trademarks or
registered trademarks of their respective companies.
Copyright
This User's Manual is copyrighted by Graphtec Corporation.
ii Contents
PREFACE
PREFACE CH 1. PRIOR TO USE
CH 1. PRIOR TO USE
CH 3. CRAFT ROBO CONTROLLER
INDEX
INDEX
CONTENTS
CONTENTS
CH 2. CONNECTION AND PREPARATION
Appendix A. Standard Specifications
CONTENTS
PREFACE
Warning ...........................................................................................................................................i
Federal Communications Commission Radio Frequency Interference Statement ..................i
Notes on this Manual......................................................................................................................i
RegisteredTrademarks ..................................................................................................................i
Copyright.........................................................................................................................................i
CHAPTER 1. PRIORTO USE
1.1 Check All the Items.................................................................................................................... 1-1
1.2 Craft ROBO Parts and Functions ............................................................................................. 1-2
CHAPTER 2. CONNECTION AND PREPARATION
2.1 Connecting andTurning on the Power .................................................................................... 2-1
2.2 Connecting to a Computer........................................................................................................ 2-2
2.3 Loading Media............................................................................................................................ 2-3
Media loading method............................................................................................................... 2-3
Allowable cutting area............................................................................................................... 2-5
2.4 Carrier Sheet .............................................................................................................................. 2-7
Using the carrier sheet.............................................................................................................. 2-7
Allowable cutting area of the carrier sheet ............................................................................. 2-9
2.5 Adjusting and Mounting the Blade Holder ............................................................................ 2-10
Blade holder construction ...................................................................................................... 2-10
Blade adjustment caps and media selection ........................................................................ 2-10
Changing the blade adjustment cap ...................................................................................... 2-11
Mounting the blade holder...................................................................................................... 2-12
2.6 Mounting a ballpoint pen ........................................................................................................ 2-13
Acceptable ballpoint pens ...................................................................................................... 2-13
Mounting the ballpoint pen..................................................................................................... 2-14
2.7 What to Do ifThis Happens .................................................................................................... 2-15
CHAPTER 3. CRAFT ROBO CONTROLLER
3.1 System Requirements ............................................................................................................... 3-1
3.2 Installing the Craft ROBO Controller ....................................................................................... 3-2
Starting up the [Start] window ................................................................................................. 3-2
Installing the Craft ROBO Controller ....................................................................................... 3-2
3.3 Starting up the Craft ROBO Controller .................................................................................... 3-4
3.4 Craft ROBO Controller Operations .......................................................................................... 3-6
Cutting your design................................................................................................................... 3-6
Printing your design on a printer, and then using the Craft ROBO to cut it ........................ 3-6
Test Plotting ............................................................................................................................... 3-7
Performing a test cut and creating a MediaType setting....................................................... 3-8
3.5 Craft ROBO Controller Settings ...............................................................................................3-9
3.6 Error Messages........................................................................................................................ 3-18
APPENDIX
Appendix A. Standard Specifications ................................................................................................A-1
INDEX......................................................................................................................................................... I-1
CHAPTER 1. PRIORTO USE 1-1
PREFACE
PREFACE CH 1. PRIOR TO USE
CH 1. PRIOR TO USE
CH 3. CRAFT ROBO CONTROLLER
INDEX
INDEX
CONTENTS
CONTENTS
CH 2. CONNECTION AND PREPARATION
Appendix A. Standard Specifications
CHAPTER 1. PRIORTO USE
1.1 Check All the Items
Referring to the list below, check to confirm that all the components are included with your product.If any
item is missing, please contact your place of purchase.
AC adapter, Power cable ....1 set USB cable ....1
Quick Start Instructions ....1Craft ROBO Software CD-ROM ....1
Carrier sheet ....1
Blade holder (with blade adjustment caps) ....1 set
Quick Application Guide ....1
Ballpoint pen holder ....1
Blade adjustment caps 
(blue, yellow and red)
MediaTrial Kit ....1
Note: One of the blade adjustment
caps is attached to the blade
holder.
AC adapter, Power cable, USB cable, Craft ROBO Software CD-ROM, Quick Start Instructions,
Quick Application Guide, Carrier sheet, Blade holder, Ballpoint pen holder, Media Trial Kit
1-2 CHAPTER 1. PRIORTO USE
PREFACE
PREFACE CH 1. PRIOR TO USE
CH 1. PRIOR TO USE
CH 3. CRAFT ROBO CONTROLLER
INDEX
INDEX
CONTENTS
CONTENTS
CH 2. CONNECTION AND PREPARATION
Appendix A. Standard Specifications
1.2 Craft ROBO Parts and Functions
Craft ROBO (CC200)
Feed knob
Clamp bracket
Standby switch
USB interface connector
AC adapter jack
Media roller
Pinch roller
Guideline
Front guide
Cutting Head
Cutting mat
Cutting head ................. Drives the blade holder/pen holder to the left or right
Clamp bracket .............. Holds the blade holder/pen holder and drives it up or down
Standby switch............. Turns the power supply to the Craft ROBO on and off.When the power supply is
on, the switch's lamp lights blue.
Feed knob ..................... Used to manually feed the media back and forth
USB interface connector
............................. Used for connecting the USB cable
AC adapter jack ............ Used for connecting the AC adapter cable
Cutting mat ................... Cutting or plotting is performed on this surface
Pinch rollers ................. Hold the media in place against the media rollers
Media rollers ................. Move the media back and forth
Front guide ................... Used as the work surface
Guideline....................... Used as a guide when media is loaded
CHAPTER 2. CONNECTION AND PREPARATION 2-1
PREFACE
PREFACE CH 1. PRIOR TO USE
CH 1. PRIOR TO USE
CH 3. CRAFT ROBO CONTROLLER
INDEX
INDEX
CONTENTS
CONTENTS
CH 2. CONNECTION AND PREPARATION
Appendix A. Standard Specifications
CHAPTER 2. CONNECTION AND PREPARATION
2.1 Connecting andTurning on the Power
Use the AC adapter and the power cable provided with the Craft ROBO to connect the AC adapter jack on
the Craft ROBO to an AC outlet of the rated voltage, and then turn on the power.
CHECKPOINT
Always connect the AC adapter to the AC adapter jack before connecting the power cable to the AC
outlet.
(1) Connect the power cable (included with the AC adapter) to the AC adapter.
(2) Plug the AC adapter cable into the AC adapter jack of the Craft ROBO.
(3) Plug the other end of the power cable into the AC outlet.
(1)
(2)
(3)
(4) Press the standby switch to turn on the power.
When the Craft ROBO is in power-on status, the lamp on the switch is lit blue.
When the Craft ROBO is in power-off status, the lamp on the switch is extinguished.
2-2 CHAPTER 2. CONNECTION AND PREPARATION
PREFACE
PREFACE CH 1. PRIOR TO USE
CH 1. PRIOR TO USE
CH 3. CRAFT ROBO CONTROLLER
INDEX
INDEX
CONTENTS
CONTENTS
CH 2. CONNECTION AND PREPARATION
Appendix A. Standard Specifications
2.2 Connecting to a Computer
The USB interface connectors are used to connect the Craft ROBO to a computer.
Use the USB cable provided with the Craft ROBO to connect the Craft ROBO to a computer.
CHECKPOINT
• The software for the Craft ROBO must be installed before the Craft ROBO is connected to a
computer.(See Chapter 3.3, "Installing the Craft ROBO Controller".)
• Do not connect the USB cable until instructed to do by an on-screen prompt.
The USB cable has different plug shapes on the computer side and the Craft ROBO side. Always
check which plug connects to which side.
CHECKPOINT
• Do not connect two or more Craft ROBO units to one computer.
•Do not connect the Craft ROBO and a Graphtec plotter to a computer at the same time.If
you do so, the Craft ROBO may not operate properly.
CHAPTER 2. CONNECTION AND PREPARATION 2-3
PREFACE
PREFACE CH 1. PRIOR TO USE
CH 1. PRIOR TO USE
CH 3. CRAFT ROBO CONTROLLER
INDEX
INDEX
CONTENTS
CONTENTS
CH 2. CONNECTION AND PREPARATION
Appendix A. Standard Specifications
2.3 Loading Media
Media loading method
(1) Press the standby switch to turn on the power, and confirm that the lamp on the standby switch
is lit (blue).
(2) Load the sheet in the Craft ROBO.
Align the left edge of the sheet with the vertical guideline indented on the front guide.Place the
top edge of the sheet against both pinch rollers, making sure that the sheet is straight.
CHECKPOINT
If a sheet wider than 210 mm is loaded, the guideline will be covered by the sheet.
However, if the sheet is loaded so that its top edge touches and is parallel to both the
pinch rollers, it will be straight.
To ensure that the loaded sheet is straight,
align the left edge of the sheet with the 
guideline indented on the front guide.
Place the top edge of the sheet against 
both pinch rollers.
Guideline indented
on the front guide
If you are using media that is not A4 size, please follow the instructions given below.
•If the media size is smaller than A4 size
Use the carrier sheet. (Please see Section 2.4, "Carrier Sheet".)
•If the media width is between 210 and 260 mm
If the width of the sheet is between 210 and 260 mm, the only types of media that can be
loaded are vinyl film or tack paper.
•If the media length is between 297 and 1000 mm
The accuracy specification is guaranteed for sheets that measure 210 x 297 mm, but if the
media is film (with a thickness of 0.1 mm or less, and 0.3 mm or less including the backing
sheet), lengths up to 1000 mm can be loaded.
2-4 CHAPTER 2. CONNECTION AND PREPARATION
PREFACE
PREFACE CH 1. PRIOR TO USE
CH 1. PRIOR TO USE
CH 3. CRAFT ROBO CONTROLLER
INDEX
INDEX
CONTENTS
CONTENTS
CH 2. CONNECTION AND PREPARATION
Appendix A. Standard Specifications
(3) Turn the feed knob in the direction toward the rear of the Craft ROBO to feed the sheet until its
top edge is aligned with the rear edge of the cutting mat, or with the indented guideline located
next to the cutting mat.
Feed knob Cutting mat
Guideline located next
to the cutting mat
If the top edge of the sheet curls up and catches on the Craft ROBO, turn the feed knob in the
direction toward the rear of the Craft ROBO to align the top edge of the sheet with the indented
guidelines located behind the cutting mat. Please note, however, that the cutting area will be
reduced by 5 mm in the media feed direction.
Feed knob Cutting mat
Guidelines located
behind the cutting mat
CHAPTER 2. CONNECTION AND PREPARATION 2-5
PREFACE
PREFACE CH 1. PRIOR TO USE
CH 1. PRIOR TO USE
CH 3. CRAFT ROBO CONTROLLER
INDEX
INDEX
CONTENTS
CONTENTS
CH 2. CONNECTION AND PREPARATION
Appendix A. Standard Specifications
Allowable cutting area
Make sure that your design fits within the allowable cutting area.The allowable cutting area varies
according to the size of the media and the mode you select.
If the media size is smaller than A4 size
Use the carrier sheet. (See Section 2.4, "Carrier Sheet".)
If the media is A4 size
Standard mode:The width of the allowable cutting area is 190 mm.
Expanded mode:The width of the allowable cutting area is 200 mm.
If registration marks are used, the allowable width is 190 mm.
CHECKPOINT
•To change the mode from Standard to Expanded or vice versa, click "Properties" in the
"Print" window and then select the desired mode in "Margin Settings" on the "Basic
Settings" tab.The default setting is "Standard" mode.
• Align the left and right edges with the vertical guidelines, making sure that the sheet is
straight.
Allowable 
cutting area
Allowable 
cutting area Media
190mm 200mm
Standard mode Expanded mode
5mm
20mm
Allowable 
cutting area
Allowable 
cutting area
10mm 10mm 5mm 5mm
5mm
20mm
If the media width is between 210 and 260 mm
Even if the width of the sheet is larger than 210 mm, the allowable width is the same as that for an
A4 size sheet (190 mm in Standard mode and 200 mm in Expanded mode).
Standard mode:The width of the allowable cutting area is 190 mm.
Expanded mode:The width of the allowable cutting area is 200 mm.
If registration marks are used, the allowable width is 190 mm.
CHECKPOINT
•To change the mode from Standard to Expanded or vice versa, click "Properties" in the
"Print" window and then select the desired mode in "Margin Settings" on the "Basic
Settings" tab.The default setting is "Standard" mode.
• Align the left and right edges with the vertical guidelines, making sure that the sheet is
straight.
2-6 CHAPTER 2. CONNECTION AND PREPARATION
PREFACE
PREFACE CH 1. PRIOR TO USE
CH 1. PRIOR TO USE
CH 3. CRAFT ROBO CONTROLLER
INDEX
INDEX
CONTENTS
CONTENTS
CH 2. CONNECTION AND PREPARATION
Appendix A. Standard Specifications
If the media length is between 297 and 1000 mm
Standard mode:The width of the allowable cutting area is 190 mm.
Expanded mode:The width of the allowable cutting area is 200 mm.
If registration marks are used, the allowable width is 190 mm.
CHECKPOINT
•To change the mode from Standard to Expanded or vice versa, click "Properties" in the
"Print" window and then select the desired mode in "Margin Settings" on the "Basic
Settings" tab.The default setting is "Standard" mode.
• Align the left and right edges with the vertical guidelines, making sure that the sheet is
straight.
Media
190mm 200mm
Standard mode Expanded mode
5mm
20mm
10mm 10mm 5mm 5mm
5mm
20mm
Allowable 
cutting area
Allowable 
cutting area Allowable 
cutting area
Allowable 
cutting area
CHAPTER 2. CONNECTION AND PREPARATION 2-7
PREFACE
PREFACE CH 1. PRIOR TO USE
CH 1. PRIOR TO USE
CH 3. CRAFT ROBO CONTROLLER
INDEX
INDEX
CONTENTS
CONTENTS
CH 2. CONNECTION AND PREPARATION
Appendix A. Standard Specifications
2.4 Carrier Sheet
Using the carrier sheet
The carrier sheet allows media smaller than A4 size and media without a backing sheet (liner) to be
cut.
CHECKPOINT
• Always be sure to use the carrier sheet when cutting right through media.
• The carrier sheet is reusable, and so it can be used repeatedly.When its adhesive power
becomes weak, however, replace it with a new carrier sheet.
• The carrier sheet is a consumable. Replace it after cutting approximately 10 sheets.
Using a carrier sheet for more than 10 sheets may cause misaligned cutting or other
problems. Be sure to replace it with a new carrier sheet after cutting 10 sheets.
• Pulling on the carrier sheet to remove it from the Craft ROBO may shorten its lifetime or
cause misaligned cutting. Be sure to use the feed knob to remove the media.(If you use
the Eject Media function, the media will automatically be ejected to the front of the Craft
ROBO after the cutting operation has been completed. For further details, please refer to
the ROBO Master User's Manual.)
Using the carrier sheet for media with a width of 190 mm or smaller
CHECKPOINT
Do not use media smaller than postcard size (100 x 148 mm).
(1) Peel off only the inside liner of the carrier sheet, so that the adhesive surface is visible. (Do not
peel off the liner strips on both sides.)
Liner
Peel off only the inside liner.
(2) Press the media onto the adhesive surface of the carrier sheet.
CHECKPOINT
• When pressing the media onto the adhesive surface, be careful not to cause air
bubbles or wrinkles in the media.
• Make sure that the edges of the media are parallel to the edges of the carrier sheet.
Adhesive surface
Media
Carrier sheet
2-8 CHAPTER 2. CONNECTION AND PREPARATION
PREFACE
PREFACE CH 1. PRIOR TO USE
CH 1. PRIOR TO USE
CH 3. CRAFT ROBO CONTROLLER
INDEX
INDEX
CONTENTS
CONTENTS
CH 2. CONNECTION AND PREPARATION
Appendix A. Standard Specifications
Using the carrier sheet for media from 191 to 210 mm in width (equivalent to ISO A4 size)
CHECKPOINT
Do not use media that is wider than 210 mm with the carrier sheet.
(1) Peel off the inside liner and the liner strips on both sides of the carrier sheet, so that the entire
adhesive surface is visible.
Liner
Peel off the inside liner and the liner strips 
on both sides of the carrier sheet.
(2) Press the media onto the adhesive surface of the carrier sheet.
CHECKPOINT
• When pressing the media onto the adhesive surface, be careful not to cause air
bubbles or wrinkles in the media.
•Make sure that all of the media is pressed down.
• Make sure that the edges of the media are parallel to the edges of the carrier sheet.
Adhesive surface
Media
Carrier sheet
CHAPTER 2. CONNECTION AND PREPARATION 2-9
PREFACE
PREFACE CH 1. PRIOR TO USE
CH 1. PRIOR TO USE
CH 3. CRAFT ROBO CONTROLLER
INDEX
INDEX
CONTENTS
CONTENTS
CH 2. CONNECTION AND PREPARATION
Appendix A. Standard Specifications
Allowable cutting area of the carrier sheet
The allowable cutting area of the carrier sheet is shown in the diagram below.
When using media smaller than A4 size, always affix the media within the allowable cutting area. In
addition, make sure that the edges of the media are parallel to the edges of the carrier sheet.
CHECKPOINT
Do not use media smaller than postcard size (100 x 148 mm).
Allowable 
cutting area
Allowable 
cutting area
Media
190mm
5mm
20mm
10mm 10mm
2-10 CHAPTER 2. CONNECTION AND PREPARATION
PREFACE
PREFACE CH 1. PRIOR TO USE
CH 1. PRIOR TO USE
CH 3. CRAFT ROBO CONTROLLER
INDEX
INDEX
CONTENTS
CONTENTS
CH 2. CONNECTION AND PREPARATION
Appendix A. Standard Specifications
2.5 Adjusting and Mounting the Blade Holder
The blade adjustment cap controls the blade length.To obtain optimum cutting results, select the blade
adjustment cap for the blade holder to suit the type of media to be cut.
Caution
When handling the cutter blade, take care not to cut your hands.
Blade holder construction
The blade holder consists of a holder to which a cap containing a blade is attached.The length of
the blade protruding from the cap can be adjusted by selecting one of the three available blade
adjustment caps.
Select the blade adjustment cap best suited for the media you plan to use.
Holder
Blade adjustment cap 
• Blue:Thin film
•Yellow:Thick film, thin paper
• Red:Thick paper such as a postcard
Blade
Blade adjustment caps and media selection
Select and attach the blade adjustment cap best suited to the media you plan to use.To prevent
damage to the cutting mat, the length of the blade protruding from the cap should not exceed the
thickness of the media.
Caution
When handling the cutter blade, take care not to cut your hands.
Selection guide for blade adjustment caps
Cap Media Protruding blade length
(approx.)
Blue Thin film 0.1 mm
Yellow Thick film, thin media 0.2 mm
Red Thick media such as postcards 0.3 mm
CHAPTER 2. CONNECTION AND PREPARATION 2-11
PREFACE
PREFACE CH 1. PRIOR TO USE
CH 1. PRIOR TO USE
CH 3. CRAFT ROBO CONTROLLER
INDEX
INDEX
CONTENTS
CONTENTS
CH 2. CONNECTION AND PREPARATION
Appendix A. Standard Specifications
Changing the blade adjustment cap
To prevent damage to the cutting mat, the length of the blade protruding from the cap should not
exceed the thickness of the media.
Caution
When handling the cutter blade, take care not to cut your hands.
The blade adjustment cap is a screw-on type.
(1) Turn the cap in the counterclockwise direction to remove it.
(2) Replace it with the correct blade adjustment cap.
(3) Turn the cap in the clockwise direction to tighten it.
Holder
Loosen
Tighten
Blade adjustment cap
Assuming that the media thickness is "t", as shown in the figure below, the blade length "l" should
be equal to or slightly greater than " t ".Make sure that "rr
rr
r" is never greater than the combined
thickness of the media and its backing sheet.If it is not possible to accurately determine the media
thickness, perform a cutting test for each blade adjustment cap in the order of blue, yellow, and red.
The most suitable cap is the one where only faint traces of the blade appear on the backing sheet
after the cutting test has been performed.
t
Media
Backing sheet
2-12 CHAPTER 2. CONNECTION AND PREPARATION
PREFACE
PREFACE CH 1. PRIOR TO USE
CH 1. PRIOR TO USE
CH 3. CRAFT ROBO CONTROLLER
INDEX
INDEX
CONTENTS
CONTENTS
CH 2. CONNECTION AND PREPARATION
Appendix A. Standard Specifications
Mounting the blade holder
Mount the blade holder that has had its protruding blade length adjusted (by selecting the most
suitable blade adjustment cap) in the Craft ROBO.
Caution
When handling the cutter blade, take care not to cut your hands.
CHECKPOINT
Be sure to grip the clamp bracket firmly when mounting or removing the blade holder.
(1) Turn the lock lever to the left (OPEN direction) to loosen the clamp bracket.
Lock lever
Loosen Tighten
If you are using media that does not require the carrier sheet, mount the blade holder while
making sure that the protrusion on the holder faces the front and that it is aligned with the
notch in the clamp bracket.
If you are using the carrier sheet, turn the protrusion on the holder 90 degrees to the right so
that it fits against the protrusion on the clamp bracket.
Protrusion on the holder
Protrusion on the clamp bracket
Notch in the clamp bracket
When using media without the carrier sheet When using the carrier sheet
Front
HolderHolder HolderHolder
Protrusion on the holderProtrusion on the holder
(2) Firmly insert the blade holder in the clamp bracket and then turn the lock lever to the right
(CLOSE direction) to tighten the clamp bracket.
Firmly insert the blade holder until this 
face contacts the clamp bracket.
Note: In the diagram below, the protrusion on
the holder is facing the front.
CHAPTER 2. CONNECTION AND PREPARATION 2-13
PREFACE
PREFACE CH 1. PRIOR TO USE
CH 1. PRIOR TO USE
CH 3. CRAFT ROBO CONTROLLER
INDEX
INDEX
CONTENTS
CONTENTS
CH 2. CONNECTION AND PREPARATION
Appendix A. Standard Specifications
2.6 Mounting a ballpoint pen
Acceptable ballpoint pens
The ballpoint pen holder accepts the following pen types:
(1) Cylindrical ballpoint pens: Up to 8.5 mm in diameter
(2) Hexagonal ballpoint pens:Up to 7.5 mm side-to-side
(3) The tips of both pen types must extend between 3 and 3.5 mm past the ballpoint pen holder's
opening.
Hexagonal
ballpoint pen
Cylindrical
ballpoint pen Ballpoint
pen holder
Thumb screw
Pen tip 3 to 3.5mm
7.5mm
φ8.5mm
2-14 CHAPTER 2. CONNECTION AND PREPARATION
PREFACE
PREFACE CH 1. PRIOR TO USE
CH 1. PRIOR TO USE
CH 3. CRAFT ROBO CONTROLLER
INDEX
INDEX
CONTENTS
CONTENTS
CH 2. CONNECTION AND PREPARATION
Appendix A. Standard Specifications
Mounting the ballpoint pen
Mount a ballpoint pen into the ballpoint pen holder and then mount the ballpoint pen holder in the
Craft ROBO's clamp bracket.
CHECKPOINT
When mounting the ballpoint pen holder, always align it with the notched part of the clamp
bracket.
(1) Loosen the thumbscrew on the ballpoint pen holder by turning it counterclockwise.
(2) Insert the ballpoint pen into the holder.
(3) Confirm that the tip of the ballpoint pen protrudes 3 - 3.5 mm from the holder.
(4) Tighten the thumbscrew by turning it clockwise.
(5) Turn the lock lever to the left (OPEN direction) to loosen the clamp bracket.
(6) Mount the ballpoint pen holder in the clamp bracket while making sure that the protrusion on
the holder faces the front and that it is aligned with the notch in the clamp bracket.
Ballpoint pen
Thumb screw
Tighten
Loosen
Ballpoint pen holder Tighten
Align with the notch.
(7) When the pen holder has been mounted, turn the lock lever to the right (CLOSE direction) to
tighten it.
CHAPTER 2. CONNECTION AND PREPARATION 2-15
PREFACE
PREFACE CH 1. PRIOR TO USE
CH 1. PRIOR TO USE
CH 3. CRAFT ROBO CONTROLLER
INDEX
INDEX
CONTENTS
CONTENTS
CH 2. CONNECTION AND PREPARATION
Appendix A. Standard Specifications
2.7 What to Do ifThis Happens
Thick or dense media like a photo paper may be cut when it is cut twice
• If you use "ROBO Master", CraftROBO cut media twice when you copy and paste the object at the
same place on the ROBO Master.
•If you use "Cutting Master 2 for Craft ROBO", you can set how many times cut at "Passes" on
Advanced Tab.
The blade no longer cuts cleanly
• If dirt or dust has adhered to the blade, remove the blade adjustment cap and then remove any
dirt from around the blade.
•Start up the Craft ROBO Controller, select the "Adjust Settings" check box, and then increase the
value by one in the "Thick" direction.
•Replace the cutter blade with a new one.
•Wipe the cutting head shaft with a lint-free cloth.
Shaft
An abnormal noise is generated with the power is turned on, and the cutting head
does not move smoothly.
•Wipe the cutting head shaft with a lint-free cloth.

Other manuals for Craft ROBO CC200

1

Other GRAPHTEC Plotter manuals

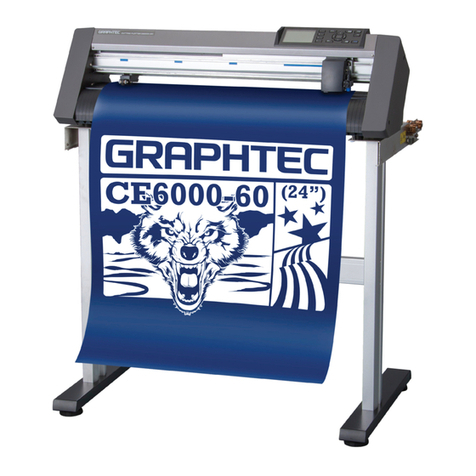
GRAPHTEC CE3000-40 User manual

GRAPHTEC

GRAPHTEC CE3000-40 User manual

GRAPHTEC FC8600-60 User manual

GRAPHTEC

GRAPHTEC FC8600-60 User manual

GRAPHTEC CE6000 SERIES User guide

GRAPHTEC

GRAPHTEC CE6000 SERIES User guide

GRAPHTEC CE5000-120AP User manual

GRAPHTEC

GRAPHTEC CE5000-120AP User manual

GRAPHTEC CE5000 SERIES User manual

GRAPHTEC

GRAPHTEC CE5000 SERIES User manual

GRAPHTEC FC7000 Series Manual

GRAPHTEC

GRAPHTEC FC7000 Series Manual

GRAPHTEC CE6000 SERIES User manual

GRAPHTEC

GRAPHTEC CE6000 SERIES User manual

GRAPHTEC CE6000 SERIES Operating and safety instructions

GRAPHTEC

GRAPHTEC CE6000 SERIES Operating and safety instructions

GRAPHTEC FC8600 SERIES User manual

GRAPHTEC

GRAPHTEC FC8600 SERIES User manual

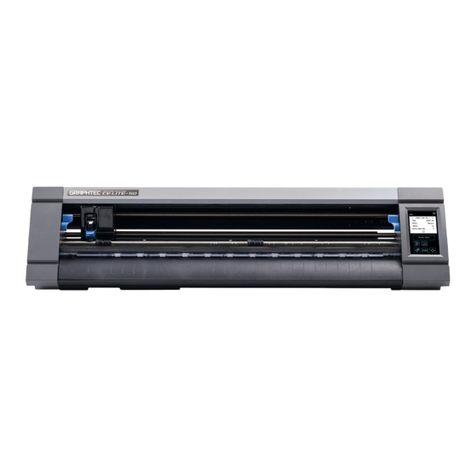
GRAPHTEC CELITE-50 User manual

GRAPHTEC

GRAPHTEC CELITE-50 User manual

GRAPHTEC FC8000 Series User manual

GRAPHTEC

GRAPHTEC FC8000 Series User manual

GRAPHTEC CE7000-40 User manual

GRAPHTEC

GRAPHTEC CE7000-40 User manual

GRAPHTEC Cutting PRO FC2230 Series User manual

GRAPHTEC

GRAPHTEC Cutting PRO FC2230 Series User manual

GRAPHTEC CE5000-60 User manual

GRAPHTEC

GRAPHTEC CE5000-60 User manual

GRAPHTEC FCX4000 SERIES User manual

GRAPHTEC

GRAPHTEC FCX4000 SERIES User manual

GRAPHTEC CE5000-40CRP User manual

GRAPHTEC

GRAPHTEC CE5000-40CRP User manual

GRAPHTEC FC9000-75 User manual

GRAPHTEC

GRAPHTEC FC9000-75 User manual

GRAPHTEC FC2250 Series User manual

GRAPHTEC

GRAPHTEC FC2250 Series User manual

GRAPHTEC CC300-20 Craft ROBO User manual

GRAPHTEC

GRAPHTEC CC300-20 Craft ROBO User manual

GRAPHTEC CE LITE-50 User manual

GRAPHTEC

GRAPHTEC CE LITE-50 User manual

GRAPHTEC LABERLROBO DLC1000 User manual

GRAPHTEC

GRAPHTEC LABERLROBO DLC1000 User manual

GRAPHTEC FC8000 Series User manual

GRAPHTEC

GRAPHTEC FC8000 Series User manual

GRAPHTEC FC4500 User manual

GRAPHTEC

GRAPHTEC FC4500 User manual

GRAPHTEC MP303-04 User manual

GRAPHTEC

GRAPHTEC MP303-04 User manual

Popular Plotter manuals by other brands

TE Connectivity AMS600 operating instructions

TE Connectivity

TE Connectivity AMS600 operating instructions

HP C2858A Service manual

HP

HP C2858A Service manual

Epson Stylus Pro 4880 Portrait Edition Guide

Epson

Epson Stylus Pro 4880 Portrait Edition Guide

Vinyl Express Qe60 user manual

Vinyl Express

Vinyl Express Qe60 user manual

CONTACLIP EMS-3eco operating instructions

CONTACLIP

CONTACLIP EMS-3eco operating instructions

MIMAKI CF3-1631 Operation manual

MIMAKI

MIMAKI CF3-1631 Operation manual

Canon iPF800 Series Service manual

Canon

Canon iPF800 Series Service manual

Anhui Liyu Computer Equipment Manufacturing TC Series user manual

Anhui Liyu Computer Equipment Manufacturing

Anhui Liyu Computer Equipment Manufacturing TC Series user manual

SignWarehouse.com Enduracut user guide

SignWarehouse.com

SignWarehouse.com Enduracut user guide

Summa TRAY ONE user manual

Summa

Summa TRAY ONE user manual

Evil Mad Scientist axidraw user guide

Evil Mad Scientist

Evil Mad Scientist axidraw user guide

MUTOH SC-PRO Important installation information

MUTOH

MUTOH SC-PRO Important installation information

US Cutter ZENCUT Black user manual

US Cutter

US Cutter ZENCUT Black user manual

Roland LEC-300 user manual

Roland

Roland LEC-300 user manual

Ioline Summit Service manual

Ioline

Ioline Summit Service manual

HP 7470A Interfacing and programming manual

HP

HP 7470A Interfacing and programming manual

HP 7470A Operator's manual

HP

HP 7470A Operator's manual

Vulcan-Hart FC-500VC Quick setup guide

Vulcan-Hart

Vulcan-Hart FC-500VC Quick setup guide

manuals.online logo
manuals.online logoBrands
  • About & Mission
  • Contact us
  • Privacy Policy
  • Terms and Conditions

Copyright 2025 Manuals.Online. All Rights Reserved.