manuals.online logo
Brands
  1. Home
  2. •
  3. Brands
  4. •
  5. Gruetzner
  6. •
  7. Lubrication System
  8. •
  9. Gruetzner G-LUBE 60 User manual

Gruetzner G-LUBE 60 User manual

5 6
User manual
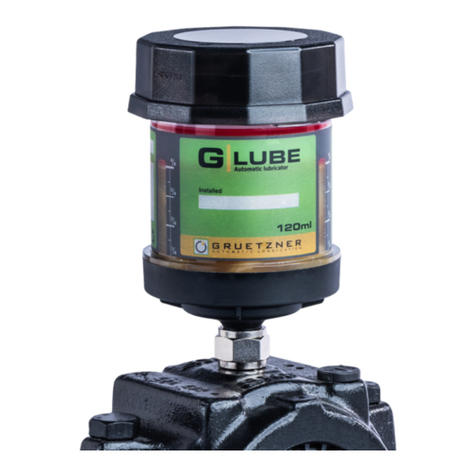
G-LUBE 60, 120, 240
3. Mounting
High backpressure can cause
a delay in dispensing. The
backpressure shall not exceed 5
bar (73 psi).
If the product is installed at a 45°
or 90° angle, please use an angle
adapter greater than or equal to
1/4" (diameter 6-8 mm).
Use a 6 mm (inner diameter) tube
for remote installations. Keep the
maximum distance at 0.5 m (1.5
feet).
G-LUBE is designed for single
point lubrication only. Direct
mounting is always preferred.
If the application does not
allow direct mounting, remotely
assemble the unit using appro-
priate accessories and keep the
distance from the lube point as
short as possible.
For remote installations use a 6 mm (inner diameter) tube pre-fi lled
with the same or compatible grease as the grease contained in the unit.
6. Product certifications
5. Dispensing volume chart
Dispensing
period
Dispensing volume/day
60 ml 120 ml 240 ml
1 month
2.00 ml 4.00 ml 8.00 ml
3 months
0.67 ml 1.33 ml 2.66 ml
6 months
0.33 ml 0.67 ml 1.33 ml
9 months
0.22 ml 0.44 ml 0.89 ml
12 months
0.17 ml 0.33 ml 0.67 ml
The output volume may vary due to unsettled outside infl uences such as
ambient temperature, atmospheric pressure, consistancy of lubricant or
tube lengths.
4. Important information
Certifi cations
• The maximum storage temperature should not exceed +40 °C
(+104 °F). Higher temperatures decrease the battery‘s lifespan. The
lubricator has to be activated within two years from receiving.
• Minimize tube resistances. Narrow passages and right angles
should be avoided.
• G-LUBE can be re-adjusted or switched off during operation.
• During operation of G-LUBE a visual inspection of G-LUBE as well
as of the lubrication point must be carried out regularly.
• G-LUBE may only be used to supply a single lubrication point.
No branches may be made. Once the lubricator is installed and
activated it must not be removed and mounted onto another
lubrication point.
• Product warranty is limited to original defects in material and
workmanship and does not cover any colleteral damage due
to mishandling, abuse and/or any other inappropriate use of
G-LUBE.
Gruetzner GmbH
Kohlenhofstr. 60 •90443 Nuremberg, GER • [email protected] • www.G-LUBE.com
ll 1 G Ex ia llC T4 Ga
INERIS 12ATEX0062X
-20°C ≤ Ta ≤ +55°C
2 3 4
56
1
2
3
4
6
5
7
9
10
8
12
4
89
7
10 11
12 13
3
WARNING
• Locations: intrinsically safe, SÉCURITÉ INTRINSÈQUE; Exia
• Potential electrostatic charging hazard. Clean with damp cloth
only.
• Do not change, replace or charge battery cells.
• Temp. code T4 : -25 ° C ≤ TA ≤ + 55 ° C
• Substitution of components may impair intrinsic safety
AVERTISSEMENT: LA SUBSTITUTION DE COMPOSANTS PEUT
COMPROMETTRE LA SÉCURITÉ INTRINSÈQUE
• If ignitable gases are present, only touch with an isolating object
or while wearing an electrostatic grounding device.
• To prevent ignition of fl amable or combustible atmospheres read,
understand and follow the instructions of this user manual.
Nr. Benennung
1 Housing cap
2 Mode selector
3 Thread 1/4" male
4 Battery cover
5 Battery
Nr. Benennung
6 Printed curcuit board
7 Piston
8 Lubricant reservoir
9 Funnel
10 Plug
1. Product details 2. Installation & disposal
Remove any contaminants
around the lube point.
The reliable operation depends on completely fi lled grease
lines. Ensure that the grease lines are not blocked. Therefore, grease
them before starting G-LUBE. Remove any hardened grease by purging
the lube point with a manual grease gun. The grease in the equipment
and the grease in the unit should be the same or compatible.
Ensure a clear passage using a
manual grease gun.
NOTE
Remove the plug.
The lubricator requires a certain start-up time until the
lubricant is fi rst dispensed. The start-up time varies in line with the
volume dispensed, dispenser size and operating temperature.
NOTE
Unscrew the housing cap
counterclockwise.
Note the installation date and
the scheduled date of lube cycle
completion on the label.
When the selected dispensing
period has been completed
remove the lubricator from the
application.
G-LUBE is an eco-friendly
product that should be
disposed of seperately.
Unscrew the housing cap
counterclockwise to disas-
samble the product for proper
disposal.
Unscrew the srews to remove
the battery cover.
Remove the batteries and
return them for recycling.
Detach the PCB from the unit
using a fl at-head screwdriver.
Dispose of remaining plastic
components according to legal
regulations for recycling.
Do not cut, puncture or reuse
the lubricator.
NOTE Remove the grease nipple and install proper connectors.
Pull out the mode selector from
the default OFF position (0).
Firmly push the mode selector
into the slot of the desired
period.
When screwing on the housing cap ensure the sealing
ring is fi tted correctly.
NOTE

This manual suits for next models

2

Other Gruetzner Lubrication System manuals

Gruetzner Lubricus M User manual

Gruetzner

Gruetzner Lubricus M User manual

Gruetzner G-LUBE 60 User manual

Gruetzner

Gruetzner G-LUBE 60 User manual

Gruetzner Lubricus LUB-D Series User manual

Gruetzner

Gruetzner Lubricus LUB-D Series User manual

Gruetzner Lubricus LUB-V1 User manual

Gruetzner

Gruetzner Lubricus LUB-V1 User manual

Gruetzner Lubricus V User manual

Gruetzner

Gruetzner Lubricus V User manual

Gruetzner LUBRICUS LUB-B User manual

Gruetzner

Gruetzner LUBRICUS LUB-B User manual

Gruetzner Lubricus LUB-D1 User manual

Gruetzner

Gruetzner Lubricus LUB-D1 User manual

Gruetzner LUBRICUS LUB-V User manual

Gruetzner

Gruetzner LUBRICUS LUB-V User manual

Gruetzner Lubricus S User manual

Gruetzner

Gruetzner Lubricus S User manual

Popular Lubrication System manuals by other brands

Lincoln industrial AM 08 owner's manual

Lincoln industrial

Lincoln industrial AM 08 owner's manual

Perma STAR VARIO Pocket guide

Perma

Perma STAR VARIO Pocket guide

Graco FIRE-BALL Instructions-parts list

Graco

Graco FIRE-BALL Instructions-parts list

Pentair Lincoln PORTABLE LUBRIGUN 917-57 quick start guide

Pentair

Pentair Lincoln PORTABLE LUBRIGUN 917-57 quick start guide

SKF LAGD 400 Instructions for use

SKF

SKF LAGD 400 Instructions for use

Bijur Delimon SureFire II Quick start manual

Bijur Delimon

Bijur Delimon SureFire II Quick start manual

MIRCONA MINIBOOSTER instructions

MIRCONA

MIRCONA MINIBOOSTER instructions

RelaDyne THERMOJET H-2500E Series Installation and operating manual

RelaDyne

RelaDyne THERMOJET H-2500E Series Installation and operating manual

MEMOLUB PLCD quick start guide

MEMOLUB

MEMOLUB PLCD quick start guide

SKF OLA Series owner's manual

SKF

SKF OLA Series owner's manual

Graco Mini Fire-Ball 225 Series Instructions-parts list

Graco

Graco Mini Fire-Ball 225 Series Instructions-parts list

Samoa DVP-25 Parts and technical service guide

Samoa

Samoa DVP-25 Parts and technical service guide

Urrea 23623 User manual and warranty

Urrea

Urrea 23623 User manual and warranty

SKF HTL201 EEX operating instructions

SKF

SKF HTL201 EEX operating instructions

Graco 24Z764 instructions

Graco

Graco 24Z764 instructions

Patton EQUALIZER quick start guide

Patton

Patton EQUALIZER quick start guide

Graco Manzel HP-50 Service maintenance manual

Graco

Graco Manzel HP-50 Service maintenance manual

Perma NOVA 130 manual

Perma

Perma NOVA 130 manual

manuals.online logo
manuals.online logoBrands
  • About & Mission
  • Contact us
  • Privacy Policy
  • Terms and Conditions

Copyright 2025 Manuals.Online. All Rights Reserved.