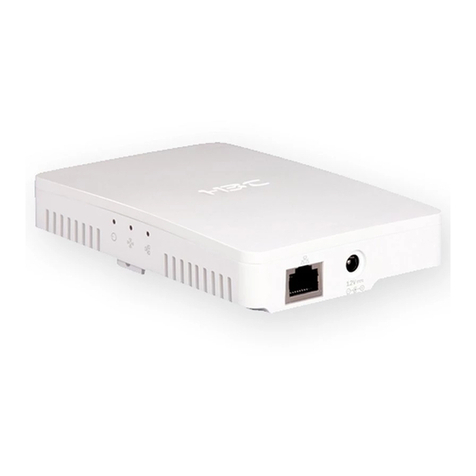
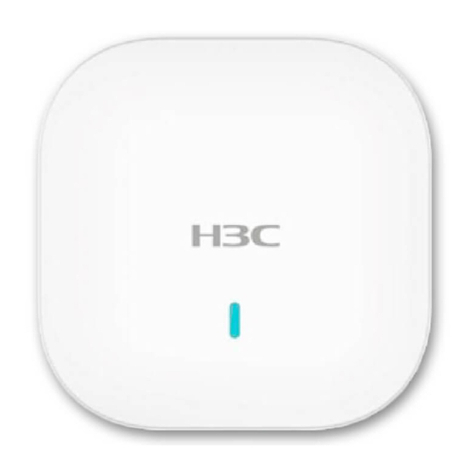
H3C WA6320H User manual

H3C WA6320H Access Point
Installation Guide
New H3C Technologies Co., Ltd.
http://www.h3c.com
Document version: 5W101-20200302

Copyright © 2020, New H3C Technologies Co., Ltd. and its licensors
All rights reserved
No part of this manual may be reproduced or transmitted in any form or by any means without prior written
consent of New H3C Technologies Co., Ltd.
Trademarks
Except for the trademarks of New H3C Technologies Co., Ltd., any trademarks that may be mentioned in this
document are the property of their respective owners.
Notice
The information in this document is subject to change without notice. All contents in this document, including
statements, information, and recommendations, are believed to be accurate, but they are presented without
warranty of any kind, express or implied. H3C shall not be liable for technical or editorial errors or omissions
contained herein.
Environmental protection
This product has been designed to comply with the environmental protection requirements. The storage, use,
and disposal of this product must meet the applicable national laws and regulations.

Preface
This installation guide describes the installation procedure for the H3C WA6320H access point.
This preface includes the following topics about the documentation:
•Audience.
•Conventions.
•Documentation feedback.
Audience
This documentation is intended for:
•Network planners.
•Field technical support and servicing engineers.
•Network administrators working with the WA6320H access point.
Conventions
The following information describes the conventions used in the documentation.
Command conventions
Convention Description
Boldface Bold text represents commands and keywords that you enter literally as shown.
Italic Italic text represents arguments that you replace with actual values.
[ ] Square brackets enclose syntax choices (keywords or arguments) that are optional.
{ x | y | ... }
Braces enclose a set of required syntax choices separated by vertical bars, from which
you select one.
[ x | y | ... ]
Square brackets enclose a set of optional syntax choices separated by vertical bars,
from which you select one or none.
{ x | y | ... } *
Asterisk marked braces enclose a set of required syntax choices separated by vertical
bars, from which you select a minimum of one.
[ x | y | ... ] *
Asterisk marked square brackets enclose optional syntax choices separated by vertical
bars, from which you select one choice, multiple choices, or none.
&<1-n> The argument or keyword and argument combination before the ampersand (&) sign
can be entered 1 to n times.
# A line that starts with a pound (#) sign is comments.
GUI conventions
Convention Description
Boldface Window names, button names, field names, and menu items are in Boldface. For
example, the New User window opens; click OK.
> Multi-level menus are separated by angle brackets. For example, File > Create >
Folder.

Symbols
Convention Description
WARNING! An alert that calls attention to important information that if not understood or followed
can result in personal injury.
CAUTION: An alert that calls attention to important information that if not understood or followed
can result in data loss, data corruption, or damage to hardware or software.
IMPORTANT: An alert that calls attention to essential information.
NOTE: An alert that contains additional or supplementary information.
TIP: An alert that provides helpful information.
Network topology icons
Convention Description
Represents a generic network device, such as a router, switch, or firewall.
Represents a routing-capable device, such as a router or Layer 3 switch.
Represents a generic switch, such as a Layer 2 or Layer 3 switch, or a router that
supports Layer 2 forwarding and other Layer 2 features.
Represents an access controller, a unified wired-WLAN module, or the access
controller engine on a unified wired-WLAN switch.
Represents an access point.
Represents a wireless terminator unit.
Represents a wireless terminator.
Represents a mesh access point.
Represents omnidirectional signals.
Represents directional signals.
Represents a security product, such as a firewall, UTM, multiservice security
gateway, or load balancing device.
Represents a security module, such as a firewall, load balancing, NetStream, SSL
VPN, IPS, or ACG module.
Examples provided in this document
Examples in this document might use devices that differ from your device in hardware model,
configuration, or software version. It is normal that the port numbers, sample output, screenshots,
and other information in the examples differ from what you have on your device.
T
T
T
T
Documentation feedback
You can e-mail your comments about product documentation to info@h3c.com.
We appreciate your comments.

i
Contents
1 Preparing for installation······························································· 1-1
Safety recommendations ·········································································································· 1-1
Site preparation ······················································································································ 1-1
Installation accessories ············································································································ 1-1
Installation tools······················································································································ 1-2
2 Installing the AP ········································································· 2-1
Installation flowchart ················································································································ 2-1
Pre-installation tasks················································································································ 2-1
Mounting the AP ····················································································································· 2-1
Powering the AP····················································································································· 2-3
Connecting a PoE power source·························································································· 2-3
Connecting a local power source ························································································· 2-3
Check after power-on ········································································································ 2-4
Connecting the AP to the network······························································································· 2-4
3 Appendix A Technical specifications ··············································· 3-1
4 Appendix B Ports and LEDs··························································4-1
Ports ···································································································································· 4-1
LEDs···································································································································· 4-3

1-1
1 Preparing for installation
Safety recommendations
WARNING!
Only professional technical personnel can install and remove the AP and its accessories. You must
read all safety instructions carefully before working with the AP.
To avoid possible bodily injury and equipment damage, read the following safety recommendations
before installing the AP. Note that the recommendations do not cover every possible hazardous
condition.
•To avoid bodily injury and device damage, take adequate safety measures.
•Place the AP in a dry and flat location and take anti-slip measures.
•Keep the AP clean and dust-free.
•Do not place the AP in a moist area and avoid liquid intrusion.
•Keep the AP and installation tools away from walkways.
Site preparation
Before installing the AP, examine the installation site and ensure that the AP will operate in a
favorable environment. Make sure the temperature and humidity at the installation site meet the
requirements in Table 1-1.
Table 1-1 Temperature and humidity requirements
Item Specification
Operating temperature 0°C to 40°C (32°F to 104°F)
Storage temperature –40°C to +70°C (–40°F to +158°F)
Operating humidity 5% RH to 95% RH, noncondensing
Installation accessories
Figure 1-1 Accessories provided with the AP

1-2
Installation tools
When installing the AP, you might need the following tools. Prepare the installation tools yourself as
required.
Figure 1-2 Installation tools

2-1
2 Installing the AP
Installation flowchart
Figure 2-1 Installation flowchart
Pre-installation tasks
Before installing the AP, perform the following tasks:
•Power on the AP and connect the AP to the network. Examine the LEDs to verify that the AP is
operating correctly. For information about the LEDs, see "LEDs."
•Record the MAC address and serial number of the AP for future use.
Mounting the AP
1. As shown in Figure 2-2, use M4 screws to attach the mounting bracket to an electrical outlet
box.

2-2
Figure 2-2 Attaching the mounting bracket to an electrical outlet box
2. As shown in Figure 2-3, connect cables to the pass-through port and uplink/PoE in port on the
rear of the AP.
The pass-through ports on the rear and bottom of the AP are standard RJ-45 ports. You can
connect phone cables or Ethernet cables to the pass-through ports as needed.
Figure 2-3 Connecting a cable to the uplink/PoE in port
3. Secure the AP to the mounting bracket, as shown in Figure 2-4.
a. Align the mounting peg on the mounting bracket with the installation slot in the rear of the
AP and insert the peg into the slot.
b. Slide down the AP so that it sits securely on the peg.
c. Fasten the M3 × 4 screw on the side panel of the AP.

2-3
Figure 2-4 Securing the AP to the mounting bracket
Powering the AP
You can supply power to the AP by using a local power source or through 802.3af/802.at PoE as
required. Before powering the AP, make sure the local power source or the power sourcing
equipment (PSE) is reliably grounded.
Connecting a PoE power source
To power the AP through PoE, use an Ethernet cable to connect an Ethernet port on a PoE switch to
the uplink/PoE in port on the AP.
Figure 2-5 Powering the AP through PoE
Connecting a local power source
You can use an AC/DC power adapter to connect the AP to a local power source. No power adapter
is provided with the AP. Prepare one yourself as required. Table 2-1 describes the power adapter
specifications.

2-4
Table 2-1 Power adapter specifications
Item Specification
Input 100 VAC to 240 VAC
Output +54 VDC at 0.74 A
Figure 2-6 Using a power adapter to connect the AP to a local power source
Check after power-on
Examine the LEDs on the AP after you power on it to verify that the AP is operating correctly. For
more information about the LEDs, see "LEDs."
Connecting the AP to the network
All AP settings are configured on the AC. To verify network connectivity of the AP, execute the
display wlan ap all command on the AC. If the AP status is R/M, the AP has been connected
to the network.
<AC> display wlan ap all
Total number of APs: 1
Total number of connected APs: 1
Total number of connected manual APs: 1
Total number of connected auto APs: 0
Total number of connected common APs: 1
Total number of connected WTUs: 0
Total number of inside APs: 0
Maximum supported APs: 3072
Remaining APs: 3071
Total AP licenses: 128
Remaining AP licenses: 127
AP information
State : I = Idle, J = Join, JA = JoinAck, IL = ImageLoad
C = Config, DC = DataCheck, R = Run M = Master, B = Backup

2-5
AP name AP ID State Model Serial ID
ap1 1 R/M WA6320H 219801A2978199E00001

3-1
3 Appendix A Technical specifications
Table 3-1 Technical specifications
Item Specification
Dimensions (H × W × D) 30 × 160 × 86 mm (1.18 × 6.30 × 3.39 in)
Weight 0.25 kg (0.55 lb)
Antenna Internal antennas
Power consumption •≤12.95 W without a USB device attached
•≤15.45 W without a USB device attached
IEEE standards IEEE802.11a/b/g/n/ac/ax

4-1
4 Appendix B Ports and LEDs
Ports
The AP provides the following ports:
•One console port
•Four 10/100/1000M Ethernet copper ports
•One power port
•Two pass-through ports
•One uplink/PoE in port
•One USB port
It provides also a reset button (RST) and a security screw hole.
Figure 4-1 Ports on the AP
(1) 10/100/1000M Ethernet copper ports (2) Pass-through port
(1) Power port (2) Security screw hole

4-2
(1) Reset button (RST) (2) Console port (3) USB port
(1) Pass-through port (2) Uplink/PoE in port
Table 4-1 Port descriptions
Port Standards and
protocols Description
Console port RS/EIA-232 Used by technical personnel only for device
configuration and management.
10/100/1000M Ethernet
copper port (1 to 4)
•IEEE802.3
•IEEE802.3u
Represented by interface number GE1/0/2 to
GE1/0/5 in the MAP file and GigabitEthernet 2 to
GigabitEthernet 5 on the AC.

4-3
Port Standards and
protocols Description
Uplink/PoE in port
(10/100/1000M Ethernet
copper port)
•IEEE802.3
•IEEE802.3u
•IEEE802.3af
•IEEE802.3at
Used for connecting the AP to an uplink device for
Internet or MAN access. It can also receive PoE
power from the uplink device.
It is represented by interface number GE1/0/1 in the
MAP file and GigabitEthernet 1 on the AC.
Power port (54 V) N/A Used for receiving +54 VDC power from a local
power source.
Pass-through port (2 in total) •IEEE802.3
•IEEE802.3u Use for connecting a phone cable or RJ-45 cable.
USB port USB 2.0 Used for charging as well as data reading or writing.
Reset button N/A
•To reset the AP, press and hold the button for
no more than 5 seconds.
•To restore the factory default, press and hold
the button for more than 5 seconds.
LEDs
Figure 4-2 LEDs on the AP
(1) Power status LED (2) Radio status LED
(3) Uplink port status LED (4) Ethernet port status LEDs

4-4
Table 4-2 LED descriptions
LED Status Description
Power status LED
Off No power is present or the LED has been disabled.
Steady yellow The device is initializing or an initialization exception
has occurred.
Flashing yellow at 1 Hz No radio cards have been detected.
Flashing yellow at 2 Hz The Ethernet interfaces are down and no mesh links
are established.
Steady green The AP has started up and registered to an AC, and
is in standby state.
Flashing green at 0.5 Hz The AP has started up but has not registered to any
AC.
Flashing green at 2 Hz The AP is upgrading the image.
Radio status LED
Off The radios do not have associated clients, or the
LED has been turned off from the CLI.
Flashing green at 1 Hz Only the 2.4G radio has associated clients.
Flashing yellow at 1 Hz Only the 5G radio has associated clients.
Alternating between
green and blue at 1 Hz
Both the 2.4G and 5G radios have associated
clients.
Uplink port status LED
Off No power is present.
Steady yellow The port has been auto-negotiated to operate at
10/100 Mbps.
Flashing yellow The port is sending or receiving data at 10/100
Mbps.
Steady green The port has been auto-negotiated to operate at
1000 Mbps.
Flashing green The port is sending or receiving data at 1000 Mbps.
Ethernet port status
LED
Off No link is present on the port.
Steady yellow The port has been auto-negotiated to operate at
10/100 Mbps.
Flashing yellow The port is sending or receiving data at 10/100
Mbps.
Steady green The port has been auto-negotiated to operate at
1000 Mbps.
Flashing green The port is sending or receiving data at 1000 Mbps.
Table of contents
Other H3C Wireless Access Point manuals

H3C
H3C WA5320X-E Operating and maintenance manual

H3C
H3C WA2210-AG_INDOORSINGLEBANDAP User manual

H3C
H3C WA6628 User manual

H3C
H3C WA560 User manual

H3C
H3C WA Series User manual

H3C
H3C WA2620-AGN User manual

H3C
H3C WA2210-AG User manual

H3C
H3C WA2620X-AGNP User manual

H3C
H3C WA2620-AGN User manual

H3C
H3C WA Series Installation manual