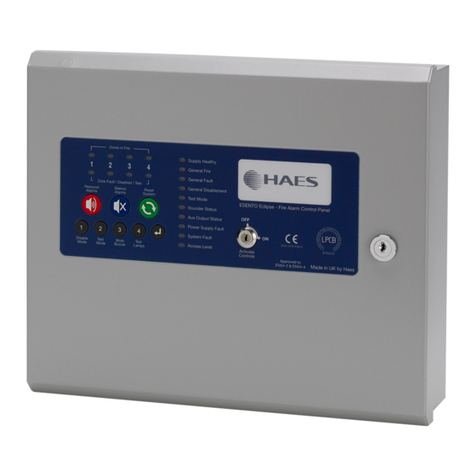
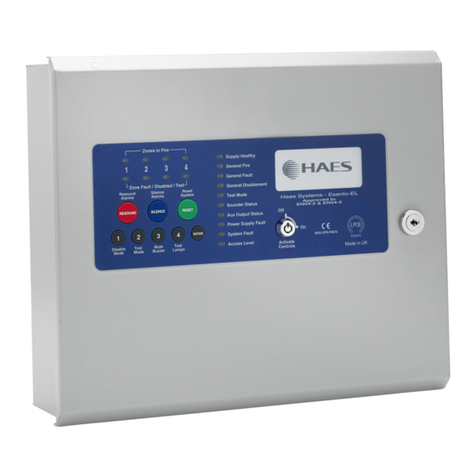
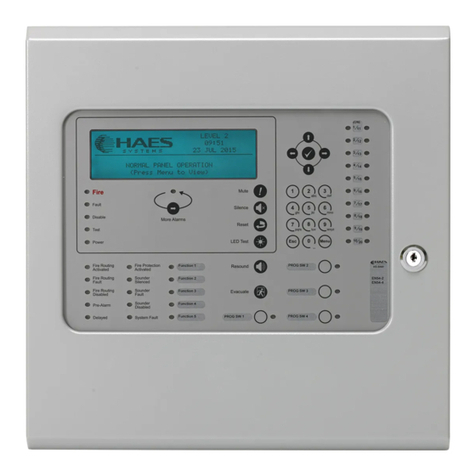
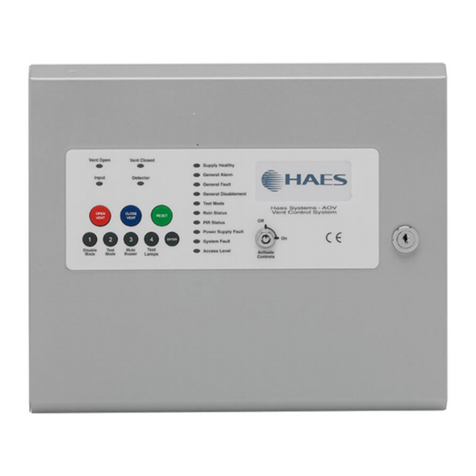
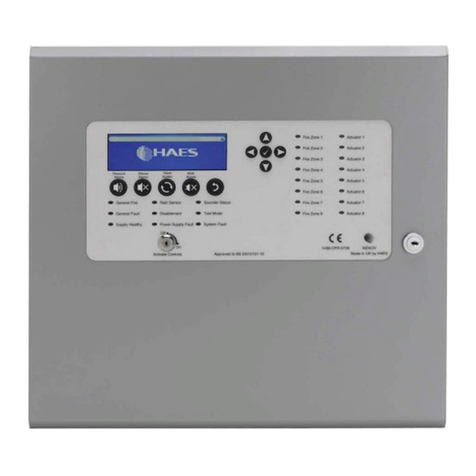
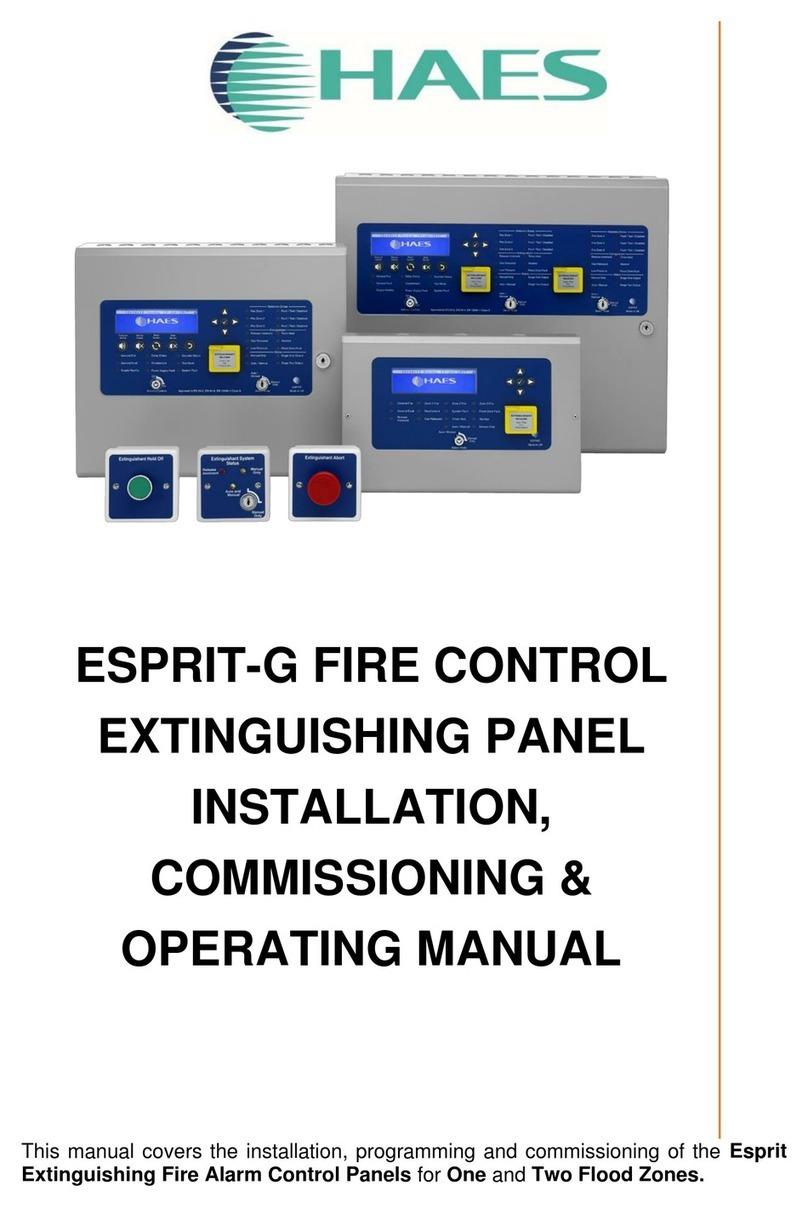
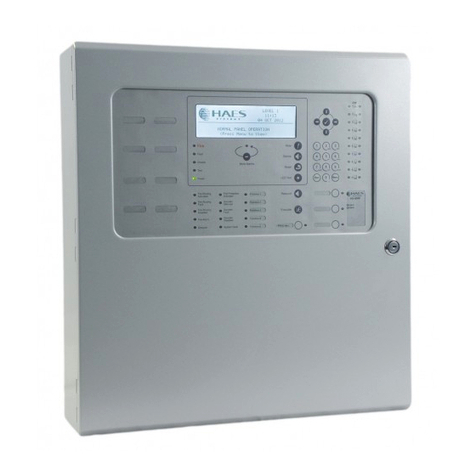
Haes FCPTEC-HS-4200 Guide

Installation and Commissioning Manual
Document Reference MTEC-HS-01 Rev 071 Author ADV-DC Page 1
Technical Data
Sheet
I
In
ns
st
ta
al
ll
la
at
ti
io
on
n & Commissioning Manual
F
FC
CP
PT
TE
EC
C-
-H
HS
S-
-4
42
20
00
0
&
&
F
FC
CP
PT
TE
EC
C-
-H
HS
S4
44
40
00
0
F
Fi
ir
re
e
A
Al
la
ar
rm
m
C
Co
on
nt
tr
ro
ol
l
P
Pa
an
ne
el
ls
s

Installation and Commissioning Manual
Document Reference MTEC-HS-01 Rev 071 Author ADV-DC Page 2
Specifications
FCPTEC-HS-4200 FCPTEC-HS-4400
Enclosure Steel IP30 Steel IP30
Dimensions H x
W x D mm 475 x 450 x 115 475 x 450 x 115
Weight 10.5Kg 10.5Kg
Temperature 0°to 45°C 0°C to 45°C
Humidity 95 % Max 95 % Max
Cable Entries
(20mm knockouts) 18 x top, 9 x top rear and 2 x bottom 18 x top, 9 x top rear and 2 x bottom
Mains Supply 220-240V, +10%, -15%
47 –63 Hz AC
1 A max
220-240V, +10%, -15%
47 –63 Hz AC
1 A max
Battery Capacity
(For 24Hr.
standby)
24V 4Ah Internal (min)
24V 17Ah Internal (max)
24V 48 Ah External (max)
24V 4Ah Internal (min)
24V 17 Ah Internal (max)
24V 48Ah External (max)
Charging Current 2.4A
Temperature Compensated
2.4A
Temperature Compensated
Power Supply Separate 24V DC, 4A Universal Input
Switched Mode Separate 24V DC, 5A
Universal Input
Switched Mode
Number of Fire
Zones 200 max, across 2 loops
(1000 when networked) 200 max, across 4 loops
(1000 when Networked)
Number of Loops 1 to 2 1 to 4
Devices per Loop
Loop Current 500mA max. per Loop
Protocols
Sounder Outputs 4 x 1A Programmable
Relay Outputs 2 x 1A 30V AC/DC (max)
10mA. 5V (min)
Programmable
Open Collector
Outputs 2 x Programmable
10mA 30V DC (max)
Digital Outputs 6 x Programmable
Auxiliary Supply
Output 24V DC, 300mA
See notes
Event Log
Notes: Aux supply tracks a maximum of 0.5V below battery terminal voltage when no mains supply available.

Installation and Commissioning Manual
Document Reference MTEC-HS-01 Rev 071 Author ADV-DC Page 3
Standards:
The FCPTEC-HS-4200 and FCP-TEC-HS-4400 Fire Alarm Control Panels conform to the following standards:
BS EN54-2: 1998 Control and Indicating Equipment
BS EN54-4: 1998 Power Supply Equipment
BS EN60950: 2000 Safety of information technology equipment
BS EN50130-4: 196 Product Family Standard
Electromagnetic Compatibility Directive 89/336/EEC (and the amending directive 92/23/EEC)
Low Voltage Directive 73/23/EEC
Contents
1Introduction ____________________________________________________ 6
1.1 EN54 Functions____________________________________________________________7
1.2 Installation Approvals ______________________________________________________7
1.2.1 Fire System Installations _________________________________________________________ 7
1.2.2 Wiring Regulations______________________________________________________________7
2Installation _____________________________________________________ 8
2.1 Identification of Parts_______________________________________________________8
22 Installing the FCPTEC-HS-4200 & 4400 Enclosures _____________________________9
2.2.1 Opening the Enclosure Cover______________________________________________________ 9
2.2.2 Removing the Chassis ___________________________________________________________ 9
2.2.3 Mounting the Enclosure __________________________________________________________9
2.2.4 Remounting the Chassis_________________________________________________________10
2.2.5 Recommended Cable Routing Arrangement _________________________________________ 10
2.2.6 Installing Additional Loop Circuits in the FCPTEC-HS4200 & FCPTEC-HS-4400___________ 11
2.2.7 Removing a Loop Driver Card____________________________________________________11
2.3 Wiring Installation ________________________________________________________12
2.3.1 AC Mains Wiring______________________________________________________________12
2.3.1.1 Cable Gland _____________________________________________________________ 12
2.3.2 Battery Installation _____________________________________________________________ 13
2.3.2.2 FCPTEC-HS-4200 & FCPTEC-HS-4400_______________________________________ 13
2.3.3 Detector Loop Installation _______________________________________________________ 15
2.3.4 Sounder Circuits_______________________________________________________________ 16
2.3.5 Relay Circuits_________________________________________________________________16
2.3.6 Open Collector Outputs _________________________________________________________17
2.3.7 Auxiliary Supply Output ________________________________________________________ 17
2.3.8 Switch Inputs _________________________________________________________________ 17
2.3.9 RS232 Interface _______________________________________________________________18
3Programming __________________________________________________ 19
3.1 Introduction______________________________________________________________19
3.1.1 Access Levels_________________________________________________________________ 19
3.1.2 Memory Lock_________________________________________________________________ 19
3.1.3 Navigating through menus _______________________________________________________ 19
3.1.4 Changing Text Descriptions______________________________________________________20
3.1.5 Numeric data entry_____________________________________________________________21

Installation and Commissioning Manual
Document Reference MTEC-HS-01 Rev 071 Author ADV-DC Page 4
3.2 Recommended Programming Procedure _____________________________________ 21
3.3 Level 3 Menu Functions ___________________________________________________ 21
3.3.1 Loops _______________________________________________________________________ 22
3.3.2 Loops - View/Edit _____________________________________________________________ 22
3.3.2.1 State ___________________________________________________________________ 22
3.3.2.2 Type ___________________________________________________________________ 22
3.3.2.3 Value __________________________________________________________________ 23
3.3.2.4 Zone ___________________________________________________________________ 23
3.3.2.5 Device Text _____________________________________________________________ 23
3.3.2.6 Action__________________________________________________________________ 23
3.3.2.7 Sensitivity_______________________________________________________________ 24
3.3.2.7.1 Mode- Apollo: _________________________________________________________ 24
3.3.2.7.2 Mode- Hochiki: ________________________________________________________ 24
3.3.2.7.3 Delay ________________________________________________________________ 25
3.3.2.7.4 Alarm- Apollo _________________________________________________________ 25
3.3.2.7.5 Alarm- Hochiki ________________________________________________________ 25
3.3.2.7.6 Pre-Alarm ____________________________________________________________ 25
3.3.2.7.7 Minimum Value________________________________________________________ 25
3.3.2.7.8 Special Sensitivity Mode SSM/Clock _______________________________________ 25
3.3.2.8 O/P Group ______________________________________________________________ 26
3.3.2.9 Additional Info___________________________________________________________ 26
3.3.2.10 Detector Testing__________________________________________________________ 27
3.3.3 Loops - Auto Learn ____________________________________________________________ 27
3.3.3.1 Normal Procedure / Initial learn______________________________________________ 27
3.3.3.2 Procedure if the Panel finds Devices Missing ___________________________________ 28
3.3.3.3 Procedure if the Panel finds Devices Added ____________________________________ 28
3.3.3.4 Procedure if the Panel finds Devices Changed___________________________________ 28
3.3.4 Loop – Calibrate ______________________________________________________________ 29
3.3.5 Loop – Driver_________________________________________________________________ 29
3.3.6 Zones _______________________________________________________________________ 29
3.3.7 Exit_________________________________________________________________________ 29
3.3.8 Outputs______________________________________________________________________ 30
3.3.8.1 Default Output Settings ____________________________________________________ 30
3.3.8.2 Cause __________________________________________________________________ 31
3.3.8.3 Style ___________________________________________________________________ 32
3.3.8.3.1 Delay ________________________________________________________________ 32
3.3.8.3.2 Mode ________________________________________________________________ 32
3.3.8.3.3 Wait _________________________________________________________________ 32
3.3.8.4 Copying Output Settings to Multiple Zones ____________________________________ 32
3.3.9 Investigation Delays____________________________________________________________ 33
3.3.9.1 Overriding Delays at Level 1 ________________________________________________ 33
3.3.10 Time and Date______________________________________________________________ 33
3.3.11 View Options ______________________________________________________________ 34
3.3.12 Passwords _________________________________________________________________ 34
3.3.13 Panel _____________________________________________________________________ 34
3.3.14 PC Config _________________________________________________________________ 35
3.3.15 Setup _____________________________________________________________________ 35
3.3.15.1 Network ________________________________________________________________ 35
3.3.15.2 Panel Zone ______________________________________________________________ 35
3.3.15.3 Service Number __________________________________________________________ 35
3.3.15.4 Service Due Date _________________________________________________________ 36
3.3.15.5 Trace Logging Mode ______________________________________________________ 36
3.3.15.6 Detector Blinking_________________________________________________________ 36
3.3.15.7 Company LCD Logo ______________________________________________________ 37
3.3.15.8 Program ID______________________________________________________________ 37
3.3.15.9 Config Data _____________________________________________________________ 37
4EN54 Optional Features__________________________________________38
5Service and Maintenance_________________________________________39

Installation and Commissioning Manual
Document Reference MTEC-HS-01 Rev 071 Author ADV-DC Page 5
5.1 Maintenance Schedule _____________________________________________________39

5.1.1 Daily Actions _________________________________________________________________39
5.1.2 Monthly Actions_______________________________________________________________39
5.1.3 Quarterly Actions ______________________________________________________________ 39
5.1.4 Annual Actions________________________________________________________________39
5.2 Replacement of Components________________________________________________40
5.2.1 Batteries _____________________________________________________________________40
5.2.1.1 Standby Batteries _________________________________________________________40
5.2.1.2 Lithium Battery___________________________________________________________40
5.2.2 Liquid Crystal Display __________________________________________________________41
6Appendices ___________________________________________________ 42
6.1 Appendix 1 – Forgotten Level 3 Password_____________________________________42
6.2 Appendix 2 – Recommended Cables__________________________________________43
6.3 Appendix 3 – Battery Standby Calculation Chart ______________________________44
6.3.1 FCPTEC-HS-4400 & FCPTEC-HS-4200 ___________________________________________44
6.4 Appendix 4 – Cause and Effect Programming Example _________________________45
6.4.1 Introduction __________________________________________________________________ 45
6.4.2 Output Groups ________________________________________________________________45
6.4.3 Styles _______________________________________________________________________ 45
6.4.4 Output Group Programming______________________________________________________ 46
6.5 Appendix 5 – Apollo Information ____________________________________________47
6.5.1 View Drift____________________________________________________________________47
6.5.2 Rapid Compensation ___________________________________________________________ 47
6.5.3 View EEPROM _______________________________________________________________48
6.6 Appendix 6 – Hochiki Esp Information _______________________________________49
6.6.1 Unprocessed Analogue information________________________________________________ 49
6.6.2 CHQ-BS / CHQ-WS Sounders____________________________________________________49
6.7 Appendix 7 – FCPTEC-HS4000 Series Loop Output Drive Capabilty _____________50
6.7.1 Hochiki______________________________________________________________________50
6.7.2 Apollo_______________________________________________________________________50

Installation and Commissioning Manual
Document Reference MTEC-HS-01 Rev 071 Author ADV-DC Page 6
Cautions and Warnings
STOP
BEFORE INSTALLATION – Refer To the Ratings shown on the label inside the product and
to the ‘Specifications Chart’ in this document.
Please read this manual carefully. If you are unclear on any point, DO NOT proceed. Contact
the manufacturer or supplier for clarification and guidance.
Only Trained service personnel should undertake the Installation, Programming and
Maintenance of this equipment.
This product has been designed to comply with the requirements of the Low Voltage Safety
and the EMC Directives. Failure to follow the installation instructions may compromise its
adherence to these standards.
This equipment is constructed with static sensitive components. Observe anti-static
precautions at all times when handling printed circuit boards. Wear an anti-static earth
strap connected to panel enclosure earth point. Before installing or removing any printed
circuit boards remove all sources of power (mains and battery).
1 Introduction
This manual covers the installation, programming and commissioning of the FCPTEC-HS-4200 and FCPTEC-
HS-4400 Fire Alarm Control Panels. Refer to the User Manual for details of how to operate the panel.
The FCPTEC-HS-4200 is a Multiple Loop, Analogue Addressable Fire Alarm Control Panel with provision for up
to two loops.
The FCPTEC-HS-4400 is a Multiple Loop, Analogue Addressable Fire Alarm Control Panel with provision for up
to four loops.
All three panels are designed for use with the Apollo Discovery, Explorer , XP95 and Series 90 and Hochiki ESP
fire detection devices.
Install the panel, detection loops, sounder circuits, etc. in accordance with the instructions in Section 2 and
then program the operation in accordance with the instructions detailed in Section 3.

Installation and Commissioning Manual
Document Reference MTEC-HS-01 Rev 071 Author ADV-DC Page 7
1.1 EN54 Functions
This Fire Alarm Control Panel is compliant with the requirements of EN54 parts 2
and 4 (1997).
In addition to the basic requirements, the following optional functions are provided
and these comply with the requirements of EN54.
C.I.E Optional Functions EN54-2 Clause
Indication
Outputs
Controls
Outputs to Fire Alarm Devices
Investigation Delays to Outputs
Co-incidence Detection
Fault Signals from Points
Disablement of Points
Test Condition
Standardised I/O
7.8
7.11
7.12
8.3
9.5
10
11
P.S.E Functions EN54-4 Clause
Operation from a main power supply
Operation from a standby battery
Monitor and Charge the Standby Battery
Recognise and Notify Supply Faults
5.1
5.2
5.3
5.4
This Fire Alarm Control Panel also supports additional functions that are not covered
by EN54. These are as follows:
Additional Function Refer to
Paragraphs
Auxiliary Power Supply Output
Auxiliary Relay Outputs
Programmable Cause / Effect on Outputs (Phased Evacuation)
Printer Option
2.3.7
2.3.5
6.4
User Manual
1.2 Installation Approvals
1.2.1 Fire System Installations
The panel must be installed and configured for operation in accordance with these instructions and the applicable
fire systems installation regulations appropriate to the country and location of the installation.
1.2.2 Wiring Regulations
The panel and system must be installed in accordance with these instructions and the applicable wiring codes and
regulations appropriate to the country and location of the installation.

Installation and Commissioning Manual
Document Reference MTEC-HS-01 Rev 071 Author ADV-DC Page 8
2 Installation
2.1 Identification of Parts
The following diagram shows the major parts of the panel.
2.1.1 FCPTEC-HS-4200 & FCPTEC-HS-4400
Chassis
Assembl
y
Rear
Enclosure
AC Mains
In
p
ut
Battery
Leads

Installation and Commissioning Manual
Document Reference MTEC-HS-01 Rev 071 Author ADV-DC Page 9
2.2 Installing the FCPTEC-HS-4200 & 4400 Enclosures
The panel can weigh in excess of 20kg when the batteries are installed. Use appropriate fixing
hardware to secure the panel to the wall. Observe recommended lifting practices to guard
against spinal injury.
2.2.1 Opening the Enclosure Cover
The FCPTEC-HS-4200 & FCPTEC-HS-4400 are provided with a key-lock assembly for securing the hinged door
to the back box. Insert and turn the key to open the enclosure.
2.2.2 Removing the Chassis
It is recommended that the chassis be removed
before fitting the panel to the wall. To remove the
chassis:
Refer to the diagram opposite.
Disconnect the earth cable connecting the chassis
to the spade terminal on the rear enclosure.
Remove the bottom two screws holding the chassis
to the back box. Keep these items in a safe place
for later re-use.
Loosen the top two screws holding the chassis to
the backbox via the keyhole slots. The chassis
assembly can now be removed.
Carefully remove the chassis from the rear
enclosure and place in a safe place to prevent
accidental damage.
Earth
Connection
Fixing
Screws.
Do not lift the chassis by holding onto any of the printed circuit cards. Hold the chassis by the
metal plate only.
2.2.3 Mounting the Enclosure
Firstly, remove the required knockouts for the
installation wiring. There are sufficient knockouts on
the top of the enclosure for all installation wiring. In
addition, there are knockouts at the top of the back
wall, if required, for rear entry cabling.
The diagram opposite shows the positions of the four
holes. Use all four positions to ensure the panel is held
securely to the wall.
Drill the required holes in the supporting wall using a
drill bit diameter 7.0 mm and plug with a suitable
40mm long expansion plug. Affix the panel to the wall
with M5 screws (length 40mm) or No.10 screws
(length 1½”).
Ensure that there is sufficient space to allow the door to
be opened when the panel is mounted. In addition,
there should be sufficient space below the panel to
allow access to the RS232 connected, if fitted.
Finally, use a brush to remove any dust or swarf from
inside the enclosure.
450
380
35
25
475 405
Earth
Studs
x4
Cable Tie
Anchor Points x9
Enclosure Size and Fixing Point Dimensions

Installation and Commissioning Manual
Document Reference MTEC-HS-01 Rev 071 Author ADV-DC Page 10
2.2.4 Remounting the Chassis
Carefully replace the chassis and locate onto the upper two screws. Replace the bottom two screws and tighten all
four screws to hold the chassis securely to the backbox.
Reconnect the chassis earth cable to the spade terminal in the rear of the enclosure.
2.2.5 Recommended Cable Routing Arrangement
It is recommended that the routing arrangement
shown in the diagram opposite be employed.
Segregate the low voltage wiring (Loop Circuit,
Sounder Circuits, RS485 and AUX Supply)
from the AC Mains Wiring.
Segregate any wiring connected to the relay
contacts.
Eyelets are provided in the rear of the back box
to enable the cables to be securely fastened,
using tie-wraps.
Sounders and AUX wiring should be routed
behind the chassis assembly and tie-wrapped to
the back box.
Cable screens / shields should be connected to
the back box using the threaded studs provided
near the knockout holes.
Refer to Appendix 2 – Recommended Cables
for further information on cable types to be
used.
Refer to specific sections on how to install AC
Mains input and loop, sounder, relay and AUX
outputs circuits.
AC Mains Relays Sounders + AUX Ad-NeT /
N
etwork
LOOPS
Sounders + AUX
Internal arrangement showing recommended routing of cables.

Installation and Commissioning Manual
Document Reference MTEC-HS-01 Rev 071 Author ADV-DC Page 11
2.2.6 Installing Additional Loop Circuits in the FCPTEC-HS-4200 &
FCPTEC-HS-4400
To extend the number of detector loops or to replace an
existing loop driver card follow the procedure
described below.
An example of the loop driver is shown opposite. This
is provided with a plastic grip handle on the top edge to
ease removal of the card from the Base Card.
Isolate ALL sources of power before
installing or removing printed circuit
boards.
Observe anti-static precautions at all
times when handling printed circuit
boards.
Loop Driver – Component Side View
Open the enclosure and then open the display plate (it
is hinged on the right hand side and there is a magnetic
catch strip on the left-hand side) to gain access to the
Base Card.
A section of the Base Card identifying the locations for
each loop driver is shown in the picture opposite
To install a loop driver, remove the retaining strap, then
gently guide the loop driver printed circuit card into the
guide slots of the machined end blocks and then push
into place onto the connector on the Base Card.
Ensure that the pins of the connectors are correctly
aligned. The loop driver should be inserted with the
component side of the board placed on the left-hand
side. Replace the retaining strap.
The Base Card can accept up to four loop driver cards –
it does not matter which positions are used. Ensure that
the detector loop wiring is made to the terminal block
positions appropriate to the loop driver cards actually
installed.
Close the chassis display plate and then close up the
enclosure.
2.2.7 Removing a Loop Driver Card
To remove a loop driver, remove all power and follow
the procedure above but:
Take a firm hold of the lever located on top of the loop
driver card. Gradually and carefully pull the loop driver
vertically away from the base card and guide it out of
the slots in the machined end blocks.
Component side of
Loop Driver Card
Machined End
Block
LOOPS
1234
NB: The FCPTEC-HS-4200 only has positions 1 & 2
available.

Installation and Commissioning Manual
Document Reference MTEC-HS-01 Rev 071 Author ADV-DC Page 12
2.3 Wiring Installation
2.3.1 AC Mains Wiring
Route the high voltage mains AC wiring into the
enclosure at the upper left corner only. Keep the AC
wiring away from the circuit boards and all other
wiring.
The panel must be connected to the supply earth
through the power cable.
The mains input connector is shown in the diagram
opposite. Note the positions of the earth, neutral and
live terminal connections. These are clearly marked on
the label next to the connector. The connector block
contains an integral fuse holder.
Secure the mains input wiring by tie wrap as close to
the terminal block as possible.
The fuses are rated as follows:
T 3.15A H 250V (for FCPTEC-HS-4200 and
FCPTEC-HS4400)
Replace with correct rating and specification only.
Connect the Control Panel to the mains supply via a
readily accessible; disconnect device (Isolation Switch)
and suitable earth fault protection incorporated in the
building installation wiring. The Mains cable should be
0.75mm2cable rated at 250V and fused via a 5A anti-
surge fuse.
FUSE
Brown
Green LIVE
EARTH
N
EUTRAL
Panel Wiring
Blue
3.15A
AC Mains terminations – FCPTEC-HS-4200 &
FCPTEC-HS-4400
2.3.1.1 Cable Gland
The cable gland and any cord clamp bushing s used in routing the Mains cable through the
20mm knockout must have a minimum flame-retardant rating of 94HB.
Suggested glands and bushings are: -
Type
Gland IP65 – Brass M20, EExd / Eexe
Gland IP68 – Nylon 66 M20 Black, UL94V2
Bushing – Nylon 66 M20 Black, UL94V2
Manufacturer
Lappcable
Multicomp
Multipcomp

Installation and Commissioning Manual
Document Reference MTEC-HS-01 Rev 071 Author ADV-DC Page 13
2.3.2 Battery Installation
The panel requires two 12V batteries
for standby operation.
The battery leads are connected onto
the base card via a two-part plug and
socket, as shown in the diagram
opposite.
Refer to the Specifications for
minimum and maximum battery sizes
allowed.
BAT +
BAT –
AUX -
AUX +
FCPTEC-HS-4200& FCPTEC-
HS4400
Place the batteries in the bottom of the enclosure and
connect the ‘Red’ lead to the positive (+) terminal of
battery #1 and the ‘Black’ lead to the negative (-)
terminal of battery #2. Connect the negative of battery
#1 to the positive of battery #2 using the supplied link
cable.
Ensure that the battery terminals do not short out
against any part of the enclosure, circuit board or
chassis plate.
+-+-
+
-
#1 #2
RED
BLACK
Link Cable
Do not make the final battery connections until the installation wiring is completed and the
system is to be powered up.
Always connect the AC Mains input before connecting the battery.
New batteries require ‘top-charging’ before installation. Refer to Section 5.2.1.1 for a list of
recommended batteries.
2.3.2.1 FCPTEC-HS-4200 & FCPTEC-HS-4400
The diagrams opposite show the
recommended location and orientation for the
12AH and 17AH batteries within the panel.
For battery sizes greater than 17AH, the
batteries must be installed in a separate
enclosure suitable for fire protection use with
wiring connected to the panel through rigid
conduit.
For battery sizes greater than 12AH, it will be
necessary to remove the spade terminals
fixed to the battery leads and replace these
with connection fixings suitable for the
installed batteries.
12AH
12AH

Installation and Commissioning Manual
Document Reference MTEC-HS-01 Rev 071 Author ADV-DC Page 14
Replacement Fuse
FS1 T6.3A 250V Anti-Surge
17AH 17AH

Installation and Commissioning Manual
Document Reference MTEC-HS-01 Rev 071 Author ADV-DC Page 15
2.3.3 Detector Loop Installation
Section 12.5.2
Maximum of 32 Sensors / Call Points between Isolators.
The Detection Loop Circuit should be installed as a continuous loop with isolator
modules such that a short circuit condition does not remove more than 32 input
devices.
Form the loop starting at the Loop Out + and –
terminals on the base card.
Route the wires around the loop connecting all devices
in accordance with the manufacturers’ data sheet
supplied with each unit.
Ensure that the devices are correctly installed with
regard to their positive and negative terminal polarity
(especially Loop Isolator Modules).
Connect the return wires to the Loop IN + and –
terminals on the base card.
The diagram opposite shows the typical arrangement of
the loop connections on the base cards.
Refer to Section 2.2.6 for details on installing
additional loop drivers on the multi-loop panels.
OUT +
OUT –
IN +
IN –
Base Card Terminations (Typical).
When screened cable is used, it is vital to connect the screen / drain wire to the chassis / earth at
the cable gland input / earth stud in the panel. Always ensure that all segments of the cable loop
have continuity of the screen and take care to ensure that the screen is not exposed to any other
earth point (e.g. metalwork, cable trays, junction boxes, etc.).
The Loop Driver Circuit on the Base card is equipped
with in-built isolators to take care of short circuit
conditions on the wiring between the panel and the first
device on the loop. Do not fit loop isolators at the panel
outputs.
The diagram opposite shows a typical loop
arrangement.
Maximum recommended cable loop length is 1500 to
2000 Metres. Refer to Appendix 2 – Recommended
Cables for further information on cable types to be
used.
+
-
+
-
Isolators
Typical Loop Arrangement.
Take care that the voltage drop at full load is within the detector rating – refer to the detector
manufacturers’ data sheet for minimum values.
To maintain signal line wiring supervision, break the wiring run at each loop device.

Installation and Commissioning Manual
Document Reference MTEC-HS-01 Rev 071 Author ADV-DC Page 16
2.3.4 Sounder Circuits
The FCPTEC-HS4200 is equipped with two supervised
sounder circuits. These are denoted as Circuits A and
B.
The FCPTEC-HS-4400 is equipped with four
supervised sounder circuits. These are denoted as
Circuits A, B, C and D.
Each Sounder output is rated at a maximum of 1
Ampere.
The terminal connections on the base card are shown in
the diagram opposite.
SND A +
SND A –
SND B +
SND B –
Base Card Connections – Typical.
The sounder outputs are monitored (supervised) for
open and short circuit conditions using reverse polarity
signals. Sounder must be equipped with an in-built
blocking diode that prevents the sounder from taking
power when the output is in the supervising condition.
An End-of-Line Resistor (EOLR) of value 10,000Ω, ½
Watt must be fitted to the last sounder / bell.
Refer to Appendix 2 – Recommended Cables for
further information on cable types to be used.
+
-
Typical
Arrangement
EOL
Typical Sounder Arrangement.
When screened cable is used, it is vital to connect the screen to the chassis / earth at the cable
gland input / earth stud in the panel. Always ensure that all segments of the cable loop have
continuity of the screen and take care to ensure that the screen is not exposed to any other
earth point (e.g. metalwork, cable trays, junction boxes, etc.).
2.3.5 Relay Circuits
Section 8.8
Fault Output.
Relay 1 is arranged for failsafe operation as standard.
The panels are equipped with two relay outputs. These
are normally programmed to activate on Fault and Fire
Alarm conditions respectively.
Each output is unsupervised with volt-free changeover
contacts rated at 30V AC/DC, 1 Ampere.
Optional relay cards are available if additional relays
are required.
COM
NC
NO
COM
NO
NC
RELAY 2 RELAY 1
Base card arrangement – typical.

Installation and Commissioning Manual
Document Reference MTEC-HS-01 Rev 071 Author ADV-DC Page 17
2.3.6 Open Collector Outputs
The FCPTEC-HS-4200 & FCPTEC-HS-4400 are
equipped with two open collector type outputs that can
sink up to 10mA each from the AUX Power Output.
These are fully programmable and can be used to
control external relays.
The connections of the base card are shown in the
diagram opposite.
No external back-emf diodes are required.
O/C1 DRIVE
AUX + (24V)
AUX + (24V)
O/C2 DRIVE
The FCPTEC-HS-4400 are equipped with two open
collector and six digital programmable outputs via a
10-pin connector – see opposite.
An optional 8-way relay card is available to connect to
this connector.
O/C1 DRIVE
OUTPUT 3
OUTPUT 4
O/C2 DRIVE
OUTPUT 5
OUTPUT 6
OUTPUT 7
OUTPUT 8
A
UX + (24V)
A
UX + (24V)
2.3.7 Auxiliary Supply Output
All panels are equipped with an
auxiliary 24V DC, 300mA power
supply output. This can be used for
powering ancillary equipment. It is only
to be used for powering localised
internal equipment.
BAT +
BAT –
A
UX – (GND)
A
UX + (24V)
FCPTEC-HS-4200/4400
2.3.8 Switch Inputs
Key switch inputs can be used for changing access level, performing “class change” etc. by changing the “Action”
of these inputs. An optional 8 way input board is also available for this connector.
See separate Tech sheets for examples.
COMMON
COMMON
I/P 8
I/P 7
I/P 6
I/P 5
I/P 4
I/P 3
I/P 2
I/P 1
DISPLAY PCB

Installation and Commissioning Manual
Document Reference MTEC-HS-01 Rev 071 Author ADV-DC Page 18
2.3.9 RS232 Interface
The FCPTEC-HS4200 & FCPTEC-HS-4400 are
equipped with an isolated RS232 I/F Circuit at the
bottom of the base card.
The terminal block connections are shown opposite.
TX = Transmit Data from the panel, RX = Receive
Data into the panel, GND = Ground Reference.
The RS232 I/F can be used with the RS232 I/F Cable
Kit. This kit consists of the cable and a bulkhead
mounting connector thereby enabling external
connection without opening the door.
GND
RX
TX
RS232
Base Card Connections - typical.
The internal RS232 I/F Cable Kit option provides
connections, via a standard 9-way d-type connector,
from the outside of the enclosure.
To install the cable:
1. Remove the cover plate in the bottom face of the
back box.
2. Secure the D-Type Connector in the mounting hole
using the fixing hardware supplied.
3. Plug the end of the cable into the socket header on
the base card.
(Refer to the RS232 Interface Section above for details
of the terminal block signals).
The D-Type connector can be used with:
APC Cable Kit to connect the panel directly to a PC.
A Modem and Cable Kit for remote PC connection.
A Printer Adapter and Cable Kits for connection to a
printer.
Contact your supplier for the relevant part numbers and
order information for option kits.
Typical Internal Arrangement
RS232 Cable &
Recommended Routing

Installation and Commissioning Manual
Document Reference MTEC-HS-01 Rev 071 Author ADV-DC Page 19
3 Programming
3.1 Introduction
3.1.1 Access Levels
The panel operation is protected from inadvertent and erroneous misuse by means of three access levels. These
levels are as follows:
Level 1 Untrained user
Level 2 Authorised User
Level 3 Commissioning, Service and Maintenance
This document covers the Level 3 functions.
For details on the operation and use of the panel at Levels 1 & 2, refer to User Manual 680-015.
A level 3 password is required to enter the commissioning menus. For details of Passwords, refer to Section
3.3.12.
Level-3 Passwords.
If this number is lost, it is not possible to enter commission mode functions.
Refer to 6.1 for further formation.
3.1.2 Memory Lock
The configuration memory is protected against
inadvertent change by means of a memory lock.
Before making any configuration data changes, move
the jumper strap to the OPEN position.
After all changes have been made, move the jumper
strap back to the CLOSE position to protect the
memory against inadvertent change.
Refer to the diagram opposite for information on the
jumper settings.
MEM
LOC
K
CLOSE J1
MEM
LOC
K
CLOSE J1
OPEN
POSITION
CLOSED
POSITION
Typical View
3.1.3 Navigating through menus
The display will revert to status mode after 60s. Press the ‘Menu’ button to restore the display.
[Commission Menu 1]
LOOPS ZONES EXIT
OUTPUTS TIME/DATE VIEW
Next Menu
When a menu is displayed, use the ÍÏÐÎ buttons to highlight the required menu option and then press the 5
button to select it.
Press the ‘Esc’ button from within a menu option to return to the previous menu.
The display can be forced back into status mode by pressing the ‘Esc’ button when at the top level commissioning
menu (or by waiting 60s).

Installation and Commissioning Manual
Document Reference MTEC-HS-01 Rev 071 Author ADV-DC Page 20
3.1.4 Changing Text Descriptions
Various parameters can have a text description defined. These include loop devices, zones, etc. The zone and
device text descriptions will be shown on the display in the Fire Alarm, Fault and Warning Conditions, etc. to
provide a quick and clear indication of the source of the problem.
To change the text description, first highlight the text description within the appropriate programming option and
then press the 5button. The display then changes to show the text entry dialogue screen. For example:
>RESTAURANT <
KEY IN THE REQUIRED TEXT
The method of entering the characters is similar to the method employed on mobile
telephones. The number buttons provide both their appropriate number and several
letters of the alphabet. An example of the keypad is shown opposite.
For example, Button 2 allows entry of the number 2 and letters A, B and C.
When a button is pressed, the number is first shown on the display at the current cursor
position. If the button is pressed again within ½ second, the first character replaces the
number. A further press displays the second available character and so on. After pressing
the button to obtain the required character, wait for 1-second and the character will be
entered and the cursor will move to the next character in the text description.
Pressing another button will immediately enter the previous character and move the
cursor on to the next character.
Use the ÍÎ buttons to move backwards or forwards along the line.
When the text description is as required, press the 5button to confirm the change.
If the text has been entered incorrectly, press the ‘Esc’ button to cancel all changes and return to the previous
display.
The following table shows the numbers, characters and symbols assigned to each button on the keypad.
Button 1st Press 2nd Press 3rd Press 4th Press 5th Press
1 1
2 A B C 2
3 D E F 3
4 G H I 4
5 J K L 5
6 M N O 6
7 P Q R S 7
8 T U V 8
9 W X Y Z 9
0 Blank 0
Alternatively, press the ÏÐ buttons to scroll through a list of characters. When the required character is shown,
press the Îbutton to move on to the next character. The list of characters available and the order of presentation
is as follows:
Blank !“#$%&‘()*+,-./ 0123456789 :;<=>?@ ABCDEFGHIJKLMNOPQRSTUVWXYZ [‘]^_
4
ghi 5
jkl 6
mno
2
abc
8
tuv
13
def
7
pqrs 9
wxyz
0
9
Esc Menu
This manual suits for next models
1
Table of contents
Other Haes Control Panel manuals

Haes
Haes AOV Series Guide

Haes
Haes AlarmSense Guide

Haes
Haes Excel-EN Guide

Haes
Haes ESG-2001 Guide

Haes
Haes AlarmSense PLUS User manual

Haes
Haes Excel-32 Series User manual

Haes
Haes Esento Eclipse ECL-2 Guide

Haes
Haes ESENTO ESEN-8MAR Guide

Haes
Haes ELAN HS-5000 Series User manual

Haes
Haes ESENTO MARINE Guide
Popular Control Panel manuals by other brands

Honeywell
Honeywell ENVIRAZONE PANEL W8835 Product data

Firegear
Firegear PAVER-CP-MT Installation and operating instructions

EBS
EBS CPX230NWB user manual

Viessmann
Viessmann Vitotronic 200 GW1 operating instructions

DITEC
DITEC RO2H Installation handbook

ADT
ADT SafeWatch 3000 BATTERY REPLACEMENT INSTRUCTIONS