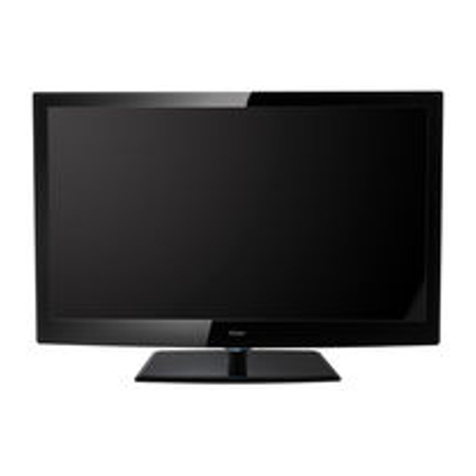
Haier HLH26BBTV User manual

Owner s Manual 3
IMPORTANT SAFETY INSTRUCTIONS
Read all of the instructions before using this appliance. When using this
appliance, always exercise basic safety precautions, including the following:
1)Save these Instructions ---the safety and operating instructions should be
retained for future reference.
2)All warning on the appliance and in the operating instructions should be followed.
3)Cleaning --- Unplug from the wall outlet before cleaning. Do not use liquid
cleaners or aerosol cleaners. Use only dry cloth for cleaning.
4)Attachments ---do not use attachments not recommended by the manufacturer
as they may cause hazards.
5)Water and moisture -- do not place this product near water, for example, near a
bathtub, wash bowl, kitchen sink, laundry tub, in a wet basement, or near a
swimming pool.
6)Accessories ---do not place this unit on an unstable cart, stand, tripod, bracket,
or table. Use only with a cart, stand, tripod, bracket, or table recommend by the
manufacture, or sold with the unit.
7)Ventilation ---Slots and openings in the cabinets and the back or bottom are
provided for ventilation. These openings must not be blocked. In a built in
installation such a bookcase or rack do not install product unless proper ventilation
is provided.
8)Power Source ---this TV should be operated only from the type of power source
indicated on the rating label. If you are not sure of the type of power supply to your
home, consult your appliance dealer or local power company.
9)Do not defeat the safety purpose of the polarized or grounding-type plug. A
polarized plug has two blades with one wider than the other. A grounding type plug
has two blades and a third grounding prong. The wide blade or the third prong are
provided for your safety. If the provided plug does not fit into your outlet, consult an
electrician for replacement of the obsolete outlet. To prevent electric shock, ensure
the grounding pin on the AC cord power plug is securely connected.
10)Power cord protection ---Power supply cords should be routed so that they are
not likely to be walked on or pinched by items placed upon or against them. Pay
particular attention to cords or plugs, convenience receptacle, and the point where
they exit from the appliance.
11)Lighting precaution ---for added protection for this product during a lighting
storm or when it is left unattended for long period of time, unplug it from the wall
outlet and disconnect the antenna or cable system. This will prevent damage to the
product due to lighting and power line surges.
12)Never push objects of any kind into this product through openings as they may
touch dangerous voltage point or short out parts that could result in a fire or electric
shock. Avoid spilling liquid of any kind on the product.
13)Servicing ---do not attempt to service the product by yourself, as opening or
removing covers may expose you to dangerous voltage or other hazards. Refer all
servicing to authorized service personnel.
14)Unplug this unit from the wall outlet and refer servicing to qualified service
personnel under the following conditions:
a. When the power supply cord or plug is damaged or frayed.

b.If liquid has been spilled, or objects have been fallen into the unit.
c.If the unit has been exposed to rain or water.
d.If the unit does not operate normally by following the operating instructions.
Adjust only those controls that are covered by the operating instructions, as
improper adjustment of other controls may result in damage and will often
require extensive work by a qualified technician to restore the unit to its normal
operation.
e.If the unit has been dropped or damaged in any way.
f.When the unit exhibits a distinct change in performance; this indicates a need
for service.
15)Heat --- The product should be situated away heat source such as radiators, heat
registers, stoves, or other products (Including amplifiers) that product heat.
16)Overloading ---Do not overload wall outlets and extension cord as this can result
in a risk of fire or electric shock.
SAVE THESE INSTRUCTIONS

Signal source inputoption
Down/Up. Sel ct desired optionon MENU ortune
to the desiredchannel.
e
VOLUME Buttons
MENU Button
Power On/Off Button
Remote Control Sensor
illuminates red instandby mode,illuminates bluewhen
the display isturned on
Power Standby Indicator
Menu exit
MENU TV/AV
MENU INPUT VOL VOL
P- P+ V- V+ POWER

DVI
VGA
L-AUDIO-R
AV IN
S-VIDEOVIDEO
L-AUDIO-R
AV OUT
VIDEOAUDIO
DVI IN
AUDIO
VGA IN
COMPONENT IN
Pr/Cr Pb/Cb YL-AUDIO-R
VGA Input/Audioinput
DVD/DTV Input
Connect a componentvideo/audio
device to thesejacks
DVI Input/Audio input
connect your cable/PC
through the input
Audio/Video Input 1
Connect audio/video
output from anexternal
device to thesejacks
S-Video Input
Power Cord Socket
This TV receiver operates onAC power. The
voltage is indicatedon the specifications page.
Never attempt tooperate the TV on DCpower
Earphone port
Power On/Off
External audio/
video output
Audio/Video Input 2
Connect audio/video
output from anexternal
device to thesejacks
0
AC IN
ANTIN
Antenna Input
Connect cable or
antenna signals to
the TV, either direc-
tly or through your
cable box.

When using theremote control. Aim it towardsthe remote sensor on the TV.
3
2
1
Installing Batteries
Open the batterycompartment cover onthe back sideand install
the batteries matchingcorrect polarity (+with +, -with -).
Install two 1.5VAAbatteries. Don`t mixold or usedbatteries with
new ones.Replace cover.
Function introduction
INPUT
Display all thesource input mode.
-
MTS/SAP EXIT
ARC
CALENDAR DNR
MUTE
INPUT
CH+
CC
MUTE
Switches the soundon or off
POWER
Turns your TV or any other programmed
equipment on oroff, depending on mode.
Digits
Program direct option(whenedit program,
every press canset different sign by turnsamong
the digits andsign on topof them)
Q.VIEW
Switch the currentchannel to the
last channel youhave viewed.
MENU
Brings up themain menu tothe screen orexit.
POWER
LOCK
GUIDE AVC
VOL-
Information display
Display of currentsignal information
EXIT
Clears all on-screendisplays and returnsto
TV viewing fromany menu.
P.STD
Display the pictureappropriate for
the program's character.
ARC
Changes the aspectratio.
FREEZE
Freezes the currently-viewedpicture.
GUIDE no available
Shows program schedule.
CC(Closed Caption)
CHANNEL UP/DOWN
Selects available channelsfound with
channel Scan.
MTS/SAP
no available
S.STD
Display the soundappropriate for
the program's character.
VOLUME UP/DOWN
Increases/decreases the soundlevel.
LOCK
.Press to enterthe Lock Setmenu
AVC
Automatic Volume Control
FAVORITE
no available
MENU
Q.VIEW
CH-
VOL+
P.STD
S.STD RATING
DISPLAY
SLEEP
AUTO
PC FREEZE
DNR
Digital noise reduction
SLEEP
Press this keyto set sleeptimer.
CALENDAR
PC
Select PC source
AUTO
Auto adjust forPC
RATING
set the parentalcontrol.

VIDEO INPUT POWER
PC
AUTO DVI MUTE
EXIT
AVC
DISPLAY
DNR
MENU
/
LOCK CALENDAR
CC
RATING FREEZE
SURROUND
ARC
ENTER
SAVING
SLEEP
P.STD
S.STD
VOL+
VOL-

Turning on the TV just after installation.
1. Connect powercord correctly.
2. Press the switchbutton on backof the TV. At this moment, the TV is switchedto standby mode.
Press the POWERbutton on theremote control oron the TV and thenthe TV will turn on.
* In thismanual, the OSD(On Screen Display)may be different from your `s, because itis just
an example tohelp you withthe operation.
TV
TV
1.If the TV was turnedoff with the button on theTV
Press the switch button on the TV to turn the TV on.
2. If theTV was turned off with the remotecontrol and thenthe ON/OFF switch on the back of the TV.
Press the switchbutton on theback of TV and thenpress the POWERbutton on theremote control toturn
the TV on.
NOTE
If you intend to be away on vacation, disconnect the power plug from the wallpower outlet.
switch
TV
Turning on the TV
Choose the Menu Language
When you start using your set for the first time, you must select the Menu Language which will be used for displaying
menus and indications.
Menu Language English
OSD Timeout 15seconds
Menu Background Translucent
Calendar
Auto Off Off
BlueScreen Off
Close Caption Off
Parental
B
C
A
1 Press MENU and then use VOL+/- button to select the
FUN. Menu.
2 Press CH+/-button to selectMenu Language.
3 Select a particular Menu Language by pressing VOL+/- button
repeatedly.
4 When you are satisfied with your choice, press the EXIT button to
return to normal viewing.
Choose the Input Source
- Change thepicture source so that you can watch yourTV, cable TV, VCR, DVD, or any other devices thatare
connected to yourTV.
1. Press INPUTbutton on theremote controller,the Scoure menuwill appear onthe screen.
2. Press CH+/-buttonfor option andthen press VOL+/-button to confirm.
Source
TV
AV1
AV2
YPbPr/YCbCr
VGA
DVI

Basic Function
Operation Menu
1.Press MENU buttonto open themain menu. PressVOL+/- button to select PIC., SOU., ADJ., SYS. , FUN. or TIME menu.
2.Press CH+/- buttonto select submenu,and press VOL+/- button to increase/decrease the value or select the setup.
4.The setup timein display willdisappear automatically without any operation when the latest preset time expiries. MENU
display time canbe set to5,10,15,20,25,30 and 40 seconds.
5.Press EXIT button to exitany menu ifMENU is ondisplay.
Sound Mode
Press S.STD buttonon the remotecontroller for menudisplay, and then use CH+/- button to select
the desired mode,press VOL+/- toconfirm.
Basic Function
3.Press MENU toreturn to themain menu.
(This feature canalso be changedfrom the soundmenu function screen)
SOU.Mode
Music
Standard
Theater
Personal
Picture Mode
Press P.STD button onthe remote controllerfor menu display, and thenuse CH+/- button to select
the desired mode,press VOL+/- toconfirm.
Sleep Timer
Every press ofSLEEP button, the timer willbe set inthe following sequence:
Sleep 0Min Sleep 5Min Sleep 15Min Sleep 30Min Sleep 60Min Sleep 90Min Sleep 120Min Sleep 0Min
If remaining timeof set timeris to bedisplayed, press theSLEEP button once.
(This change canalso be madefrom Picture menuadjustment screen)
PIC.Mode
Vivid
Standard
Mild
Custom
Standard:
Vivid:
Mild:
Custom:
normal mode.
mode of watchingthe movement ofpicture.
the effect of the pictureis soft.
picture effect which you favorite.
Normal sound withmoderate bass andtreble setting.
.
Enables extra bassand treble toenhance the movie experience.
Personal:
Standard:
Music:
Theater:
A sparesetting that canbe adjusted to personal tastes.
Adjust the soundto best suitmusic programs

This TV set has three methods to set channels, which are respectively Automatic search, manual search fine tune.
In this section,how to use the remote control to set channel is explained.You can also use
buttons on the TV set to set channel.
System Menu
Color Sys. AUTO
Sound Sys. M/N
Fine Tune 49.75MHz
Skip Off
Channel Type CATV
CATV Type STD
Auto Scan
Prog. Switch
B
C
A
1Press MENU button and then use VOL+/- button to select the SYS. Menu.
2Press CH+/- buttons to select "Channel Type" item.
3Press VOL+ button to select CATV or Air item.
Note : the tuning menu will be
only operated in normal TV mode.
Channel Type
Fine Tune
B
C
A
If the picture or sound are poor, try using the fine tune feature.
Do not use this feature unless reception is poor.
1Repeat step 1-2, then press CH+/-buttons to select"Fine Tune" item.
2Press VOL-/+ buttons repeatedly tocarry out fine tune, till the best
picture and sound are obtained, then loosen the button.
Automatic Scan
1Press MENU button and then use VOL+/- button to select the SYS. Menu.
2Press CH+/- buttons to select "Auto Scan" item.
3Press VOL+/- button to ensure automatic search function work.
4Press MENU button to stop automatic search function.
After the search has finished, all channels now playing
program will be automatically preset in order.
When Air is selected, theTV will detect antenna signalsand will search
for antenna TV (NTSC andATSC) channels availablein your localarea.
When is selected, theTV will detect cable companysupplied
signals and willsearch for cableTV (NTSC,ATSC, QAM modulated)
channels available inyour area.
Make sure thatregistration with yourcable TV provider and connection
of equipment arecompleted.
When Air and are selected, theTV will detect the antenna
signals and cablecompany supplied signals,and search forthe
antenna TV and cable TV channels availablein your area.
CATV
CATV
Color Sys. AUTO
Sound Sys. M/N
Fine Tune 49.75MHz
Skip Off
Channel Type CATV
CATV Type STD
Auto Scan
Prog. Switch
CATV Type
1Press MENU button and then use VOL+/- button to select the SYS. Menu.
2Press CH+/- buttons to select "CATV Type" item.
3Press VOL+/- button to select STD, IRC or HRC item.

Color System
B
C
A
Usually this shouldbe set inthe auto position.However if thecolor displayed
on the screenare incorrect, youcan manually selectthe correct color system.
Press MENU andthen VOL+/- button,till the picturemenu shown onthe
right will displayon the screen.
Press CH+/- buttons to select "Color Sys.", then pressthe VOL-/+ buttons
to select thecorrect color system.In general, youcan set itas "AUTO".
After the programsare presetting, youcan skip someprograms so thatto select yourfavorite channels only.
1. Press CH+/-button or Direct-digitchoosing button toselect a channeldirectly.
2.Press MENU and then use VOL+/- button to select the SYS. Menu.
3.Press CH+/-buttons to select "Skip" item.
4. press VOL-/+ button to set Skip as On.
5. When youare satisfied withyour choice, press MENU button to return to
the previous menuor press EXIT button to return to TV viewing.
1. Use Direct-digitChoosing button toselect the number of the channel to
be recovered.
2. Do theabove steps again.
3. Press VOL+/-button to setSkip as Off.
Skip
B
C
A
If you want to recover the skipped channel
1..Press MENU and then use VOL+/- button to selectthe SYS. Menu
2. Press CH-/+button to selectProg.Switch.
3. Press VOL+/- toenter the submenu,and press thedigital button toset the desired
channel number,
Press CH+/- buttonto Current Prog or To Prog item, and VOL+/- to select the position then press the digital button to set the
exchange channel number, press CH+button to Switch,then press VOL+button to confirm.
4. When youare satisfied withyour choice, pressMENU button to returnto
the previous menuor press EXIT button to return to TV viewing.
Prog.Switch
Current Prog 000
ToProg 001
Switch
B
C
A
System Menu
Color Sys. AUTO
Sound Sys. M/N
Fine Tune 49.75MHz
Skip Off
Channel Type CATV
CATV Type STD
Auto Scan
Prog. Switch
Color Sys. AUTO
Sound Sys. M/N
Fine Tune 49.75MHz
Skip Off
Channel Type CATV
CATV Type STD
Auto Scan
Prog. Switch

Picture Quality Adjust
The TV menu gives you an overview ofMENU you can select.
Note: Depending on the input signal, one or more menu items may not be selectable.
Contrast
This will adjustthe intensity ofbright parts inthe picture butkeep
the dark partsunchanged.
Brightness
This will adjustthe light outputof the completepicture, which will
mainly affect the darker areasof the picture.
Color
This will adjustthe saturation levelof the colorsto suit yourpersonal preference.
Hue (selectable in NTSC mode only)
Allows you toselect the colormix (Hue) ofthe picture.
Sharpness
This will adjustthe sharpness offine details inthe picture.
DNR (Digital Noise Reduction )
Automatically filters outand reduces theimage noise andimproves picture
quality when receivingweak video signals.
Select Auto/Off/Weak/Medium /Strong according to the image noise.
1 Press MENU and then use VOL+/- button to selectthe PIC. Menu.
2 Press CH+/-button to selectthe desired items.
3 Press VOL+/- button to adjust the setting.
4When you aresatisfied with yourchoice, press MENU button to return to
the previous menuor press EXIT button to return to TV viewing.
Mode Custom
Contrast
Brightness
Color
Hue
Sharpness
DNR Auto
B
C
A
50
50
50
0
50
Note:
When Custom modeis not selected,the Custom modecan be entered automatically if Contrast, Brightness,
Color, Hueand Sharpness parametersare adjusted.

Sound adjustment
Sound Adjust
1. Press MENUbutton and thenuse VOL+/- buttonto select theSOU.menu.
2. Press CH+/- button for desiredoption.
3. Afteryour option isselected, press VOL+/-button to adjust.
4. Repeat step2 and 3until desired soundhas been achievedwhen displayed
time for menusetup expires withoutany operation ,MENU disappears from
the picture .If MENU orEXIT button is pressed ,MENU in displaywill disappear
in sequence orimmediately respectively.
Volume 50
Balance 0
SOU.Mode Personal
Treble 50
Bass 70
Surround Off
AVC Off
Woofer Off
B
C
A
Note:
1. Select Balanceto balance rightand left soundchannels of theTV.The intermediate value is 0.When indication valueof
Balance increases toward+50,sound of theright and leftspeaker becomes strongerand weaker,respectively. When indication
value of Balancedecreases toward -50,sound of theright and leftspeaker becomes weakerand stronger.
2.When Personal modeis not selected,the Personal modecan be enteredautomatically if Treble or Bass parameters are adjusted.
Sound adjustment
Sound can beadjusted for anyinput as follows:
Volume
This will adjustthe sound outputlevel.
Balance
This will adjustthe output ofthe right andleft speakers to obtain the best
stereo reproduction foryour listening position.
SOU.Mode
This select themodes for soundreproduction dependent onthe broadcast signalsor signals fromexternal inputs received.
Press CH+/- buttonto Select SOU.Mode,
press VOL+/- buttonto select theMusic Standard Theater or Personal.
Treble
This will adjustthe treble outputlevel.
Bass
This will adjustthe bass outputlevel.
Surround
The surround soundfeature expands the audio listening field wider and deeper to create exceptional sound quality
from the TV`s speakers.
Press CH+/- buttonto Select Surround,
press VOL+/- buttonto set Surround as Off or On
AVC (Automatic Volume Control)
Each broadcasting stationhas its ownsignal conditions, andso it isnot easy foryou to adjustthe volume everytime the
channel is changed.This feature lets you automaticallyadjust the volumeof the desiredchannel and reducesthe volume
differences between channels and programs,providing a moreconstant overall level.
This will alsoreduce the dynamicsof sound.
Press CH+/- buttonto Select AVC,
press VOL+/- buttonto set AVC as Off or On
Woofer
Woofer is a speaker thatcomplements front speaker`sreproduction capability oflow-pitched sound.
Press CH+/- buttonto Select Woofer,
press VOL+/- buttonto set Woofer as Off or On

Adjustment Setup
Adjustment Setup
When VGA DVI input modeis set
VGA/DVI:
Display Mode Full Screen
Adjust
RGB
Reset
Auto Sync.
Color Temper Standard
Black Stretch On
B
C
A
1. Press MENUbutton on theremote controller andthen use the
VOL+/- to selectthe ADJ.menu.
2.
3. Press theVOL+ button andthen use CH+/-button for desired
adjust parameter option.
4. Press VOL+/-fordesired adjust parameteroption until satisfactory
value is achieved.When VGAsignals are received,the automatic
mode is usedfor parameter adjustment.
Note:
Adjust, RGB andReset are functionalonly under VGAand DVI mode,and AutoSync is functionalin VGAmode.
Adjustment Setup
Press CH+/- to enter .
H Size
H Position
V Size
V Position
Phase Adjust
B
C
A
Red
Green
Blue
B
C
A
0
0
0
0
0
0
0
0
No selectable
In VGAand DVI inputmode , HPosition and VPosition can beused to
adjust the pictureposition.
Display Mode
This will adjustthe picture ratio.
Under the VGAsignal, there areFull Screen ,one to oneand 4:3
mode for Displaymode to select.
Under theAV1or Av2 signal, there are Full Screen, Vertical Zoom,
Half Zoom, Panoramaand 4:3 Modefor Display Modeto select.
Under the DVIsignal, there areFull Screen and4:3 Mode forDisplay
Mode to select.
Adjust
this is optedfor adjusting HPosition and VPosition as wellas
relative parameters inVGA andDVI modes.(PhaseAdjust is not
available in DVI)
RGB
this is optedfor adjustment ofthe numerical valueof red, greenand
blue in VGA/DVImode.
Reset
this is optedfor initialization adjustment of parameters (Afterthe operation,
Complete will beon the rightof the option)
Auto sync
this is optedfor adjustment ofpicture location frequencyand phase
parameters in VGAmode. (Not availablein DVI)
( Afterthe operation, Completewill be onthe right ofthe option.)
Color temperature
This will increaseor decrease Warm (red) and Cold (blue) colors to suit
personal preferences.
Select Cold to give thewhite colors ablue tint, Standard to give the white
colors a neutraltint, Warm to give thewhite colors a red tint.

Function Setup
Function Setup
It is possibleto select MenuLanguage, OSD translucent,position and screen display of MENU as follows:
1. Press MENUbutton once, andthen use VOL+/-button until the following menu appears on the screen:
Menu Language English
OSD Timeout 15seconds
Menu Background Translucent
Calendar
Auto Off Off
BlueScreen Off
Close Caption Off
Parental
Av
B
C
A
2. Press theVOL+ button andthen use CH+/-button on theremote controller toenter MENU ofsystem setup.
3. Press CH+/-to select desiredoption on MENU.
4. Press VOL+/- to adjust selectedoption.
Menu Language Option
Repeat step 3and 4 toselect English, Francaisor Espanol asMENU Menu Language.
OSD Timeout Option
Repeat step 3and 4 toselect menu displaytime for 5,10,15, 20, 25, 30 or 40 seconds.
Menu Background Option
Repeat step 3and 4 toselect OSD backgroundbetween Translucentand Opaque.
Function Setup
Auto Off
Repeat step 3and 4 toselect On/Off. If On isselected, and thereis no signalto the TV for 2minutes , Auto Off will
be on thescreen and for3 minutes theTV will be in standbycondition . If Off is selected , andthere is nosignal to the
TV for 3minutes without anyoperation , screenprotection will beon the screen.
Calendar Display and Check
Repeat step 3and press VOL+/-button to entercalendar menu as follows:
Enter Calendar menu,press VOL+/- andCH+/- button to
adjust or checkthe date.
BlueScreen
Repeat step 3and 4 toselect blue Screenbetween off or on.

Parental
Close Caption
(Note: Close Caption is only availablein AV and S-Video signal)
Closed captioning isa process whichconverts the audioportion of atelevision program
into written wordswhich then appearas subtitles onthe television screen.Closed
captions allow viewersto read thedialogue and narrationof television programs.
Using Closed Captions
Captions are thesubtitles of thedialogue and narration of television programs.
For prerecorded programs,program dialogue canbe arranged into captions in
advance. Its possibleto caption alive program byusing a process called real-time
captioning, which createscaptions instantly. Real-time captioningis normally
done by professionalreporters using amachine shorthand system and computer
for translation intoEnglish.
Captioning is aneffective system for the hearing-impaired,and it can also aid
in teaching MenuLanguage skills.
1. Press MENU button and then use VOL+/- button to selectthe Fun. menu.
2. Press CH+/- to select Close Caption.
3. Press theVOL+/- button to select available caption items.
(Off/CC1/CC2/CC3/CC4/TX1/TX2/TX3/TX4/XDS.)
4. Press EXIT button to return to TV viewing.
Menu Language English
OSD Timeout 15seconds
Menu Background Translucent
Calendar
Auto Off Off
Blue Screen Off
Close Caption Off
Parental
B
C
A
TEXT
The term forthe words thatappear in alarge black frameand almost cover
the entire screen;usually messages providedby the broadcaster.
Parental Control can be used to block specific channels, ratings and
other viewing sources.
The Parental Control Function (V-Chip) is used to block program viewing
based on the ratings sent by the broadcasting station.
The default setting is to allow all programs to be viewed.
It is also possible to block all program viewing for a time period.
To use this function, the following must be done :
1. Set ratings and categories to be blocked.
2. Specify a password
3. Enable thelock
V-Chip rating and categories
Rating guidelines are provided by broadcasting stations. Most television
programs and television movies can be blocked by TV Rating and/or
Individual Categories. Movies that have been shown at the theaters or
direct-to-video movies use the Movie Rating System (MPAA) only.
Menu Language English
OSD Timeout 15seconds
Menu Background Translucent
Calendar
Auto Off Off
BlueScreen Off
Close Caption Off
Parental
B
C
A
1. Press CH+/- to select Parental.
2. Press theVOL+ button to enterParental submenu.
The TV is set up with the initial password 0-0-0-0
. If thepassword in theLock Set menube changed,
and security default
password is 9-4-4-3
The password herewill also change.
Parental Control Off
Unrated Program Block Off
Parental Guild
MPAA Rating
Parental

Ratings for Movies previously shown in theaters:
Movie Ratings :
NR (Permits all programs)
G (General audience)
PG (Parental guidance suggested)
PG-13 (Parents strongly cautioned)
R (Restricted)
NC-17 (No one 17 and under admitted)
X (Adult only)
If you set PG-13 : G and PG movies will be available , PG-13, R,
NC-17 and X will be blocked.
Ratings for Television programs including made-for-TV movies :
TV-Y (All children)
TV-Y7 (Children 7 years older)
TV-G (General audience)
TV-PG (Parental guidance suggested)
TV-14 (Parents strongly cautioned)
TV-MA (Mature audience only)
TV Rating Children:
ALL (Age) (applies to TV-Y, TV-Y7)
FV (Fantasy Violence) (applies to TV-Y7)
TV Rating General:
ALL (Age) (applies to TV-G, TV-PG, TV-14, TV-MA)
D (Dialogue - sexual dialogue) (applies to TV-PG, TV-14)
L (Language - adult language) (applies to TV-PG, TV-14, TV-MA)
S (Sex -sexual situations) (appliesto TV-PG, TV-14, TV-MA)
V (Violence) (applies to TV-PG, TV-14, TV-MA)
Parental
Continue
Parental Control Off
Unrated Program Block Off
Parental
Rating ALL V S L D
TV-Y V
TV-Y 7 V V
TV-G V
TV-P G V V V V V
TV-1 4 V V V V V
TV-M A V V V V
G V
PG V
PG-13 V
R V
NC17 V
X V
Note: If some option is locked,the options of the same levelwill also be locked and the screen displays Lock .
TV Rating Limitand Movie Rating Limit can only be opted when Parental Control is set to Custom.
(Parental is only available in AV and S-Video signal)
Parental Guild
MPAA Rating
Parental Guild
MPAA Rating

Time Setup
If Off-time or On-time isintended inAV1/S-Video/YPbPr/YCbCr/VGA, follow the instructions as below:
Clock --:--
Off Time --:--
On Time --:--
On Prog 000
Remind Time --:--
Remind Prog. 000
B
C
A
Indication will appearon the screen 1 minute prior to
expiration of theset
Off Time
Time Setup
Note:
If Clock isset, time youset for Off Timeand On Time will be a point
of tiem. Otherwise,if Clock isnot set, timeyou set forOff Time and
On Timewill be aperiod of time. And itwill account timefrom the time
when you setautomatically .
Note:
The Sleep Time and Off Time can not be set at simultaneously .
If both timeare set ,the later setupwill be inoperation.
The clock will only work if the TV set is turned on or in standby.
When the set is disconnect from the power supply or is turned off by
the main power on the rear panel, the clock loses power and will need
to be reset when the power is reconnected.
1Press MENU buttonand then VOL+/-button to selectthe TIME menu.
2 Press CH+/- buttonsto select "Clock",press VOL +/- buttons toselect hour
or minute position,then press thedigital buttons toset the value of hour or minute.
Clock Setting
Off/On Time
Using on/off time function, the TV set can automatically turn on to a preset program or shut down in a preset
1Press CH+/- buttonsto select "OnTime", press VOL+/-buttons to select hour or minute position; then press the digital
buttons to setthe value ofhours or minutes.
2Press CH+/- buttonsto select "OnProg", then pressthe digital buttonsto select your desired channel.
3Repeat step 1-2to set Off Time .
Remind Time/Remind Prog.
1Press MENU and then VOL+/- button to call up the TIME menu on the screen.
2Press CH+/- buttonsto select "Remind Time", then press VOL+/- buttons to select hour or minute position;
then press the digital to set the value of hour or minute.
3Press CH+/- buttonsto move the cursor to "Remind Prog.".
Then press the digital buttons to set the desired channel.

Lock Setup
Lock Set
PassWord
Tuning Lock Off
Preset Prog. Off
Prog. Num 1
Source Lock
Child Lock Off
Max Volume 100
UnLock
Change Password
The password canbe changed. PressCH+/- button andselect
Password. Press VOL+/- or ENTER button,the screen willdisplay
Old Pw.----,which will stayon the screenif a wrong password
is entered. Ifcorrect password isentered, the screen will
display New Pw.----. Then enter the new password, and the screen will display
Confirm----. If thesame password isentered correctly twice,the old password will be changed. If the same password
is not correctlyentered twice, thescreen will displayNew Pw.----, then you have to reenter the password.
Note:
The initial passwordis 0000, andthe security defaultpassword is 9443. If Unlock is activated, the password
setup cannot bechanged.
Lock Menu Options
Lock Menu Options
Press LOCK buttonon remote control,Password will appearon the screen.If password iscorrectly entered, theLock set menuwill be
menu willl be entered. If thepassword is notcorrectly entered, youwill be requiredto reenter thepassword and thecursor will stay
At the firstplace. Press EXITto erase thewindow. Iftime you setin OSD menuexpires after thelatest press, MENU
will disappear automatically.
- The TV has the function ofsecurity default lock.Password needs tobe entered whenthe program lockmode is tobe set.
Press CH+/- to select Tuning Lock and VOL+/- to set On/Off. (To set On, some operation such as search will be
not available. Whenenter the SYS.menu, TunerLock will beon the screen,and the timewill be thesame with
the main menuif no operation.If you wantto operate SYS.menu, you needto enter theLock menu toset Tuning
Lock Off or operate UnLock.
Tuning Lock
Preset Prog.
Preset Prog. isopted for setting up start signal resource. Press CH+/- button to selectPreset Prog. Press VOL+/-
button, sources canbe swapped in TV/AV1/SVideo/AV2/YPbPr/VGA/DVI/Off mode. After setup,the set mode will be
entered if the TV is switchedoff and on again.entered if the

Source Lock
Source Lock isopted to hinder external input modes, such as AV, S -Video and VGA. Press CH+/- button to select
the option, andpress VOL+/- button to display Source Lock menu.
Source Lock
AV1 Off
S-Video Off
AV2 Off
YPbPr/YCbCr Off
VGA Off
DVI Off
Press CH+/- buttonto select desiredoption. Press VOL+/-button to setup the
mode of SourceLock. If someSource Lock isset on, themode will beentered
and the screenwill display bluebackground with themute mode activated
and Lock. Inlock on mode,when screen isblank, icon Lockwill be always
displayed on thescreen. If lockmode is tobe verified, enterSource Lock sub
menu and setrelative mode off or selectUnlock mode inthe Preset Prog.Menu.
Child Lock
Max Volume
Press CH+/- buttonto select MaxVolume. Press VOL+/- button for adjustment between 0 100. If acertain value is set,
when volume isbeing adjusted, the sound value cannot exceed maximum volume value. If current volume is over
Max Volume,when Lock Setmenu is set, current volume will become set maximum volume. If current
volume is
below maximum volume,customer set volume will stay unchanged.
Unlock
Press CH+/- buttonto select Unlockmode.
Press VOL+/- buttonto unlock allset modes, settingall lock optionsto off, and the maximumvolume returns to100.
Press CH+/- buttonto select ChildLock. Press VOL+/- button to set On orOff mode. If lock on mode is set,
Child Lock isinactivated automatically.In such case, If buttons on TV are pressed, the screen will display Child Lock,
which can beerased by pressof EXIT button. 5 secondslater after thelatest press, thescreen display willdisappear
automatically. The Child Lock mode canbe resumed byentering Lock Setmenu to setChild Lock off or activeUnlock.
Prog. Num isopted for settingup preset channel.Press CH+/- buttonto select ProgNum. Press VOL+/-button, to select
channel number.(Theitem is notavailable except TV signal.)
Prog.Num

- RGB (PC)mode only; This function doesn`twork for RGB-DTVmode.
- Automaticallyadjusts picture positionand minimizes imageshaking.
- Afteradjustment, if theimage is stillnot correct, yourTV is functioning properly butneeds further adjustment.
- TheAuto sync are not activein DVI mode.
1. Press MENUbutton and thenuse VOL+/- buttonto select theADJ. Menu.
2. Press CH+/-button to selectAuto Sync.
3. Press VOL+/-button to runAuto Sync.
When Auto Sync has finished, a better quality will be shown on screen.
If the positionof the imageis still notcorrect, tryAuto adjustment again.
4. In RGB(PC) mode, ifthe image needsto be adjustedmore after usingAuto
Sync, you can try Auto Sync again.
Note: It isbetter to useReset instead ofAuto syncin 480P,720P,1080i.
Press the ARC button repeatedly to select the desired picture format.
4:3 mode
Choose 4:3 mode when you want to view a picture with an original 4:3 aspect ratio, with black bars appearing at both the
left and rightsides.
Full screen( correspond with 16:9)
Choose Full screen when you want to adjust the picture horizontally, in a linear proportion to fill the entire screen.
one to one
Choose one to onewhen you wantto adjust thepicture in realproportion, (Only availablein PC signal,
especial for 800X600mode and modesof under it)
Vertical Zoom
Choose Vertical Zoomwhen you wantto adjust thepicture the picturevertically, that is without any back bars.
Half Zoom
Choose Half Zoom when you want to enlarge the picture vertically by enlarge top of the picture, that is the letters on the
bottom are stillon the screen.
Panorama
Choose Panorama when you wantto enlarge thetwo sides ofthe picture ina non-linear proportion.
Note:
The setting ofaspect ratio isrespective in different signal source, that meansdifferent aspect ratio could besaved
in different source
- Caution: Ifa 4:3 orone to onefixed image ison the screenfor a longtime, it mayremain visible. This is calledburn-in.
- Set everyaspect ratio forVideo, Component 480i sources.
- Use 4:3,or 16:9 forother RGB-PC andDVI-PC sources.
- Horizon isnot available forComponent (480p,720p,1080i), DTV(480p,720p,1080i) sources.
- This function works inthe following modes:
RGB-PC, RGB-DTV (480p,720p,1080i),DVI-DTV (480p,720p,1080i), COMPONENT(480p,720p,1080i).
1. Press MENUbutton and thenuse VOL+/- buttonto select theADJ. Menu.
2. Press CH+/-button to selectone option andthen press VOL+/-to adjust.
3. Press MENUor EXIT to exit it.
Display Mode Full screen
Color Temper Standard
Black Stretch On
Adjust
RGB
Default
Auto Sync.
B
C
A
Other manuals for HLH26BBTV
1
Table of contents
Other Haier LCD TV manuals

Haier
Haier L22B1120 User manual

Haier
Haier LR47T1 User manual

Haier
Haier LV-2610P User manual

Haier
Haier L26F6 User manual

Haier
Haier LE19B13200 User manual

Haier
Haier L32A6A-A1 User manual

Haier
Haier L19M3 User manual

Haier
Haier L26V6-A8 User manual

Haier
Haier LE22D3380 User manual

Haier
Haier L32A9 User manual

Haier
Haier HDMI LE19K300 User manual

Haier
Haier LT32F6 User manual

Haier
Haier L24C1180 User manual

Haier
Haier LE32T1000 User manual

Haier
Haier GRL-26POT User manual

Haier
Haier L24B1180 User manual

Haier
Haier L22T3W User manual

Haier
Haier L32A6A-A1 User manual

Haier
Haier 15HL25S - 15" LCD TV User manual

Haier
Haier LET32T1000HF User manual