manuals.online logo
Brands
  1. Home
  2. •
  3. Brands
  4. •
  5. Hakko Electronics
  6. •
  7. Soldering Gun
  8. •
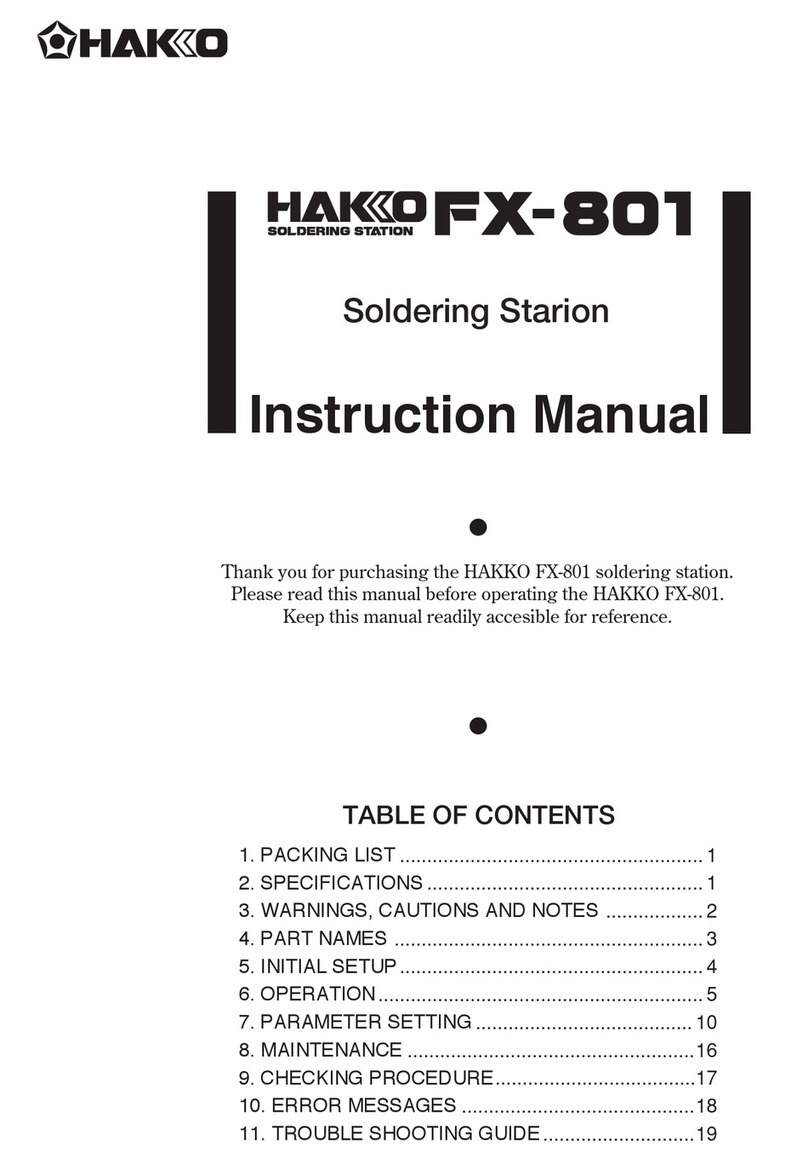
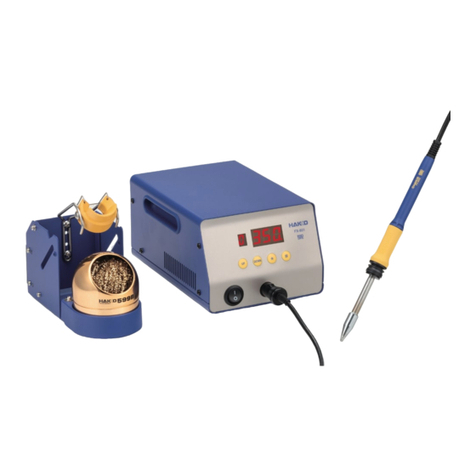
  9. Hakko Electronics FX-100 User manual

Hakko Electronics FX-100 User manual

small sponge
large sponge
CAUTION
Using the sponge without water may damage the
tips.
2014.5
MA02600XZ140512
Soldering Station
Instruction Manual
Thank you for purchasing the HAKKO FX-100 Soldering Station.
Please read this manual before operating the HAKKO FX-100.
Keep this manual readily accessible for reference.
1. PACKING LIST AND PART NAMES
HAKKO FX-100 soldering station 1
HAKKO FX-1001 soldering iron 1
Sleeve (Green) 1
Sleeve (Gray) 1
Cleaning wire 1
Heat resistant pad 1
Iron holder 1
Power cord 1
Instruction manual 1
Please check to make sure that all items listed
below are included in the package.
CAUTION
This product includes such features as electrically conductive plastic parts and grounding of the handpiece
and station as measures to protect the device to be soldered from the effects of static electricity. Be sure to
observe the following instructions:
1. The handle and other plastic parts are not insulators, they are conductors. When replacing parts or
repairing, take sufficient care not to expose live electrical parts or damage insulation materials.
2. Be sure to ground the unit during use.
* Specifications and design are subject to change without notice.
4. INITIAL SETUP
A. Iron holder

This product includes two methods for cleaning the
tip: a wire tip cleaner, and a sponge. Please be
sure to soak the sponge in water before using.
1. Set the iron holder.
2. Put the small cleaning sponge in one of the five
holes in the iron holder base.
3. Add water to the iron holder base. The small
sponge will keep the large sponge moist through
capillary action.
4. Wet the large sponge, squeeze it dry and put it
on the iron holder base.
B. Handpiece cord assembly
1. Pass the iron cord through the hole in the heat
resistant pad.
2.HoldtheheadpartoftheT31seriestip(not
included)withtheheatresistantpadandinsert
thetipintothehandpiece.Pushuntilthetip
stops.
C.Station
1. Insert the power cord into the receptacle at the
back of the station.
2. Insert the connection cable plug into the
receptacle at the front of the station, and turn it
in a clockwise direction until it stops.
3. Set the iron in the iron holder.
4. Plug the power cord into a grounded wall socket.
CAUTION
Be sure the power switch is OFF before connecting or disconnecting the soldering iron cord. Failure to do so may
result in damage to the circuit board.
CAUTION
The HAKKO FX-100 is protected against electrostatic
discharge and must be grounded for full efficiency.
HAKKO FX-100
Soldering station
HAKKO FX-1001
Soldering iron
Power cord
Heat resistant
pad
Iron holder
Iron holder
base
Cleaning
sponge
Sleeve
(Green)
Sleeve
(Gray)
Power switch
Receptacle
2. SPECIFICATIONS
Output power
Output frequency
Dimensions
Weight
50 W
13.56 MHz
127 (W) × 150 (H) × 167 (D) mm
(5.0 × 5.9 × 6.6 in.)
3 kg (6.6 lb.)
Station
HAKKO FX-1001 soldering iron
Length of cord
Total Length (w/o cord)
Weight (w/o cord)
1.3 m (4.3 ft.)
190 mm (7.5 in.) with T31-02D24 tip
31 g (0.07 lb.) with T31-02D24 tip
NOTE:
This product is protected against electrostatic discharge.
28 W (85 W)
T31-01 Series / 450℃(840℉)
T31-02 Series / 400℃ (750℉)
±1.1℃(±2.0℉)
Power consumption
Tip series /
Tip temperature
Temperature stability
Copyright © 2014 HAKKO Corporation. All Rights Reserved.
OVERSEAS AFFILIATES
U.S.A.: AMERICAN HAKKO PRODUCTS, INC.
TEL: (661) 294-0090 FAX: (661) 294-0096
Toll Free (800)88-HAKKO
4 2 5 5 6
http://www.hakkousa.com
HONG KONG: HAKKO DEVELOPMENT CO., LTD.
TEL: 2811-5588 FAX: 2590-0217
http://www.hakko.com.hk
E-mail:[email protected]
SINGAPORE: HAKKO PRODUCTS PTE LTD.
TEL: 6748-2277 FAX: 6744-0033
http://www.hakko.com.sg
E-mail:[email protected]
Please access to the following address for the other Sales affiliates.
http://www.hakko.com
HEAD OFFICE
4-5, Shiokusa 2-chome, Naniwa-ku, Osaka 556-0024 JAPAN
TEL:+81-6-6561-3225 FAX:+81-6-6561-8466
http://www.hakko.com E-mail:[email protected]
CAUTION
WARNING
To prevent accidents or damage to the HAKKO FX-100, be sure to observe the following:
When power is ON, the tip will be hot. To avoid injury or damage to personnel and
items in the work area, observe the following:
Do not touch the tip or the metal parts near the tip.
Do not allow the tip to come close to, or touch, flammable materials.
Inform others in the area that the unit is hot and should not be touched.
Turn the power off when not in use, or left unattended.
Turn the power off when changing parts or storing the HAKKO FX-100.
The unit is for a counter or workbench use only.

This appliance can be used by children aged from 8 years
and above and persons with reduced physical, sensory or
mental capabilities or lack of experience and knowledge if
they have been given supervision or instruction concerning
use of the appliance in safe way and understand the hazards
involved.

Children shall not play with the appliance.

Cleaning and user maintenance shall not be made by
children without supervision.
Do not use the HAKKO FX-100 for applications other than soldering.
Do not allow the HAKKO FX-100 to become wet, or use it when hands are wet.
Do not modify the HAKKO FX-100.
Use only genuine HAKKO replacement parts.
Be sure to hold the plug when inserting or removing the iron cord.
Do not strike the iron against hard objects to remove excess solder. This will damage
the iron.
Be sure the work area is well ventilated. Soldering produces smoke.
While using the HAKKO FX-100, don't do anything which may cause bodily harm or
physical damage.
3. WARNINGS, CAUTIONS AND NOTES
Warnings, cautions and notes are placed at critical points in this manual to direct the operator’s
attention to significant items. They are defined as follows:
CAUTION : Failure to comply with a CAUTION may result in injury to the operator, or damage to the
items involved. Two examples are given below.
WARNING: Failure to comply with a WARNING may result in serious injury or death.
NOTE : A NOTE indicates a procedure or point that is important to the process being described.
Cleaning wire
*When using a Cleaning Wire
Place it in the iron holder as shown on the right. See "2.Using a Cleaning Wire"
in section "7. MAINTENANCE"
Display
MODE
DSP
 SHOWPROFILE
 SHOWTIPLOADS
 SHOWTIPTIME
 SELECTPROFILE
 TIPTYPE
  MANUALSET*
HAKKOFX-100has3operationbuttons.Theoperationexecuted
byeachbuttonvariesdependingonwhatisonthedisplayscreen.
Theoperationforeachbuttonisindicatedatthebottomofthe
screen.Selectthebuttonaccordingtotheindication.
Bypressingcertainbuttonsfromthehomescreen,thedisplaywill
change,revealingthebuttonlabelsandwaitingforyourselection.
LeftbuttonMODE
CenterbuttonDSP(Display)
RightbuttonSET(Parameters)
Ifnobuttonispressed,itwillgobacktothehomescreen.
5.OPERATION
Controlsanddisplays
Leftbutton Rightbutton
Centerbutton
● Operation
1. Turn ON the power switch.
2. The screen will switch in order of product number indication →greeting →home screen.
3. When the home screen is displayed, the MODE status is indicated on the left and output graph at the
center. The graph starts rising as the iron tip temperature increases. The graph starts falling as the iron
tip approaches stable temperature, reaching the minimum when the stable temperature is achieved. Start
soldering after the stable temperature is reached.
Example)MODEscreen
▲
NORMAL
BOOST
<CANCEL>
<↑>  <↓>  <OK>
Operatethemachineusingthesebuttons
thatareplacedintheorderofthebuttons
displayedonthescreen.
・When MODE is pressed
The mode can be changed to NORMAL mode or BOOST mode.
By changing the mode to BOOST, the performance of the station is increased and the tip temperature rises
slightly.
▲
NORMAL
BOOST
<CANCEL>
<↑>  <↓>  <OK>
BN
Movethecursorbypressingthe<↑>or<↓>
buttontoselectNORMALorBOOST.
Afterselecting,press<OK>.
DisplayintheNORMALmode DisplayintheBOOSTmode
 
 N
MODE ・ DSP ・ SET
5.OPERATION
・WhenDSP(Display)ispressed
Theselectedinformationwillbedisplayedonthescreen.
SHOW PROFILE
Thesetprofileinformation(Station,User,andSolder)isdisplayed.
SHOW TIP LOADS
Thesolderingcountisdisplayed.ByselectingRESETandthenOK,thecountisresetto0.
Toescapewithoutresetting,selectCANCEL.
SHOW TIP TIME
Thecumulativerunningtimeontheirontipisdisplayed.*Notincludingshut-offperiod.ByselectingRESET
andthenOK,theperiodisresetto0.Toescapewithoutresetting,selectCANCEL.
SELECT PROFILE
Theprofileinformationtobedisplayedisselectedhere.ProfileinformationNo.1orNo.2canbeselected.
▲
SHOW PROFILE
SHOW TIP LOADS
SHOW TIP TIME
<↑>  <↓>  <OK>
The cursor moves by pressing the <↑> or <↓>
button. The following items are displayed in order.
・SHOW PROFILE
・SHOW TIP LOADS
・SHOW TIP TIME
・SELECT PROFILE
・TIP TYPE
・<CANCEL>
PEOFILE 1
STATION ID
USER NAME
SOLDER TYPE
PEOFILE 1
S:○○○○○
U:××××××
S:△△△△
TIP LOADS
 approx.
  xxxxxx points
<RESET>     <OK>
Really RESET OK?
<CANCEL>    <OK>
WhenRESETisselected
Really RESET OK?
<CANCEL>    <OK>
WhenRESETisselected
TIP TIME
   xxxx hours
<RESET>     <OK>
1xxxxxxx
2zzzzzzzz
 <1>        <2>
DisplayintheMANUALSETmode(whenT31-01isselected)
<01>
N
When
MANUALSET
isselected
AUTO DETECT
MANUAL SET
OFF
<↑>  <↓>  <OK>
▲
<01>
<02>
<03>
<↑>  <↓>  <OK>
▲
NOTE:
If you select RESET in the TIP LOADS screen or the TIP TIME screen, you need to enter
the password if password lock is set.
NOTE:
If any user name is set, it is displayed
in this step.
5.OPERATION
TIP TYPE
Thetiptype(450°Cor400°C)isdisplayed.
WhenMANUALSETisselected,thescreenchangestotheoneasshowninthelowerrightfigure.Select
anappropriatenumberaccordingtothetiptobeused.Then,thetiptype01(450°C)or02(400°C)is
displayedsothatthetiptypeisclearlyknown.
WhenAUTODETECTisselected,thetiptype(type01(450°C)ortype02(400°C))isautomaticallydetected.The
followingconditionsarerequiredtodetectthetiptype.
-Thetipmustbecold.
-Thetipmustbeplacedonthesolderingironstand.
Whenthetipisfrequentlychangedbetweentype01and
type02,youcanselectAUTODETECT.Whenyoudonot
needautomaticdetectionbecauseyouuseeithertypeonly,
youcanselectMANUALSET.Whenyoudonotneedany
display,youcanselectOFF.Youcanselectanymode
dependingontheusage.
6.PARAMETERSETTING
・When SET is pressed
Varioussettingscanbechanged.Afterchangingthesetting,settingchangeisreflectedbyselectingSAVE
→OK.Toescapewithoutsettingchange,selectCANCEL.パスワードロックの設定を行なっている場合、
SET画面へ移行する前にパスワードの入力が必要となります。
DisplayintheAUTODETECTmode(whenT31-01isselected)
 01
N
DISPLAY
AUTO SLEEP
AUTO SHUTOFF
<↑>  <↓>  <OK>
The cursor moves by pressing the <↑> or <↓>
button. The following items are displayed in order.
・DISPLAY
・AUTO SLEEP
・AUTO SHUTOFF
・PASSWORD LOCK
・PROFILE
・ALERT TIME
・<SAVE>
・<CANCEL>
▲
NOTE:
WhenAUTODETECTisselected,01or02isdisplayedonlywhenthesolderingironis
placedonthestand.
Display item
NORMAL / BOOST
SHOW PROFILE / SHOW TIP LOADS / SHOW TIP TIME / SELECT PROFILE / TIP TYPE
Display in the set profile
Display in the soldering count
Display in the cumulative running time on the iron tip
No.1 / No.2
AUTO DETECT / MANUAL SET / OFF
<01> / <02> / <03>
Initial value
NORMAL
ー
0
0
No.1
OFF
ー
Display
SET
 DISPLAY
 AUTO SLEEP
 AUTO SHUT OFF
 PASSWORD LOCK
  PASSWORD*
 PROFILE
  STATION ID
  PROFILE 1 (2)
   USER NAME
   SOLDER TYPE
 ALERT TIME**
Display item
DISPLAY / AUTO SLEEP / AUTO SHUT OFF / PASSWORD LOCK / PROFILE / ALERT TIME
NORMAL / EXPAND / OFF
00 (OFF) / 01 - 29 min
OFF / 30 min /60 min
ON / OFF
“A - Z” Select three letters
STATION ID / PROFILE 1 / PROFILE 2
“A - Z”, “0 - 9”, “.”, “-” and space. You can enter up to 14 letters.
USER NAME / SOLDER TYPE
“A - Z”, “0 - 9”, “.”, “-” and space. You can enter up to 14 letters.
“A - Z”, “0 -9”, “.”, “-” and space. You can enter up to 14 letters.
0 - 9999 hours
Initial value
NORMAL
06 min
30 min
OFF
-
-
-
-
-
-
0
Display item and initial value of MODE / DSP screen are as follows.
CAUTION
The solder count is an approximate number. The number is sometimes counted when
temperature change occurs in the tip other than soldering.
* Displayed only when “MANUAL SET” is selected.
* Displayed only when PASSWORD LOCK “ON” is selected.
** CHG TIP will not be displayed when ALERT TIME is set to “0”. (See the “ALERT TIME”)
Display item and initial value of SET screen are as follows.
6.PARAMETERSETTING6.PARAMETERSETTING 7. MAINTENANCE
■Cleaning the tip using the iron holder
1. Using the cleaning sponge 2. Using the cleaning wire
Use the cleaning sponge that comes with the product
to clean the tip. It offers wide-ranging uses, from simple
removal of excess solder to complete elimination of
matter occurring as a result of oxidization.
Material that is not removed easily with the cleaning
sponge can likely be removed using the cleaning wire.
● Tip Maintenance
1. When the temperature stabilizes, clean the tip with the cleaning sponge and check the condition of the tip.
2. If the solder plated part of the tip is covered with black oxide, apply fresh solder containing flux, and clean
the tip again. Repeat until all the oxide is removed, then coat the tip with fresh solder.
3. If the tip is deformed or heavily eroded, replace it with a new one.
Performing proper and periodic maintenance extends product life. Efficient soldering depends upon
the temperature, quality and quantity of the solder and flux.
Apply the following service procedure as dictated by the conditions of usage.
Since the soldering iron can reach a very high temperature, please work carefully. Except the case
especially indicated, always turn the power switch OFF and disconnect the power plug before performing
any maintenance procedure.
■Replacing the fuse
1. Unplug the power cord from the power
receptacle.
2. Remove the fuse holder.
3. Replace the fuse.
4. Put the fuse holder back in place.
The port on the back of the station is used to display heater
output on the external device. (not included)
The output displayed on the
monitor can be displayed on
an external device by connecting
the machine to equipment such
as an oscilloscope.
9. OPTION
PROFILE
The profile information can be set up.
STATION ID: Station name, Asset ID, etc., PROFILE1,2: User name and solder information.
ALERT TIME
"CHG TIP" is displayed on the home screen when the iron tip cumulative running time reaches the set
period. To clear this display, you need to change the tip and reset the TIP TIME from the DSP menu. (See 5.
How to Use, “SHOW TIP TIME”.)
Setting AUTO SHUTOFF
AUTO−SHUTOFF SET
   NOW:30min
<OFF> <30m><60m>
Setting PASSWORD LOCK
PASSWORD LOCK
   
<ON>       <OFF>
PASSWORD input screen (When ON is selected)
PASSWORD
    A
■■
 <↑>  <↓>  <OK>
AUTO SHUTOFF
The time to automatically turn off the soldering station can be set up. Electricity is stopped automatically
when the solder iron is not used for the set period of time. SHUTOFF function is canceled by pressing one
of the 3 buttons.
PASSWORD LOCK
The setting can be changed so that a password input is required every time a parameter is changed or a
count is reset. A 3-letter password comprising of letters A to Z is set up.
PROFILE screen When STATION ID is selected
STATION ID
PROFILE 1
PROFILE 2
<↑>  <↓>  <OK>
USER NAME
SOLDER TYPE
<CANCEL>
<↑>  <↓>  <OK>
When PROFILE1 (2) is selected
STATION ID
〔              〕
 <↑>  <↓>  <OK>
When SOLDER TYPE is selected
PROF.1 SOLDER
〔              〕
 <↑>  <↓>  <OK>
When USER NAME is selected
PROF.1 USER
〔              〕
 <↑>  <↓>  <OK>
You can make your name and ID from “A-Z”,
“0-9”, “.”, “-” and space. You can enter
up to 14 letters. This is blank in the initial setting.
▲ ▲
Setting ALERT TIME
ALERT TIME
   xxxxhours
 <↑>  <↓>  <OK>
When the SHUT OFF time is set, the power
supply stops when the soldering iron is not
used for the set period of time even though
the soldering iron is not placed on the stand.
+−
DISPLAY
The fashion in which the output graph is displayed can be changed.
NORMAL: Histogram (rolling bar graph), EXPAND: Horizontal expanding graph, OFF: No display
AUTO SLEEP
The automatic sleep period can be set up. Sleep function is canceled by removing the solder iron from the
holder or pressing one of the 3 buttons.
Setting AUTO SLEEP
AUTO SLEEP SET
   01min
  
 <↑>  <↓>  <OK>
In the AUTO SLEEP mode, you can set the sleep
time between 01 to 29 minutes. When 00 is set,
the sleep function is OFF
When OFF is selected
When NORMAL is selected
When EXPAND is selected
N
N
   N
LOCK
DISPLAY screen
NORMAL
EXPAND
OFF
<↑>  <↓>  <OK>
▲
Displayed when password lock is set
N
            CHG
            TIP
Display in the “CHG TIP”
8. TROUBLE SHOOTING GUIDE
WARNING
Before checking the inside of the HAKKO FX-100 or replacing parts, be sure to disconnect the power
plug. Failure to do so may result in electric shock.
The solder iron does not operate even
when the power switch is turned ON.
Grip Error is displayed.
Solder does not become wet at the
iron tip.
The tip temperature is too Low.
CHECK :
Is the power supply cable or connection plug disconnected?
ACTION : Connect it tightly.
CHECK : Is the fuse blown?
ACTION : Replace the fuse. If the fuse blows again, please send the
entire product back to us for repair.
ACTION : Check that the soldering iron or the iron tip is connected.If
the error is displayed again even when it is connected, the
soldering iron or the iron tip may be damaged.
CHECK : Is the tip oxidized?
ACTION : Clean the tip to remove oxidation.
CHECK : Is the tip oxidized?
ACTION : Clean the tip to remove oxidation.
Please purchase in the way of your
connection plug (Φ3.5 mono plug).
10. PARTS LIST
Item No.
1
2
3
Part No.
B5002
B5003
B5004
B5005
B2403
B3011
B2987
Part Name
P.W.B
Transformer
Transformer
Transformer
Fuse/250V-2A
Fuse/250V-2A
Fuse/250V-1A
Specifications
100 - 110V
120V
220 - 240V
100 - 110V
120V
220 - 240V
● HAKKO FX-100 Starion
Item No.
1
2
3
4
Part No.
A1559
B5009
B3751
A1561
Part Name
Cleaning sponge
Iron holder base / Blue-yellow
Bottom plate
Cleaning wire
Specifications
with rubber foot
with Protective Sheet & rubber foot
● Iron Holder Parts
Part No.
B5006
B5007
B5008
FX1001-81
B2300
FH800-81BY
Part Name
Sleeve / Yellow
Sleeve / Green
Sleeve / Gray
HAKKO FX-1001
Heat resistand pad
HAKKO FH-800
Specifications
●HAKKO FX -1001
FX-100
1
4
4
2
4
5 6
3
1
1
2
2
3
3
Item No.
1
2
3
4
5
6
● Optional Parts
Part No.
B3474
Part Name
Rubbercleaner
Specifications
Item No.
4
Part No.
B2419
B2421
B2422
B2424
B2425
B2426
B2436
B3508
B3550
Part Name
Power cord, 3-wire
cord & American plug
Power cord, 3-wire
cord but no plug
Power cord, 3-wire
cord & BS plug
Power cord, 3-wire
cord & European plug
Power cord, 3-wire
cord & BS plug
Power cord, 3-wire
cord & Australian plug
Power cord, 3-wire
cord & Chinese plug
Power cord, 3-wire
cord & American plug (B)
Power cord, 3-wire
cord & SI plug
Specifications
120V USA
India
220V KTL 230V CE
230V CE
China

Other manuals for FX-100

5

Other Hakko Electronics Soldering Gun manuals

Hakko Electronics 936 User manual

Hakko Electronics

Hakko Electronics 936 User manual

Hakko Electronics FP-102 User manual

Hakko Electronics

Hakko Electronics FP-102 User manual

Hakko Electronics 936 User manual

Hakko Electronics

Hakko Electronics 936 User manual

Hakko Electronics 702B User manual

Hakko Electronics

Hakko Electronics 702B User manual

Hakko Electronics 816 User manual

Hakko Electronics

Hakko Electronics 816 User manual

Hakko Electronics FX-952 User manual

Hakko Electronics

Hakko Electronics FX-952 User manual

Hakko Electronics FN-1010 User manual

Hakko Electronics

Hakko Electronics FN-1010 User manual

Hakko Electronics FP-101 User manual

Hakko Electronics

Hakko Electronics FP-101 User manual

Hakko Electronics FR-803 User manual

Hakko Electronics

Hakko Electronics FR-803 User manual

Hakko Electronics 942 User manual

Hakko Electronics

Hakko Electronics 942 User manual

Hakko Electronics FP-948 User manual

Hakko Electronics

Hakko Electronics FP-948 User manual

Hakko Electronics FX-889 User manual

Hakko Electronics

Hakko Electronics FX-889 User manual

Hakko Electronics FX-951 User manual

Hakko Electronics

Hakko Electronics FX-951 User manual

Hakko Electronics FX?801 User manual

Hakko Electronics

Hakko Electronics FX?801 User manual

Hakko Electronics 485 User manual

Hakko Electronics

Hakko Electronics 485 User manual

Hakko Electronics HU-200 User manual

Hakko Electronics

Hakko Electronics HU-200 User manual

Hakko Electronics 485 User manual

Hakko Electronics

Hakko Electronics 485 User manual

Hakko Electronics FX-301B User manual

Hakko Electronics

Hakko Electronics FX-301B User manual

Hakko Electronics FX-950 User manual

Hakko Electronics

Hakko Electronics FX-950 User manual

Hakko Electronics 475 User manual

Hakko Electronics

Hakko Electronics 475 User manual

Hakko Electronics FX-9705 User manual

Hakko Electronics

Hakko Electronics FX-9705 User manual

Hakko Electronics FX-301B User manual

Hakko Electronics

Hakko Electronics FX-301B User manual

Hakko Electronics FX-100 User manual

Hakko Electronics

Hakko Electronics FX-100 User manual

Hakko Electronics 936 User manual

Hakko Electronics

Hakko Electronics 936 User manual

Popular Soldering Gun manuals by other brands

Atten ATETOOL AT-689A user manual

Atten

Atten ATETOOL AT-689A user manual

HAKO FX-805 instruction manual

HAKO

HAKO FX-805 instruction manual

Meec tools 019114 operating instructions

Meec tools

Meec tools 019114 operating instructions

Kurtz Ersa EASY ARM 2 operating instructions

Kurtz Ersa

Kurtz Ersa EASY ARM 2 operating instructions

Melchioni WS-937 user manual

Melchioni

Melchioni WS-937 user manual

Micron T 2443 operating instructions

Micron

Micron T 2443 operating instructions

Weller EC2002M operating instructions

Weller

Weller EC2002M operating instructions

iroda SOLDERPRO 70K instructions

iroda

iroda SOLDERPRO 70K instructions

Atten ST 60 user manual

Atten

Atten ST 60 user manual

jbc NANE instruction manual

jbc

jbc NANE instruction manual

Edsyn LONER 971DX instruction manual

Edsyn

Edsyn LONER 971DX instruction manual

Velleman VTSSC73 user manual

Velleman

Velleman VTSSC73 user manual

Rebel LUT0040 user manual

Rebel

Rebel LUT0040 user manual

jbc B-IRON 500 instruction manual

jbc

jbc B-IRON 500 instruction manual

Silverline 245090 Original instructions

Silverline

Silverline 245090 Original instructions

Velleman VTSUSB user manual

Velleman

Velleman VTSUSB user manual

Melchioni WS-931 user manual

Melchioni

Melchioni WS-931 user manual

jbc JTE-1B manual

jbc

jbc JTE-1B manual

manuals.online logo
manuals.online logoBrands
  • About & Mission
  • Contact us
  • Privacy Policy
  • Terms and Conditions

Copyright 2025 Manuals.Online. All Rights Reserved.