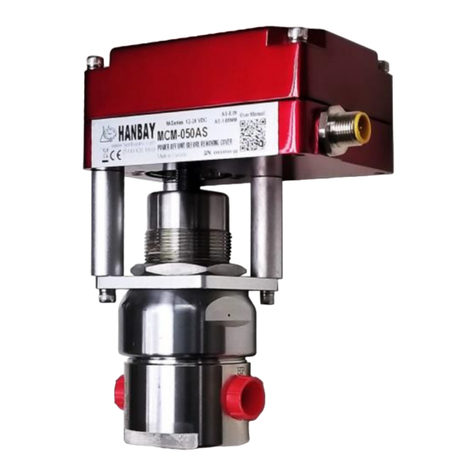
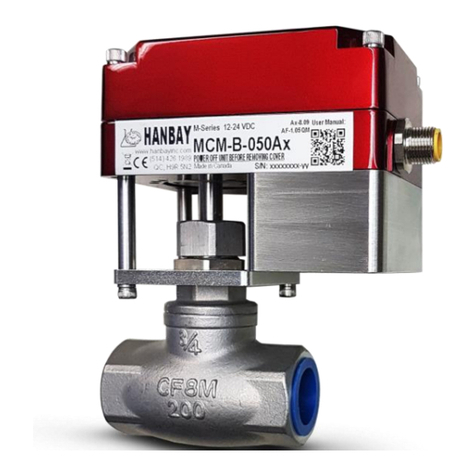
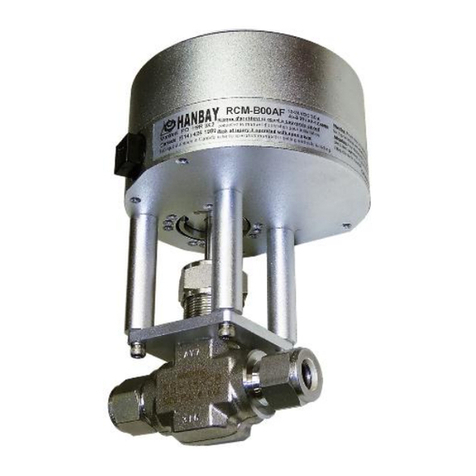
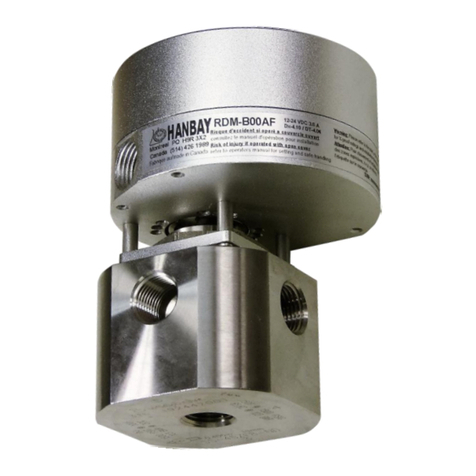
Hanbay MC-B-A-8.09 Series User manual

User Manual MCx-B-xxxAx-8.09
Page 1 of 10 www.hanbayinc.com | 1 800 315 4461
Rev.2020.3 hanbaysales@hanbayinc.com
MCx-B-xxxAx-8.09
Contents
Installation pg. 1-3
Mounting pg 1
Wiring pg 2
Connecting Power and Signal pg 2-3
Operation pg. 4-6
DIP Switch settings pg 4
Torque Settings pg 5
Signal loss and Calibration pg 5-6
Troubleshooting pg 6
Appendix pg. 7-9
Changing number of turns pg 7
Speed and Torque Details pg 7-8
Dimensions pg 9
Installing a cable pg 9
Part Number Breakdown pg. 10
Installation
Mounting:
Usually, the actuator has to be mounted and supported as shown
in the picture to the left.
Exceptionally, and only if the application is vibration free and the
tubing is minimum ¼” dia. stainless, the actuator may be
suspended on the tubing itself.
Mounting bracket
Cable entry

User Manual MCx-B-xxxAx-8.09
Page 2 of 10 www.hanbayinc.com | 1 800 315 4461
Rev.2020.3 hanbaysales@hanbayinc.com
Wiring:
The actuator comes standard with a Turck 5 position connector and a 20’ cable with plug. Cut the cable to the
length required and then connect according to the following wire color schematic:
Wire color schematic for “Turck5”cable:
* “feedback” available in MCx-B-xxxAFversion of actuator only.
** “isolated” available in MCx-B-xxxAIand xxxAFversions of actuator only.
Otherwise, if the Turck cable is not included in your actuator, see pg.9for more detailed wiring instructions.
Pin
Colour
Function
6
White ->
+24VDC
5
Black ->
Power Gnd.
4
Grey ->
Output Signal (4...20mA)*
3
Not connected
2
Brown->
Isolated** Input Signal Gnd.
1
Blue ->
Isolated** Input + Signal (4...20mA)
Connect the power:
The MCx-B may be connected to 24 VDC +/- 10%.
The power consumption will range from max. 3.0A to approx. min. 100mA
when the actuator is active. When not moving, the actuator draws around
50mA.
Battery fail safe units will move to the designated “fail”
position upon loss of power, then wait for power to return.
The actuator will be powered by the battery for about one minute to track
the position of the valve. After one minute, the actuator will go into “sleep”
mode to preserve the life of the battery.
Remove R66 to
convert to 1...5V
input signal
Terminal
1 2 3 4 5 6
Turck male connector pin-out

User Manual MCx-B-xxxAx-8.09
Page 3 of 10 www.hanbayinc.com | 1 800 315 4461
Rev.2020.3 hanbaysales@hanbayinc.com
Connect the signal:
Locate the correct connection terminals as shown on the previous page, then connect your input
signal on pos. 1 and 2 as shown below. Feedback, if applicable is connected to position 4.
1 2 3 4 5 6
P1
4 .. 20mA Signal source,
user powered
-
+
Actuator
SIGNAL GND
MCx
Internal
RES
R66
NOTE 1: Usually, the actuators are
shipped for 4 .. 20mA signal input.
For 1 ..5 V signal input, remove 250 ohm
resistor R66.
The actuator 4..20 mA output is internally supplying
the signal current and can drive sufficient voltage for
any sensing resistor of up to 250 ohms.
The potential of the external GND after the sensing
resistor may not be more than +6VDC / -2 VDC away
from the power GND of the actuator.
This feedback signal output is only available in
HANBAY MCx-B-xxxAF model actuators.
External
4 .. 20mA
Sensing
resistor
NC
NOTE 3: DO NOT CONNECT pin 4
directly or through a multimeter only to
ground.
A sensing resistor of 50 ohms or more
needs to be present.
Not observing this warning will damage
the equipment.
NOTE 2: Signal Gnd. is NOT
ISOLATED from Power Gnd. in all
MCx-B-xxxAB basic models.
If your signal Gnd. is different from
Power Gnd. use HANBAY MCx-B-xxxAI
or MCx-B-xxxAF model actuators.

User Manual MCx-B-xxxAx-8.09
Page 4 of 10 www.hanbayinc.com | 1 800 315 4461
Rev.2020.3 hanbaysales@hanbayinc.com
Operation
DIP switches:
The DIP switches allow you to change the
settings on your actuator. To flip a switch,
gently use a small flat-head screwdriver.
See chart on next page for DIP switch functionality.
In this example DIPs 1, 2, 5 and 12 are on.
DIP
Function
1
2
Speed: Choose how quickly the actuator will turn the drive wheel. See pg.7-8.
3
For external gear stage (MCH)
4
5
6
7
8
Turns: The actuator usually ships from the factory with the recommended number of turns for the valve.
This number can be changed however. See pg.7for relation between position of the DIP switches vs.
number of turns.
Turning on a switch will add that number of turns to the actuator’s movement.
Example: Turning on DIP 6 will add four turns, turning on DIP 8 adds one turn. If both DIP 6 and 8 are on,
then the total turns of the actuator would be five.
9
Signal loss: See below.
10
11
Power: Set how much torque the actuator exerts on the valve lever. See below and pg.7-8.
12
Direction/Calibration: Toggle switch on and off while powered to re-calibrate actuator. Also sets direction in
which the actuator will open and close. See pg. 5-6.
Example: The MCM model actuator turns clockwise when the signal is decreased with DIP 12 in the OFF
position. For changes to rotation to take affect flip the switch and cycle the power to the actuator.
When cycling the power, the power must be off for at least 2 minutes to ensure the battery has switched off

User Manual MCx-B-xxxAx-8.09
Page 5 of 10 www.hanbayinc.com | 1 800 315 4461
Rev.2020.3 hanbaysales@hanbayinc.com
Torque Settings:
To accommodate different valves and other applications
with different torque requirements, the actuator can be
set to apply different torque on the valve stem when in the
seating mode. Please see the box to the right and the tables
on pg.7-8to select the power setting that is right for your
application.
The actuator will try to reach the speed set by DIP 1 and
DIP 2. It will use 100% of available torque to try and reach
the selected speed. Current drawn will be limited
proportionally to the DIP setting applied actuator will
automatically slow down and deliver the maximum available
torque for a given “Permanent Power Setting”.
To deal with sticking valves, at the beginning of the first reversing movement after the seating (“zeroing”) of the
valve, the actuator will apply double the power set by DIP 10 and Dip11 (up to 100% power.)
This “pull out” function is always enabled.
Signal Loss and Calibration:
1. Battery fail-safe model will move to it’s designated fail position
IF YOU HAVE TO turn the actuator manually when its power is turned off, it will lose its position, and it
will need to be re –zeroed (as described in section 3 on the following page).
2. For actuators that are connected to a UPS the behavior on signal loss can be set as follows:
Normal position of DIP9: OFF
With DIP9 in the off position, the actuator will ignore the signal if it is lost (i.e.: if the signal falls below 0.7V
or 2.8mA) and simply remain in its current position.
Note: if the sensing resistor R66 is removed (for 1..5V input signals), we recommend placing a 10K resistor between signal and
signal GND.
Predetermined signal loss position DIP9: ON
With DIP9 in the on position, the actuator will move to a predetermined position when the signal is lost
(i.e.: if the signal falls below 2.8mA or 0.7V).
Setting of the predetermined signal loss position:
a.- turn DIP 9 to the “off” position
b.- re –zero the actuator by sending and holding an input signal between 2.8 and 4.16 mA (0.7 to
1.04V) wait until the device is re-zeroed, (i.e.: the valve is closed)
c.- by varying the input signal, move the actuator to the position that is going to be the predetermined
signal loss position.
d.- switch DIP 9 to the “on” position. The current actuator position will be saved as the default signal
loss position. (The default signal position is an absolute actuator position. i.e.: not a signal value.)
Seating power settings:
(when operating at 24V)
DIP 10 DIP 11 Power
Off Off 16%
Off On 33%
On Off 66%
On On 100%
Warning: High power settings can supply enough torque to damage your valve.
Please be cautious, especially when using the 100% power setting.

User Manual MCx-B-xxxAx-8.09
Page 6 of 10 www.hanbayinc.com | 1 800 315 4461
Rev.2020.3 hanbaysales@hanbayinc.com
3. Re –Zeroing the actuator and initiating calibration routine:
The actuator will re-zero when the input signal is between 2.8 and 4.16mA (0.700V –1.040V). It will
extend until the actuator has reached the fully closed position of the valve.
Different valves mounted to actuator need the calibration routine initiated manually. This is done by
toggling DIP 12 in the one way and back to its original position while the actuator is powered. This will
initiate the calibration routine and is essential when changes have been made to the valve.
If you need to re-zero in the opposite direction (i.e.: for pressure regulators, which typically go to the
“top” fully open position at 4mA) change the setting of DIP12 and cycle power.
Remember to wait 2 minutes before restoring the power, to allow the battery board to shut down after
moving to the fail-safe position.
4. Feedback calibration: [MCx-B-xxxAF model actuators only]
The current feedback will be calibrated from the factory.
To re-calibrate the feedback:
a.- Turn off the actuator, and disconnect the feedback and input signals. If possible, remove from
the valve. Wait 2 minutes for the battery board to shut down.
b.- Connect the feedback signal to the signal input (Terminal strip #1BLUE to #4 GRAY. Also re-
connect the power and signal grounds (terminals 5 & 6).
c.- Power up the actuator with this “signal loop-back” setup.
d.- Short SP1 on the circuit board. It will automatically run a special routine to calibrate the feedback
signal to the signal input.
The whole process takes about 1.5 seconds.
e.- Turn off the power and reconnect the actuator as normal.
Troubleshooting:
Upon noticing a problem, your first step should almost always be to recalibrate the actuator by switching DIP 12,
then switching it back to its original position, all while the actuator is powered. This alone can solve basic
problems. See section 3 on this page for more details.
If the actuator does not move, try following these steps:
1) Re-calibrate the actuator. This will move the actuator regardless of what signal it is receiving.
2) A sticking valve may be the problem. Remove the valve from the actuator, and re-test the actuator.
3) Remove power. Re-check the wiring and the power/signal apparatus. Power actuator, and re-calibrate. If
the problem persists, please call Hanbay for technical support.
Testing Battery Fail-Safe:
The batteries will be continuously on charge when power is available to the actuator.
The fail-safe function should be tested once every three months by removing the power to the actuator and
observing the fail-safe function.
The battery voltage can be measured with a multimeter set for DC volt measurement.
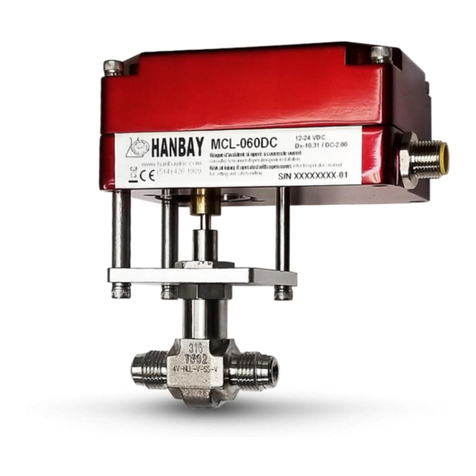
Measure battery
voltage between the
connector terminals.
Value should be
8.4vDC +/- 0.4vDC

User Manual MCx-B-xxxAx-8.09
Page 7 of 10 www.hanbayinc.com | 1 800 315 4461
Rev.2020.3 hanbaysales@hanbayinc.com
Appendix
Changing the number of turns:
The 4...20mA (or 1…5V) input signal represents a total span of a number of turns.
i.e.: If you set the number of turns to 2, then a signal of 12mA will set the actuator to exactly 1 turn from the fully
closed position. 15 mA will give: (15-4)/16=0.6875 => 68.75% of 2 turns => 1.375 turns from closed etc.
With the DIP switch settings, you can adjust anything between 1 and 31 turns to represent the full signal range of
4...20mA. Check in the table below. (1 = “On” 0 = “Off”)
Total Turns
Dip4=0
DIP 5 DIP 6 DIP 7 DIP 8
reserved 0 0 0 0
1 0 0 0 1
2 0 0 1 0
3 0 0 1 1
4 0 1 0 0
5 0 1 0 1
6 0 1 1 0
7 0 1 1 1
8 1 0 0 0
9 1 0 0 1
10 1 0 1 0
11 1 0 1 1
12 1 1 0 0
13 1 1 0 1
14 1 1 1 0
15 1 1 1 1
WARNING: Be sure that the number of turns the actuator is set for is LESS than the number of turns for the
valve. The actuator should not stop itself on a fully opened valve. It can damage the valve, and the actuator will
lose its position.
Speed and Torque Details:
The maximum speed of the actuator can be set by using the first two positions of the DIP switch selector.
As a result of this setting, the actuator will limit the maximum speed. The tables below show the maximum torques
that can be expected at the given maximum speeds.
The torque available also depends on the voltage provided in the power connection and on the seating power
settings on DIP 10, 11 as shown below.
Speed and Torque of MCL-B-xxxAx Actuators NOTE: If actuator is MCJ-B-xxxAx, divide torque values by 3.
Time for
1 turn
(sec)
OFF OFF 7
OFF ON 3
ON OFF 2
ON ON 1
24VDC
48
24VDC
12
24VDC
20
24VDC
38
Torque in in-lbs
Torque in in-lbs
DIP 1
DIP 2
Torque in in-lbs
Torque in in-lbs
66% Power*
100% Power*
16% Power*
33% Power*
To convert in-lbs to Nm, divide the in-lbs value by 9
For more turns set DIP 4 as follows:
DIP 4=0
0
DIP 4=1
+16 turns
Note:
This actuator can accommodate up to the following
number of turns on its different models:
MCL-B-xxxAx 31 turns MCJ -xxxAx 31 turns
MCM-B-xxxAx 31 turns MCK -xxxAx 31 turns
MCF-B-xxxAx xx turns
This will add 16 turns
to the function of DIPs 5
to 8
Operating torque is 100%. These torque values are for valve seating.

User Manual MCx-B-xxxAx-8.09
Page 8 of 10 www.hanbayinc.com | 1 800 315 4461
Rev.2020.3 hanbaysales@hanbayinc.com
Speed and Torque of MCM-B-xxxAx Actuators NOTE: If actuator is MCK-B-xxxAx, divide torque values by 3.
Time for
1 turn
(sec)
OFF OFF 23
OFF ON 11
ON OFF 7
ON ON 4
24VDC
60
24VDC
115
24VDC
145
66% Power*
100% Power*
Torque in in-lbs
Torque in in-lbs
Torque in in-lbs
DIP 1
DIP 2
33% Power*
16% Power*
Torque in in-lbs
24VDC
35
To convert in-lbs to Nm, divide the in-lbs value by 9
Speed and Torque of MCH-xxxAx Actuators (Not battery fail-safe)
Time for
1 turn
(sec)
OFF OFF 90
OFF ON 45
ON OFF 30
ON ON 18
24VDC
205
24VDC
400
24VDC
497
24VDC
120
DIP 1
DIP 2
Torque in in-lbs
Torque in in-lbs
Torque in in-lbs
Torque in in-lbs
16% Power*
33% Power*
66% Power*
100% Power*
To convert in-lbs to Nm, divide the in-lbs value by 9
Speed and Torque of MCF-B-xxxAx Actuators
Time for
1 turn
(sec)
OFF OFF 161
OFF ON 77
ON OFF 49
ON ON 28
24VDC
1241
24VDC
756
24VDC
1008
24VDC
1134
DIP 1
DIP 2
Torque in in-lbs
Torque in in-lbs
Torque in in-lbs
Torque in in-lbs
16% Power*
33% Power*
66% Power*
100% Power*
Note: 66% setting and 100% setting require voltage supply minimum values as follows:
-Supply voltage needs to be min 24vDC for battery fail-safe models.
-When operating above 20VDC and 66% power, Duty cycle is reduced to 50% - 25% maximum.
At these levels, the electronics produce more heat which must be dissipated (depending on
environmental temperature)
Note: Digital potentiometer functionality is disabled for supply voltages below 18VDC, so the
actuator position will not be retained on power-loss, on power-up the actuator will need to be
re-zeroed every time. For the battery fail-safe model, upon loss of power, the actuator will
move to the defined fail position and track the movement.
Battery fail-safe models will not operate below 18vDC
Operating torque is 100%. These torque values are for valve seating.

User Manual MCx-B-xxxAx-8.09
Page 9 of 10 www.hanbayinc.com | 1 800 315 4461
Rev.2020.3 hanbaysales@hanbayinc.com
MCx-B-xxAx
MCL-xxxAx
MCM-xxxAx
MCJ-xxxAx
MCK-xxxAx models
MCH-xxxAx models
Main Dimensions:
Cable Installation:
Select a connection cable with 5 leads.
O.D. 2.5 - 6.5mm (0.10 - 0.26in). Be sure to not use a cable with an OD that is no bigger than this!
Remove the liquid
tight fitting from the
actuator casing and
insert the cable into it.
Carefully insert the cable
into the actuator base. Mind
the red motor cable and its
plug into the board. Moving
the plug out of its fully
inserted position may cause
malfunction of the actuator.
Put the liquid tight fitting
back and tighten (lightly
with tool).
Connect wires according
to your application
(see page 2,3).
The cable has to be stripped
of its jacket for 2 inches
(50mm) and the wires need
1/8” (3mm) stripped ends.
Bend the wires so that
insertion becomes easy.
Hand tighten the liquid tight
fitting to establish seal.
Mount actuator cover
and tighten 4 screws.
1
2
5
4
3
8
7
6
This manual suits for next models
10
Table of contents
Other Hanbay Controllers manuals

Hanbay
Hanbay MC-AS-1.05 Series User manual

Hanbay
Hanbay MC A 8.09 Series User manual

Hanbay
Hanbay MC DC-2.00 Series User manual

Hanbay
Hanbay MD DT-10.31 Series User manual

Hanbay
Hanbay M Series User manual

Hanbay
Hanbay RC Series User manual

Hanbay
Hanbay RD-DT-10.31 Series User manual

Hanbay
Hanbay RD-AC Series User manual

Hanbay
Hanbay RC AS-1.05 Series User manual