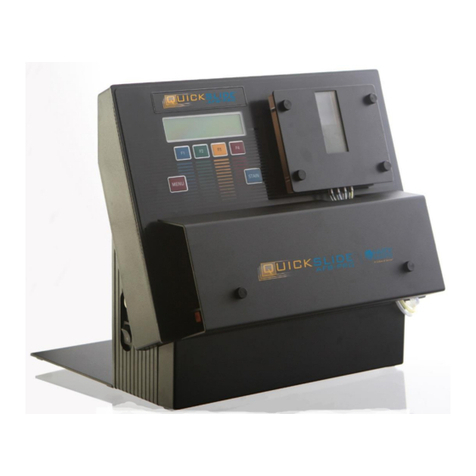
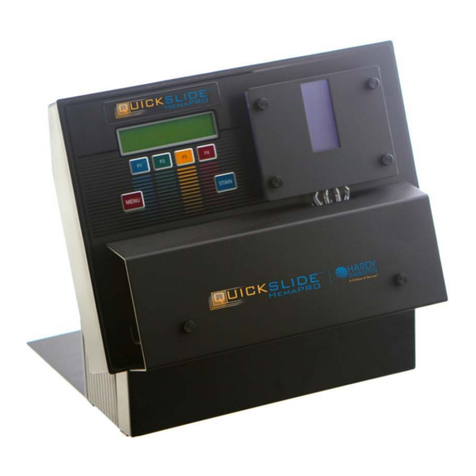
Hardy Diagnostics QuickSlide HemaPRO Mounting instructions

IFU-10891[C] HemaPRO User Manual
Page 1 of 33

IFU-10891[C] HemaPRO User Manual
Page 2 of 33
TableofContents
1.0 Instrument Specifications....................................................................................................4
2.0 Work Area Requirements.....................................................................................................5
3.0 Introduction...........................................................................................................................6
3.1 Operator Responsibility – Safety Instructions......................................................................6
4.0 Materials Required but Not Provided..................................................................................7
5.0 Ordering Information............................................................................................................7
6.0 HemaPRO Stain Kit...............................................................................................................8
6.1 HP1SK: Wright-Giemsa Stain Kit, Improved .......................................................................8
6.2 HP1BSK: Wright-Giemsa Stain Kit, Original........................................................................8
7.0 Instrument Diagram..............................................................................................................9
8.0 Specimen Slide Preparation ..............................................................................................10
8.1 Blood Specimen and Bone Marrow Specimen..................................................................10
8.2 Methanol Fixation..............................................................................................................10
9.0 Unit Installation...................................................................................................................11
10.0 User Operation..................................................................................................................14
10.1 The Staining Process ......................................................................................................14
11.0 Menu Navigation ...............................................................................................................17
11.1 Altering Timing for Stain and Buffer.................................................................................17
11.2 Sound Settings................................................................................................................18
11.3 Exiting the Menu Options ................................................................................................19
12.0 User Maintenance.............................................................................................................20
12.1 Reagent Kit Installation ...................................................................................................20
12.2 Stain Activation Module...................................................................................................21
12.3 Tubing Kit Replacement..................................................................................................23
12.4 Setting Fill Levels ............................................................................................................27
12.5 Purging the Unit...............................................................................................................29
12.6 Hardy Diagnostics QuickSlide™ Service Request..........................................................29
13.0 Safety Data Sheets............................................................................................................30
14.0 References.........................................................................................................................30
15.0 HemaPRO Warranty..........................................................................................................31
16.0 HemaPRO Training Checklist ..........................................................................................33

IFU-10891[C] HemaPRO User Manual
Page 3 of 33

Congratulations!
You have made an excellent choice for your Lab. Hardy Diagnostics thanks you for the trust you
have placed in our products and services.
This operating manual has been designed to help you gain an understanding of the operation
and application of our HemaPRO Automated Hematology stainer. For optimal utilization of all
functions, we recommend that you thoroughly study this manual prior to beginning operation.
This manual has been prepared as an aid for all operations and user maintenance, which can
be carried out in your facility.
The QuickSlide™ Quality Management System
This product is supplied by Hardy Diagnostics in accordance with its quality management
system, which complies with the U.S. Food and Drug Administration's (FDA's) Quality Systems
Regulation (QSR) and current Good Manufacturing Practices (cGMP) contained in Title 21 Part
820 of the Code of Federal Regulations (CFR). The company's manufacturing establishments
are registered, and its medical devices are listed with the FDA. In addition, Hardy Diagnostics'
quality management system is certified to ISO 13485 for medical devices.
Our devices for the medical laboratory are developed, produced, and distributed according to
the requirements of ISO 13485.
Unpacking and Inspecting
Carefully unpack the HemaPRO and accessories. Check for damage incurred during transit.
Keep all packing material until you are sure the unit operates properly. Any damage to the
shipping box should be reported to the responsible carrier. These instructions must be followed
in order to support your claim.
Set-up assistance for the HemaPRO may be obtained by calling the Technical Service
Department of QuickSlide
TM
at (800) 266-2222 (option 2) during the hours of 8 a.m.to 5 p.m.
Pacific Standard Time, Monday through Friday. Alternatively, you may locate Unit Installation
(Section 9.0) in this User Manual for quick set-up.
Important: Retain this operating manual for future use.
© 2016 All Rights Reserved
QuickSlide
TM
800-266-2222 (option, 2)
www.HardyDiagnostics.com
www.QuickSlide.com

IFU-10891[C] HemaPRO User Manual
Page 4 of 33

1.0 InstrumentSpecifications
Dimensions/Weight
Width 30.48 cm (12 in.)
Height 26.67 cm (10.5 in.)
Depth 27.94 cm (11 in.)
Weight 4.5 kg (10.00 lbs.)
Power Requirements Input 100-240V, 50-60 Hz, 0.8 A
Standard power cord is supplied to meet local standards.
Output 12V, 2.0A
Temperature, Ambient
Operation 16-32 Degrees C (60-90 Degrees F)
Humidity 0 to 95%, without condensation
Operator Adjustments Individual adjustable stain times on both blood and marrow stain cycles
Adjustable sound volume control
Operator Entry Keypad overlay
Standards
IEC-61010-1:2010 (Third Edition)
EN55022; CISPR 22 Ed. 6.0:2008 Class A
CFR 47, Part 15, Subpart B, Class A, 2011
ICES-003 Issue 4, 2004 CAN/CSA-CIE/IEC CISPR 22;02 Class A
EN61326-1: 2010
Warranty One-Year Standard
Symbols
| – Power On
O – Power Off
Caution – Refer to marked paragraphs in this manual for details.

IFU-10891[C] HemaPRO User Manual
Page 5 of 33
2.0 WorkAreaRequirements
The Reagent Supply Kit (Cat. No. HP1SK) should be positioned at the same level as the
instrument on the counter immediately behind the instrument. The HemaPRO has a flat base in
the rear on which the reagents may be positioned.
NOTE: Do not place reagents above or below the instrument.
The HemaPRO uses an external power supply module that requires an input of 50-60
Hz, 100-240V, 0.8 A. This unit requires power from a grounded outlet. The HemaPRO should
only be used with the provided power cord. The power supply is a Class I supply that must be
connected to an earthed (grounded) main power outlet. Failure to connect the HemaPRO as
specified will prevent the electrical safety protection features to function as designed.
The HemaPRO has one waste tube which drains all of the waste fluids. The HemaPRO
drain line can be placed into a customer designated disposal container to accommodate the
waste fluids according to your facility and local regulations.
The HemaPRO is pre-installed with a tubing set to connect the instrument to each
reagent. Each reagent supply line is equipped with a cannula (rigid tube) to submerge in the
specified reagent supply container. Labels attached to those lines indicate which reagent is to
be used with each line.

IFU-10891[C] HemaPRO User Manual
Page 6 of 33
3.0 Introduction
This User Manual is provided to guide the user in all aspects of unit set-up, operational
use, and user-level maintenance of the QuickSlide
TM
HemaPRO Automated Hematology stainer
unit.
The HemaPRO microscope slide stainer is capable of automatically performing a
hematology stain (Wright’s-Giemsa) sequence on a slide containing a biological specimen for in
vitro diagnostic use. This instrument accepts standard thickness 1”x3”x1mm glass slides that
are frosted and pre-cleaned (Cat. No PF72P)
The HemaPRO has two programmed settings – a setting for blood smears and a setting
for bone marrow smears – with specific stain durations that are customizable for each. The
cuvette holds one slide at a time. The chamber is sequentially filled with stain, buffer, and rinse
by use of peristaltic pumps under the front cover. Once staining and rinsing has been
completed, the slide quality will be best when promptly removed from the cuvette and blotted or
air dried.
Operator Responsibility – Safety Instructions
The HemaPRO ensures safe operation when installed, operated, and maintained
according to common safety regulations. This section explains the potential dangers that may
arise when operating the HemaPRO.
It is the operator’s responsibility to be properly qualified to operate the HemaPRO. The
operator and laboratory personnel are advised to refer to this User Manual and the set-up letter
that is packaged with the unit.
In addition, the operator must be familiar with good laboratory practices and safety
precautions when processing specimens with potential blood-borne pathogens.

IFU-10891[C] HemaPRO User Manual
Page 7 of 33
4.0 MaterialsRequiredbutNotProvided
Standard microbiological supplies are required, but not provided. These may include but
are not limited to:
Wright-Giemsa Stain Kit, Improved (HP1SK)
Wright-Giemsa Stain Kit, Original (HP1BSK)
HemaPRO Replacement Tubing Kit (HP1RT)
ProSlide™ Frosted Microscope Slides (PF72P)
Cuvette Cleaning Swabs (QS1001)
Bibulous Paper (28511007)
Methanol 32oz. (VMT032)
Coplin Jars (VCJ001)
Microscope Lens Cleaner (Z97)
Lens Paper (52846001)
Immersion Oil (Z95)
Microscope (MRP5000)
5.0 OrderingInformation
If additional supplies are needed, Reagent Stain Kits and Tubing Kits can be ordered
through Hardy Diagnostics Customer Service. Call (800) 266-2222 (option 1), or go to
www.HardyDiagnostics.com. Alternatively, you may contact your preferred distributor.

IFU-10891[C] HemaPRO User Manual
Page 8 of 33
6.0 HemaPROStainKit
The HemaPRO accomplishes automatic hematology staining by systematically staining,
buffering, and rinsing the provided biological specimen. It is critical for the success of this
automated process that these unique reagents are obtained from Hardy Diagnostics
QuickSlide™.
Every reagent kit includes a Stain Activation Module that is required to be installed in the
HemaPRO before use. Attempting to operate the HemaPRO without properly installing, or
swapping out the Stain Activation Module will result in a system error, preventing any further
user operation. For additional information on this error, please refer to Section 12.2.
We offer two alternatives of Hematology stain, based on traditional and improved versions
of Wrights-Giemsa formulations:
HP1SK: Wright-Giemsa Stain Kit, Improved
Provides our users with a modified Wrights-Giemsa stain formulation to show
enhanced color of the leukocytes, with well-defined red blood cell morphology.
6.1.1.1 Wrights Giemsa Stain will appear dark purple.
6.1.1.2 Wrights-Giemsa Buffer will appear dark blue.
6.1.1.3 Wrights-Giemsa Rinse will appear orange/pink.
HP1BSK: Wright-Giemsa Stain Kit, Original
Wrights-Giemsa Stain Kit, Original provides our users with a more traditional
Wrights-Giemsa stain.
6.2.1.1 Wrights Giemsa Stain will appear dark blue/purple.
6.2.1.2 Wrights-Giemsa Buffer will appear clear in color.
6.2.1.3 Wrights-Giemsa Rinse will appear clear in color.

IFU-10891[C] HemaPRO User Manual
Page 9 of 33
7.0 InstrumentDiagram
The basic anatomy of the HemaPRO is identified in the diagram above.
Please use this diagram to familiarize yourself with the common areas of the HemaPRO unit.
Display – User interface where options are presented.
Keypad – Contains F1, F2, F3, F4, Menu, and Stain.
Cuvette – Houses the slide during the staining process.
Power Cord Input – The power cord plugs into the left side of the machine.
Pump Cover – Covers the reagent supply and waste drain pump rollers and tubing.
Reagent and Waste Line(s) – These lines wrap around the left side to the back of the unit. The
HemaPRO Reagent Kit sits behind the instrument on the designated platform.
Stain Activation Module Input – The Stain Activation Module (included with the QuickSlide™
HemaPRO Reagent Kit) plugs into the right side of the unit.
Pump Cover
Stain Activation
Module Input
Power Cord
Input
Reagent and
Waste line(s)
Keypad
Display Cuvette

IFU-10891[C] HemaPRO User Manual
Page 10 of 33
8.0 SpecimenSlidePreparation
Blood Specimen and Bone Marrow Specimen
Specimen smears shall be prepared based on the classical recommendations and
following institutional procedures.
Methanol Fixation
Specimen fixation causes the cells to adhere to the glass slide to make possible the
subsequent rinsing of the smear with water without the significant loss of cells. This can be
accomplished by methanol fixation. For best results, it is required that the methanol method be
used, rather than heat, since it is superior in preventing lysis, distortion, or damage to the cells
in clinical material. Red blood cells and white blood cells will not be harmed, whereas heat may
distort or disrupt the cells.
While recommended, the adoption of fixation procedure shall be at the discretion of the
institution. For slides that will not be stained immediately and will be stored long term, the
practice of methanol fixation is highly recommended.
Methanol Fixation Procedure
Air-dry the specimen at room temperature. Heat blocks are not recommended since it is
extremely important that the specimen does not get damaged by excessive heat. Once fully
dried, fix by submerging the slide in the Coplin jar filled with methanol for 30 seconds. Please
ensure that the methanol covers the whole smear. Drain off remaining methanol without rinsing
by tapping the bottom edge of the slide to a paper towel and allow the slide to air dry at room
temperature. Do not apply heat after the methanol dries.
NOTE: Because the slide preparation technique can vary from institution to institution
and technique is not always controllable (i.e., differences in smear thickness, fixation
techniques, drying time, specimen adherence to different types and brands of slides,
etc.). Rare instances of carryover of specimen from slide to slide can occur. The chance
of this can be minimized by carefully following the instructions in this manual.

IFU-10891[C] HemaPRO User Manual
Page 11 of 33
9.0 UnitInstallation
If you are installing your instrument for the first time, please use the following guide to
ensure proper set-up. For this setup, the unit will need to be powered off, and you will need to
have a HemaPRO Reagent Kit on hand.
Remove the two thumb screws to open the front panel that is covering the
pump tube rollers.
Attach all four orange pump tubes around their pump rollers.
Open the HemaPRO Reagent Kit (Cat. No. HP1SK). Remove the cap from
each reagent bottle, and pierce the induction seal on the opening of each bottle
with a sterile needle.

IFU-10891[C] HemaPRO User Manual
Page 12 of 33
Separate all four of the clear lines and check the integrity of the lines, making
sure there are no significant kinks or cracks in the tubing. Wipe the ends of the
four color coded cannulas with an alcohol swab and insert them into the
corresponding bottles of reagents, where the puncture was made. Use the
puncture as the aperture for the cannula.
9.1.4.1 Place the “Stain” line that has a blue tag into the Wright-Giemsa Stain bottle.
9.1.4.2 Place the “Rinse” line that has a white tag into the Wright-Giemsa Rinse
bottle.
9.1.4.3 Place the “Buffer” line that has a green tag into the Wright-Giemsa Buffer
bottle.
9.1.4.4 Place the “Waste” line that has a red tag into an established waste disposal
container. Waste disposal regulations vary according to jurisdiction. Please dispose of
waste according to your facility and local regulations.
Remove the Stain Activation module (the short cord that resembles a phone
cord) from the HemaPRO reagent kit box. Connect the Stain Activation module
to the receptacle on the right-hand side of the instrument.
NOTE:If the Stain Activation module is not plugged in when the unit is turned on,
the message “SELF-TEST FAILURE: Pack not connected” will appear. Turn
unit off, connect Stain Activation module and turn unit on to continue.
The HemaPRO will only accept stain packs with an included module sold by Hardy
Diagnostics QuickSlide™ to ensure optimal results. The instrument is calibrated only
for these reagents. The use of other stain packs or solutions will produce unreliable
results and will void the warranty.
Plug the power cord into the left-hand side of the instrument, directly above the
on/off switch. Make sure the power is turned off and then plug the wall
transformer into the wall.
Power the instrument on. The instrument will boot with a Hardy Diagnostics
splash screen showing the unit’s software revision, and immediately perform a
self-test.
Self Test Failure:
Pack not connected

IFU-10891[C] HemaPRO User Manual
Page 13 of 33
Once the Self-Test is finished, the cuvette will perform a precautionary drain
cycle, and boot into the Main Menu.
Main Menu
Before using the instrument, you will need to <F1> Prime the unit twice.
NOTE:For every new tubing kit that has been installed on the HemaPRO, a double
Prime will be required. This is to ensure that all reagent lines are properly filled and
ready for staining.
Hardy Diagnostics
Rev 2.m COPYRIGHT'16
SYSTEM SELF TEST
-in process-
SYSTEM SELF TEST
-pass-
Draining Cuvette
Evaluation RPM B
GG&B in house burnin
Cycles Remaining 125
F1=Prime F4=Cont.

IFU-10891[C] HemaPRO User Manual
Page 14 of 33
10.0 UserOperation
General Guidelines
Do not place HemaPRO Reagent kit above or below the instrument.
Do not place the slide in the cuvette unless the display instructs you to do so.
Use high quality, clean slides (Cat. No. PF72P). Slides with different thickness may
show variable staining results.
If staining bone marrow specimen, ensure the smear is methanol fixed and dried before
placing into the cuvette. Please see Methanol Fixation Procedure listed under Specimen
Slide Preparation.
oDo not subject the slide to heat fixation before or after staining.
The unit’s Tubing Kit (Cat. No. HP1RT) is to be replaced every six (6) months. Refer to
User Maintenance for step by step procedure for replacing the tube kit.
Do not leave the stained slide in the cuvette for an extended period of time as this could
result in an altered stain quality.
The Staining Process
Main Menu
Press <F4> Cont. to continue to the Slide Type screen.
Choose your slide type by pressing either <F1> Blood for a blood smear or
<F4> Marrow for a bone marrow smear. Your decision will determine which
default timing will be used.
NOTE: The default factory setting for blood specimen is a 30 second stain and
a 30 second buffer.
The default factory setting for bone marrow specimen is a 255 second stain
and a 255 second buffer.
Cycles Remaining 125
F1=Prime F4=Cont.
Choose Slide Type:
F1=Blood F4=Marrow

IFU-10891[C] HemaPRO User Manual
Page 15 of 33
The unit will now prompt you to prepare the cuvette before inserting the slide.
Continue to prepare the cuvette by pressing <F4>.
NOTE: “Preparing” will fill the cuvette about half way with stain. Once filled, the
below screen will show.
When prompted, you may now load the slide into the cuvette with the specimen
facing out towards the front (facing you). Once the slide has been placed inside
the stain filled cuvette, immediately press the <Stain>. The unit will proceed to
stain the slide, followed by the buffer, and quick rinse of the slide.
When the staining process is complete, promptly remove the slide from the
cuvette and press the <F4> Cont. to continue to the Main Menu.
NOTE: DO NOT leave the slide in the cuvette after staining. The stain quality is
best when the slide is promptly removed from the cuvette and allowed to air dry.
Main Menu
NOTE: When the unit returns to the Main Menu, your cycle count will be reduced
by 1.
To Prepare Cuvette:
(F1=back) Press F4
WAIT !!!
Preparing Cuvette
NOW load slides THEN
press STAIN to Time!
Done: Remove Slides
F4=Cont.
Cycles Remaining 124
F1=Prime F4=Cont.

IFU-10891[C] HemaPRO User Manual
Page 16 of 33
Wipe the back side of the slide and let it completely air dry before viewing the
slide under the microscope. Alternatively, you can use bibulous paper for
blotting (Cat. No. 28511007).

IFU-10891[C] HemaPRO User Manual
Page 17 of 33
11.0 MenuNavigation
The HemaPRO has five (5) menu options from the Main Menu, each of which will be explained
below. Each Menu screen follows a linear path; to proceed through the different Menu screens,
you will need press the <Menu> button consecutively. To “go back” a screen will require you to
cycle through the five (5) menu options until you locate your desired Menu option.
Upon first press of the Menu button, you will see the splash screen shown below. No further
action can be taken from this screen. Please continue to the next section.
<Menu> #1
Alter Timing for Stain and Buffer
A second press of the <Menu> button will allow you to alter Stain times for
either <F1> Blood or <F4> Bone Marrow.
<Menu> #2
A third press of the <Menu> button will allow you to alter the Buffer times for
either <F1> Blood or <F4> Bone Marrow.
<Menu> #3
IMPORTANT:
The default factory setting for blood specimen is a 30 second stain and a 30
second buffer.
The default factory setting for bone marrow specimen is a 255 second stain
and a 255 second buffer.
NOTE: Times may be altered depending on your lab’s visual preference of the
smear. If the stain and buffer times are adjusted to anything other than the
factory settings, you will have to reset your customized stain and buffer times
with the installation of each new reagent kit.
EVALUATION RPM B
GG&B in house burnin
Alter Stain Timing
F1=Blood F4=Marrow
Alter Buffer Timing
F1=Blood F4=Marrow

IFU-10891[C] HemaPRO User Manual
Page 18 of 33
Stain and buffer times are changed in five second intervals. Press the blue
<F1> to decrease staining times and press the green <F2> key to increase
staining times. Press <F4> to save the custom stain and buffer times.
NOTE: After the timing changes have been been saved, the screen will prompt
you to Choose Slide Type to run a stain cycle (below). If you would like to
proceed back to the Main Menu, you will need to cycle through the Menu screens
until you arrive at the final “Exit Menu” screen, as described in Exiting the Menu
Options.
Sound Settings
A fourth press of the <Menu> button will bring you to the sound setting options
menu. Press the <F1> button to turn the alerts off or the <F4> button to keep
the alerts on.
<Menu> #4
NOTE: It is not recommended that the systems sound be turned off, as these
alerts are meant to inform the technician when the machine needs attention.
NOTE: After the sound setting has been saved, the screen will prompt you to
Choose Slide Type to run a stain cycle (below). If you would like to proceed
back to the Main Menu, you will need to cycle through the Menu screens until
you arrive at the final “Exit Menu” screen, as described in Exiting the Menu
Options.
Blood: Time 30
F1=- F2=+ F4=SAVE Marrow: Time 255
F1=- F2=+ F4=SAVE
Choose Slide Type:
F1=Blood F4=Marrow
Sound Beeps?
F1=No F4=Yes
Choose Slide Type:
F1=Blood F4=Marrow

IFU-10891[C] HemaPRO User Manual
Page 19 of 33
Exiting the Menu Options
If you would like to proceed back to the Main Menu, you will need to cycle
through the Menu screen until you arrive at the final Exit Menu screen (below).
<Menu> #5
Pressing <F4>Yes will direct you back to the Main Menu by first showing the
following screen:
Main Menu
Exit MENU?
F1=No F4=Yes
Evaluation RPM B
GG&B in house burnin
Cycles Remaining 125
F1=Prime F4=Cont.

IFU-10891[C] HemaPRO User Manual
Page 20 of 33
12.0 UserMaintenance
The HemaPRO offers consistent results by systematically staining, buffering, and rinsing
the provided biological specimen. It is critical for the success of this automated process that
these unique reagents are obtained from Hardy Diagnostics.
For quality control purposes, the HemaPRO Reagent Kit is labeled with Lot Number and
Expiration Date. These values are used to track and identify the reagents used in the unit. The
kit also comes with a Stain Activation Module, which has a Reference number and Lot Number
as well. The unit tracks the number of stain cycles that a reagent kit performs through this Stain
Activation Module.
NOTE: Please ensure that the Stain Activation Module is swapped with each new
HemaPRO Reagent Kit that is installed on your machine. This module is plugged into
the right side of the unit.
The HemaPRO will only accept stain packs with the Stain Activation Module sold by
Hardy Diagnostics to ensure optimal results. The instrument is calibrated only for
these reagents. The use of other stain reagents or solutions will produce unreliable
results and will void the warranty.
Reagent Kit Installation
The Wright’s- Giemsa reagents (Stain, Rinse, and Buffer) are supplied to the unit through
the tubing’s cannula connected to the individual containers. Each tube cannula is clearly
labeled, and must be inserted into the correct reagent container. The waste tube should be
placed into a customer designated waste container according to your local city and county
regulations for waste disposal. Use care to ensure each line is properly connected before
powering on the HemaPRO unit.
Power the instrument off.
Open the HemaPRO Reagent Kit (Cat. No. HP1SK). Remove the cap from
each reagent bottle, and pierce the induction seal on the opening of each bottle
with a sterile needle.
NOTE: Do not remove the inductions seal on these bottles.
Relocate the cannulas from the old kit into correct bottles of reagent on the new
kit, where the puncture was made in the seal. Use the puncture as an aperture
for the cannula to fit through.
Other manuals for QuickSlide HemaPRO
3
Table of contents
Other Hardy Diagnostics Laboratory Equipment manuals

Hardy Diagnostics
Hardy Diagnostics QUICKSLIDE GramPRO-80 Operation instructions

Hardy Diagnostics
Hardy Diagnostics QuickSlide HemaPRO Mounting instructions

Hardy Diagnostics
Hardy Diagnostics QuickSlide HemaPRO Mounting instructions

Hardy Diagnostics
Hardy Diagnostics QuickSlide AFB-PRO Mounting instructions

Hardy Diagnostics
Hardy Diagnostics QuickSlide HemaPRO User manual