manuals.online logo
Brands
  1. Home
  2. •
  3. Brands
  4. •
  5. Harken
  6. •
  7. Marine Equipment
  8. •
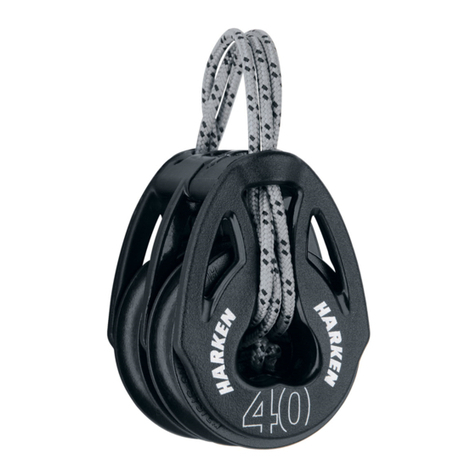
  9. Harken T2 Loop 2148 User manual

Harken T2 Loop 2148 User manual

This manual suits for next models

1

Other Harken Marine Equipment manuals

Harken T2 Loop 2148 User manual

Harken

Harken T2 Loop 2148 User manual

Harken 9000 User manual

Harken

Harken 9000 User manual

Harken 391 Assembly instructions

Harken

Harken 391 Assembly instructions

Harken MKIV Unit 1 User manual

Harken

Harken MKIV Unit 1 User manual

Harken 1988 User manual

Harken

Harken 1988 User manual

Harken 1624 Assembly instructions

Harken

Harken 1624 Assembly instructions

Harken 1561 User manual

Harken

Harken 1561 User manual

Harken R27.1M User manual

Harken

Harken R27.1M User manual

Harken HYDRO POWER UNIT 1 User manual

Harken

Harken HYDRO POWER UNIT 1 User manual

Harken R27 Assembly instructions

Harken

Harken R27 Assembly instructions

Harken Black Magic Series User manual

Harken

Harken Black Magic Series User manual

Harken 394 Assembly instructions

Harken

Harken 394 Assembly instructions

Harken GT326S User manual

Harken

Harken GT326S User manual

Harken 8685 User manual

Harken

Harken 8685 User manual

Harken 1567 User manual

Harken

Harken 1567 User manual

Harken 3195 User manual

Harken

Harken 3195 User manual

Harken 1634 Assembly instructions

Harken

Harken 1634 Assembly instructions

Harken UNIT 2 MKIII User manual

Harken

Harken UNIT 2 MKIII User manual

Harken C14526 Operating manual

Harken

Harken C14526 Operating manual

Harken Cam-Matic 412 Assembly instructions

Harken

Harken Cam-Matic 412 Assembly instructions

Harken 2142 User manual

Harken

Harken 2142 User manual

Harken T2 Ratchamatic Block User manual

Harken

Harken T2 Ratchamatic Block User manual

Harken MKIV User manual

Harken

Harken MKIV User manual

Harken T2 User manual

Harken

Harken T2 User manual

Popular Marine Equipment manuals by other brands

POWERWINCH 825 Operation manual

POWERWINCH

POWERWINCH 825 Operation manual

JRC JLN-628 brochure

JRC

JRC JLN-628 brochure

DIGITAL YACHT PilotLink2 Product handbook

DIGITAL YACHT

DIGITAL YACHT PilotLink2 Product handbook

Clarion CMS2 Owner's manual & installation manual

Clarion

Clarion CMS2 Owner's manual & installation manual

EBS M7000 installation manual

EBS

EBS M7000 installation manual

Kongsberg M3 Bathy installation manual

Kongsberg

Kongsberg M3 Bathy installation manual

NPK SCS-1002 operating manual

NPK

NPK SCS-1002 operating manual

Furuno FE-800 installation manual

Furuno

Furuno FE-800 installation manual

Simrad DD15 manual

Simrad

Simrad DD15 manual

Notifier FS-BSO Installation and maintenance instructions

Notifier

Notifier FS-BSO Installation and maintenance instructions

Raymarine ST40 Quick reference guide

Raymarine

Raymarine ST40 Quick reference guide

Raymarine Maxiview ST80 Owner's handbook

Raymarine

Raymarine Maxiview ST80 Owner's handbook

E2S E2XS112UL Instructions/service manual

E2S

E2S E2XS112UL Instructions/service manual

GUIDANCE MARINE 20- Series Installer's guide

GUIDANCE MARINE

GUIDANCE MARINE 20- Series Installer's guide

R2Sonic 2026 Operation manual

R2Sonic

R2Sonic 2026 Operation manual

COBHAM SAILOR 6000 installation manual

COBHAM

COBHAM SAILOR 6000 installation manual

Raymarine ST60 Tridata Owner's handbook

Raymarine

Raymarine ST60 Tridata Owner's handbook

Furuno Navtex NX-700-A Operator's manual

Furuno

Furuno Navtex NX-700-A Operator's manual

manuals.online logo
manuals.online logoBrands
  • About & Mission
  • Contact us
  • Privacy Policy
  • Terms and Conditions

Copyright 2025 Manuals.Online. All Rights Reserved.

N15W24983 Bluemound Rd. • Pewaukee, WI 53072 USA
Tel: 262-691-3320, Fax: 262-701-5780 • Web: www.harken.com, Email: [email protected]
Strictly follow all instructions to avoid an accident, damage to your vessel, personal injury or
death. See www.harken.com/manuals for additional safety information.
Replacement Loops
Part
No. Description
Sheave
Ø
Max line
Ø
Maximum
working load
Breaking
load
in mm lb kg lb kg
2148 40 mm 40 mm
3
/
8
10 485 220 1200 544
2151 57 mm 57 mm
7
/
16
10 792 359 2380 1080
Specifications
Terms
Planning Installation
Loop only to objects with rounded edges. Avoid sharp corners.
WARNING! Loop can cut easily on sharp corners causing loop to break suddenly under load,
possibly causing an accident.
Using Alternate Line, Knots and Splices
WARNING! Improper knots or splices can weaken the block installation causing it to break suddenly
at high loads, possibly causing an accident.
WARNING! Failure to account for loss of strength due to chafe or UV damage when choosing
line can result in line breaking suddenly at high loads.
Harken® equipment is designed for minimal maintenance. However, some upkeep is required to give
the best service and comply with the Harken® limited warranty.
Keep your equipment clean and free-running by frequently ushing with fresh water. Periodically
clean with mild detergent and water solution. Spin sheaves to distribute soap solution evenly.
Flush with fresh water.
IMPORTANT! Exposure to some teak cleaners and other caustic solutions can result in discolor-
ation of part and is not covered under the Harken warranty.
Warranty
For additional safety, maintenance and warranty information see www.harken.com/manuals or the
Harken® catalog.
Maintenance
Printed in USA 4369 01-09-13
INCORRECTCORRECT
Rounded Sharp
Anchor Post
Head
Mouth
Sheave
Bail
Loop
Read important information on choosing line, knots and splices at:
www.harken.com/knots.
Additional Information
For additional information go to online manual 4371 at www.harken.com/manuals.
Part No. 2148 (40mm) 2151 (57mm)
Strands lbs kg lbs kg
4600 272 1190 540
Minmum Breaking Load for Line to Make Loop
Four (4)
Strands Part
No. Description
Sheave
Ø
Replacement
Loops / Lines
Replacement line
Ø
Loop
length Line
Typein mm in mm
2148 40 mm 40 mm 2154
1
/
8
3 5
1
/
2
140 Spectra®
2151 57 mm 57 mm 2155
1
/
8
3 6
1
/
2
165 Spectra®
INSTRUCTIONS
Patent Pending
™
LOOP
Dyneema® is a registered trademark of DSM Dyneema
Spectra® is a registered trademark of Honeywell International, Inc.
Harken is not liable or responsible for use of line used to secure blocks. Go to Harken Limited Warranty
at www.harken.com for complete details. It is your responsibility to choose the correct line for the block.
When choosing line, use a breaking load that is at least double the block's breaking load to account for
strength loss from:
1. Knots slipping or breaking much lower than line breaking load. Spectra® or Dyneema®-type lines
require specialized knots.
2. Splices slipping or failing due to the incorrect type or execution.
3. UV damage increasing with each passing year.
4. Chafing seriously reducing strength.
If you are not comfortable choosing line, work with a qualified rigger or use Harken-supplied Loops 2148
or 2151. Go to www.harken.com/knots for additional information.
WARNING! Tying to head will cause block to break suddenly, possibly causing an accident.
See www.harken.com/manuals for additional safety information.
Inspect loop for chafe or UV-damage every time you sail.
Replace damaged loop immediately. Replace line with
no visible damage every two-years use.
Inspect Line Every Time You Sail
WARNING! Failure to inspect and replace UV-damaged, worn or frayed line can cause
the line to break suddenly, possibly causing an accident.
Do Not Use Loop in Choker Style
Use Harken supplied loops. Refer to specification chart. If you make your own loops refer to Using
Alternate Line Knots and Splices on last page.
Always Loop to Anchor Post in Mouth of Block
Always loop to anchor post in the mouth of the block. The head is not strong enough to secure line.
CORRECT INCORRECT
Assembly
Remove one end of loop.
Tip: Use a small hooked tool or hex key to lift loop off the anchor post.
Slip loop around bail. Run loop into head at bottom of block and into mouth as shown.
Tip: use a tool to push loop into mouth.
Secure end of loop to Anchor Post. Pull on block to make sure loop is seated.
Mouth
Head
WARNING! Using loop in a choker style greatly reduces the strength of the loop causing
the loop to break suddenly at high load, possibly causing an accident.
Do not use the loop in the choker style as shown below. Always attach loop to create four strands as
shown under Assembly.
INCORRECT
Make sure spliced loop is long enough to prevent pinching and
binding sheave. Make loop longer than sheave diameter.
Make sure “X” is
greater than “Y”. X
Y
Using T2 Block as a Becket
CORRECT
Four (4)
Strands
Four (4)
Strands