manuals.online logo
Brands
  1. Home
  2. •
  3. Brands
  4. •
  5. Hatco
  6. •
  7. Display Case
  8. •
  9. Hatco FLAV-R-SAVOR FSHC-12W1 User manual

Hatco FLAV-R-SAVOR FSHC-12W1 User manual

Other manuals for FLAV-R-SAVOR FSHC-12W1

3

This manual suits for next models

5

Other Hatco Display Case manuals

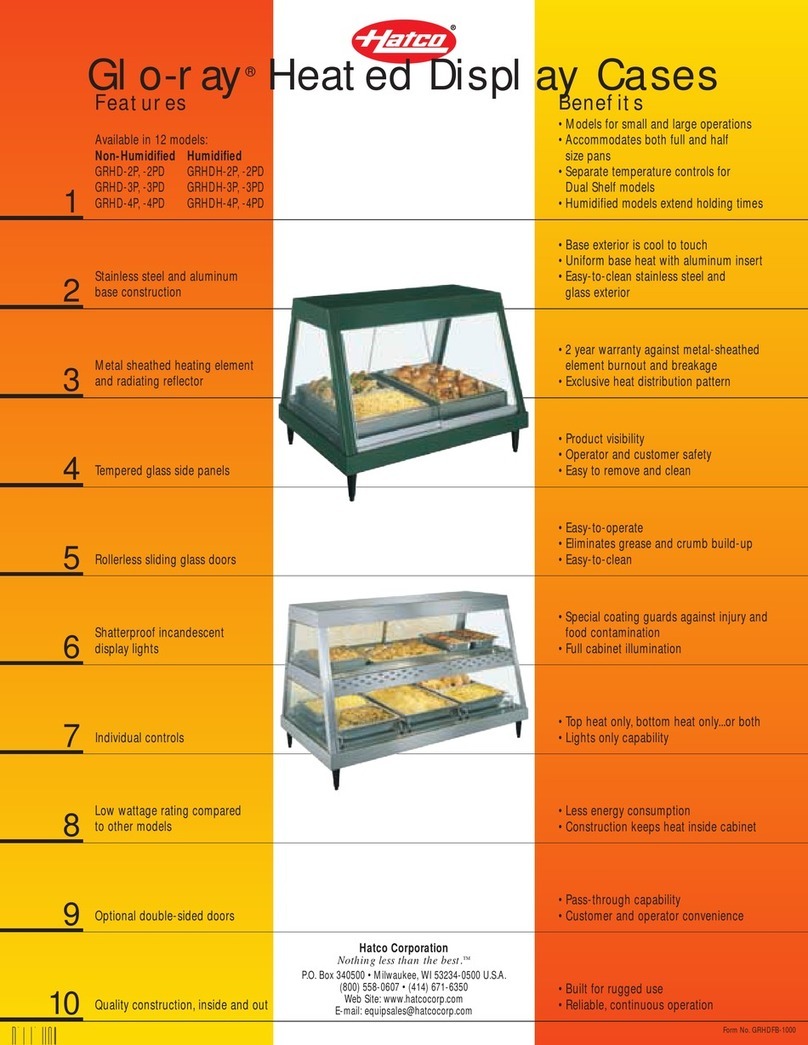
Hatco FLAV-R-SAVOR PFST-1X User manual

Hatco

Hatco FLAV-R-SAVOR PFST-1X User manual

Hatco FLAV-R-FRESH FDWD Series User manual

Hatco

Hatco FLAV-R-FRESH FDWD Series User manual

Hatco MDW-1X User manual

Hatco

Hatco MDW-1X User manual

Hatco Glo-Ray GRCD-1P Installation instructions

Hatco

Hatco Glo-Ray GRCD-1P Installation instructions

Hatco GMHD Series User manual

Hatco

Hatco GMHD Series User manual

Hatco Flav-R-Savor Series User manual

Hatco

Hatco Flav-R-Savor Series User manual

Hatco FLAV-R-SAVOR PFST Series Installation instructions

Hatco

Hatco FLAV-R-SAVOR PFST Series Installation instructions

Hatco FLAV-R-SAVOR WFST-1X Installation instructions

Hatco

Hatco FLAV-R-SAVOR WFST-1X Installation instructions

Hatco FLAV-R-SAVOR LFST-48 User manual

Hatco

Hatco FLAV-R-SAVOR LFST-48 User manual

Hatco FLAV-R-SAVOR PFST-1X Installation instructions

Hatco

Hatco FLAV-R-SAVOR PFST-1X Installation instructions

Hatco FLAV-R-SAVOR PFST-1X Application guide

Hatco

Hatco FLAV-R-SAVOR PFST-1X Application guide

Hatco Flav-R-Savor WFST Series User manual

Hatco

Hatco Flav-R-Savor WFST Series User manual

Hatco FLAV-R-SAVOR LFST-48 Owner's manual

Hatco

Hatco FLAV-R-SAVOR LFST-48 Owner's manual

Hatco Glo-Ray GRHD-2P Application guide

Hatco

Hatco Glo-Ray GRHD-2P Application guide

Hatco Glo-Ray GR3SDH-39 User manual

Hatco

Hatco Glo-Ray GR3SDH-39 User manual

Hatco FLAV-R-SAVOR LFST-48 User manual

Hatco

Hatco FLAV-R-SAVOR LFST-48 User manual

Hatco GRCD Series User manual

Hatco

Hatco GRCD Series User manual

Hatco FLAV-R-SAVOR FSCD Series User manual

Hatco

Hatco FLAV-R-SAVOR FSCD Series User manual

Hatco Glo-Ray GRCD-1P User manual

Hatco

Hatco Glo-Ray GRCD-1P User manual

Hatco FST-2X User manual

Hatco

Hatco FST-2X User manual

Hatco FLAV-R-SAVOR FSHC-12W1 User manual

Hatco

Hatco FLAV-R-SAVOR FSHC-12W1 User manual

Hatco Glo-Ray GRHD-2P User manual

Hatco

Hatco Glo-Ray GRHD-2P User manual

Hatco Glo-Ray GRCD-2PDG User manual

Hatco

Hatco Glo-Ray GRCD-2PDG User manual

Hatco FLAV-R-SAVOR FSD-1 User manual

Hatco

Hatco FLAV-R-SAVOR FSD-1 User manual

Popular Display Case manuals by other brands

Displays2go RPFIRESFTY Assembly instructions

Displays2go

Displays2go RPFIRESFTY Assembly instructions

FPG IN 3B08 product manual

FPG

FPG IN 3B08 product manual

Federal CRR4828 Installation & operation instructions

Federal

Federal CRR4828 Installation & operation instructions

True TCGD-50 installation manual

True

True TCGD-50 installation manual

Bonnet Neve SKYLIGHT User instructions

Bonnet Neve

Bonnet Neve SKYLIGHT User instructions

Tecnodom EVO SELF User and maintenance manual

Tecnodom

Tecnodom EVO SELF User and maintenance manual

Delfield F15SC48N Specification sheet

Delfield

Delfield F15SC48N Specification sheet

Costan VIVALDI User instructions

Costan

Costan VIVALDI User instructions

Skope FDM Series user manual

Skope

Skope FDM Series user manual

KMW KIM 108 Series operating manual

KMW

KMW KIM 108 Series operating manual

saro FIONA instruction manual

saro

saro FIONA instruction manual

Nordcap GENIUS 2 H145-L70 manual

Nordcap

Nordcap GENIUS 2 H145-L70 manual

Delfield F15SC48D Specification sheet

Delfield

Delfield F15SC48D Specification sheet

Nuttall Flexeserve Hub 600 Operation manual

Nuttall

Nuttall Flexeserve Hub 600 Operation manual

Hussmann GSVM 4060D Installation & operation manual

Hussmann

Hussmann GSVM 4060D Installation & operation manual

Polar Refrigeration CP728 instruction manual

Polar Refrigeration

Polar Refrigeration CP728 instruction manual

Costan WHALE 2000 G LG300 User instructions

Costan

Costan WHALE 2000 G LG300 User instructions

Structural Concepts GP441RG.6122 Installation and operating manual

Structural Concepts

Structural Concepts GP441RG.6122 Installation and operating manual

manuals.online logo
manuals.online logoBrands
  • About & Mission
  • Contact us
  • Privacy Policy
  • Terms and Conditions

Copyright 2025 Manuals.Online. All Rights Reserved.

F AV-R-SAVOR®
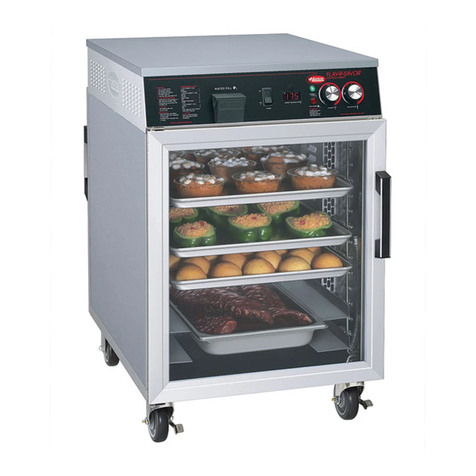
Tall Humidified Holding Cabinet
FSHC-12W1, FSHC-12W2,
FSHC-17W1, and FSHC-17W2 Series
Installation and
Operating Manual
I&W #07.05.169.00
This manual contains important safety information
concerning the maintenance, use, and operation of
this product. Failure to follow the instructions
contained in this manual may result in serious
injury. If you’re unable to understand the contents of
this manual, please bring it to the attention of your
supervisor. Do not operate this equipment unless
you have read and understood the contents of this
manual. Keep this manual in a safe location for
future reference.
Este manual contiene importante información
sobre seguridad concerniente al
mantenimiento, uso y operación de este
producto. Cualquier falla en el seguimiento de
las instrucciones contenidas en este manual
puede resultar en un serio daño. Si usted no
puede entender el contenido de este manual
por favor pregunte a su supervisor. No opere
este equipo al menos que haya leído y
comprendido el contenido de este manual.
Almacenar este manual en una localización
segura para la referencia futura.
Model FSHC-12W1 Model FSHC-17W1D Model FSHC-17W2 Model FSHC-17W2D
© 2007 Hatco Corporation
i
CONTENTS
Form No. FSHC1217WM-1207
This manualprovides the installation, safety, and
operating instructions for the Flav-R-Savor Tall
Humidified Holding Cabinet. Hatcorecommends all
installation, operating, and safety instructions
appearing in this manual be read prior to installation
or operation of a Hatco Holding Cabinet. Safety
instructions that appear in this manual after a safety
alert symbol and the words WARNING or
CAUTION printed in boldface are very important.
WARNING means there is the possibility of
serious personal injury or death to yourself or
others. CAUTION means there is the possibility
of minor or moderate injury. The word NOTICE
signifies the possibility of equipment or property
damage only.
Your Hatco Flav-R-Savor Tall Humidified Holding
Cabinet is a product of extensive research and field
testing. The materials used were selected for
maximum durability, attractive appearance, and
optimum performance. Every unit is inspected and
tested thoroughly prior to shipment.
INTRODUCTION
Hatco Flav-R-Savor Tall Humidified Holding
Cabinets are designed to hold prepared foods for
prolonged periods of time while maintaining that
“just-made” quality. Hatco Holding Cabinets provide
the best environment for food products by regulating
the air temperature while at the same time balancing
the humidity level.
Flav-R-Savor air flow pattern is designed to
maintain consistent cabinet temperature without
drying out foods. The precise combination of heat
and humidity creates a “blanket” effect around the
food. The air flow rate enables the cabinet to rapidly
recover temperature after opening and closing the
door.
The use of controlled, moisturized heat maintains
serving temperature and texture longer than
conventional dry holding equipment.
Important Owner Information ..............................i
Introduction ...........................................................i
Important Safety Information .............................1
Model Descriptions .............................................2
All Models .......................................................2
Specifications ......................................................3
Plug Configurations ........................................3
Electrical Rating Chart....................................3
Dimensions .....................................................4
Installation............................................................6
All Models .......................................................6
Location ..........................................................7
Reversible Access Door..................................7
Operation..............................................................8
General ...........................................................8
Food Holding Guide........................................9
Maintenance .......................................................10
General .........................................................10
Cleaning........................................................10
Draining The Water Pan ...............................10
Removing Lime and Mineral Deposits ..........11
Accessories........................................................12
Options ...............................................................12
Troubleshooting Guide .....................................14
Hatco imited Warranty ....................................15
Authorized Parts Distributors............Back Cover
IMPORTANT OWNER INFORMATION
Record the model number, serial number (located
on the side of the unit), voltage, and purchase date
of your Flav-R-Savor®Tall Humidified Holding
Cabinet in the spaces provided. Please have this
information available when calling Hatco for service
assistance.
Model No. ________________________________
Serial No. ________________________________
Voltage __________________________________
Date of Purchase __________________________
Business 8:00 a.m. to 5:00 p.m.
Hours: Central Standard Time
(Summer Hours: une to September –
8:00 a.m. to 5:00 p.m. C.S.T.
Monday through Thursday
8:00 a.m. to 2:30 p.m. C.S.T. Friday)
Telephone: (800) 558-0607; (414) 671-6350
Fax: (800) 690-2966 (Parts and Service)
(414) 671-3976 (International)
24 Hour 7 Day Parts and Service
Assistance available in the
United States and Canada
by calling (800) 558-0607.
Additional information can be found by visiting our
web site at www.hatcocorp.com.
If service is required on this unit, contact
your Authorized Hatco Service Agent or
contact the Hatco Service Department at
800-558-0607 or 414-671-6350; fax 800-690-
2966 or International fax 414-671-3976.
This product has no “user-serviceable”
parts. To avoid damage to the unit or injury
to personnel, use only Authorized Hatco
Service Agents and Genuine Hatco
Replacement Parts when service is
required.
Genuine Hatco Replacement Parts are
specified to operate safely in the
environments in which they are used. Some
aftermarket or generic replacement parts do
not have the characteristics that will allow
them to operate safely in Hatco equipment. It
is essential to use Genuine Hatco
Replacement Parts when repairing Hatco
equipment. Failure to use Genuine Hatco
Replacement Parts may subject operators of
the equipment to hazardous electrical
voltage, resulting in electrical shock or burn.
To avoid any injury or damage, locate the
unit at the proper counter height in an area
that is convenient for use. The location
should be level to prevent the unit or its
contents from falling accidentally and
strong enough to support the weight of the
unit and food.
Unit is not weatherproof. For safe and
proper operation, locate the unit indoors
where the ambient air temperature is
constant and is a minimum of 70°F (21°C).
For safe and proper operation, the unit must
be transported in an upright position. If laid
on its side, the water must be drained from
the unit.
Use non-abrasive cleaners only. Abrasive
cleaners could scratch the finish of the unit,
marring its appearance and making it
susceptible to soil accumulation.
Do not use deionized water. Deionized water will
greatly shorten the life of the water pan and
heating element.
NOTICE
CAUTION
WARNING
IMPORTANT SAFETY INFORMATION
Form No. FSHC1217WM-1207 1
For safe and proper operation, plug unit into
a properly grounded electrical outlet of
the correct voltage, size, and plug
configuration. If the plug and receptacle do
not match, contact a qualified electrician to
determine and install the proper voltage and
size electrical outlet.
To avoid any injury, turn the POWER switch
OFF, unplug the unit from the power source,
and allow to cool completely before
performing any maintenance or cleaning.
Holding food at temperatures less than
140°F (60°C) may be dangerous.
Temperatures under 140°F (60°C) promote
the growth of harmful bacteria and toxins in
some foods.
For safe and proper operation, the unit must
be located a reasonable distance from
combustible walls and materials. If safe
distances are not maintained, discoloration
or combustion could occur.
Overfilling can cause electrical shock. To
ensure safe and proper operation, do not
overfill water pan.
To avoid any injury, turn the power OFF to
the unit and allow to cool before draining.
To prevent any injury or damage to the unit,
do not pull unit by power cord.
To prevent any injury, discontinue use if
power cord is frayed or worn.
To avoid electrical shock or personal injury,
do not steam clean or use excessive water
on the unit.
Some exterior surfaces on the unit will get
hot. Use caution when touching these areas
to avoid injury.
To avoid any injury or damage, the unit
must be serviced by qualified personnel
only.
WARNING
IMPORTANT! Read the following important safety information to avoid personal injury or
death, and to avoid damage to the equipment or property.
MODE DESCRIPTIONS
Form No. FSHC1217WM-1207
2
A MODE S
Flav-R-Savor® Tall Humidified Holding Cabinets are
made from sturdy stainless steel with tubular frame
welded construction. Features include
thermostatically-controlled heat and humidity, a
digital temperature display, and see-thru door(s) or
insulated stainless steel door(s). The door(s) can be
hinged left or right. Electrical components, controls,
and the water pan are easily accessible. Units are
equipped with locking swivel casters for easy
portability. An attached 10′ (3048 mm) power cord
and plug is standard.
Products that earn the ENERGY STAR label
reduce greenhouse gas emissions by
meeting strict energy efficient guidelines set
by the U.S. Environmental Protection
Agency and the U.S. Department of Energy.
All FSHC models listed in this manual have
earned the ENERGY STAR label.
MODE FSHC-12W1
The FSHC-12W1 is a single door, upright model.
Universal tray slides are included that will
accommodate twelve 18″ x 26″ (457 x 660 mm)
sheet pans, twenty-four 12″ x 20″ x 2-1/2″ (305 x
508 x 64 mm) hotel steam pans, twelve Gastronorm
2/1 pans (530 x 325 mm), or twenty-four
Gastronorm 1/1 pans (305 x 508 mm) on
3″ (76 mm) centers.
Figure 1. Tall Humidified Holding Cabinets
MODE FSHC-12W2
The FSHC-12W2 has all the features of the FSHC-
12W1 but is equipped with two (2) full doors, one on
each side of the unit for pass-through operation.
MODE FSHC-17W1
The FSHC-17W1 is a single door, upright model.
Universal tray slides are included that will
accommodate seventeen 18″ x 26″ (457 x 660 mm)
sheet pans, thirty-four 12″ x 20″ x 2-1/2″ (305 x 508
x 64 mm) hotel steam pans, seventeen Gastronorm
2/1 pans (530 x 325 mm), or thirty-four Gastronorm
1/1 pans (305 x 508 mm) on 3″ (76 mm) centers.
MODE FSHC-17W1D
The FSHC-17W1D has all the features of the FSHC-
17W1 but is equipped with two (2) 1/2 size doors for
enhanced performance characteristics.
MODE FSHC-17W2
The FSHC-17W2 has all the features of the FSHC-
17W1 but is equipped with two (2) full doors, one on
each side of the unit for pass-through operation.
MODE FSHC-17W2D
The FSHC-172D has all the features of the
FSHC-17W2 but is equipped with a total of
four (4) doors — two (2) 1/2 sized doors on both the
front and back side of the unit for pass-through
operation and enhanced performance
characteristics.
FSHC-12W1 FSHC-12W2 FSHC-17W1
FSHC-17W1D FSHC-17W2 FSHC-17W2D
Model Voltage Hertz Watts Amps Plug Configuration Shipping Weight
FSHC-12W1 120 60 1750 14.6 NEMA 5-15P* 265 lbs. (120 kg)
208-240 60 1573-2095 7.6-8.7 NEMA 6-15 265 lbs. (120 kg)
220-240 50 1760-2095 8.0-8.7 CE 7/7 Schuko 265 lbs. (120 kg)
or BS-1363
or No Plug
FSHC-12W2 120 60 1750 14.6 NEMA 5-15P* 295 lbs. (134 kg)
208-240 60 1573-2095 7.6-8.7 NEMA 6-15 295 lbs. (134 kg)
220-240 50 1760-2095 8.0-8.7 CE 7/7 Schuko 295 lbs. (134 kg)
or BS-1363
or No Plug
FSHC-17W1 120 60 1750 14.6 NEMA 5-15P* 295 lbs. (134 kg)
208-240 60 1573-2095 7.6-8.7 NEMA 6-15 295 lbs. (134 kg)
220-240 50 1760-2095 8.0-8.7 CE 7/7 Schuko 295 lbs. (134 kg)
or BS-1363
or No Plug
FSHC-17W1D 120 60 1750 14.6 NEMA 5-15P* 305 lbs. (138 kg)
208-240 60 1573-2095 7.6-8.7 NEMA 6-15 305 lbs. (138 kg)
220-240 50 1760-2095 8.0-8.7 CE 7/7 Schuko 305 lbs. (138 kg)
or BS-1363
or No Plug
FSHC-17W2 120 60 1750 14.6 NEMA 5-15P* 325 lbs. (147 kg)
208-240 60 1573-2095 7.6-8.7 NEMA 6-15 325 lbs. (147 kg)
220-240 50 1760-2095 8.0-8.7 CE 7/7 Schuko 325 lbs. (147 kg)
or BS-1363
or No Plug
FSHC-17W2D 120 60 1750 14.6 NEMA 5-15P* 340 lbs. (154 kg)
208-240 60 1573-2095 7.6-8.7 NEMA 6-15 340 lbs. (154 kg)
220-240 50 1760-2095 8.0-8.7 CE 7/7 Schuko 340 lbs. (154 kg)
or BS-1363
or No Plug
SPECIFICATIONS
Form No. FSHC1217WM-1207 3
E ECTRICA RATING CHART
P UG CONFIGURATIONS
Units are supplied from the factory with an electrical
cord and plug installed. Plugs are supplied
according to the applications as shown in Figure 2.
For safe and proper operation, plug unit into a
properly grounded electrical outlet of the
correct voltage, size, and plug configuration. If
the plug and receptacle do not match, contact a
qualified electrician to determine and install the
proper voltage and size electrical outlet.
WARNING
NEMA 5-15P
NEMA 6-15P
BS-1363 CEE 7/7 Schuko
NEMA 5-20P
Figure 2. Plug Configurations
NOTE: eceptacle not supplied by Hatco.
The shaded area contains electrical information for Export models only.
*NEMA 5-20P for Canada
SPECIFICATIONS
Form No. FSHC1217WM-1207
4
CC
AABB
FSHC-12W1 Series FSHC-12W2 Series
Width Depth Height
Model (A) (B) (C)
FSHC-12W1 25-3/8″ 35″ 57″
(645 mm) (889 mm) (1448 mm)
FSHC-12W2 25-3/8″ 35-3/8″ 57″
(645 mm) (899 mm) (1448 mm)
DIMENSIONS — 12 SERIES
Figure 3. Dimensions - Models FSHC-12W1 and FSHC-12W2
Cabinet Opening: 22″W x 41″H (559 x 1041 mm)
C
C
AB
AB
FSHC-17W2 Series
FSHC-17W2D Series
SPECIFICATIONS
Form No. FSHC1217WM-1207 5
Width Depth Height
Model (A) (B) (C)
FSHC-17W1 25-3/8″ 35″ 73-3/8″
(645 mm) (889 mm) (892 mm)
FSHC-17W1D 25-3/8″ 35″ 73-3/8″
(645 mm) (889 mm) (1864 mm)
Dimensions for units with Transport Package, Bumpers,
and Handles: 31-1/2″W (800 mm) x 36-1/2″D (927 mm)
Cabinet Opening: 22″W (559 mm) x 59″H (1499 mm)
Width Depth Height
Model (A) (B) (C)
FSHC-17W2 25-3/8″ 35-3/8″ 73-3/8″
(645 mm) (899 mm) (1864 mm)
FSHC-17W2D 25-3/8″ 35-3/8″ 73-3/8″
(645 mm) (899 mm) (1864 mm)
Dimensions for units with Transport Package, Bumpers,
and Handles: 31-1/2″W (800 mm) x 36-1/2″D (927 mm)
Cabinet Opening: 22″W (559 mm) x 59″H (1499 mm)
DIMENSIONS — 17 SERIES
C
AB
C
AB
FSHC-17W1 Series
FSHC-17W1D Series
Figure 4. Dimensions - Models FSHC-17W1 and
FSHC-17W1D
Figure 5. Dimensions - Models FSHC-17W2 and
FSHC-17W2D
NOTE: FSHC-17W1D and FSHC-17W2D are pass-through cabinets, not two units stacked.
INSTA ATION
Form No. FSHC1217WM-1207
6
Lexan
Reversible
Door
Control Panel
Steel Rack (4)
Magnetic
Handle
Recessed
Cord and
Plug
5” (127 mm)
Heavy Duty
Casters
Heat Tunnel
Water Pan
Drip Trough
Adjustable
Tray Slides
(shown assembled
to Steel Racks)
Heat
Element
Assembly
(underneath
Heat Tunnel)
®
Figure 6. Cabinet Components Exploded View
A MODE S
The Flav-R-Savor® Tall Humidified Holding
Cabinets are shipped with most components
installed and ready for operation. The following
installation instructions must be performed before
operating the cabinet.
1. Remove unit from box.
2. Remove information packet. To prevent delay
in obtaining warranty coverage, fill out and
mail in the warranty card.
3. Remove tape and protective packaging from all
surfaces of the unit.
4. Unpack the adjustable tray slides from the carton
and install them to the steel racks as shown in
Figure 6.
5. Make sure the water pan and heat tunnel are
installed correctly (see Figure 10).
NOTE: FSHC-12 Series: Quantity 24 Tray Slides
FSHC-17 Series: Quantity 34 Tray Slides
OCATION
NOTE: The unit must be transported in the upright
position. If laid on its side, water must be
drained from the unit. See DRAINING THE
WATER PAN in the MAINTENANCE section
of this manual.
For safe and proper operation, the unit must be
located a reasonable distance from combustible
walls and materials. If safe distances are not
maintained, discoloration or combustion could
occur.
To prevent any injury or damage to the unit, do
not pull unit by power cord.
To avoid any injury or damage, locate the unit at
the proper counter height in an area that is
convenient for use. The location should be level
to prevent the unit or its contents from falling
accidentally and strong enough to support the
weight of the unit and food.
Unit is not weatherproof. For safe and proper
operation, locate the unit indoors where the
ambient air temperature is constant and is a
minimum of 70°F (21°C).
For safe and proper operation, the unit must be
transported in an upright position. If laid on its
side, the water must be drained from the unit.
REVERSIB E ACCESS DOOR
Units are shipped from the factory with the doors
hinge-mounted on the right side of the cabinet,
opening from the left. The doors can be reversed to
open from the right, as follows:
1. Using a flat-blade screwdriver, pry the hinge
covers off of the two hinges.
2. Remove the screws securing the door to the
hinges (see Figure 7.)
3. Remove the screws securing the hinges to the
cabinet.
4. Remove the screws securing the door handle to
the cabinet door.
5. Remove the screws securing the strike plate to
the cabinet.
6. Remove the screw plugs from the left side of the
cabinet and insert in the right side.
WARNING
CAUTION
CAUTION
CAUTION
WARNING
INSTA ATION
Form No. FSHC1217WM-1207 7
7. Rotate the door 180° and install on the left side
of the cabinet using the original hinge mounting
hardware. Replace the hinge covers.
8. Install the strike plate on the right side of the
cabinet using the original mounting hardware.
9. Install the door handle on the right side of the
cabinet door using the original mounting
hardware.
Figure 7. Reversible Access Door
Figure 8. Rotate door 180°
Hinge
Side Hinge
Side
Rotate
180°
Handle
Strike
Plate
Hinge
Cover
Hinge
Screws
5. Set the TEMPERATURE control to the desired
level. See the FOOD HOLDING GUIDE for
recommendations.
NOTE: Pre-heat the cabinet 20-30 minutes before
each use. To be assured of maintaining the
cabinet temperature and obtaining the best
results, avoid putting hot foods into a cold
cabinet.
NOTE: Temperature and humidity settings may
vary depending upon product make-up
and consistency. The CABINET
TEMPE ATU E display shows the lowest
temperature point inside the cabinet, not the
product temperature.
Allow 30-45 minutes to preheat a full pan of water.
The green HUMIDITY CYCLE indicator light will
illuminate when the humidity element cycles on. The
red HEAT CYCLE indicator light will illuminate when
the air heating element cycles on.
The water pan capacity permits uninterrupted
operation for approximately 4-8 hours, depending
on the humidity and temperature settings as well as
how frequently the door is opened.
NOTE: Operating at a high humidity setting for
extended periods of time may require the
drip trough(s) to be emptied periodically
(located at the bottom of the door, see
Figure 6.).
Holding food at temperatures less than 140°F
(60°C) may be dangerous. Temperatures under
140°F (60°C) promote the growth of harmful
bacteria and toxins in some foods.
WARNING
GENERA
1. Plug unit into a properly grounded electrical
outlet of the correct voltage, size, and plug
configuration. See SPECIFICATIONS for details.
2. Move the POWER switch on the control panel to
the ON position.
3. Fill the water pan with softened or distilled water.
To fill the water pan, slowly pour water into the
water pan until full.
NOTE: Use of softened or distilled water is
recommended to extend the life of the
electrical and mechanical components in
the water pan and to make cleaning easier.
Do not use deionized water. If “hard” water
is used, the water pan will require
periodic cleaning and de-liming. See
MAINTENANCE for de-liming instructions.
Overfilling can cause electrical shock. To assure
safe and proper operation do not overfill the
water pan.
Do not use deionized water. Deionized water will
greatly shorten the life of the water pan and
heating element.
NOTE: Product failure caused by deionized water is
not covered by warranty.
Some exterior surfaces on the unit will get hot.
Use caution when touching these areas to avoid
injury.
NOTE: On the initial fill, the water pan capacity is
two gallons (7.6 liters).
4. Set the HUMIDITY control to the desired level.
See the FOOD HOLDING GUIDE for
recommendations.
NOTICE
WARNING
WARNING
OPERATION
Form No. FSHC1217WM-1207
8
Figure 9. Control Panel