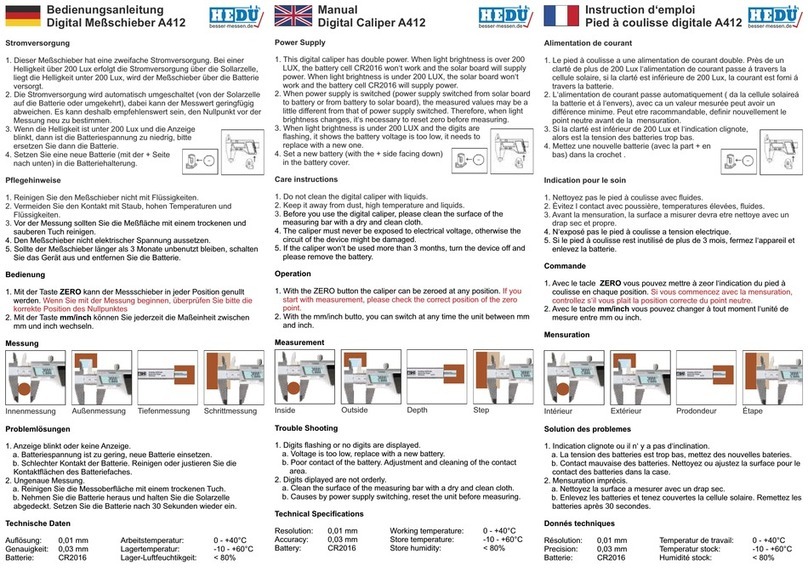
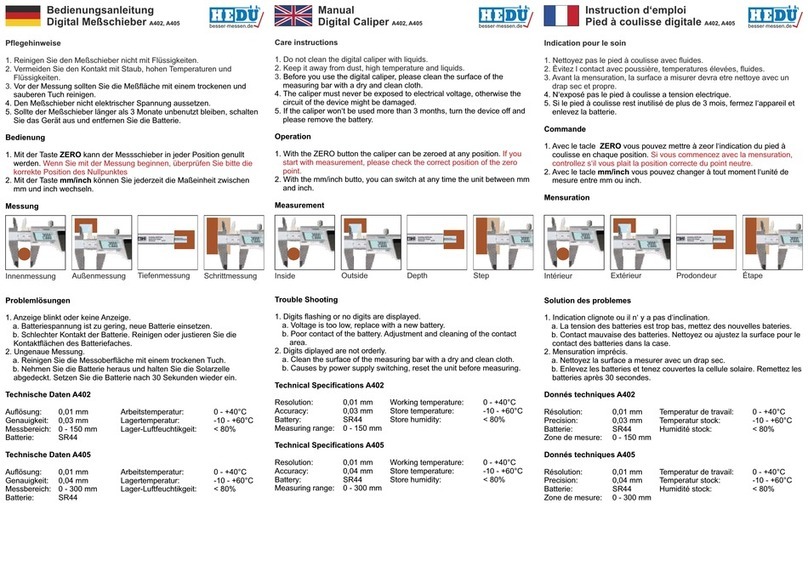
HEDÜ DigiScan 3 in 1 User manual

Metall suchen
In der unmittelbaren Umgebung sollte sich kein Metall befinden.
Schalten Sie DigiScan ein. Das Metall-Symbol wird im Display
gezeigt.
DigiScan 3 in 1
Art.Nr. E210
Bedienungsanleitung
Metall / Strom
Sensor
Balkensensor
Ein/Aus &
Betriebsart-
Wählschalter Scan-Taste
Markierungshilfe
für Balkenmitte
Batteriefach
Für DigiScan benötigen Sie eine 9V-Block-
batterie (nicht im Lieferumfang enthalten).
Batteriepegel-Anzeige
Zeigt den aktuellen Zustand der Batterie.
Vier Segmente heißt die Batterie ist voll. Bei
drei Balken ist sie in einem sehr guten und
bei zwei Balken in normalem Zustand.
Wechseln Sie die Batterie wenn ein oder
kein Segment gezeigt wird.
Auto-Aus
DigiScan schaltet drei Minuten nach letzter
Verwendung automatisch aus.
Strom suchen
In der unmittelbaren Umgebung sollte sich keine elektrische
Spannung befinden. Drücken Sie den Ein-/Ausschalter zweimal bis
die Symbole im Display gezeigt werden.
Nach Wahl der Betriebsart kalibriert sich DigiScan automatisch, dabei
schließen sich die Balken im Display. Die Kalibrierung ist abgeschlossen,
wenn die geschlossen ist. Nach der Kalibrierung erscheint die
Meldung im Display und ein kurzer Quittungston ist zu hören. Sie
können nun mit dem Scannen beginnen.
Anzeige
Halten Sie das Gerät Horizontal
mit dem Sensor zur Wand. Suchen Sie die Fläche systematisch ab.
Gefundenes Metall wird durch die sich schließende Anzeige angezeigt.
Die Anzeige ist geschlossen, wenn sich das Metallobjekt oder die
Stromquelle unmittelbar vor dem Sensor befindet. Zum Feststellen der
exakten Position, drücken Sie jetzt die SCAN-Taste und wiederholen Sie das
Scannen.
Auto
In dieser Betriebsart erkennt DigiScan gleichzeitig Metall, Strom und
Holzbalken. Drücken Sie den Ein-/Ausschalter mehrfach bis das
Symbol im Display erscheint.
AnmerkungenfürdieStromsuche
lEinige Wände enthalten metallische Faserstoffe die bei der Messung zu
Ungenauigkeiten führen können. Halten Sie Ihre freie Hand an die Wand um
denEffektzukompensieren.
lVermeidenSiestatischeAufladungdurchReibungamDigiScan.
lTestenSiedieFunktiondesGerätesaneinerStellewoSiemitSicherheitüber
elektrischeSpannungverfügen.
lAbgeschirmte elektrische Leitungen werden vom Gerät nur als Metall
erkannt.DeshalbzurKontrolleauchinderBetriebsartMetallscannen.
lGehenSiekeinRisikoein!ImZweifelsfallkontaktierenSieeinenElektriker.
Holzbalkensuchen
DasGerätistausgeschaltet.HaltenSiedas GerätinvertikalerPosi-
tion gegen die Wand. Durch dreimaliges Drücken auf den Ein-
/Ausschalter geht DigiScan in den Holz-Modus. Das Holzsymbol
wird im Display angezeigt. Das Gerät kalibriert sich automatisch,
dabei schließt sich die Anzeige im Display. Nach dem Kalibrieren erscheint
die Meldung im Display und ein kurzer Quittungston ist zu hören. Sie kön-
nenmitdemScannenbeginnen.
Suchen Sie die Fläche systematisch ab. Führen Sie DigiScan horizontal über
dieWandumvertikaleBalkenzufindenoderumgekehrt.EingefundenerBalken
wird durch die sich schließende Anzeige angezeigt. Ist die Anzeige
ganz geschlossen, machen Sie eine Markierung im Markierungsloch. Führen
Siedas GerätingleicherRichtung weiterüberdieWand.MachenSieeinezwei-
te Markierung, wenn sich die Anzeige wieder öffnet. Der Balkenmittelpunkt
liegtzwischendenbeidenMarkierungen.
AnmerkungenfürdieBalkensuche
lWird das Gerät an einer massiven Wand
kalibriert, zeigt DigiScan nur den Unter-
schied in der Dichte der Wand und keinen
Balken.
lWirddasGerätüber einenverdecktenBalken kalibriert,sinddieanderenBal-
ken schwer zu finden. Versuchen Sie DigiScan an anderer Stelle zu kalibrie-
ren.
lWände mit Folien- oder Metallüberzug können möglicherweise nicht
gescanntwerden.
lÜber einer Tür- oder Fensteröffnung ist möglicherweise ein massiver Holz-
balken als Überzug eingebaut. Das Scannen funktioniert nicht, wenn Sie
DigiScanübersolch einem Balken kalibrieren. Kalibrieren Sie deshalbDigiS-
cananandererStelleoderaneineranderenWand.
lWenn die Wandtafeln sehr dünn oder dick sind, zeigt sich das beim Scannen
dadurch, dass die Anzeige sich über einem Holzbalken nicht vollständig
schließt. In diesem Fall ist der höchsteAusschlag an der Kante des Holzbal-
kens.
SCAN
SCAN
BEEP
BEEP
SCAN

Stud Seeking
Hold DigiScan against the wall in a vertical position. Press Selector
Switch once by once until icon is appeared on the LCD.At this
moment, auto calibration will start by displaying the Scanning Bars
from bottom of the Scanning Indicators. This procedure will complete when
the Scanning Indicators show a full scale of reading and disappear
quickly. At the same time, the symbol will display on the LCD with a
short „beep“ tone. DigiScan is ready for scanning now. For locating the
vertical batten or wall stud, move the instrument horizontally across the wall.
As the instrument moves towards a stud, the Scanning Bars Icon will appear
from bottom. Once as full Scanning Bars Icon with steady tone sounds are
appeared, this represents a stud edge detected. Mark the first spot in the hole
at the head of the instrument. Continue moving the instrument until the arrow
bar disappear and sounds cease, mark the second spot. The stud is now
located and the middle of stud is at the center between the two marks. For
locating the horizontal batten or wall stud, place DigiScan against the wall in
horizontal position. Repeat the same procedure for locating vertical wall stud.
Metal Detection
Check that there is no metal in the immediate vicinity. Turn ON the
instrument by pressing the Power & Function Selector Switch once.
The icon will appear on the LCD screen.
DigiScan 3 in 1
Art.No. E210
Manual
Metal / voltage
sensor
Stud sensor
Power & function
selector switch Scan switch
Marking hole for
stude edge
Battery cover
DigiScan is operated by one 9V battery
which is not included.
Battery Level Indicator
It shows current status of battery. Full
segments indicate battery in perfect
condition. Three segments indicate battery
in good condition and two segments
indicate battery in normal condition. When
one segment or no segment appears,
replace battery immediately.
Auto-Power Off
The instrument will turn off automatically if
cease to operate for about 3 minutes.
Notes For Voltage Detection
lSome walls may contain metallic fibre for fireproofing, this will spread the
area of voltage pick-up. Place your free hand on the wall may cancel the
effect.
lRubbing or banging the instrument may generate static electicity and cause
a false reading.
lOnly a small amount of electricity will trigger the instrument and can cause
false readings, such as a circumstance that a badly insulated cable
touching a damp wall.
lWhen NO VOLTAGE reading is given, check the instrument on a known
voltage source before touching any conductor.
lIt will not detect shielded conductors, i.e. those in metal conduct, the
instrument only shows presence of METAL.
lNever take risks! If in trouble, consult a qualified electrician.
Voltage Detection
Check that there is no source of electricity in the immediate vicinity.
Then press Selector Switch once by once until icons are
appeared on the LCD screen.
At this moment, auto calibration will start by displaying the Scanning Bars
from bottom of the Scanning Indicators. This procedure will complete when
the Scanning Indicators show a full scale of reading and disappear
quickly. At the same time, the Scan Symbol will display on the LCD
screen with a short „beep“ tone. The instrument is ready for scanning now.
Hold the instrument horizontally with the sensor head pointing towards
the wall and sweep systematically over the required area. If a source of
voltage/metal is detected, the Scanning Bars Icon will appear from bottom.
Once a full Scanning indicators icon with steady tone sounds are
appeared, this represents a source of voltage/metal is close to the sensor
head. To pinpoint the exact position, press the Scan button once and repeat
the above procedures.
Auto Mode
When this mode is selected, the instrument can detect METAL,
VOLTAGE and STUD simultaneously. Press Selector Switch once
by once until l icon is appeared on the LCD screen.
Notes For Stud Seeking
lIn case of DigiScan is placed over a dense
wall surface material, such as concrete wall,
during calibration procedure; the reading
only shows difference of wall density on the
surface. It is actually not a stud.
lIf by chance the instrument is placed over
the stud during calibration, the other studs
may be hard to detect. It is suggested that
frequency re-calibration on various place on
the same wall can avoid the false readings.
To do so, press Scan button once and
repeat the above procedures.
lThe stud detection can be carried normally
on wallpapered walls, however, it may not function on some types of foil-
backed or metallic fabric surfaces.
lA double width of stud will be detected around door or window frames due
to double batten or stud encountered.
lA solid wood header may exist in some doors. The stud location will not be
found if DigiScan is calibrated over the header. However, if the unit is
calibrated on a normal wall first and then moved to the header area, it will
indicate the presence of the header.
lIf the wall material is expecially dense or thick, the top arrow bar icon may
not appear. Insted, the other scanning bars might appear which will actually
be the *PEAK*.
This manual suits for next models
1
Table of contents
Languages:
Other HEDÜ Measuring Instrument manuals


