11/2008
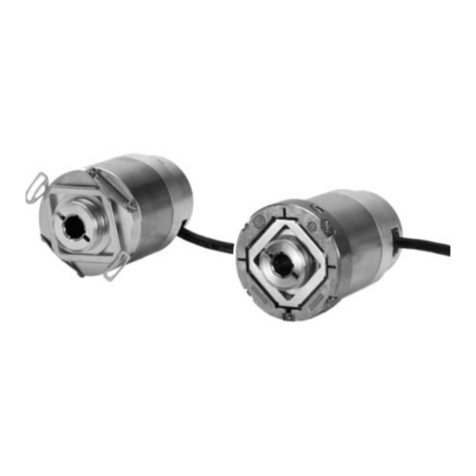
ERN 1323
Montageanleitung
Mounting Instructions
Instructions de montage
Istruzioni di montaggio
Instrucciones de montaje
WELLA1: 67N
KUPPA1: 06
ANELA1: 62S16
BELEA1: 1L
DR. JOHANNES HEIDENHAIN GmbH
Technical
support,
measur
ing
systems
+49
(8669)
31
-31
04
.E-Mail:
ser
[email protected] 670 703-91 · Ver00 · 01/2018 · H · Printed in Germany
Achtung: Die Montage und Inbetriebnahme ist von einer Fachkraft für Elektrik und Feinmechanik
unter Beachtung der örtlichen Sicherheitsvorschriften vorzunehmen.
Die Steckverbindung darf nur spannungsfrei verbunden oder gelöst werden.
Der Antrieb darf während der Montage nicht in Betrieb gesetzt werden.
Note: Mounting and commissioning is to be conducted by a specialist in electrical equipment
and precision mechanics under compliance with local safety regulations.
Do not engage or disengage any connections while under power.
The drive must not be put into operation during installation.
Attention: Le montage et la mise en service doivent être réalisés par une personne qualifiée en
électricité et mécanique de précision dans le respect des règles de sécurité locales.
Le connecteur ne doit être branché ou débranché que hors tension.
L’entraînement ne doit pas être mis en route pendant le montage.
Attenzione: far eseguire montaggio e messa in servizio da un tecnico specializzato in impianti
elettrici e meccanica di precisione in ottemperanza alle disposizioni di sicurezza locali.
Collegare o staccare i collegamenti soltanto in assenza di tensione.
L'azionamento non deve essere messo in funzione durante il montaggio.
Atención: El montaje y la puesta en marcha deben ser realizados por un especialista en
electricidad y mecánica de precisión, observando las prescripciones locales de seguridad.
Conectar o desconectar el conector sólo en ausencia de tensión.
El accionamiento no debe estar en marcha durante el montaje.
Mehrfachverwendung max. 3x.
For multiple use, max. 3x.
Utilisation répétée 3x max.
Riutilizzo max 3x.
Uso múltiple máx. 3 veces.
M5
x
35–8.8 DIN 6912
M
d
= 5
+
0.5 Nm
2.
1.
SW3/SW4
3.
SW4
M10
360° .... 720°
b)
M5
x
10
M6
x
70
a)
M5
b)
a)
Kabel einclicken und auf Anschlag schieben
Click cable into place, and push it in as far as possible
Encliqueter le câble et le pousser jusqu'en butée
Fissare il cavo e spingere fino in battuta
Doblar el cable y deslizarlo hasta el tope
Demontage in umgekehrter Reihenfolge
Disassembly in reverse order
Demontage dans l'ordre inverse
Smontaggio in sequenza inversa
Desmontaje en orden contrario
Zwei Möglichkeiten zum Abdrücken während der Demontage des Drehgebers
Two ways of pressing the encoder out during dismounting
Deux possibilités de démontage du capteur rotatif
Due possibilità di smontaggio dell’encoder
Dos posibilidades de aflojar durante el desmontaje del encoder
6.
Md= 5
+
0.5 Nm
7.
Montage
Assembly
Montage
Montaggio
Montaje
5.
4.
Md= 1.25
–
0.2 Nm
SW2
M5
x
35–8.8 DIN 6912
ID 202 264-40
Im Lieferumfang enthalten:
Included in delivery:
Contenu dans la fourniture:
Standard di fornitura:
Elementos suministrados:
Fleckbeschichtung
Patch coating
Enduit autofreinant
Rivestimento
Recubrimiento tintado
Lagerung
Bearing
Roulement
Cuscinetto
Rodamiento
12.5 –0.006/–0.024
21.5
L
35
65 +0.1
0
M5
12
0.1 A
±0.5
0.02 A
4
1.5±0.2
15
ID 341 369-xx
ID 341 370-xx
Allgemeine Hinweise
General Information
Informations générales
Informazioni generali
Información general
Kundenseitige Anschlussmaße (mm)
Required mating dimensions (mm)
Conditions requises pour le montage (mm)
Quote per il montaggio (mm)
Cotas de montaje requeridas (mm)
Störquellen
Noise sources
Sources parasites
Sorgenti didisturbo
Fuentes de interferencias
> 100 mm
M
> 100 mm > 200 mm
