manuals.online logo
Brands
  1. Home
  2. •
  3. Brands
  4. •
  5. HEIDENHAIN
  6. •
  7. Scanner
  8. •
  9. HEIDENHAIN AK ECA 4410 User manual

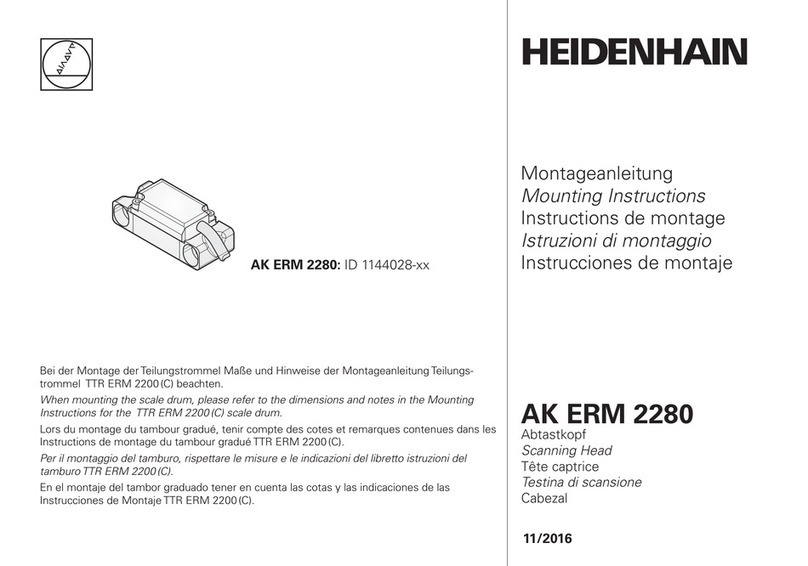
HEIDENHAIN AK ECA 4410 User manual

AK ECA 4410
AK ECA 4490 F, M, P
12/2015
Instrucciones de montaje
Cabezal captador
Para el montaje del tambor de graduación, por favor considerar las instrucciones separadas.
Istruzioni di montaggio
Testina di scansione
Per il montaggio del tamburo graduato attenersi alle istruzioni separate.
Instructions de montage
Tête captrice
Pour le montage du tambour gradué, consulter les instructions séparées.
Montageanleitung
Abtastkopf
Für die Montage derTeilungstrommel bitte separate Anleitung beachten.
Mounting Instructions
Scanning Head
For mounting the scale drum, please see separate Mounting Instructions.
2
Indice
Página
3Indicaciones
4Advertencias
6Suministro
7Indicaciones para el montaje
8Dimensiones
10 Montaje
14 Trabajos finales
15 Ajuste y diagnóstico
Indice
Pagina
3Avvertenze
4Avvertenze
6Standard di formitura
7Avvertenze per il montaggio
8Dimensioni
10 Montaggio
14 Operazioni finali
15 Taratura e diagnostica
Sommaire
Page
3Remarques
4Recommandations
6Contenu de la fourniture
7Procédure de montage
8Dimensions
10 Montage
14 Opérations finales
15 Réglage et diagnostic
Inhalt
Seite
3Hinweise
4Warnhinweise
6Lieferumfang
7Hinweise zur Montage
8Abmessungen
10 Montage
14 Abschließende Arbeiten
15 Justage und Diagnose
Contents Page
3Notes
4Warnings
6Items supplied
7Mounting procedure
8Dimensions
10 Mounting
14 Final steps
15 Adjustment and diagnosis
3
Indicaciones
Para una comprobación del montaje, tiene a su disposición el PWM 20 y el software ATS.
Avvertenze
Per la verifica del montaggio, è a disponibile il PWM 20 e il software ATS.
Remarques
Le PWM 20 et le logiciel ATS sont à votre disposition pour vérifier le montage.
Hinweise
Soll der Anbau überprüft werden, steht das PWM 20 und die ATS-Software zur Verfügung.
Notes
The PWM 20 and the ATS software are available for inspection of the mounting.
4
Advertencias
Avvertenze
Recommandations
Warnhinweise
Achtung:
– Die Montage und Inbetriebnahme ist von einer qualifizierten Fachkraft unter Beachtung der örtlichen Sicherheitsvorschriften vorzunehmen.
– Die Steckverbindung darf nur spannungsfrei verbunden oder gelöst werden.
– Alle Montageflächen müssen gratfrei und sauber sein.
– Der direkte Kontakt von Flüssigkeiten mit Messgerät und Steckverbinder ist zu vermeiden!
– Die Schrauben sind entsprechend der Montageanleitung mit dem angegebenen Anzugsdrehmoment festzuschrauben und gegen unbeabsichtigtes Lösen
zu sichern.
– Anzugsmomente der Befestigungsschrauben nur gültig für Anbau auf Stahl!
Warnings
Note:
– Mounting and commissioning is to be conducted by a qualified specialist under compliance with local safety regulations.
– Do not engage or disengage any connections while under power.
– All mounting surfaces must be clean and free of burrs.
– Avoid direct contact of fluids with the encoder and connector!
– The screws must be tightened with the specified tightening torque according to the Mounting Instructions and secured against unintentional loosening.
– The tightening torques of the mounting screws are only valid for mounting on steel!
5
Atención:
– El montaje y la puesta en marcha deben ser realizados por un especialista cualificado, observando las prescripciones locales de seguridad.
– Conectar o desconectar el conector sólo en ausencia de tensión.
– Todas las superficies de montaje no deben presentar rebabas y deben estar limpias.
– Es preciso evitar el contacto directo de los líquidos con los sistemas de medición y los conectores.
– Conforme a las instrucciones de montaje, es preciso aplicar el par de apriete indicado a los tornillos y asegurarlos para que no se suelten accidentalmente.
– ¡El par de apriete de los tornillos de fijación es sólo válido para el montaje sobre acero!
Attenzione:
– Il montaggio e la messa in funzione devono essere eseguiti da personale qualificato nel rispetto delle norme di sicurezza locali.
– I cavi posso essere collegati o scollegati solo in assenza di tensione.
–Tutte le superfici di montaggio devono essere pulite e prive di bava.
– È da evitare il contatto diretto di liquidi con encoder e connettore!
– Le viti devono essere serrate alla coppia indicata e fissate contro l’allentamento involontario secondo le istruzioni di montaggio.
– Coppie di serraggio delle viti di fissaggio valide soltanto per montaggio su acciaio!
Attention :
– Le montage et la mise en service doivent être assurés par un personnel qualifié dans le respect des consignes de sécurité locales.
– Le connecteur ne doit être connecté ou déconnecté qu’hors potentiel.
– Toutes les surfaces de montage doivent être propres et exemptes de bavures.
– Eviter le contact direct de liquide sur le système de mesure et le connecteur !
– Les vis doivent être fixées conformément aux instructions de montage, avec le couple de serrage prescrit, et doivent être sécurisées contre le risque de
détachement involontaire.
– Les couples de serrage mentionnés pour les vis de fixation ne sont valables que pour un montage sur acier !
6

















Cabezal de captación AK ECA 44x0
Cursar el pedido por separado: juego con 3 unidades de ayuda para el
montaje y 3 láminas distanciadoras
Mediante la ayuda para el montaje, es posible ajustar de modo óptimo la distancia de trabajo entre el cabezal captador y el tambor de graduación.
Suministro
Testina AK ECA 44x0
Da ordinare separatamente: set con 3 x aiuto di montaggio e pellicola
distanziatrice
L’aiuto di montaggio consente di regolare in modo ottimale la distanza di lavoro tra testina di scansione e tamburo graduato.
Standard di formitura
Tête captrice AK ECA 44x0
A commander séparément : kit de trois outils de montage et de trois feuilles
d’espacement
L’outil d’aide au montage permet de régler parfaitement la distance fonctionnelle entre la tête captrice et le tambour.
Contenu de la fourniture
Abtastkopf AK ECA 44x0
Separat bestellen: Set mit 3 x Montagehilfe und Abstandsfolie
Mit der Montagehilfe kann der Arbeitsabstand zwischen Abtastkopf undTeilungstrommel optimal eingestellt werden.
Lieferumfang
AK ECA 44x0 scanning head
Order separately: Set of three mounting aids and spacer foils each
The mounting aid can be used to set the optimal scanning gap between the scanning head and the scale drum.
Items supplied
7




Si fuera necesario, limpiar el tambor de graduación y el cabezal captador con
un trapo limpio que no suelte pelusa y alcohol isopropileno.
Distancia mínima respecto a las fuentes de interferencias.
Indicaciones para el montaje
All’occorrenza, pulire il tamburo graduato e la testina di scansione con un
panno pulito che non lascia pelucchi e alcol isopropilico.
Distanza minima dalle sorgenti di disturbo.
Avvertenze per il montaggio
En cas de besoin, nettoyer le tambour gradué à l’aide d’un chiffon sans
peluches et d’alcool isopropylique.
Distance minimale avec les sources de perturbation.
Procédure de montage
Bei Bedarf Teilungstrommel und Abtastkopf mit fusselfreiem Tuch und
Isopropylalkohol reinigen.
Mindestabstand von Störquellen.
Hinweise zur Montage
If necessary, clean the scale drum and the scanning head with a lint-free cloth
and isopropyl alcohol.
Minimum distance from sources of interference.
Mounting procedure
8
1=
A=
Línea central óptica y marca de 0°
Rodamiento
Dimensiones
Indicazione ottica dell’interasse e riferimento
posizione di 0°
Cuscinetto
Dimensioni
Ligne médiane optique et repère pour
la position 0°
Roulement
Dimensions
Optische Mittellinie und Markierung
für 0° Position
Lagerung
Abmessungen
Dimensions
Optical centerline and mark
for 0° position
Bearing
9

















Posible montaje alternativo
Radios de torsión admisibles en los cables.
R1: Torsión contínua, R2: Torsión variable
Possibilità di montaggio alternativa
Raggio di curvatura consentito per il cavo di collegamento:
R1: con curvatura fissa, R2: con flessioni ripetute
Alternative de possibilité de montage
Rayons de courbure admissibles sur le câble de raccordement.
R1: Courbure permanente, R2: Courbure fréquente
Alternative Anbaumöglichkeit
Zulässige Biegeradien der Anschlusskabel.
R1: Dauerbiegung, R2: Wechselbiegung
Alternative mounting option
Permissible bending radii of connecting cable.
R1: for rigid configuration, R2: for frequent flexing
10











1.
1
2
Tener en cuenta que en la ayuda para el montaje, el diámetro exterior del tambor y el valor indicado del
diámetro deben coincidir.
Montaje
Enroscar un tornillo M4, apretando ligeramente; es imprescindible que el cabezal captador esté en
contacto por ambos lados con el tope de la ayuda para el montaje.
Tener en cuenta el tope existente. Es imprescindible que el cabezal captador se encuentre encima, en la
esquina marcada.
Prestare attenzione alla corrispondenza tra diametro esterno del tamburo e indicazione del diametro
sull’aiuto di montaggio!
Montaggio
Stringere leggermente la vite M4, la testina di scansione deve trovarsi su entrambi i lati a battuta
dell’aiuto di montaggio.
Prestare attenzione alla battuta! La testina di scansione deve trovarsi nello spigolo marcato.
Veiller à ce que le diamètre extérieur du tambour corresponde bien au diamètre indiqué sur l’outil de montage !
Montage
Serrer légèrement la vis M4. La tête captrice doit se trouver de part et d’autre de la butée de l’outil de montage.
Attention à la butée ! La tête captrice doit se trouver au niveau du coin indiqué.
Auf Übereinstimmung von Trommelaußendurchmesser und Durchmesserangabe auf der Montagehilfe achten!
Auf Anschlag achten! Abtastkopf muss in markierter Ecke aufliegen.
Montage
M4 Schraube leicht festziehen, Abtastkopf muss beidseitig auf dem Anschlag der Montagehilfe liegen.
Make sure the drum outside diameter and the diameter indication on the mounting aid match!
1
2
Mounting
Lightly tighten the M4 screw; the scanning head must rest on both sides on the fixed stop of the mounting aid.
Pay attention to the fixed stop! The scanning head must rest in the corner indicated in the illustration.
11

2.
3.
Apretar el cabezal palpador y la ayuda de montaje con una fuerza reducida contra el
tambor de graduación y la superficie de enroscado y enroscar fuertemente.
Extraer el tornillo M4.
Premere leggermente la testina di scansione con aiuto di montaggio contro il
tamburo graduato e la superficie di montaggio e avvitare a fondo.
Rimuovere la vite M4.
Exercer une légère pression sur l’ensemble tête captrice/outil de montage pour les
pousser vers le tambour gradué et les amener sur la surface d’appui, puis les visser.
Retirer la vis M4.
Abtastkopf plus Montagehilfe mit geringer Kraft gegen dieTeilungstrommel und
Anschraubfläche drücken und festschrauben.
M4 Schraube entfernen.
Gently press the scanning head and mounting aid against the scale drum and the
mounting surface and fasten with the screw.
Remove the M4 screw.
12
4.
5.
Enroscar fuertemente el tornillo M3.
Retirar la ayuda de montaje.
Stringere la vite M3.
Rimuovere l’aiuto di montaggio.
Serrer la vis M3.
Retirer l’outil de montage.
M3 Schraube festschrauben.
Montagehilfe entfernen.
Tighten the M3 screw.
Remove the mounting aid.
13
Posible montaje alternativo
Possibilità di montaggio alternativa
Alternative de possibilité de montage
Alternative Anbaumöglichkeit
Alternative mounting option
14


Trabajos finales
Comprobar la resistencia eléctrica entre la carcasa del conector y la máquina.
Valor nominal: 1  máx.
Operazioni finali
Controllare la resistenza elettrica tra l’alloggiamento del connettore e la macchina.
Valore nominale: 1

max.
Opérations finales
Tester la résistance électrique entre le carter de la prise et la machine.
Valeur nominale: 1 max.
Abschließende Arbeiten
Elektrischen Widerstand zwischen Steckergehäuse und Maschine prüfen.
Sollwert: 1

max.
Final steps
Check the resistance between the connector housing and the machine.
Desired value: 1

max.
15
Ajuste y diagnóstico
Para comprobar las señales, por favor emplear la documentación “Asistente para el montaje ECA 44x2“ con el identificador ID 1126455.
Taratura e diagnostica
Per verificare i segnali utilizzare la documentazione “Assistente al montaggio per ECA 44x2” con ID 1126455.
Réglage et diagnostic
Pour le contrôle des signaux, veuillez vous référer à la documentation “Assistant au montage de l’ECA 44x2” (ID 1126455).
Justage und Diagnose
Zur Überprüfung der Signale bitte die Dokumentation „Anbauassistent ECA 44x2“ mit der ID 1126455 verwenden.
Adjustment and diagnosis
To check the signals, please refer to the “ECA 44x2 Mounting Wizard” documentation with ID 1126455.






 
 

 

 

 

 


*I1125431-02*
1125431–01–C–01 · Ver00 · Printed in Germany · 12/2016 · H
1125431-02

Other manuals for AK ECA 4410

2

This manual suits for next models

3

Other HEIDENHAIN Scanner manuals

HEIDENHAIN AK ECA 4410V User manual

HEIDENHAIN

HEIDENHAIN AK ECA 4410V User manual

HEIDENHAIN LIDA 400 Series User manual

HEIDENHAIN

HEIDENHAIN LIDA 400 Series User manual

HEIDENHAIN AK LIC 411 User manual

HEIDENHAIN

HEIDENHAIN AK LIC 411 User manual

HEIDENHAIN AK LIC 401 User manual

HEIDENHAIN

HEIDENHAIN AK LIC 401 User manual

HEIDENHAIN AK ERM 2280 User manual

HEIDENHAIN

HEIDENHAIN AK ERM 2280 User manual

HEIDENHAIN AK LIDA 49 M User manual

HEIDENHAIN

HEIDENHAIN AK LIDA 49 M User manual

HEIDENHAIN AK LIP 607 User manual

HEIDENHAIN

HEIDENHAIN AK LIP 607 User manual

HEIDENHAIN LIC 4019 User manual

HEIDENHAIN

HEIDENHAIN LIC 4019 User manual

HEIDENHAIN AK ERM 220 User manual

HEIDENHAIN

HEIDENHAIN AK ERM 220 User manual

HEIDENHAIN AK ERM 220 User manual

HEIDENHAIN

HEIDENHAIN AK ERM 220 User manual

HEIDENHAIN LIF 47R User manual

HEIDENHAIN

HEIDENHAIN LIF 47R User manual

HEIDENHAIN AK ECA 4410 User manual

HEIDENHAIN

HEIDENHAIN AK ECA 4410 User manual

HEIDENHAIN AK ERP 10 0 Series User manual

HEIDENHAIN

HEIDENHAIN AK ERP 10 0 Series User manual

HEIDENHAIN LIDA 400 Series User manual

HEIDENHAIN

HEIDENHAIN LIDA 400 Series User manual

Popular Scanner manuals by other brands

MDL Dynascan Operator's manual

MDL

MDL Dynascan Operator's manual

Avision AV626C user manual

Avision

Avision AV626C user manual

Alaris S2050 user guide

Alaris

Alaris S2050 user guide

SICK WLG16 Bluetooth operating instructions

SICK

SICK WLG16 Bluetooth operating instructions

Panasonic KV-SS50 Specifications

Panasonic

Panasonic KV-SS50 Specifications

Tandy Radioshack Realistic PRO-2026 Service manual

Tandy

Tandy Radioshack Realistic PRO-2026 Service manual

Revopoint 3D Technologies POP 2 user manual

Revopoint 3D Technologies

Revopoint 3D Technologies POP 2 user manual

Steren COM-160 instruction manual

Steren

Steren COM-160 instruction manual

Honeywell Voyager 1400g Series user guide

Honeywell

Honeywell Voyager 1400g Series user guide

CardScan 600c quick guide

CardScan

CardScan 600c quick guide

Uniden BC92XLT Manual Del Usuario

Uniden

Uniden BC92XLT Manual Del Usuario

Fujitsu M3093DE Installation procedures

Fujitsu

Fujitsu M3093DE Installation procedures

Epson Expression 10000XL Series Service manual

Epson

Epson Expression 10000XL Series Service manual

Nikon LS8000 user manual

Nikon

Nikon LS8000 user manual

CDVI FTC1000 manual

CDVI

CDVI FTC1000 manual

Konig CMP-BARSCAN50 user manual

Konig

Konig CMP-BARSCAN50 user manual

Worth Data LZ300 Specifications

Worth Data

Worth Data LZ300 Specifications

Kaiser Baas iPad PhotoScanner user guide

Kaiser Baas

Kaiser Baas iPad PhotoScanner user guide

manuals.online logo
manuals.online logoBrands
  • About & Mission
  • Contact us
  • Privacy Policy
  • Terms and Conditions

Copyright 2025 Manuals.Online. All Rights Reserved.