manuals.online logo
Brands
  1. Home
  2. •
  3. Brands
  4. •
  5. HEINE
  6. •
  7. Medical Equipment
  8. •
  9. HEINE NC1 User manual

HEINE NC1 User manual

HEINE Optotechnik GmbH & Co. KG
Kientalstr. 7 · 82211 Herrsching · Germany
Tel. +49 (0) 81 52 / 38 - 0
Fax +49 (0) 81 52 / 38 - 2 02
E-Mail: [email protected] · www.heine.com
med 0415 2015-03-25
HEINE Dermatoscopes
V-200.00.036
5/28med 0415 2015-03-25
HEINE Dermatoscopes
These instructions apply to the following products of the HEINE Dermatoscope
series: HEINE®NC1 Dermatoscope, HEINE DELTA®20 Plus Dermatoscope,
HEINE DELTA®20TDermatoscope, HEINE mini3000®LED Dermatoscope,
HEINE mini3000®Dermatoscope.
Please read and follow these instructions for use of and keep them for
future reference.
Intended Use
The HEINE dermatoscopes are battery-powered medical examination
lights.These devices are intended for medical purposes to illuminate body
surfaces during a medical examination. So are epiluminescence microscopes
(dermatoscope) with a polarizing filter and a magnification used by a medical
professional for non-invasive visual examination of intact skin.
This can be performed on every kind of patient.
For U.S. only:
Federal law restricts this device to sale by or on the order of a
Physician or Practitioner!
Warnings and Safety Information
Caution! Indicates potential hazardous situations. Ignoring the
corresponding instructions may lead to dangerous situations of mild
to moderate extent. (Background color yellow, foreground color black.)
Note! Note indicates valuable advice in terms of installation, operation,
maintenance or repair. Notes are important, but not related to hazardous
situations.
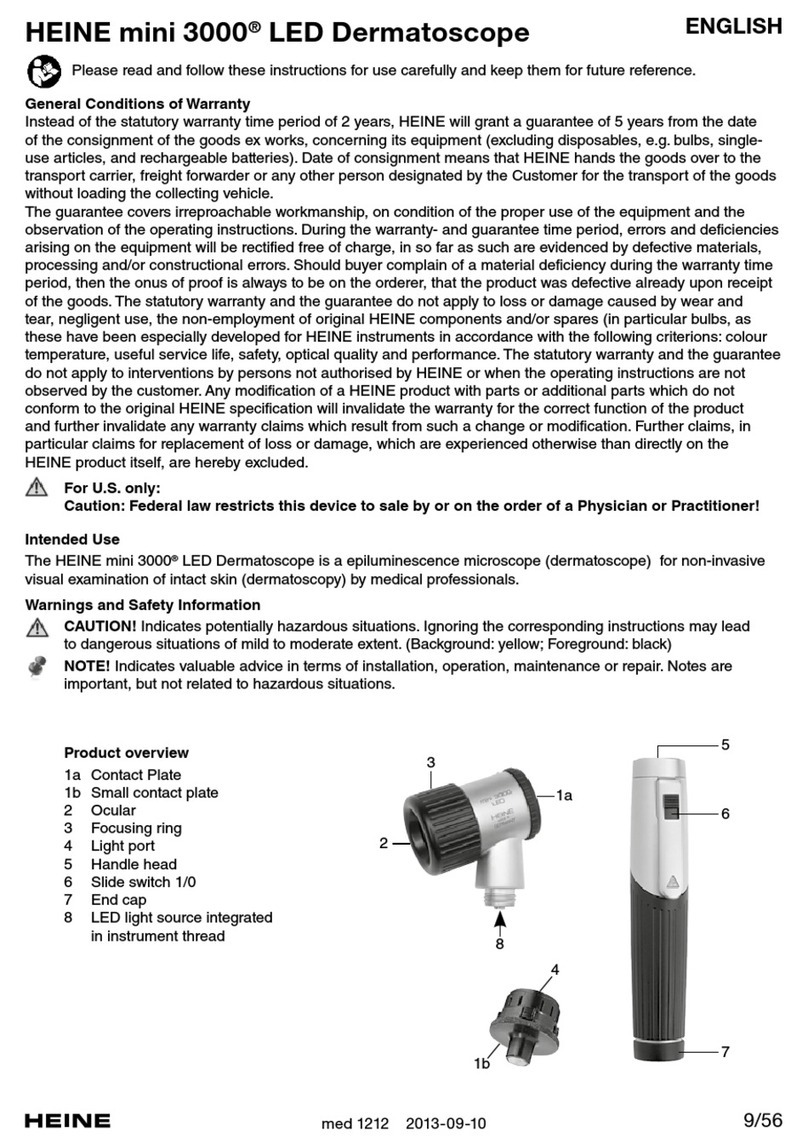
Product overview
HEINE DELTA® 20 Plus and HEINE DELTA®20TDermatoscope
HEINE®NC1 Dermatoscope
10 Focusing ring
11 Contact plate
HEINE mini3000®LED/XHL Dermatoscope
12 Contact plate
13 Contact plate small
14 Ocular
15 Focusing ring
16 Light port
17 Handle head
18 Slide switch 1/0
19 End cap
20 LED or XHL light source
integrated in instrument
head
Setting up
To set up the instrument, screw the instrument head into the HEINE battery
handle or plug it on the HEINE rechargeable handle.
HEINE DELTA® 20 Plus and HEINE DELTA®20TDermatoscope
Assembly of lter insert and contact plate:
Attach the insert (9) to the contact plate (1) and rotate the insert to lock the
bayonet connection. To disassemble the filter (9) from the contact plate,
please reverse the procedure.
Attachment of contact plate:
The contact plates (1 and 8) are attached by a bayonet connection. To remove
the contact plate turn it counterclockwise and pull it away from the derma-
toscope. To attach, reverse the procedure. Always check whether the bayonet
is safely locked.
Operation
HEINE DELTA®20 Plus Dermatoscope
For examination of hard to reach lesions use the small contact plate (8) in
place of the standard contact plate (1).
Use DELTA 20 Plus with immersion contact plate (1a, 1b, 8):
Prepare the skin by moistening with HEINE dermatoscopy-oil (use a cotton
swab) or disinfectant spray.
Turn the dermatoscope on by rotating the on/off ring (7) at the handle. Gently
place the instrument so that the lesion is in the center of the contact plate.
The examiner’s eye should be as close to the eye-piece (3) as possible. Adjust
the focus ring until a crisp, clearly-focused-image is obtained.
Always use the device in combination with one of the filter inserts
(polarizing filter or neutral density filter).
Only use contact plates from HEINE.
Using the DELTA 20 Plus with polarizing contact plate (1c, 1d):
When using the polarizing contact plate, DO NOT prepare the skin with liquid
like dermatoscopy-oil or disinfectants.
Apart from that the general operation is the same as the procedure above.
Brightness control:
The voltage regulation electronics of the HEINE DELTA®20 Plus Dermatoscope
guarantee constant brightness.
Pressing one of the two buttons on the instrument (2) will reduce the bright-
ness by 50% and will turn off 2 of the 4 LED’s resulting in lateral illumination
for improved contrast when viewing the pigmented structure.
An electrical conducting connection between camera, PC and a mains
power source is not permissible.
For documentation with a digital camera only, use the HEINE photo
adaptor and our recommend adaptor from the digital camera adaptor
range.
HEINE DELTA®20TDermatoscope
The DELTA 20Tallows for a rapid change from polarized to non-polarized
examination mode over a side switch. Application remains the same as the
DELTA 20 Plus with the immersion contact plate (see above). A difference is
that no immersion fluid is required in the polarized examination mode.
HEINE®NC1 Dermatoscope
The device can be used in non-contact modus. To do this, the contact plate,
which is attached through magnets, must be removed.
Hold the device approximately 2cm above the skin area to be examined. Bring
your eye towards the eye piece (10) as close as possible and adjust the eye
piece focus until a sharp image is achieved.
Contact modus (with contact plate):
See HEINE DELTA®20 Plus Dermatoscope with polarizing contact plate.
An extra lens is integrated in the contact plate (11) which provides a 9x magni-
fication when the contact plate is connected. Without the contact plate, a 6 x
magnification is achieved.
HEINE mini3000®LED/XHL Dermatoscope
Moisten the affected skin with HEINE dermatoscopy oil or comparable
with a cotton wool swab. Switch on the device and place it gently over the
lesion, so that it is in the center of the contact plate (12).
The examiner’s eyes should be as close as possible to the ocular (14). With
the free hand adjust the focusing ring (15) until a clearly focused image is
obtained. Using the scale on top of the dermatoscope you can control the
adjustment of the focusing ring. In most cases it is only necessary to set up
the focus once.
ENGLISH
10 11
1 Contact plate
1a Contact plate immersion (N) with scale
1b Contact plate immersion (N) without scale
1c Contact plate polarisation (P) with scale
1d Contact plate polarisation (P) without scale
1e Contact plate DELTA 20Twith scale
1f Contact plate DELTA 20Twithout scale
2 Changeover to 2 LEDs
3 Focus ring
4 Camera indicator
5 Fixation groove
6 BETA handle (optional)
7 Dimmer
8 Contact plate small
9 Filter insert
9a Polarizing insert
9b Neutral density insert
9c DELTA 20Tfilter insert
18
19
17
16
13
12
15
20
14
6/28 med 0415 2015-03-25
Removing the contact plate:
The contact plate (12) is attached by a bayonet fitting. To remove, simply
rotate the knurled ring counterclockwise and detach from the dermatoscope.
The small contact plate (13) can be used instead of the contact plate (12) for
the examination of inaccessible lesions. To remove it, simply hold the knurled
housing and pull off without twisting. When replacing, make sure that the light
port (16) faces the bulb/LED.
HEINE dermatoscopes are intended for a brief examination of less than
10 minutes with a 20 minutes break until the next application.
The setup and operation of the HEINE handles are described in a separate
instruction for use.
Hygienic Reprocessing
Instructions on hygienic reprocessing must be adhered to, based on national
standards, laws and guidelines.
Classication according to KRINKO: non-critical
Spaulding Classication USA: non-critical
Allow the device to cool down before reprocessing.
In the event of suspected contamination, the instruments should be
forwarded for reprocessing immediately.
The described cleaning and disinfection measures do not replace the
specic rules applicable for the establishment.
HEINE Optotechnik only approves the agents and procedures
mentioned below.
Cleaning and disinfection may only be carried out by personnel with
sufcient hygienic knowledge.
Observe the instructions of the manufacturer of the reprocessing media.
Do not use spray or immersion disinfection, dripping wet or heavily
foaming tissues. Do not use ultrasonic reprocessing. Do not use
reprocessing media including alcohol.
The contact plates have to be cleaned and/or disinfected after each use.
They should only be sterilized after the treatment of high risk patients.
The mini3000 contact plate up to 4 times max., the DELTA 20 Plus
contact plate up to 25 times max.
Steam sterilization of the instrument heads, the lter inserts (9), the small
contact plates of the DELTA 20 Plus and DELTA 20T(8), of the mini3000,
mini3000 LED dermatoscope (13) and the contact plate of the NC1
dermatoscope (11) and the DELTA 20T(1e+1f ) is not allowed.
Procedure
Instrument head:
Clean and disinfect the head of the dermatoscopes manually (clean and
disinfect through wiping)
Recommended agents:
Cleaning agent: Neodisher®MediClean
Disinfectant agent: quaternary ammonium compounds (e.g. Microbac®
Tissues)
Contact plates:
Clean and disinfect the contact plates manually after removing from the
instrument head (clean and disinfect through wiping).
Before cleaning or disinfection you can remove the additional lens of
the NC1 dermatoscope, but you must remove the lter insert of the
DELTA 20 Plus and of the DELTA 20T.
Recommended agents:
Cleaning agent: Neodisher®MediClean
Disinfectant agent: quaternary ammonium compounds (e.g. Microbac®
Tissues)
The contact plates can be reprocessed up to 1000 cycles (without
autoclaving).
The contact plates of the DELTA 20 Plus (1a-1d) and of the mini3000,
mini3000 LED dermatoscope (12) can be sterilized once they have been
removed from the instrument head and the lter inserts have been removed.
Recommended programs of sterilization:
Steam sterilization: 132-134°C; 3 min
Fractional vacuum procedure (three-times) or gravitational procedure
(three-times).
Changing the light source
Allow the device to cool down before changing the bulb.
HEINE DELTA®20 Plus, HEINE DELTA® 20T, HEINE®NC1 and
HEINE mini3000®LED Dermatoscope:
The LED cannot be changed.
HEINE mini3000®Dermatoscope:
Remove the instrument head from the handle and pull out the bulb.
Wipe down the head of the new bulb with a soft cloth Insert the new bulb as
far as possible into the socket.
Maintenance and Service
The instruments do not require maintenance or service.
General Warnings
Check the correct operation of the device before use! Do not use the
device if there are visible signs of damage or the light begins to ash.
Do not use the device in re- or explosive risk area (e.g. oxygen
saturated or anaesthetic environments)
Do not modify the device.
Use only original HEINE parts, spare parts, accessories and power
sources.
Repairs shall only be carried out by qualied persons.
Do not look directly into the light source to avoid dazzle from the intense
light. The dermatoscopes are not suitable for eye examination.
General Notes
The warranty for the entire product is invalidated if non-genuine HEINE
products or non-original parts are used and if repairs or modications
are made to the device by persons not authorized by HEINE. For more
information, please visit www.heine.com.
If you don’t use the device for a longer period of time, please remove the
batteries in advance.
Disposal
The product must be recycled as separated electrical and electronic
devices. Please observe the relevant state-specic disposal regulations.
Electromagnetic Compatibility
Medical electric devices are subject to special precautionary measures with
regard to electromagnetic compatibility (EMC). Portable and mobile high
frequency communication equipment can affect medical electric devices.
This is a device in the domestic environment, this device may cause
radio interference, so that it may be necessary in this case, to take
appropriate remedial measures, as e.g. orientation, new arrangement
or shielding of the device or restrict the connection to the site.
The use of accessories, converters or cables other than the ones speci-
fied by HEINE might lead to increased emission and reduced electrical
immunity of the medical equipment.
The device may not be stacked directly near or used directly beside
other devices. If the device is to be operated in a stack or with other
devices, the device should be watched to ensure it operates properly
in this location.
The appendix contains following tables:
- Guidance and manufacturer’s declaration – Electromagnetic immunity
- Technical specification
- Explanation of the used symbols
Appendix
Guidance and manufacturer declaration - Electromagnetic immunity
The device is intended for use in the electromagnetic environment specified below.
The customer or the user of the device should assure that it is used in such environment.
Immunity test IEC 60601 test level Compliance level Electromagnetic environment – Guideline
Electrostatic discharge (ESD)
acc. to IEC 61000-4-2
± 6 kV contact discharge
± 8 kV air discharge
± 6 kV contact discharge
± 8 kV air discharge
Floors should be wood, concrete or covered with
ceramic tiles. If floors are covered with synthetic
material, the relative humidity should be at least
30 %.
Electrical fast transient/burst
IEC 61000-4-4
± 2 kV for mains cables
± 1 kV for input and output lines
± 2 kV for mains cables
± 1 kV for input and output lines
The supply voltage quality should be that of a
typical commercial or hospital environment.
Surge IEC 61000-4-5 ± 1 kV voltage phase – phase,
± 2 kV voltage phase – earth
± 1 kV voltage phase – phase
± 2 kV voltage phase – earth
Mains power quality should be that of a typical
commercial or hospital environment.
Voltage dips, short interruptions
and voltage variations on power
supply input lines
IEC 61000-4-11
< 5% UT, (>95% dip in UT)
for 1/2 period
40% UT, (60% dip in UT)
for 5 periods
70% UT, (30% dip in UT)
for 25 periods
<5% UT, (>95% dip in UT)
for 5 seconds
< 5% UT, (>95% dip in UT)
for 1/2 period
40% UT, (60% dip in UT)
for 5 periods
70% UT, (30% dip in UT)
for 25 periods
<5% UT, (>95% dip in UT)
for 5 seconds
Mains power quality should be that of a typical
commercial or hospital environment. If the user
of the device requires continued operation
during power mains interruptions, it is recom-
mended that the device be powered by a UPS
(uninterruptible power supply) or a battery.
Power frequency (50/60 Hz)
magnetic field IEC 61000-4-8
3 A/m 3 A/m Power frequency magnetic fields should be at
levels characteristic of a typical location in a
typical commercial or hospital environment.
Comment: UTis the a.c. supply voltage prior to application of the test level.
Guidance and manufacturer’s declaration – electromagnetic emissions
The device is intended for use in the electromagnetic environment specified below.
The customer or the user of the device should assure that it is used in such environment.
Emission test Compliance Electromagnetic environment – Guidelines
RF emissions
CISPR11
Group 1 The device uses RF energy only for its internal function. Therefore, RF-emission is very low and it is unlikely that any
interference in nearby electronic equipment.
RF emissions
CISPR 11
Class B The device is suitable for use in all establishments, including domestic establishments and those directly connected
to the public low-voltage power supply network that supplies buildings used for domestic purposes.
Harmonic Emissions
IEC 61000-3-2
Class A Symmetrical three-phase devices and other devices.
Voltage Fluctuations/
Flicker Emissions
IEC 61000-3-3
Passed
Guidance and manufacturer’s declaration – electromagnetic immunity
The device is intended for use in the electromagnetic environment specified below. The customer or the user of the device
should assure that it is used in such environment.
Immunity test IEC 60601 test level Compliance level Electromagnetic environment Guidelines
Conducted RF
IEC 61000-4-6
3 Veff
150 kHz to 80 MHz
3 V eff Portable and mobile RF communication equipment should be used no
closer to any part of the device, including cables, than the recommen-
ded separation distance calculated from the equation applicable to the
frequency of the transmitter.
Radiated HF
IEC 61000-4-3
3 V/m
80MHz to 2,5GHz
3 V/m Recommended separation distance:
d = 3,5/3 * SQRT (P/W)
d = 3,5/3 * SQRT (P/W) 80 MHz to 800 MHz
d = 7/3 * SQRT (P/W) 800 MHz to 2,5 GHz
where P is the maximum output power rating of the transmitter in
watts (W) according to the transmitter manufacturer and d is the
recommended separation distance in metres (m).
Field strengths from fixed RF transmitters, as determined by an
electromagnetic site surveyaa, should be less than the compliance
level in each frequency range.b
Interference may occur in the vicinity of equipment marked with the
following symbol:
Note 1: At 80Hz and 800MHz, the higher frequency range applies.
Note 2: These guidelines may not apply in all situations. Electromagnetic propagation is affected by absorption and reflection from structures, objects
and people.
a
Field strengths from fixed transmitters, such as base stations for radio (cellular / cordless) telephones and land mobile radios, amateur radio, AM and FM
radio broadcast and TV broadcast cannot be predicted theoretically with accuracy.
To assess the electromagnetic environment due to fixed RF transmitters, an electromagnetic site survey should be considered. If the measured field strength
in the location in which the device is used exceeds the applicable RF compliance level above, the device should be observed to verify normal operation.
If abnormal performance is observed, additional measures may be necessary, such as reorienting or relocating the device.
b
Over the frequency range 150 kHz to 80 MHz, field strengths should be less than 3 V / m.
23/28med 0415 2015-03-25
24/28 med 0415 2015-03-25
Recommended separation distances for portable and mobile RF communication equipment and the device
The device is intended for use in the electromagnetic environment in which radiated RF disturbances are controlled.The customer or user of the device can
help prevent electromagnetic interference by maintaining a minimum distance between portable and mobile RF communication equipment (transmitters) and
the device as recommended below, according to the maximum output power of the communications equipment.
Rated maximum output power
of transmitter (W)
Separation distance according to frequency of transmitter (m)
150 kHz to 80 MHz
d = 3,5/3 * SQRT (P)
80 MHz to 800 MHz
d = 3,5/3 * SQRT (P)
800 MHz to 2,5 GHz
d = 7/3 * SQRT (P)
0.01 0.1 0.1 0.2
0.1 0.4 0.4 0.7
1 1.2 1.2 2.3
10 3.7 3.7 7.4
100 11.7 11.7 23.3
For transmitters rated at a maximum output power not listed above, the recommended separation distance d in metres (m) can be determined using the
equation applicable to the frequency of the transmitter, where P is the maximum output power rating of the transmitter in watts (W) according to the transmitter
manufacturer.
Note 1: At 80 MHz and 800 MHz, the higher frequency range applies.
Note 2: These guidelines may not apply in all situations. Electromagnetic propagation is affected by absorption and reflection from structures, objects
and people.
Technical specification
Environmental conditions
for operation
+10°C to +35°C
30% to 75% rel. humidity
700hPa to 1060hPa
Environmental conditions
for storage
+5°C to +45°C
45% to 80% rel. humidity
500hPa to 1060hPa
Environmental conditions
for transport
-20°C to +50°C
45% to 80% rel. humidity
500hPa to 1060hPa
Nominal voltage 3.0V – 3.7V
Nominal current 440 –760mA
Protection class internal power supply
IP-Code IP20
Device classification
according to IEC 6247
Group 2
Applied part Type BF (for contact plate)
HEINE mini3000®Dermatoscope #109 (2,5V)
Erläuterung der verwendeten Symbole
Auf dem Gerät bzw. der Verpackung nden sich folgende Symbole:
Explanation of utilized symbols
The following symbols are used on the device or on the packaging:
Explication des symboles utilisés
Les symboles suivants gurent sur l’appareil ou sur l’emballage :
Explicación de los símbolos utilizados
Sobre el aparato o sobre el embalaje se encuentran los siguientes símbolos:
Spiegazione dei simboli utilizzati
Sull’apparecchio e/o sulla confezione sono presenti i seguenti simboli:
Förklaring av symboler som används
På enheten eller på förpackningen hittar du följande symboler:
Verklaring van de gebruikte symbolen
Op het apparaat resp. op de verpakking staan de volgende symbolen:
Forklaring af de anvendte symboler
Følgende symboler ndes på apparatet hhv. emballagen:
Käytettyjen symbolien selitys
Laitteesta ja pakkauksesta löytyvät seuraavat symbolit:
Explicação dos símbolos utilizados
Os símbolos seguintes são usados nos equipamentos ou nas suas embalagens:
CE-Kennzeichnung kennzeichnet die Übereinstimmung mit
der Europäischen Medizinprodukterichtlinie 93/42 EWG.
The CE mark indicates that the product complies with the
European medical device directive 93/42/EEC.
Le marquage CE indique la conformité à la directive
européenne 93/42/CEE relative aux dispositifs médicaux.
El marcado CE indique la conformidad con la directiva
europea 93/42 /CEE relativa a los productos sanitarios.
Il marchio CE indica la conformità con la direttiva europea
sui dispositivi medici 93/42 CEE.
CE-märkning markerar en överensstämmelse med det
europeiska direktivet för medicinska produkter 93/42 EEG.
CE-markering duidt de overeenstemming aan met de Europese
Richtlijn betreffende medische hulpmiddelen 93/42 EEG.
CE-mærkningen angiver overensstemmelse med det
europæiske direktiv 93/42/EØF om medicinsk udstyr.
CE-merkintä tarkoittaa, että laite vastaa eurooppalaisen
lääkinnällisiä laitteita koskevan standardin 93/42 ETY
vaatimuksia.
O símbolo CE identifica a concordância com a Diretriz
Européia para Dispositivos Médicos 93/42/CEE.
Katalog- oder Bestellnummer
Catalogue- or order number
Numéro de catalogue ou de commande
Número de catálogo o de pedido
Codice catalogo e di dell’ordine numero
Katalog- eller Beställningsnummer
Catalogus- of Bestelnummer
Katalog- eller Ordrenummer
Luettelo- tai viitenumero
Número de catálogo ou pedido
REF

Other manuals for NC1
1

This manual suits for next models

4

Other HEINE Medical Equipment manuals

HEINE NC1 User manual

HEINE

HEINE NC1 User manual

HEINE iC 2 User manual

HEINE

HEINE iC 2 User manual

HEINE BETA100 User manual

HEINE

HEINE BETA100 User manual

HEINE HR User manual

HEINE

HEINE HR User manual

HEINE GAMMA Series User manual

HEINE

HEINE GAMMA Series User manual

HEINE BETA 200 User manual

HEINE

HEINE BETA 200 User manual

HEINE GAMMA 2.1 User manual

HEINE

HEINE GAMMA 2.1 User manual

HEINE omega 500 unplugged User manual

HEINE

HEINE omega 500 unplugged User manual

HEINE BETA 200 LED User manual

HEINE

HEINE BETA 200 LED User manual

HEINE FlexTip F-000.22.313 User manual

HEINE

HEINE FlexTip F-000.22.313 User manual

HEINE omega 500 unplugged User manual

HEINE

HEINE omega 500 unplugged User manual

HEINE GAMMA 2.2 User manual

HEINE

HEINE GAMMA 2.2 User manual

HEINE S-Frame User manual

HEINE

HEINE S-Frame User manual

HEINE mini-c Cliplamp User manual

HEINE

HEINE mini-c Cliplamp User manual

HEINE i-View User manual

HEINE

HEINE i-View User manual

HEINE visionPRO User manual

HEINE

HEINE visionPRO User manual

HEINE omega 500 unplugged User manual

HEINE

HEINE omega 500 unplugged User manual

HEINE iC1 User manual

HEINE

HEINE iC1 User manual

HEINE iC1 User manual

HEINE

HEINE iC1 User manual

HEINE NC2 User manual

HEINE

HEINE NC2 User manual

HEINE mini-c User manual

HEINE

HEINE mini-c User manual

HEINE HSL 150 User manual

HEINE

HEINE HSL 150 User manual

HEINE omega 500 unplugged User manual

HEINE

HEINE omega 500 unplugged User manual

HEINE BETA 200 User manual

HEINE

HEINE BETA 200 User manual

Popular Medical Equipment manuals by other brands

PARAMOUNT BED Everfit Light PE-9002 instruction manual

PARAMOUNT BED

PARAMOUNT BED Everfit Light PE-9002 instruction manual

natus CFM Olympic Brainz Monitor quick start

natus

natus CFM Olympic Brainz Monitor quick start

Porter DIGITAL MDM Operation and installation manual

Porter

Porter DIGITAL MDM Operation and installation manual

Otto Bock 50R20 Dorso Osteo Care Instructions for use

Otto Bock

Otto Bock 50R20 Dorso Osteo Care Instructions for use

Invacare IRC5PO2 Operator's manual

Invacare

Invacare IRC5PO2 Operator's manual

Norditalia Calor Standard operating manual

Norditalia

Norditalia Calor Standard operating manual

Jumper AngelSounds JPD-100S4 instruction manual

Jumper

Jumper AngelSounds JPD-100S4 instruction manual

EchoNous Uscan Setup guide

EchoNous

EchoNous Uscan Setup guide

FHC microTargeting 66-DS-PA Directions for use

FHC

FHC microTargeting 66-DS-PA Directions for use

Oxylator EM-100 operating manual

Oxylator

Oxylator EM-100 operating manual

Primus PRIMECARE PCB901 instruction manual

Primus

Primus PRIMECARE PCB901 instruction manual

Animas vibe Quick reference guide

Animas

Animas vibe Quick reference guide

Integra CUSA Clarity Service and maintenance manual

Integra

Integra CUSA Clarity Service and maintenance manual

Joerns Hoyer HPL700 Service & parts manual

Joerns

Joerns Hoyer HPL700 Service & parts manual

W&H Implantmed SI-1010 quick guide

W&H

W&H Implantmed SI-1010 quick guide

Medela Thopaz+ Instructions for use

Medela

Medela Thopaz+ Instructions for use

medi Spinomed manual

medi

medi Spinomed manual

STERILUX SterOx System V Series Short user guide

STERILUX

STERILUX SterOx System V Series Short user guide

manuals.online logo
manuals.online logoBrands
  • About & Mission
  • Contact us
  • Privacy Policy
  • Terms and Conditions

Copyright 2025 Manuals.Online. All Rights Reserved.