manuals.online logo
Brands
  1. Home
  2. •
  3. Brands
  4. •
  5. Helvex
  6. •
  7. Toilet
  8. •
  9. Helvex WLU GOBI TDS User manual

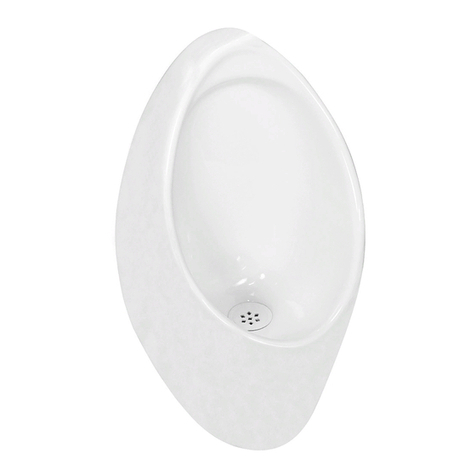
Helvex WLU GOBI TDS User manual

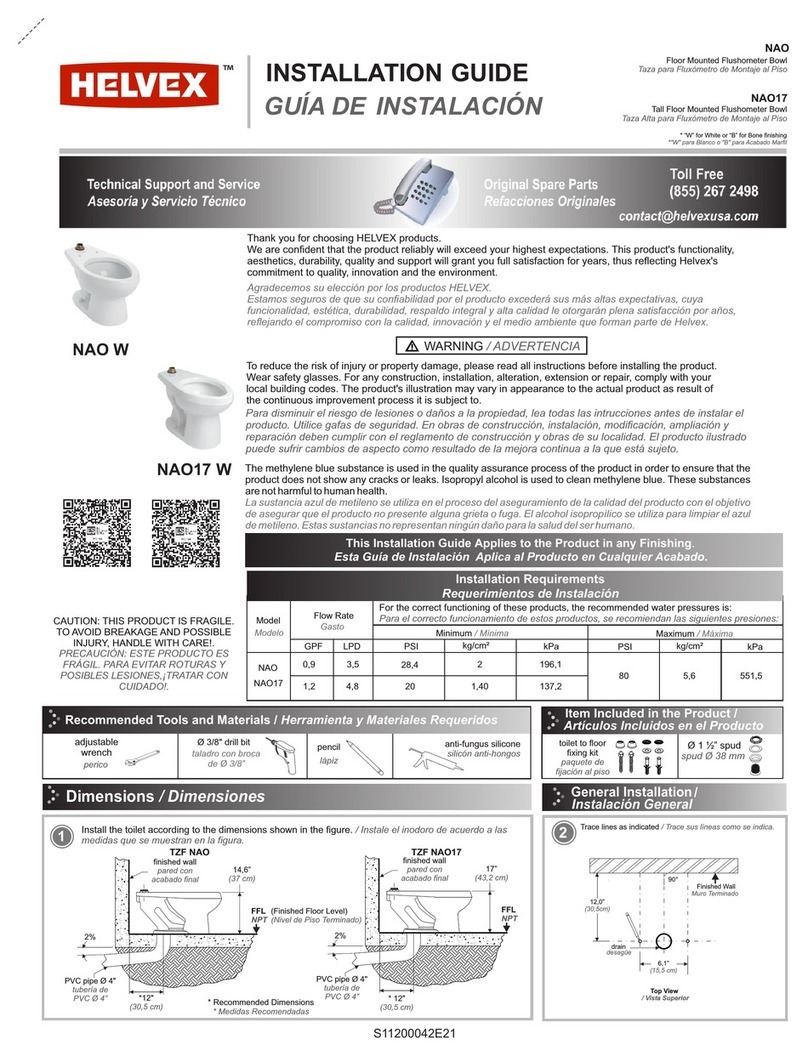
Mark the center of the groove, placing the wall bracket, at the
recommended dimensions. It is recommended that PVC drain
piping is used. / Marque el centro de la ranura, colocando el ancla
a las medidas recomendadas. Se recomienda que la tubería del
desagüe sea de PVC.
wall
bracket
ancla
ø2” drain
pipe
tubería del
drenaje
ø2”
FFL (Finished Floor Level)
NPT (Nivel de Piso Terminado)
*Recommended Dimensions
*Medidas Recomendadas
Drill on the mark with Ø 5/16" concrete drill bit (not included). /
Barrene en la marca con broca de Ø 5/16” para concreto (no
incluida).
drill with Ø 5/16" bit
taladro con broca
de Ø 5/16"
screwdriver
desarmador adjustable
wrench
perico
pencil
lápiz fixing kit
kit de
fijación
Ø 1½"-2"
trap connector
conector
de Ø 1½"-2"
wall bracket
ancla
connecting pipe
tubo conector maintenance key
llave de
mantenimiento
WLU NEGEV TDS
WLU MOJAVE TDS
Recommended Tools and Materials / Items Included in the Product / Tool Included /
Herramienta Incluida
technology &drains seals
CAUTION: THIS PRODUCT IS FRAGILE, TO AVOID BREAKAGE AND POSSIBLE INJURY, HANDLE WITH CARE!.
PRECAUCIÓN: ESTE PRODUCTO ES FRÁGIL, PARA EVITAR ROTURAS Y POSIBLES LESIONES, ¡MANÉJESE CON CUIDADO!.
S14100212E21-1
DO NOT Install on copper DWV copper as copper is highly susceptible to corrosion. NO Instale en cobre DWV ya que el cobre es
altamente susceptible a la corrosión.
WLU NEGEV TDS
WLU MOJAVE TDS
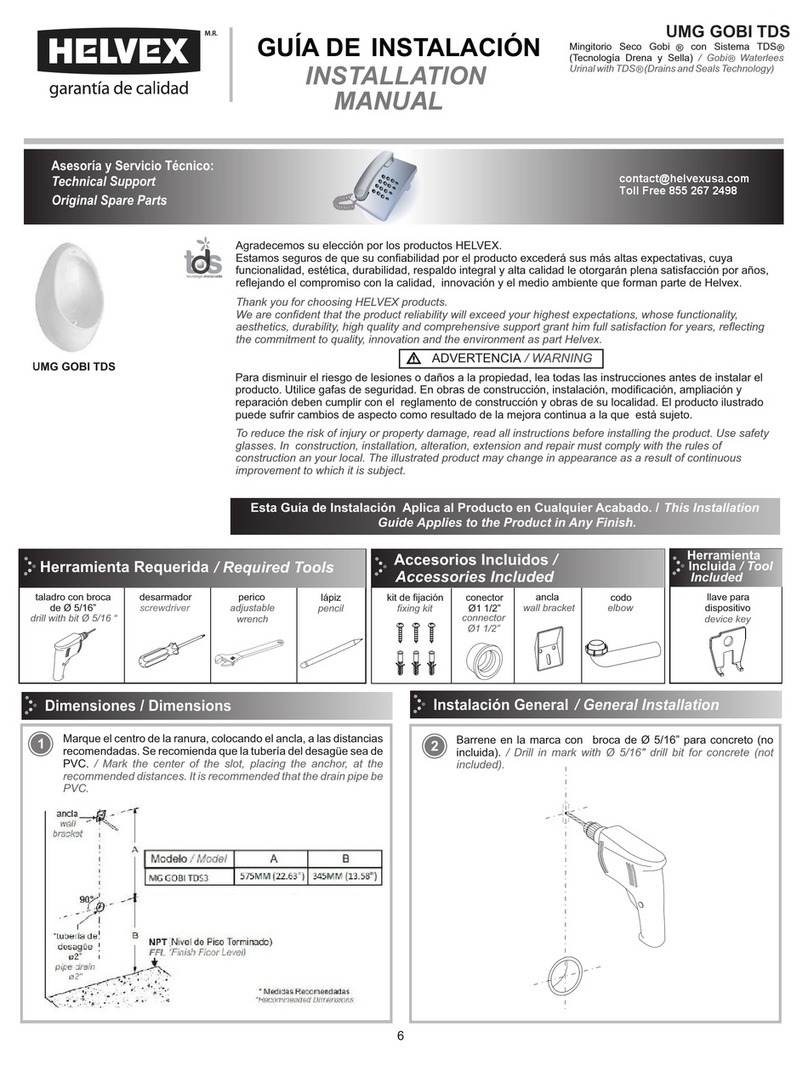
WLU GOBI TDS
Waterless Urinal with DST System (Drain and Seal Technology)
Mingitorio Seco con Sistema TDS (Tecnología Drena y Sella)
WLU GOBI TDS
This Installation Guide Applies to the Product in any Finishing.
Esta Guía de Instalación Aplica al Producto en Cualquier Acabado.
The methylene blue substance is used in the quality assurance process of the product in order to ensure that the
product does not show any cracks or leaks. Isopropyl alcohol is used to clean methylene blue. These
substances are not harmful to human health.
La sustancia azul de metileno se utiliza en el proceso del aseguramiento de la calidad del producto con el
objetivo de asegurar que el producto no presente alguna grieta o fuga. El alcohol isopropílico se utiliza para
limpiar el azul de metileno. Estas sustancias no representan ningún daño para la salud del ser humano.
Thank you for choosing HELVEX products.
We are confident that the product reliably will exceed your highest expectations. This product's functionality,
aesthetics, durability, quality and support will grant you full satisfaction for years, thus reflecting Helvex's
commitment to quality, innovation and the environment.
Agradecemos su elección por los productos HELVEX.
Estamos seguros de que su confiabilidad por el producto excederá sus más altas expectativas, cuya
funcionalidad, estética, durabilidad, respaldo integral y alta calidad le otorgarán plena satisfacción por años,
reflejando el compromiso con la calidad, innovación y el medio ambiente que forman parte de Helvex.
To reduce the risk of injury or property damage, please read all instructions before installing the product.
Wear safety glasses. For any construction, installation, alteration, extension or repair, comply with your
local building codes. The product's illustration may vary in appearance to the actual product as result of
the continuous improvement process it is subject to.
Para disminuir el riesgo de lesiones o daños a la propiedad, lea todas las intrucciones antes de instalar el
producto. Utilice gafas de seguridad. En obras de construcción, instalación, modificación, ampliación y
reparación deben cumplir con el reglamento de construcción y obras de su localidad. El producto ilustrado
puede sufrir cambios de aspecto como resultado de la mejora continua a la que está sujeto.
WARNING / ADVERTENCIA
Herramientas y Materiales Recomendados Artículos Incluidos en el Producto
Model / Modelo
WLU GOBI TDS
AB
16,5” (42 cm)
20,4” (52 cm)
WLU MOJAVE TDS 18,5” (47 cm)
WLU NEGEV TDS
16,5” (42 cm)
16,5” (42 cm)
16,9” (43 cm)
tape measure
flexometro
NOTE / NOTA:
If the drain pipe is of a different diameter, it is recommended to
purchase a sanitary coupling or adapter as required. / Si la tubería
del desagüe es de un Ø diferente, se recomienda comprar un
acoplamiento sanitario o adaptador a la medida requerida.
Make sure the connector pipe is installed with an inclination to avoid liquids stagnation. If the installation was successful follow the installation steps.
Otherwise proceed to adjust the installation (step 15). / Asegúrese de que el tubo conector esté instalado con una inclinación para evitar estancamiento
de líquidos. Si la instalación fue correcta siga con los pasos de instalación. En caso contrario proceda a ajustar la instalación (paso 15).
Remove the urinal. / Desmonte el
mingitorio.
Mark the missing holes and remove the
wall bracket. / Marque los barrenos
faltantes y retire el ancla.
Drill in mark with Ø5/16" drill bit for
concrete (not included). / Barrene en la
marca con broca de Ø5/16” para concreto
(no incluida).
Mount the urinal on the wall bracket.
/ Monte el urinal en el ancla.
Insert the anchor (included). / Inserte
el taquete (incluido). Screw the lag screw to fix the wall
bracket (included). / Enrosque la
pija para fijar el ancla (incluida).
Insert the trap connector or adapter
(included) into the drain pipe. / Inserte el
conector o adaptador (incluido), en el
tubo de desagüe a tope.
Ø 2" drain pipe
tubería del
drenaje de Ø 2"
Insert the connector pipe (included) into
the trap connector or adapter (included). /
Inserte el tubo conector (incluido) al
conector (incluido).
connector
pipe
tubo conector
If you DO NOT comply with
these conditions, proceed with
the Installation Adjustment
(step 15). / Si no cumple con
estas condiciones, proceda
con el Ajuste de Instalación
(paso 15).
nut
tuerca
DST system
sistema TDS
tilt
inclinación
wall
bracket
ancla
Screw the nut to the DST system,
verifying that the tilt of the connector tube
is adequate to avoid stagnation and
return of bad smells. / Enrosque la tuerca
al sistema TDS, verificando que la
inclinación del tubo conector sea la
adecuada para evitar estancamientos
y regreso de malos olores.
Cut the pipe
if necessary
Corte el tubo
si es necesario
Insert the anchors into the holes. /
Inserte los taquetes en los barrenos. Screw the lag screws (included) to fix
the wall bracket. / Enrosque las pijas
(incluidas) para fijar el ancla.
Mount the urinal on the wall bracket.
Monte el mingitorio en el ancla.
lag
screw
pija
Unscrew the connector pipe’s nut and remove the urinal from wall
bracket. / Desenrosque la tuerca del tubo conector y desmonte el
mingitorio del ancla.
15 16 Unscrew the lag screw and move the wall bracket up or down as
required. / Afloje la pija y recorra el ancla hacia arriba o hacia
abajo según se requiera.
Screw the lag screw to fix the wall
bracket. / Fije nuevamente el ancla con
las pijas.
17 Make sure that the connector pipe is installed with a tilt to avoid liquids stagnation, if this
condition is not met, it is necessary to readjust the installation. / Asegúrese de que el tubo
conector esté instalado con una inclinación para evitar estancamientos de líquidos. Si no se
cumplió con esta condición, es necesario volver a ajustar la instalación.
18
Verify that the nut threads freely as well as
the elbow has the necessary tilt for
drainage. / Verifique que la tuerca enrosque
libremente así como el tubo cuente con la
inclinación necesaria para el desalojo.
nut
tuerca
tilt
inclinación
Troubleshooting / Posibles Causas y Soluciones
Clean daily the urinal as usual with soap
and water. It is very important to pour at
least 1 gallon of clean or recycled water
every day. / Realice la limpieza diaria
como acostumbra con agua y jabón. Es
muy importante verter al menos de 1
galón de agua limpia o reciclada todos
los días.
19
Daily Cleaning / Limpieza Diaria
Use soft fibers to avoid scratching the ceramic. /
Utilice fibras suaves para evitar rayar la cerámica.
Insert the maintenance key into the
grooves and unscrew the cartridge. /
Inserte la llave de mantenimiento en las
ranuras y desenrosque el cartucho.
20
maintenance key
llave de mantenimiento
cartridge
cartucho
Unscrew and disassamble the cartridge.
Clean all components with soap and
water, reassemble. / Desenrosque y
desensamble el cartucho. Limpie todos
los componentes con agua y jabón, arme
nuevamente.
21
grid body
cuerpo rejilla
small sphere
esfera pequeña
lower chamber
cámara inferior
funnel
embudo
In case of buildup, use a soft fiber avoid
scratching the surfaces and spheres. / En caso
de incrustaciones acumuladas, utilice una fibra
suave evitando rallar las superficies y esferas.
big sphere
esfera grande sphere holder
porta esfera
gasket
empaque
deposit
depósito
o´ring
Bad smell. / Mal olor. Trap connector was not assembled or it is
incorrectly installed. / No colocó el conector o está
mal instalado.
Connector pipe´s tilt is not adequate for draining the
liquids. / La inclinación del tubo conector no es la
adecuada para el desalojo de los líquidos.
Remove the cartridge, wash its components (page 4, step 20 and 21)
and pour limescale remover to unclog drain or perfom mechanical
maintenance on the pipeline. / Retire el dispositivo, lave sus
componentes (pag. 4, paso 20 y 21) y vierta sarricida para destapar la
tubería o realice un mantenimiento mecánico a la tubería.
Place the sphere into the cartridge (page 4, step 21 and 22). /
Coloque la esfera dentro del cartucho (pag. 4, paso 21 y 22).
Uninstall the urinal and adjust the installation( Adjust the Installation
page 3, step 15). / Desinstale el mingitorio y ajuste la instalación
(Ajuste de Instalación, pag. 3, paso 15).
Liquid stagnation. /
Los líquidos se quedan
estancados.
Sediments or objects accumulation in the device
and/or the pipeline. / Acumulación de sedimentos u
objetos en el dispositivo y/o en la tubería.
Remove the cartridge, wash its components (page 4, step 20 and 21)
and pour limescale remover to unclog drain or perfom mechanical
maintenance on the pipeline. / Retire el dispositivo, lave sus
componentes (pag. 4, paso 20 y 21) y vierta sarricida para destapar la
tubería o realice un mantenimiento mecánico a la tubería.

This manual suits for next models

2

Other Helvex Toilet manuals

Helvex WC BOLMEN User manual

Helvex

Helvex WC BOLMEN User manual

Helvex MG Ferry User manual

Helvex

Helvex MG Ferry User manual

Helvex MG GOBI TDS User manual

Helvex

Helvex MG GOBI TDS User manual

Helvex OP RIVOLI PLUS User manual

Helvex

Helvex OP RIVOLI PLUS User manual

Helvex WC MIURA User manual

Helvex

Helvex WC MIURA User manual

Helvex WC 2.5 User manual

Helvex

Helvex WC 2.5 User manual

Helvex WC OP CAPRI User manual

Helvex

Helvex WC OP CAPRI User manual

Helvex ATM User manual

Helvex

Helvex ATM User manual

Helvex WC AUSTRAL L 2P User manual

Helvex

Helvex WC AUSTRAL L 2P User manual

Helvex BOLMEN2 User manual

Helvex

Helvex BOLMEN2 User manual

Helvex WC AUSTRAL User manual

Helvex

Helvex WC AUSTRAL User manual

Helvex OP RIVOLI PLUS User manual

Helvex

Helvex OP RIVOLI PLUS User manual

Helvex AT-4 User manual

Helvex

Helvex AT-4 User manual

Helvex WC MIURA 16 TCC User manual

Helvex

Helvex WC MIURA 16 TCC User manual

Helvex WC ULTRA 2P User manual

Helvex

Helvex WC ULTRA 2P User manual

Helvex AF-1 User manual

Helvex

Helvex AF-1 User manual

Helvex WC-OPTION-AT2 User manual

Helvex

Helvex WC-OPTION-AT2 User manual

Helvex AT-5 User manual

Helvex

Helvex AT-5 User manual

Helvex WC DRAKAR User manual

Helvex

Helvex WC DRAKAR User manual

Helvex TZF NAO PARED User manual

Helvex

Helvex TZF NAO PARED User manual

Helvex WC AUSTRAL 2P W User manual

Helvex

Helvex WC AUSTRAL 2P W User manual

Helvex WC MURANO 2P User manual

Helvex

Helvex WC MURANO 2P User manual

Helvex WC MIURA16 User manual

Helvex

Helvex WC MIURA16 User manual

Helvex UMG GOBI TDS User manual

Helvex

Helvex UMG GOBI TDS User manual

Popular Toilet manuals by other brands

Toto NEOREST 500 instruction manual

Toto

Toto NEOREST 500 instruction manual

Dometic CT 4110 installation manual

Dometic

Dometic CT 4110 installation manual

BATEC Roca MULTICLEAN A80400600 Series user manual

BATEC

BATEC Roca MULTICLEAN A80400600 Series user manual

Drive DeVilbiss Healthcare 12027RA instruction manual

Drive DeVilbiss Healthcare

Drive DeVilbiss Healthcare 12027RA instruction manual

Kohler REVE K-24766T-S installation instructions

Kohler

Kohler REVE K-24766T-S installation instructions

Milano Ballam BCTWH008 Information guide

Milano

Milano Ballam BCTWH008 Information guide

Toto CS818 Series installation manual

Toto

Toto CS818 Series installation manual

agape PEAR ACER0895BR Assembly instructions

agape

agape PEAR ACER0895BR Assembly instructions

Woodbridge V8300 Installation and care guide

Woodbridge

Woodbridge V8300 Installation and care guide

Kohler VEIL K-1381T-HC installation instructions

Kohler

Kohler VEIL K-1381T-HC installation instructions

Thetford C224 installation manual

Thetford

Thetford C224 installation manual

INCINOLET 4100 Series Installation and maintenance manual

INCINOLET

INCINOLET 4100 Series Installation and maintenance manual

Seima Modia STO-20 installation instructions

Seima

Seima Modia STO-20 installation instructions

Roca UMEN AVANT 811340400 installation manual

Roca

Roca UMEN AVANT 811340400 installation manual

Toto washlet instruction manual

Toto

Toto washlet instruction manual

Biolet BTS 33 owner's manual

Biolet

Biolet BTS 33 owner's manual

NATURE LOO Mini Installation & maintenance manual

NATURE LOO

NATURE LOO Mini Installation & maintenance manual

DURAVIT SensoWash Classic 613000 01 2 00 4300 user manual

DURAVIT

DURAVIT SensoWash Classic 613000 01 2 00 4300 user manual

manuals.online logo
manuals.online logoBrands
  • About & Mission
  • Contact us
  • Privacy Policy
  • Terms and Conditions

Copyright 2025 Manuals.Online. All Rights Reserved.