manuals.online logo
Brands
  1. Home
  2. •
  3. Brands
  4. •
  5. Helvex
  6. •
  7. Toilet
  8. •
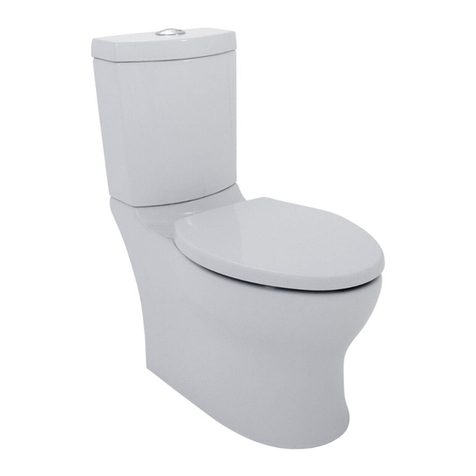
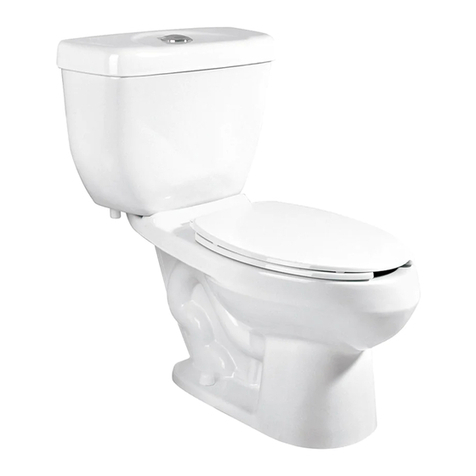
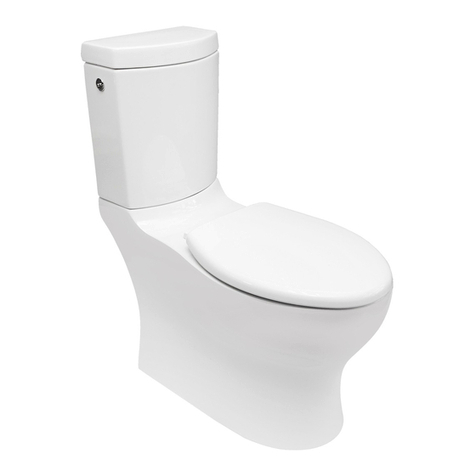
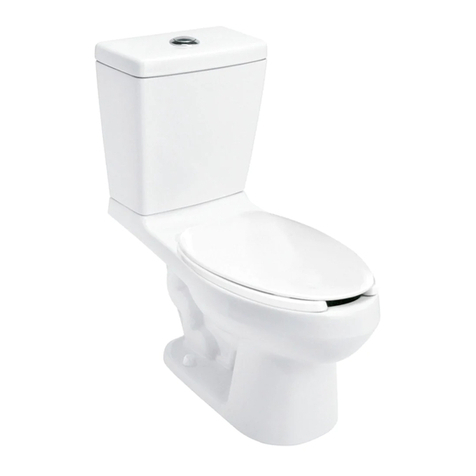
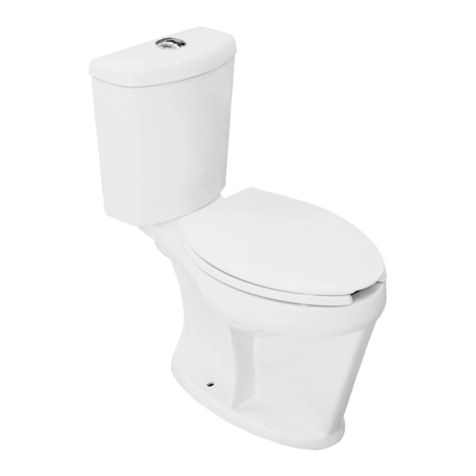
  9. Helvex WC AUSTRAL 2P W User manual

Helvex WC AUSTRAL 2P W User manual

INSTALLATION GUIDE
GUÍA DE INSTALACIÓN WC OPTION 2P W
Elongated Bowl and Toilet Tank, 1,28 GPF, White
Inodoro Taza Elongada y Tanque, 4,84 LPD, Blanco
WC AUSTRAL 2P W
foamy gasket
empaque
esponjoso
General Dimmensions / Medidas Generales
anti-fungus silicone
silicón antihongos
screwdriver
destornillador
Ø 3/8“ drill bit
taladro con broca
de Ø 3/8”
pencil
lápiz
Items Included in the Product
Required Tools / Herramienta Requerida
perico
adjustable
wrench
tank fixing kit
paquete de fijación tanque
Install the toilet according to the figure shown for each model. / Instale el inodoro de acuerdo con las medidas mostradas para cada modelo.
B
D
C
tubería de
PVC Ø 4” *12”
(30,5 cm)
2%
wall finished
pared con
acabado final
PVC pipe Ø 4"
A
1
FFL
NPT (Nivel de Piso Terminado)
(Finished Floor Level)
*Recommended Dimmensions
*Medidas Recomendadas
5,9”
(15 cm)
Model / Modelo
WC OPTION
WC DRAKAR16
AB
26,4” (67,2 cm)
29,9” (76,0 cm)
C
(38,3 cm)15,0”
(42,0 cm)16,5”
15,9” (40,6 cm)
31,2” (79,5 cm)
D
WC DRAKAR16 2P W
WC AUSTRAL 27,3” (69,5 cm) 15,9 ” (40,5 cm)
31,4” (80,0 cm)
31,2” (79,5 cm)
WC AUSTRAL 2P W
This installation guide applies to the product in any finish.
Esta guía de instalación aplica al producto en cualquier acabado.
The methylene blue substance is used in the quality assurance process of the product in order to ensure that the product
does not present any cracks or leaks. Isopropyl alcohol is used to clean methylene blue. These substances do not
represent any harm to human health.
La sustancia azul de metileno se utiliza en el proceso del aseguramiento de la calidad del producto con el objetivo de
asegurar que el producto no presente alguna grieta ó fuga. El acohol isopropílico se utiliza para limpiar el azul de metileno.
Estas sustancias no representan ningún daño para la salud del ser humano.
paquete de fijación piso
floor fixing kit
Artículos incluidos en el Producto
válvula de paso
(no incluida)
angle valve
(not included)
15,9” (40,6 cm)
15,9” (40,6 cm)
WC DRAKAR16 2P W
WC OPTION 2P W
Requerimientos de Instalación
Installation Requirements
1,40
20 137,89
Requerimientos de Instalación
Installation Requirements
Model / Modelo
Minimum / Mínima Maximum / Máxima
kg/cm²
PSI kPa kg/cm²
PSI kPa
WC OPTION 2P W
5,624
80 551,84
For the correct operation of this product, the recommended water pressures is:
Para el correcto funcionamiento de éstos productos, se recomiendan las siguientes
Caution: Do not exceed the pressure of:
Precaución: No exceder la presión de: 8,788
125 861,84
CAUTION: THIS PRODUCT IS FRAGILE,
TO AVOID BREAKAGE AND POSSIBLE
INJURY, HANDLE WITH CARE!.
PRECAUCIÓN: ESTE PRODUCTO ES
FRÁGIL, PARA EVITAR ROTURAS Y
POSIBLES LESIONES,¡TRATAR CON
CUIDADO!.
S11700262E21
WC DRAKAR16 2P W
WC AUSTRAL 2P W
2
drain
desagüe
bolt with nut
pija con tuerca
2
234
taquetes
(incluidos)
drain tube
tubo de
drenaje
drill hole
barreno
anchors
(includes)
Top View / Vista Superior
90° Wall Finished
Muro Terminado
12”
(30,5 cm)
6,1”
(15,5 cm)
válvula de paso (no incluida)
7,8”
(20 cm)
angle valve (not included)
Trace lines as indicated. / Trace sus líneas
como se indica.
nut (included)
tuerca (incluida)
bolt
(included)
pija
(incluida)
drain tube
tubo de drenaje
4 cm mín.
(1,57" min.)
General Installation / Instalación General
56
nut
tuerca
washer
rondana
plastic
washer
rondana
plástica
Bowl Installation / Instalación de la Taza
Tank Installation / Instalación del Tanque
7
fill valve
15/16" - 14 NS-1
válvula de admisión
15/16"-14 NS-1
foamy gasket
empaque esponjoso
cover
cubierta
Drill with Ø 3/8" concrete drill bit (not
included) and the anchors (includes) insert
into the holes. / Barrene con broca de Ø
3/8” para concreto (no incluída) e inserte
los taquetes (incluidos) en los barrenos.
Manually screw the nuts into the bolts and
then screw the bolts into in to the anchors,
unscrew the nuts from the bolts. /
Manualmente enrosque las tuercas en los
pernos y después enrosque los pernos en los
taquetes, desenrosque las tuercas de los
pernos.
Install the wax ring (not included) or toilet flange (not included) and place the bowl by pressing down. /
Instale el cuello de cera (no incluido) o la brida sanitaria (no incluida) y coloque la taza presionando hacia
Installation using Wax Ring
Instalación con Cuello de Cera Installation using Toilet Flange
Instalación con Brida Sanitaria
Use the fixing kit provided with the
product.
Utilice el kit de fijación contenido en
el producto.
brida sanitaria
(no incuida)
toilet flange
(not included)
drain
desagüe
Insert the plastic washers and the washers,
screw the nuts and place the nut covers. /
Inserte las rondanas de plástico y las
rondanas, enrosque las tuercas y coloque los
cubre tuercas.
Do not tighten the nuts more than necessary, to prevent
damaging your product. / No apretar las tuercas más de lo
necesario, para evitar daños a su producto.
Insert the foamy gasket into the tank base. / Inserte el empaque esponjoso en la base del tanque.
3
Remove the flush valve to fix the tank. Insert the gasket and screw the screw into the nut placing the washer. Tighten the nuts alternately until the tank is firm and
reassemble the flush valve. / Retire la válvula de descarga para fijar el tanque. Inserte el empaque cónico y atornille el tornillo en la tuerca colocando la rondana.
Apriete las tuercas alternativamente hasta que el tanque este firme y vuelva a montar la válvula de descarga.
9
Do not tighten the nuts more than necessary to avoid damage. Before being too tight, check that the tank is aligned with the bowl. The tank installation is
with the fixing kit. / No apretar las tuercas más de lo necesario para evitar daños. Antes de apretar, verifique que el tanque quede alineado con la taza. La
instalación del tanque es con el kit de sujeción.
screw
tornillo
washer
rondana
nut
tuerca
gasket
empaque
8
10
hose (not included)
manguera (no incluida)
fill valve
válvula de
alimentación
11
flush valve
válvula de descarga
flush valve
válvula de descarga
Place the tank on the bowl. / Coloque el tanque en la taza.
Screw the hose to the fill valve. / Enrosque la manguera a la válvula de admisión. Place the tank lid, verify the correct position. /
Coloque la tapa del tanque, verificando la
posición frontal correcta.
4
12
hose
manguera
angle valve
(not included)
llave angular
(no incluida)
13
Hose Installation / Instalación de la Manguera
antifungal silicone
silicón antihongos
14 15
Tank Internal Components / Componentes Internos del Tanque
The components are installed and calibrated for a maximum
efficiency. / Los componentes se encuentran instalados y
calibrados para una máxima eficiencia.
1. Fill Valve / Válvula de Admisión
2. Flush Valve / Válvula de Descarga
3. Float / Flotador
4. Float Screw / Tornillo del Flotador
5. Over Flow / Rebosadero
6. Restrictor / Restrictor
7. Hose Refil / Manguera Refil
water level mark
marca del nivel
de agua
1
2
3
46
5
7
float screw
tornillo del
flotador
16
Operation / Operación
angle valve
(not included)
llave angular
(no incluida)
flush button
botón de descarga de
limpieza única
Screw the hose to the angle valve. / Enrosque la manguera a la llave
angular.
Apply antifungal silicone (not included) in the perimeter of the toilet. /
Aplique silicón anti hongos (no incluido) en el perimetro de la base del W. C.
Only if the water level in the tank is not indicated, for mismatch,
proceed to the next: Turn the float set screw clockwise
gradually float to fill up the water level indicated, or turn left to
lower that level. / Sólo si el nivel de agua de tanque no es el
indicado, por desajuste, proceda a lo siguiente: Gire el tornillo
del flotador hacia la derecha gradualmente para llenar hasta el
nivel de agua indicado, ó gire a la izquierda para bajar dicho
Open the supply line push the flush button once. This toilet has a single-discharge cleaning system that operates with 1,26 gpf. / Abra la línea
de alimentación y oprima el botón de descarga una sola vez. El inodoro cuenta con un sistema de limpieza única que opera con 4,7 lpd.
Do not press the flush button for more than 1 second to avoid water waste.
No presione el botón de descarga durante más de 1 segundo para evitar
el desperdicio de agua.
5
19 20
filter
filtro
18
Filter Maintenance / Mantenimiento del Filtro
angle valve
(not included)
llave angular
(no incluida)
hose
(not included)
manguera
(no incluida)
fill valve
válvula de
admisión
17
Adjustment Button Shank / Ajuste del Espárrago del Botón
*Recommended Dimmensions
*Medidas Recomendadas
*A
button shank
espárrago
del botón
Model / Modelo
WC OPTION
WC DRAKAR16
*A
3,1” (8,0 cm)
2,9” (7,4 cm)
filtro
filter
WC AUSTRAL 3,2” (8,1 cm)
Check the length of the button shank for optimal flush. / Verifique la distancia del espárrago del botón, para una óptima descarga.
Close the supply line and unscrew the hose from the fill valve. / Cierre la línea de alimentación y desenrosque la manguera de la válvula
de admisión.
Remove the filter. / Retire el filtro. Clean the filter with water and a
soft brush. / Limpie el filtro con
agua y un cepillo suave.
21
22 Clean the jet with a green fiber or apply sarricide. /Limpie el jet con una fibra verde o aplique sarricida.
Jet Maintenance / Mantenimiento del Jet
jet
manguera
(no incluida)
hose
(not included)
6
Insert the filter and screw the hose (not included). / Inserte el filtro y enrosque la manguera (no incluida).
filtro
filter
Troubleshooting / Posibles Causas y Soluciones
Solids are not correctly flushed. / No se
barren correctamente los deperdicios.
Press flush button firmly only once (page 4 " Operation “ ). /
Oprima una sóla vez con firmeza ( pag. 4 " Operación " ).
Water level in the tank bellow level mark. / El nivel de
agua en el tanque está por debajo del marcado.
Remove filter from the fill valve and clean it (page 5 " Filter
Maintenance " ). / Remueva el filtro de la válvula de admisión y
proceda a limpiar (pag. 5 " Mantenimiento del filtro").
Solution / Solución
Debris in the flush valve gasket. / Impurezas del
empaque válvula de descarga.
Water flushing permanently. / Se queda
tirando agua.
Check the flush valve gasket and clean it, if necessary replace it
(page 4 " Internal Tank Components "). / Verificar el empaque de
la válvula de descarga y proceda a limpiar, si es necesario
reemplacelo (página 4 " Componentes Internos del Tanque" ).
Button shank is touching the flush valve. / El
botón toca la válvula de descarga.
Water leaks from tank to bowl. / Fuga de
agua del tanque a la taza.
Verify the button length (Page 5 “ Button adjusment " ). /
Verificar que la medida del espárrago del botón sea la
indicada(Pag. 5 “ Ajuste de botón ” ).
Fill valve does not close. / Válvula de
admisión no cierra Verify the water level. / Verificar el nivel de agua
The flush button is not pressed properly. / El
botón no es oprimido correctamente.
Cause / Causa
Problem / Problema
COMPLIES WITH DEPT. OF ENERGY 10 CFR PART 429, 430 AND 431
CUMPLE CON EL DEPARTAMENTO DE ENERGÍA 10 CFR PARTE 429, 430 Y 431

This manual suits for next models

2

Other Helvex Toilet manuals

Helvex WC MURANO 2P User manual

Helvex

Helvex WC MURANO 2P User manual

Helvex WC MIURA16 User manual

Helvex

Helvex WC MIURA16 User manual

Helvex MG Ferry User manual

Helvex

Helvex MG Ferry User manual

Helvex OP RIVOLI PLUS User manual

Helvex

Helvex OP RIVOLI PLUS User manual

Helvex WC AUSTRAL P User manual

Helvex

Helvex WC AUSTRAL P User manual

Helvex WC MURANO User manual

Helvex

Helvex WC MURANO User manual

Helvex NAO W User manual

Helvex

Helvex NAO W User manual

Helvex WC DRAKAR User manual

Helvex

Helvex WC DRAKAR User manual

Helvex WC DRAKAR2 User manual

Helvex

Helvex WC DRAKAR2 User manual

Helvex WC MIURA 16 TCC User manual

Helvex

Helvex WC MIURA 16 TCC User manual

Helvex WC OPTION User manual

Helvex

Helvex WC OPTION User manual

Helvex AT-5 User manual

Helvex

Helvex AT-5 User manual

Helvex OP RIVOLI PLUS User manual

Helvex

Helvex OP RIVOLI PLUS User manual

Helvex TZF NAO User manual

Helvex

Helvex TZF NAO User manual

Helvex ATM User manual

Helvex

Helvex ATM User manual

Helvex WC-OPTION-AT2 User manual

Helvex

Helvex WC-OPTION-AT2 User manual

Helvex WC OP CAPRI User manual

Helvex

Helvex WC OP CAPRI User manual

Helvex WC 2.5 User manual

Helvex

Helvex WC 2.5 User manual

Helvex WC Bolmen User manual

Helvex

Helvex WC Bolmen User manual

Helvex MG GOBI TDS User manual

Helvex

Helvex MG GOBI TDS User manual

Helvex AT-4 User manual

Helvex

Helvex AT-4 User manual

Helvex WC ULTRA 2P User manual

Helvex

Helvex WC ULTRA 2P User manual

Helvex MG-MOJAVE User manual

Helvex

Helvex MG-MOJAVE User manual

Helvex WC AUSTRAL User manual

Helvex

Helvex WC AUSTRAL User manual

Popular Toilet manuals by other brands

Inax DV300G manual

Inax

Inax DV300G manual

Glacier bay N2441EB Series Use and care guide

Glacier bay

Glacier bay N2441EB Series Use and care guide

Kohler K-3639 Installation and care guide

Kohler

Kohler K-3639 Installation and care guide

Invacare Aquatec 900 user manual

Invacare

Invacare Aquatec 900 user manual

Kohler K-3901 Homeowner's guide

Kohler

Kohler K-3901 Homeowner's guide

Dometic GROUP SeaLand MasterFlush 8100 Series Operation manual

Dometic GROUP

Dometic GROUP SeaLand MasterFlush 8100 Series Operation manual

Cinderella Comfort NA owner's manual

Cinderella

Cinderella Comfort NA owner's manual

Kohler VEIL K-5401T installation guide

Kohler

Kohler VEIL K-5401T installation guide

FV E181 quick start guide

FV

FV E181 quick start guide

IFO Sign 6860 Assembly instructions

IFO

IFO Sign 6860 Assembly instructions

Sanela SLW 53 manual

Sanela

Sanela SLW 53 manual

Kohler K-3322 Homeowner's guide

Kohler

Kohler K-3322 Homeowner's guide

BEMIS bioBidet HD-7000 owner's manual

BEMIS

BEMIS bioBidet HD-7000 owner's manual

VITRA V-Care Prime 7231B403-6216 user manual

VITRA

VITRA V-Care Prime 7231B403-6216 user manual

La Playa 1510 operating instructions

La Playa

La Playa 1510 operating instructions

Mirabelle AMBERLEY MIRAM241SWH manual

Mirabelle

Mirabelle AMBERLEY MIRAM241SWH manual

Dometic CT 4050 operating manual

Dometic

Dometic CT 4050 operating manual

URIMAT ceramic compact 12.301 Installation instruction

URIMAT

URIMAT ceramic compact 12.301 Installation instruction

manuals.online logo
manuals.online logoBrands
  • About & Mission
  • Contact us
  • Privacy Policy
  • Terms and Conditions

Copyright 2025 Manuals.Online. All Rights Reserved.