manuals.online logo
Brands
  1. Home
  2. •
  3. Brands
  4. •
  5. Henny Penny
  6. •
  7. Fryer
  8. •
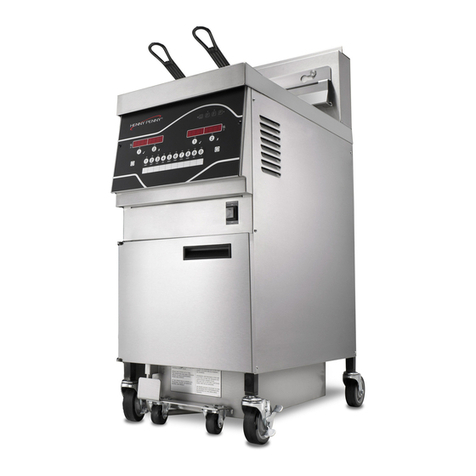
  9. Henny Penny OE 301 Operating instructions

Henny Penny OE 301 Operating instructions

Other manuals for OE 301

2

This manual suits for next models

6

Other Henny Penny Fryer manuals

Henny Penny KVE-071 User manual

Henny Penny

Henny Penny KVE-071 User manual

Henny Penny LVE-102 User manual

Henny Penny

Henny Penny LVE-102 User manual

Henny Penny 691 Operating instructions

Henny Penny

Henny Penny 691 Operating instructions

Henny Penny PFG-690 User manual

Henny Penny

Henny Penny PFG-690 User manual

Henny Penny Evolution Elite EEE-141 User manual

Henny Penny

Henny Penny Evolution Elite EEE-141 User manual

Henny Penny 690 Operating instructions

Henny Penny

Henny Penny 690 Operating instructions

Henny Penny PFE-592 User manual

Henny Penny

Henny Penny PFE-592 User manual

Henny Penny 520 User manual

Henny Penny

Henny Penny 520 User manual

Henny Penny LOV LVE-200 Series User manual

Henny Penny

Henny Penny LOV LVE-200 Series User manual

Henny Penny 680 KFC User manual

Henny Penny

Henny Penny 680 KFC User manual

Henny Penny OFE-341 Operating instructions

Henny Penny

Henny Penny OFE-341 Operating instructions

Henny Penny KFC Velocity PXE-100 User manual

Henny Penny

Henny Penny KFC Velocity PXE-100 User manual

Henny Penny F5 User manual

Henny Penny

Henny Penny F5 User manual

Henny Penny Evolution Elite EEG-163 User manual

Henny Penny

Henny Penny Evolution Elite EEG-163 User manual

Henny Penny Evolution Elite EEG-16 Series User manual

Henny Penny

Henny Penny Evolution Elite EEG-16 Series User manual

Henny Penny LVG-202 User manual

Henny Penny

Henny Penny LVG-202 User manual

Henny Penny EVOLUTION ELITE EEG-242 User manual

Henny Penny

Henny Penny EVOLUTION ELITE EEG-242 User manual

Henny Penny Evolution Elite EEE-154 User manual

Henny Penny

Henny Penny Evolution Elite EEE-154 User manual

Henny Penny F5 User manual

Henny Penny

Henny Penny F5 User manual

Henny Penny FDS-200 User manual

Henny Penny

Henny Penny FDS-200 User manual
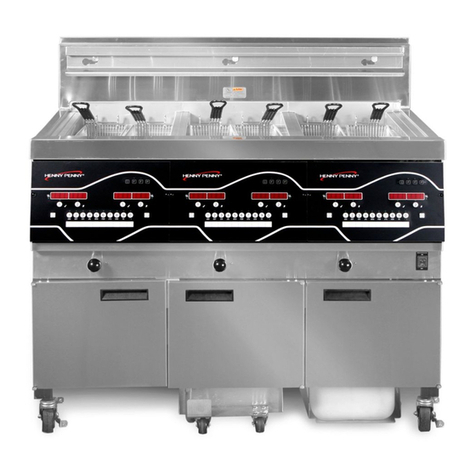
Henny Penny Evolution Elite User manual

Henny Penny

Henny Penny Evolution Elite User manual

Henny Penny 500 User manual

Henny Penny

Henny Penny 500 User manual
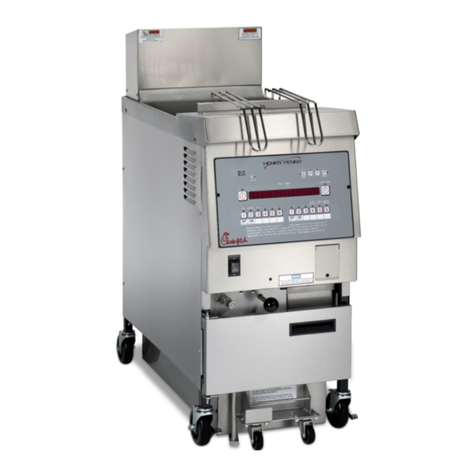
Henny Penny PFG-691 User manual

Henny Penny

Henny Penny PFG-691 User manual

Henny Penny LOV LVE-100 Series User manual

Henny Penny

Henny Penny LOV LVE-100 Series User manual

Popular Fryer manuals by other brands

GILES EOF-BIB/FFLT/24/24 manual

GILES

GILES EOF-BIB/FFLT/24/24 manual

GE 168997 manual

GE

GE 168997 manual

Falcon G350/11 Installation and servicing instructions

Falcon

Falcon G350/11 Installation and servicing instructions

GoWISE USA GW22612 instruction manual

GoWISE USA

GoWISE USA GW22612 instruction manual

Wolf IF15/S Specification sheet

Wolf

Wolf IF15/S Specification sheet

Electrolux Thermetic 9CHG583284 Operating and safety instructions

Electrolux

Electrolux Thermetic 9CHG583284 Operating and safety instructions

DeLonghi D677UX Instructions for use

DeLonghi

DeLonghi D677UX Instructions for use

SEVERIN DEEP FRYER - Dimensions

SEVERIN

SEVERIN DEEP FRYER - Dimensions

Toastmaster TMFG18-NAT Installation and operation instructions

Toastmaster

Toastmaster TMFG18-NAT Installation and operation instructions

Domo DO465FR Instruction booklet

Domo

Domo DO465FR Instruction booklet

Russell Hobbs RDF300 Instructions and warranty

Russell Hobbs

Russell Hobbs RDF300 Instructions and warranty

Farberware FBW FT 43721 B manual

Farberware

Farberware FBW FT 43721 B manual

GERMANICA GEAF5L3LD instruction manual

GERMANICA

GERMANICA GEAF5L3LD instruction manual

Wells F-85 Features and specifications

Wells

Wells F-85 Features and specifications

Philips HD9211 user manual

Philips

Philips HD9211 user manual

Lakeland 31796 Instruction booklet

Lakeland

Lakeland 31796 Instruction booklet

Dash Tasti-Crisp DFAF755 user manual

Dash

Dash Tasti-Crisp DFAF755 user manual

Keating Of Chicago 18 BB GAS Specification sheet

Keating Of Chicago

Keating Of Chicago 18 BB GAS Specification sheet

manuals.online logo
manuals.online logoBrands
  • About & Mission
  • Contact us
  • Privacy Policy
  • Terms and Conditions

Copyright 2025 Manuals.Online. All Rights Reserved.

This sectionprovidestroubleshootinginformation in theform of
aneasy-to-readtable.
If aproblem occursduring thefirst operationof anew fryer,
recheckthe installation per Section2 of this manual.
Before troubleshooting,alwaysrechecktheoperatingprocedure
per Section3 of this manual.
e T LES
In theeventof acontrol systemfailure, thedigital displaywill
showan“Error Message.”Thesemessagesarecoded:E5,E4, E6,
ElO, E15,E41,E50, E51,andE53.
enturn switc
display showsE4, thecontrol board isgetting too hot. Checkthe
louverson eachsideof theunit for obstuctions. If E4persists,
Turn switchto OFF position,thenturn switch backto ON. If
display showsE6,thermal sensormustbereplaced.Referto
section6-4.
button.If high limit doesnot reset,high limit mustbereplaced
per section6-5, or 6-6.
El5
E41,E50,
E51,E53
Drain Switch Closedrain,usingthe drainvalve handle.If display still shows
Failure E15checkdrain valve section6-13.
Programming Turn switchto OFF, thenbackto ON. If display showsanyof
Failure theerror codes,the control panelneedsreplaced.
NG
LE
With switch in
POWER position
and switch light
not illuminated,
fryer is complete
ly inoperative.
With switch in
power position,
switch light is
on, but all other
lights are out ex
cept the pump
will operate.
Shortening will
not heat but
lights are on.
Open Circuit
No power to
board
Faulty Contactor
(elec. model)
Faulty Gas Valve
(gas model)
Faulty Gas
Solenoid (gas
model)
Faulty Probe
Faulty High
Limit
Faulty Drain
Switch
Check to see if unit is plugged in.
Check breaker or fuse at supply box.
Check control panel fuse per Section 6-12.
@Check POWER switch per Section 6-14.Replaceif defective.
.Check voltage at wall receptacle.
Check cord and plug.
Check fuse on PC board.
Check gas valve per Section 6-11.
Check gas solenoid, per Section 6-19.
Check probe per Section 6-4. “Error message” E6.
Check High Limit per Section 6-6, or 6-7. “Error message”
ElO.
Check drain switch per Section 6-13. “Error message” E15.
Shortening will
not heat, but
lights are on.
A. Pilot will not
light (gas model)
B. Pilot will not
stay lit.
C. Burner will
not light, pilot li
(gas model)
Faulty Contactor
(elec. model)
Faulty Thermal
Sensor
Faulty High
Limit
Pilot not lit
Plugged pilot
orifice, and/or
pilot supply tube
Gas supply off
Faulty gas con-
trol valve
Air in gas supply
line
Faulty therm0
couple
Pilot magnetic
PlW
Drain valve open
High Limit con-
trol switch open
Possible faulty
gas control valve
Check contactor per Section 6-8.
Check thermal sensorper Section 6-4. “Error message” E6.
Check high limit control switch per Section 6-6 or 6-7.
* Light pilot per Section 2-9.
* Unplug pilot orifice and/or pilot supply tube.
Turn ON gas supply.
Replace gas control valve.
Bleed air from supply line.
Replace therm0 couple per Section 6-10.
Service per Section 6-11.
Close drain valve.
With power removed from fryer, check across high limit
switch terminals with ohmmeter. Replace if no reading is
indicated on meter.
With power removed from fryer, check across electrical
leads of gas control valve with ohmmeter, and gas valve in
“ON” position. Ohm reading should be 234 ohm resistance.
Replace the control valve if not within 10%.
5-2. T LES NG
(Continued)
_%
Heating of Low or improper
shortening too voltage (elec.
slow model)
Heating of
shortening too
slow (elec. model
Shortening
overheating
Weak or burnt
out elements
(elec. model)
Points in contac-
tor bad (elec.
model)
Wire(s) loose
Burnt or charred
wire connection
Supply line too
small - low gas
volume (gas
model)
Incorrect jet size
(gas model)
Improper ventila-
tion system (gas
model)
Check probe
calibration
Check contactor
for not opening
(elec. model)
Bad Controller
Use a meter and check the receptacle against data plate.
Check heating elements per section (elec. model).
Check contactor per Section 6-8.
Tighten
Replace wire and clean connectors.
Increase supply line size. Refer to installation instructions.
Replace with proper size jet for type of gas.
Refer to Section 2-5.
Calibrate probe if + 10°F or “C off. If more than + 10°F
or “C, replace probe.
Replace control board if heat indicator stays on past ready
temperature.
odel
Foaming or boil-
ing over of
shortening.
Shortening will Drain valve
not drain from clogged with
frypot crumbs
Filter motor rum
but pumps
shortening slowly
Filter switch ON
motor does not
run
.“Y Motor hums but
Lb,&> will not pump
Water in
shortening
Improper or bad
shortening
Improper
filtering
Improper rinsing
after cleaning the
fryer
Drain valve will
not open by turn-
ing handle
Filter valve not
open
Pump clogged
Filter line con-
nection loose
Solidified
shortening in
lines
Defective switch
Defective motor
Motor thermal
protector tripped
Clogged lines or
pump
At end of frying cycle, drain shortening and clean frypot.
Add fresh shortening.
Use recommended shortening.
Refer to the procedure covering filtering the shortening.
@Clean and rinse the frypot. Then dry thoroughly.
8 Open valve force cleaning brush through drain opening.
a Replace cotler pins in in valve capling.
Open filter valve.
Remove and clean pump per Section 6-15.
Tighten all filter line connections.
Clear all filter lines of solidified shortening.
Check/replace switch per Section 6-15.
Check/replace motor per Section 6-15.
Reset thermal switch per Section 3-7.
Remove and clean pump and lines.
Replace pump seal, rotor and rollers per 6-15.
5-5