manuals.online logo
Brands
  1. Home
  2. •
  3. Brands
  4. •
  5. hepco & becker
  6. •
  7. Motorcycle Accessories
  8. •
  9. hepco & becker 731106 User manual

hepco & becker 731106 User manual

1
130616/261016/261022/121222
LED
Zusatzscheinwerfer / Auxiliary headlights
Artikel Nr.: / Item-no.:
731106 schwarz/black
58mm
72mm 125mm
Ø22mm
23mm
80mm
1 700009350 LED Zusatzscheinwerfer Set:
bestehend aus
2x Scheinwerfer
2x Halteschelle ø22-ø39mm
2x Halteschelle ø40-ø53mm
Befestigungsschrauben
1 700007883 Kabelbaum
1 700012313 Schraubensatz:
10 Kabelbinder
1 Verlängerungskabel 140 cm
1 Ringkabelschuh für M6
1 Quetschverbinder
1 700009350 LED auxiliary headlights set:
including
2x spotlights
2x holding clip ø22-ø39mm
2x holding clip ø40-ø53mm
screw set
1 700007883 wire harness
1 700012313 screw kit:
10 cable ties
1 extension cable 140 cm
1 ring cable lug for M6
1 crimp connector
INHALT
CONTENTS
Vertikale oder horizontale Montage möglich
Vertical or horizontal mounting possible
2
Sitze und oder Verkleidungen demontieren um die Batterie zu erreichen. Masseanschluß der Batterie abklemmen.
Relais in den Anschlußstecker stecken (auf korrekte Position achten).
Schalter im Cockpit montieren und anschliessen, siehe nächste Seite.
Das gelbe Kabel des Schalters mit dem freien Anschlußstecker vom Relais verbinden.
Anschlüsse an Batterie:
Das weisse Kabel (von Sicherung kommend) wird am Pluspol der Batterie angeklemmt.
Das schwarze Kabel (vom Relais kommend) wird am Minuspol der Batterie angeklemmt.
Montage der LED Flooter :
suchen Sie sich einen geeigneten Montageort an Ihrem
Motorrad. Besonders geeignet sind die Rohre von Tank- oder
Motorschutzbügel.
Eine Montage am Standrohr ist teilweise auch möglich
HINWEIS: Bei diesem Montageort bewegen sich die Schein-
werfer mit dem Lenkeinschlag mit. Bitte bei der Montage
beachten und die Kabelführung entsprechend ausrichten.
Fastening of the LED Flooter :
Find yourself a suitable location on your motorcycle.
Especially useful are the pipes from the tank or engine guard.
A mounting on standpipe is partially possible.
NOTE: For this installation, the lights move with the steering
angle.
Please note when mounting and aligning the cable.
Dismantle seats/farings to reach the battery. Disconnect cable from the battery ground terminal.
Plug the relais in the connector.
Fix the switch in the cockpit see next side.
connect the yellow cable from the switch to the free connector coming from the relais.
Connection to the battery:
The white cable (coming from the fuse) will be fixed to the Plus pole of the battery.
The black cable (coming from the relais) is connected to the negative pole of the battery.
LED
Zusatzscheinwerfer / Auxiliary headlights
Artikel Nr.: / Item-no.:
731106 schwarz/black
Of course, the assembly requires a certain technical experience. If you are not sure how to execute a determined
action, you should ask your local distributor to do it. First, tighten all screws only loosely. After mounting all parts, the
screws should be tightened to the torque specified. This guarantees, that the product is mounted without tension.
Observe the tightening torques of the manufacturer! Control all screw connections after the assembling for tightness!
Die Voraussetzung für die Montage ist natürlich eine gewisse technische Erfahrung. Wenn Sie sich nicht sicher sind,
wie man eine bestimmte Arbeit ausführt, sollten Sie diese Ihrer Fachwerkstatt überlassen. Ziehen sie alle
zugänglichen Schrauben zuerst nur locker an. Nachdem alles montiert ist, werden die Schrauben dann auf das
entsprechende Anzugsmoment festgezogen. Dadurch wird sichergestellt, dass das Produkt spannungsfrei angebaut
ist. Anzugsmomente beachten! Nach der Montage alle Verschraubungen auf festen Sitz kontrollieren!
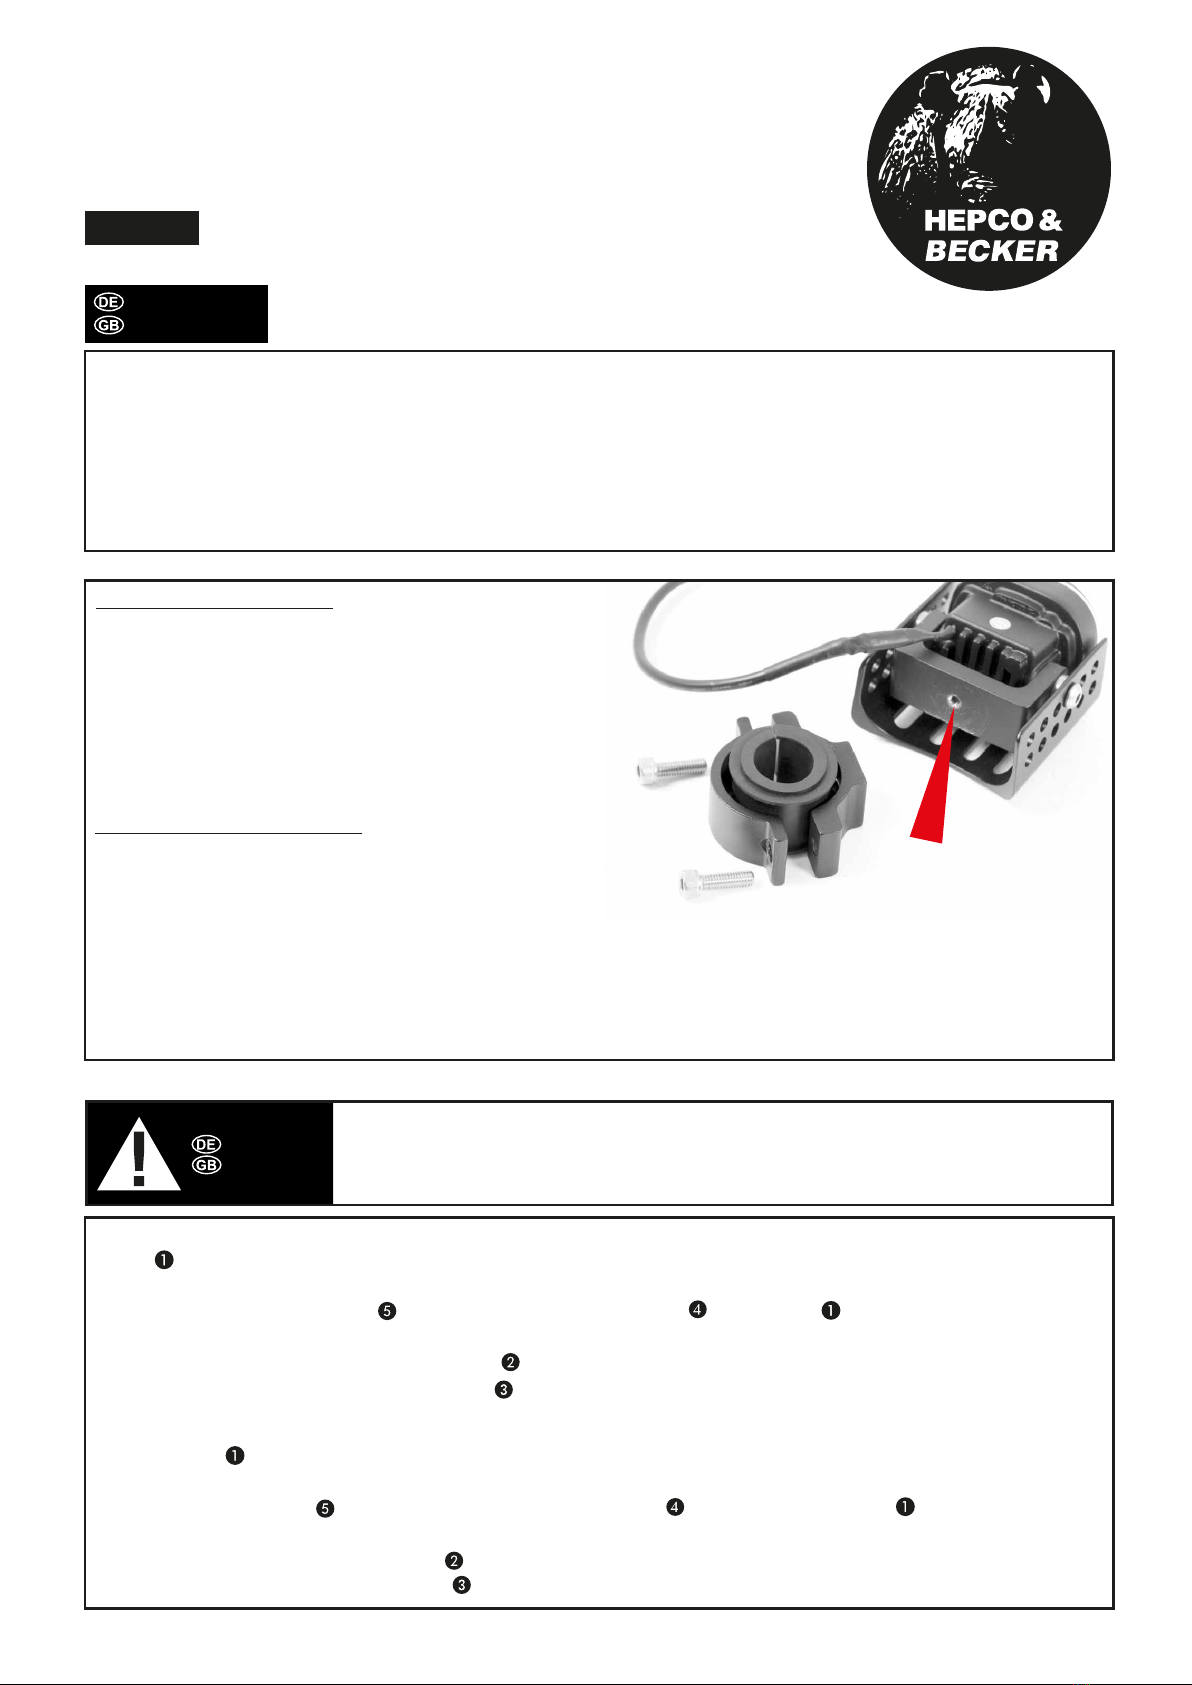
IMPORTANT
Secure the holding screw with thread
locker in the marked thread!
WICHTIG
Die Halteschraube muss mit einer
mittelfesten Schraubensicherung
eingesetzt werden.
WICHTIG
IMPORTANT
ACHTUNG
CAUTION
Falscher Anschluss der Flooter kann zu Schäden am Kabelbaum oder der
elektrischen Anlage führen! Schliessen Sie die Flooter gemäss Schaltplan an.
Verlegen Sie alle Kabel so, das sich keine Scheuerstellen bilden können.
Be carefull - wrong connection can demage the electrical system! Connect the Flooter
according to the wiring diagram. Securely attach the wiring to prevent the risk of chafing.
3
Steckver-
bindung
white
yellow
white
white
green
black
black
black
Standlicht
LED
Masse
Pluspol Batterie
Sicherung
Steckver-
bindung
Schalter
Steckver-
bindung
LED
weiss / white
schwarz
schwarz
weiss
schwarz
weiss
grün schwarz
black
gelb
weiss
Relais
LED
Zusatzscheinwerfer / Auxiliary headlights
Artikel Nr.: / Item-no.:
731106 schwarz/black
weiss / white
SCHALTPLAN
WIRING DIAGRAM
Ground
Masse
Ground
Plus pole batterie
Relay
Parking light
Connector
Fuse
Connector
Connector
Switch
4
Hepco & Becker GmbH
An der Steinmauer 6
D-66955 Pirmasens
Germany
Tel.: +49 (0)6331 - 1453 - 100
Fax: +49 (0)6331 - 1453 - 120
eMail: vertrieb@hepco-becker.de
www.hepco-becker.de
Weiteres Zubehör auf unserer Homepage. More accessories: see our homepage.
ACHTUNG
CAUTION
Nach der Montage alle Verschraubungen auf festen Sitz kontrollieren! Abgebaute Teile
wieder montieren. Bitte beachten Sie unsere beigefügten Serviceinformationen.
Control all screw connections after the assembling for tightness! Reassemble the
dismanteled parts. Please notice our enclosed service information.
LED
Zusatzscheinwerfer / Auxiliary headlights
Artikel Nr.: / Item-no.:
731106 schwarz/black
Schaltermontage:
Das einzelne weisse Kabel wird mit
dem Abzweigverbinder an der Stand-
lichtleitung verklemmt und mit dem
grünen Kabel des Schalters verbun-
den. Das schwarze Kabel des Schal-
ters muss an einen Massepunkt des
Motorrads geführt und verbunden
werden. Hierzu ggf. den Ringkabel-
schuh, das Verlängerungskabel 140
cm und den Quetschverbinder verwen-
den.
Alle Verbindungen gegen Feuchtigkeit
schützen!
Der Schalter wird an geeigneter Stelle
im Cockpit angebaut. Masse-
anschluss Batterie wieder herstellen.
Switch mounting:
The single white wire must be
attached to the parking light wire by a
branch connector.
The black cable of the switch must be
led to a ground point of the motorbike
and connected. If necessary, use the
ring cable lug, the 140 cm extension
cable and the crimp connector for this.
Protect all connections against
moisture!
The switch will be fixed at a suitable
point in the cockpit. Restore battery
ground terminal.
MONTAGEANLEITUNG
MOUNTING INSTRUCTIONS
Symboldarstellung
symbolic picture

Other hepco & becker Motorcycle Accessories manuals

hepco & becker 4212675 00 01 User manual

hepco & becker

hepco & becker 4212675 00 01 User manual

hepco & becker 70076110001 User manual

hepco & becker

hepco & becker 70076110001 User manual

hepco & becker KTM 125/200 Duke Operator's manual

hepco & becker

hepco & becker KTM 125/200 Duke Operator's manual

hepco & becker 630734 00 01 User manual

hepco & becker

hepco & becker 630734 00 01 User manual

hepco & becker 501984 00 01 User manual

hepco & becker

hepco & becker 501984 00 01 User manual

hepco & becker SOLID 5089529 00 01 User manual

hepco & becker

hepco & becker SOLID 5089529 00 01 User manual

hepco & becker 6307603 00 01 User manual

hepco & becker

hepco & becker 6307603 00 01 User manual

hepco & becker 6307565 00 01 User manual

hepco & becker

hepco & becker 6307565 00 01 User manual

hepco & becker 5034567 00 01 User manual

hepco & becker

hepco & becker 5034567 00 01 User manual

hepco & becker Easyrack 6626526 01 01 User manual

hepco & becker

hepco & becker Easyrack 6626526 01 01 User manual

hepco & becker 5039507 00 01 User manual

hepco & becker

hepco & becker 5039507 00 01 User manual

hepco & becker Easyrack User manual

hepco & becker

hepco & becker Easyrack User manual

hepco & becker 6506514 00 01 User manual

hepco & becker

hepco & becker 6506514 00 01 User manual

hepco & becker Easyrack 661718 01 01 User manual

hepco & becker

hepco & becker Easyrack 661718 01 01 User manual

hepco & becker 7105590 User manual

hepco & becker

hepco & becker 7105590 User manual

hepco & becker LOCK-IT 506012-5 User manual

hepco & becker

hepco & becker LOCK-IT 506012-5 User manual

hepco & becker 7009522 00 01 User manual

hepco & becker

hepco & becker 7009522 00 01 User manual

hepco & becker 6502541 00 02 User manual

hepco & becker

hepco & becker 6502541 00 02 User manual

hepco & becker Easyrack 661960 01 01 User manual

hepco & becker

hepco & becker Easyrack 661960 01 01 User manual

hepco & becker 6607530 01 01 User manual

hepco & becker

hepco & becker 6607530 01 01 User manual

hepco & becker Easyrack 6617523 01 01 User manual

hepco & becker

hepco & becker Easyrack 6617523 01 01 User manual

hepco & becker 5012523 00 01 User manual

hepco & becker

hepco & becker 5012523 00 01 User manual

hepco & becker Easyrack 6617501 01 01 User manual

hepco & becker

hepco & becker Easyrack 6617501 01 01 User manual

hepco & becker 6604554 01 01 User manual

hepco & becker

hepco & becker 6604554 01 01 User manual

Popular Motorcycle Accessories manuals by other brands

dye INVISION3 i3 owner's manual

dye

dye INVISION3 i3 owner's manual

MRA Sportscreen Mounting instructions

MRA

MRA Sportscreen Mounting instructions

MadStad Engineering R1200GSA instructions

MadStad Engineering

MadStad Engineering R1200GSA instructions

Nolan N52 Safety and instructions for use

Nolan

Nolan N52 Safety and instructions for use

Wunderkind Custom 106503-F15 Installation and safety

Wunderkind Custom

Wunderkind Custom 106503-F15 Installation and safety

Wunderkind Custom HDN1V Installation and safety instructions

Wunderkind Custom

Wunderkind Custom HDN1V Installation and safety instructions

Cardo Systems PACKTALK EDGE Pocket guide

Cardo Systems

Cardo Systems PACKTALK EDGE Pocket guide

Rekluse Motor Sports RadiusCX Clutch Installation & user guide

Rekluse Motor Sports

Rekluse Motor Sports RadiusCX Clutch Installation & user guide

CATU MO-180-ARC4 instruction manual

CATU

CATU MO-180-ARC4 instruction manual

BRP EXOME user guide

BRP

BRP EXOME user guide

bitubo SSW Service manual

bitubo

bitubo SSW Service manual

Denali LAH.08.10900 instruction manual

Denali

Denali LAH.08.10900 instruction manual

Kirby Morgan 37 Maintenance manual

Kirby Morgan

Kirby Morgan 37 Maintenance manual

probrake AP11-1 Mounting instruction

probrake

probrake AP11-1 Mounting instruction

LSL CB1100A FITTING INSTRUCTION

LSL

LSL CB1100A FITTING INSTRUCTION

Malossi 5517526 manual

Malossi

Malossi 5517526 manual

SCHUBERTH C3 Limited quick start guide

SCHUBERTH

SCHUBERTH C3 Limited quick start guide

GYSMATIC 9-13 user manual

GYSMATIC

GYSMATIC 9-13 user manual

manuals.online logo
manuals.online logoBrands
  • About & Mission
  • Contact us
  • Privacy Policy
  • Terms and Conditions

Copyright 2025 Manuals.Online. All Rights Reserved.