manuals.online logo
Brands
  1. Home
  2. •
  3. Brands
  4. •
  5. Hess
  6. •
  7. Lantern
  8. •
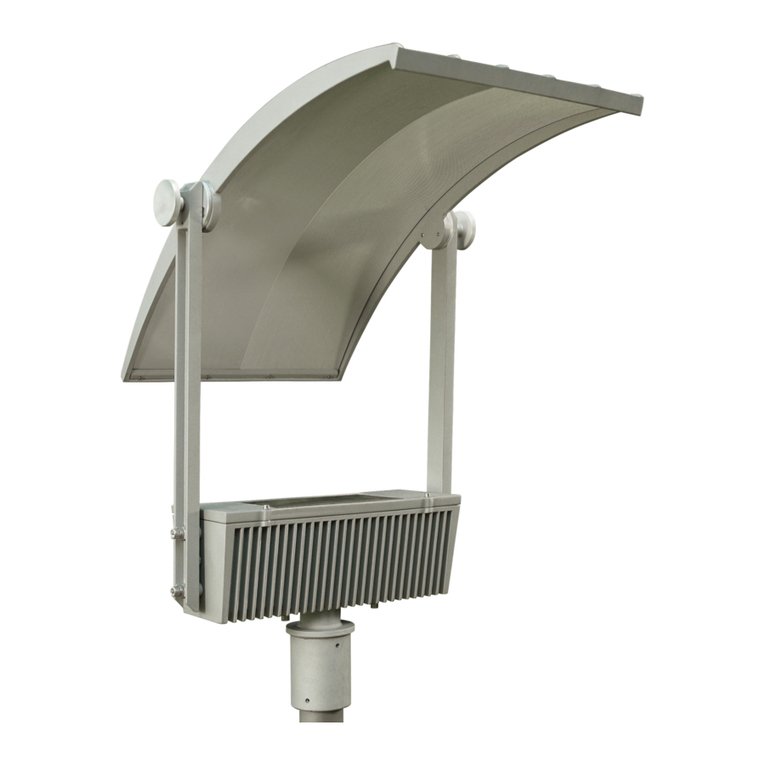
  9. Hess Varese User manual

Hess Varese User manual

1
Gebrauchsanleitung
Installation and Operating Instructions
Notice de montage et d´installation
Manual de instrucciones
Istruzioni d’uso
2017/07/A
V A R E S E
LED
2
!
Wichtige Hinweise
Important Information
Consignes importantes
Observaciones importantes
Indicazioni importanti
Leuchten mit diesem Zeichen sind
für den Betrieb mit Lampen mit externem
Zündgerät eingerichtet (HSE-E 50W und
HSE-E 70 W). Diese dürfen nicht mit Lampen
mit internem Zündgerät betrieben werden.
Luminaires with this marking are only
for operation with external ignitors (HSE-E
50 W and HSE-E 70 W). Operation of these
luminaires with internal ingitors is prohib-
ited.
Les luminaires portant ce symbole
sont conçus pour le fonctionnement avec
des lampes munies d’un amorceur externe
(HSE-E 50 W et HSE-E 70 W). Attention : Ces
luminaires ne sont pas conçus pour le fonc-
tionnement avec des lampes munies d’un
amorceur interne.
Las luminarias con este indicativo
están preparadas para ser usadas con un
cebador externo (HSE-E 50W y HSE-E 70 W).
Dichas luminarias no deben utilizarse con
lámparas con cebador interno.
Gli apparecchi provvisti di questo
simbolo sono equipaggiati per l’impie-
go con lampade provviste di accenditore
esterno(HSE-E 50W e HSE-E 70 W). Questi
apparecchi non vanno utilizzati con lampade
provviste di accenditore interno.
Die Leuchte darf nur mit kompletter
Schutzabdeckung betrieben werden.
Only operate this luminaire when it is
in a closed state, i.e. with closed cover.
Ne faire fonctionner le luminaire
qu´avec le couvercle de protection fermé.
La luminaria debe funcionar única-
mente con las cubiertas de protección al
completo.
L’apparecchio di illuminazione può
essere utilizzato solo con le coperture di
sicurezza complete.
Es dürfen nur die vom
Leuchtenhersteller vorgeschriebenen
Ersatzteile eingesetzt werden. Die
Vorschriften der Lampenhersteller sind zu
beachten.
Only replacement parts specified by
the lighting fixture manufacturer may be
used. In addition, the lamp manufacturer’s
instructions must be followed.
Seules les pièces de rechange prévues
par le fabricant des luminaires doivent être
utilisées. Observez les consignes du fabri-
cant de lampes.
Se deben utilizar únicamente las
lámparas y repuestos definidos por el fabri-
cante. Deben observarse las indicaciones
del fabricante.
Possono essere utilizzati solo i ricambi
prescritti dal costruttore dell’apparecchio.
Attenersi alle norme del costruttore della
lampada.
Fremdmasten müssen gemäß DIN EN
40 zertifiziert sein.
All poles provided by others must be
certified in compliance with DIN EN 40.
Les mâts provenant de tiers doivent
être certifiés selon DIN EN 40.
Los postes ajenos a Hess deben
estar homologados según DIN EN 40.
FI pali di altri costruttori devono
essere omologati secondo DIN EN 40.
Montage- und Wartungsarbeiten sind
nur mit Originalteilen durchzuführen. Für die
Installation und den Betrieb sind die nati-
onalen und internationalen Vorschriften zu
beachten. Werden nachträglich Änderungen
an Leuchten, Ausleger oder Masten vorge-
nommen, so gilt derjenige als Hersteller, der
diese Änderungen vornimmt. Hess Licht +
Form übernimmt keine Haftung für Schäden,
die durch unsachgemäßen Einsatz entstehen.
Montage nur durch Fachpersonal.
Only use original parts for mainte-
nance and installation of this luminaire.
National and international regulations and
laws apply to the installation and opera-
tion of this lighting fixture. If modifications
are made to the luminaire, the party who
made the modifications shall be considered
the legal manufacturer thereafter. Hess
Licht + Form does not accept liability for
any damages that occur due to improper or
unskilled actions. Only qualified persons are
permitted to install and assemble products
obtained from Hess Licht + Form.
Tous travaux de montage et d‘entre-
tien ne doivent être effectués qu‘avec des
pièces d’origine. Observez les consignes
de sécurité électriques nationales et inter-
nationales lors de l’installation et lors du
fonctionnement. En cas de modifications
ultérieurement apportées aux luminaires, la
personne responsable de ces modifications
est considérée comme le fabricant. Hess
Licht + Form n’assume aucune responsabi-
lité pour les dommages résultant d’une uti-
lisation non conforme. Le montage ne doit
être effectué que par des spécialistes.
Durante la instalación y el funciona-
miento deben observarse las normativas
nacionales e internacionales aplicables. En
caso de modificaciones ulteriores en lumina-
rias/postes, se considerará como fabricante
quienquiera que haya efectuado dichas
modificaciones. Hess Licht + Form declina
cualquier responsabilidad sobre daños por
uso indebido. Montaje únicamente por per-
sonal técnico cualificado.
Per gli interventi di montaggio e di
manutenzione vanno utilizzati esclusiva-
mente pezzi originali. Per l’installazione e il
funzionamento attenersi alle norme naziona-
li e internazionali. Se in un secondo tempo
vengono apportate modifiche agli apparec-
chi, viene considerato costruttore chi ha
effettuato le modifiche. Hess Licht + Form
non risponde in alcun modo di danni causati
da un impiego non corretto. Il montaggio va
effettuato solo da personale esperto.
3
PMMA Reinigung
Leuchtenabdeckungen aus PMMA-Kunststoff
dürfen nur mit Wasser und Spülmittel, bei
starken Verschmutzungen mit Waschbenzin
gereinigt werden. Andere Mittel sind nicht
erlaubt, insbesondere die Verwendung
von alkoholhaltigen Reinigern (Spiritus,
Glasreiniger, etc.) oder Kaltreinigern führen
zur Beschädigung der Oberfläche.
PMMA cleaning instructions
Only use a mild detergent and water to clean
luminaire covers and enclosures of PMMA
plastic. If the PMMA is very heavily soiled,
you may use benzene, but with great care and
sparingly. Do not use any other agents; in par-
ticular, alcohol-containing cleaners (spirits,
glass cleaner, etc.) or cold cleaning solvents
will damage the surface of the PMMA.
Conseil de nettoyage
Les couvercles de luminaire en matière pla-
stique (de verre acrylique) sont à nettoyer
exclusivement avec de l‘eau et un produit
vaisselle, l‘éther de pétrole est autorisé en
cas d‘encrassements tenaces. Tout autre
produit est proscrit, notamment l‘emploi de
détergents contenant de l‘alcool (white-spirit,
produits pour vitres, etc.) ou de détergents à
froid qui endommageraient la surface.
Indicaciones para la limpieza
Las cubiertas de luminaria en metacrilato
deben limpiarse únicamente con agua y
detergente, y con éter de petróleo en caso de
suciedad importante. Se prohíbe utilizar otros
agentes de limpieza. Los agentes de limpieza
que contengan alcohol (alcohol etílico, limpi-
acristales, etc.) o desengrasantes, en particu-
lar, pueden dañar la superficie.
Indicazioni per la pulizia
Per la pulizia degli schermi in polimetilme-
tacrilato utilizzare solo acqua e detergente o
benzina solvente in caso di forte imbrattamen-
to. Non è consentito l’impiego di altri mezzi;
in particolare detergenti contenenti alcol (spi-
rito, detergente per vetri, ecc.) o detergenti a
freddo danneggiano la superficie.
LED-Modul: Risikogruppe 2, nicht in
den Strahl blicken!
Die Leuchte ist so zu positionieren, dass
längeres in die Leuchte schauen in einem
geringeren Abstand als 0,4m nicht zu erwar-
ten ist.
LED module risk group 2, do not look
into the beam!
Position the luminaire to avoid extended
viewing into the luminaire at a distance of
less than 0,4m.
Module LED, groupe des risques 2, ne
pas regarder le rayon.
Positionnez le luminaire afin d´éviter d`y
regarder longtemps à une distance inférieure
à 0,4m.
Módulo LED grupo de riesgo 2, no fije
la vista en le rayo.
La luminaria debe posicionarse de tal mane-
ra que se evita mirar directamente a la luz
a una distancia menor a 0,4m durante un
tiempo prolongado.
Modulo LED gruppo a rischio 2, non
fissare direttamente la luce.
L`apparecchio deve essere posizionato in
modo da evitare la possibilità di volgere
a lungo lo sguardo verso di esso ad una
distanza inferiore a 0,4m.
4
Lieferumfang
Included in Luminaire Purchase
Matériel fourni
Programa de entrega
Volume di consegna
10.12200.0
V A R E S E A B C D E F G H
mm mm ø mm mm ø mm ømm mm mm
10.12200.0 – – – – – 200 470 850
10.22200.4900 4120 800 82,5 140 101,6 – – –
10.22200.6000 5200 1200 88,9 140 114,3 – – –
12.22200.4900
12.22200.6000
• B
• •
C
• •
D
• A •
• F •
• G •
• H •
• •
E
5
1.b1.a
Empfohlene Montagefolge
Recommended Installation Procedure
Déroulement de montage recommandé
Secuencia de montaje recomendada
Sequenza di montaggio consigliata
2. 3.
6.
Kabelbelegung
Wiring diagram
Positionnement brins
de câble
Tendido de cables
Assegnazione dei cavi
5.
4.
Wartung
Maintenance
Entretien
Mantenimiento
Manutenzione
Einstellmöglichkeiten
“DIM Modul“
Settings “DIM Modul”
Possibilités de réglage
du “Module DIM“
Posibilidades de
ajuste „Módulo DIM“
Possibilità di regola-
zione del “Modulo DIM“
6
1. Mast aufstellen / Wandarm montieren
Putting Up the Pole / Mounting the Bracket
Ériger le mât / Monter la console
Montaje del poste/ Montaje del brazo mural
Montaggio del palo / Montaggio dello sbraccio
1.a1.b
• A >> •
•• 500 mm
• A >> •
•
• B
• 500 mm
Gewichte / Windangriffsflächen
Weight / Wind Catching Surface
Poids / Surface de résistance au vent
Pesos / Superficie expuesta al viento
Pesi / Superficie di resistenza al vento
V A R E S E
kg m² kg m²
10.12200.0 10 0,15
10.22200.4900 45 0,42
10.22200.6000 72 0,53
V A R E S E A B
mm ø mm
10.22200.4900 4500 800 Q300/20
10.22200.6000 6000 800 Q400/25
Typ Q 300/20
Typ Q 400/25
22
42
300
200
27
47
400
300
7
2.1
Auf Ausrichtung achten!
The positioning of the luminaire is critical!
Veiller à la bonne orientation!
Asegurarse de que la orientación es correcta!
Fare attenzione all’orientamento!
!
Aufkleber „Haus“ in entgegengesetzer Richtung zur Straße
Make sure the “house” sticker is properly positioned
Respectez l’autocollant «Maison» situé !
Tenga en cuenta la pegatina „Casa“ .
fare attenzione all’adesivo “casa” !
LEVO LEVO Q
asymetrisch
2. Montage
Mounting
Montage
Montaje
Montaggio
LEVO 3
H05SS-F 3G1²
8
2.1
A
B
min. 12 Nm
2. Montage
Mounting
Montage
Montaje
Montaggio
9
Kabelübergangskasten
Junction Box
Boîtier de raccordement
Caja de empalmes
Cassetta di distribuzione per i cavi
3.
3.3Der Kabelübergangskasten ist nicht im Lieferumfang enthalten, er
muss VDE, ENEC und für die Montage auf C-Schienen zugelassen sein,
sowie der Schutzklasse und Schutzart der Leuchte entsprechen.Die
Schraubenanschlussklemmen müssen für das Auflegen der verwendeten Kabel
zugelassen sein.
Empfehlung: TYCO EKM 2051
The junction box does not come with the purchase of the luminaire. It
must be VDE- and ENEC-approved. In addition, it must be approved for mount-
ing to C-profile tracks and must be suitable for use with the respective lumi-
naire’s Protection Rating and Ingress Protection classifications. The screw
terminals must also be suitable for the respective wiring that is used.
Recommendation: TYCO EKM 2051
Le boîtier de raccordement n’est pas inclus dans la livraison. Il doit être
homologué VDE/ENEC ainsi que pour son montage sur des rails de transport et
il doit correspondre à la classe électrique et à l’indice de protection du lumi-
naire. Les bornes à vis doivent permettre d’appliquer des câbles utilisés.
Recommandation: TYCO EKM 2051
La caja de empalmes, que no está incluida en el programa de entrega,
debe cumplir con VDE/ENEC y estar homologada para montaje en rieles en
C, así como corresponder a la clase y tipo de protección de la luminaria. Los
bornes de conexión atornillados deben permitir el tendido del cable que se
utilice.
Recomendación: TYCO EKM 2051
La cassetta di distribuzione per i cavi non è in dotazione, deve essere
omologata secondo VDE/ENEC e per il montaggio su guide a C e inoltre corri-
spondere alla classe di isolamento e al grado di protezione dell’apparecchio. I
morsetti a vite devono consentire il collegamento dei cavi utilizzati.
Raccomandazione: TYCO EKM 2051
3.13.2
8 mm
20 mm
A
B
5.
ACHTUNG: Die mit X markierte Anschluss-
belegung in der Spalte „Variante“ beachten
ATTENTION: Please note the assignment of con-
nections as marked with X in the column “Variante”
ATTENTION: Merci de noter l´affectation des rac-
cordements, marquée par „X“ dans la colonne Variante
PRECAUCIÓN: Por favor tengan en cuenta que la
conexión del cableado está marcado con una X en la
columna variante
ATTENZIONE: Si prega di notare la colonna con la
versione “X” che marca la assegnazione dei pin
L1 N PE L2 L3 Variante
Standard
AstroDIM
StepDIM
Dali
CE
L1
L1
L1
L1
L1
N
N
N
N
N
PE
PE
PE
L2
DA
PST
L3
DA
PE
PE
SK I
L1 N PE L2 L3 Variante
Standard
AstroDIM
StepDIM
Dali
CE
L1
L1
L1
L1
L1
N
N
N
N
N
PE
PE
PE
L2
DA
PST
L3
DA
PE
PE
SKI
10
4. Wartung
Maintenance
Entretien
Mantenimiento
Manutenzione
4.1
Bei Wartungsarbeiten muss die Leuchte spannungsfrei
sein. Es muss entsprechende Schutzkleidung getragen werden.
Es sind die Angaben der Lampenhersteller zu beachten.
Prior to beginning with maintenance work, make sure
the power is reliably shut off. Protective clothing and safety
glasses must be worn during maintenance work. The specific
instructions of the respective lamp manufacturer apply.
Le luminaire doit être mis hors tension lors des travaux
de maintenance. Il faut porter les vêtements de protection adé-
quats. Il faut suivre les indications fournies par le fabricant de
lampes.
La luminaria tiene que estar desconectada durante los
trabajos de mantenimiento. Se tendrá que llevar indumentaria
adecuada de protección. Hay que observar las indicaciones del
fabricante de la lámpara.
Durante gli interventi di manutenzione il apparecchio
non deve essere sotto tensione. Indossare adeguati indumenti
di protezione. Osservare le indicazioni del produttore delle
lampade.
Die Leuchte ist weitestgehend wartungsfrei. Es ist
jedoch auch vorgesehen, dass LED-Modul und elektronisches
Vorschaltgerät sowohl modular, als auch einzeln getauscht
werden können.
Austausch bei Ausfall vor Erreichen der zu erwartenden
Lebensdauer siehe www.hess.eu/9970.
The luminaire is largely maintenance-free. You can
replace the LED unit and the electronic gear individually or you
may replace the both. If you replace either or both due to failu-
re before the luminaire exceeds its expected life expectancy,
proceed as it explained www.hess.eu/9970.
Le luminaire est très largement sans maintenance.
Cependant, un échange du module LED et du ballast électro-
nique, qu´il s´agisse d´un élément modulaire ou individuel,
a également été prévu.
Échange en cas de panne avant d´avoir atteint la durée de vie
attendue : voir www.hess.eu/9970.
La luminaria apenas requiere mantenimiento. Sin
embargo, también está previsto que el módulo LED y la bobina
de reactancia electrónica puedan intercambiarse tanto modu-
lar como individualmente.
La luminaria debe cambiarse si falla antes de que nalice el
periodo de vida útil esperado: véase www.hess.eu/9970.
L´apparecchio non richiede praticamente nessuna manu-
tenzione. E´comunque previsto che il modulo Led e lo stabiliz-
zatore elettrico, anch´esso modulare, possano essere sostituiti
anche singolarmente.
Per la sostituzione in caso di guasto prima del raggiungimento
della durata prevista vedere www.hess.eu/9970.
11
4.2
12
4.3
B
A
4. Wartung
Maintenance
Entretien
Mantenimiento
Manutenzione
13
4.4
A
alt
old
ancien
viejo
vecchio
neu
new
nouveau
nuevo
nuovo
BC
!
14
4.5
C
B
A
4. Wartung
Maintenance
Entretien
Mantenimiento
Manutenzione
15
4.6
A
B
alt
old
ancien
viejo
vecchio
neu
new
nouveau
nuevo
nuovo
16
4.7
A
B
C
4. Wartung
Maintenance
Entretien
Mantenimiento
Manutenzione
17
4.8
A
B
C
18
4.9
A
braun
brown
brun
marrón
marrone = +
= +
= +
= +
= +
braun
brown
brun
marrón
marrone = +
= +
= +
= +
= +
grün/gelb
green/yellow
vert/jaune
amar./verde
verde/giallo grün/gelb
green/yellow
vert/jaune
amar./verde
verde/giallo
C
blau =
blue =
bleu =
azul
blu =
=
blau =
blue =
bleu =
azul
blu =
=
= +
= +
= +
= +
= +
weiß
white
blanc
blanco
bianco
= +
= +
= +
= +
= +
weiß
white
blanc
blanco
bianco
=
=
=
=
=
grau
grey
gris
gris
grigio
=
=
=
=
=
grau
grey
gris
gris
grigio
LEVO / LEVO 3
SK I
SK II
4. Wartung
Maintenance
Entretien
Mantenimiento
Manutenzione
19
SK I
LEVO Q
4.9
A
C
rot
red
rouge
marrón
rojo
= +
= +
= +
= +
= +
grün/gelb
green/yellow
vert/jaune
amar./verde
verde/giallo grün/gelb
green/yellow
vert/jaune
amar./verde
verde/giallo
= +
= +
= +
= +
= +
braun
brown
brun
marrón
marrone
blau
blue
bleu
azul
blu
=
=
=
=
=
schwarz
black
noir
negro
nero
=
=
=
=
=
braun
brown
brun
marrón
marrone = +
= +
= +
= +
= +
blau =
blue =
bleu =
azul
blu =
=
SK II
rot
red
rouge
marrón
rojo
= +
= +
= +
= +
= +
schwarz
black
noir
negro
nero
=
=
=
=
=
20
4.10
4. Wartung
Maintenance
Entretien
Mantenimiento
Manutenzione

Other Hess Lantern manuals

Hess REVARA L600 User manual

Hess

Hess REVARA L600 User manual

Hess PALERMO G220 1,5T User manual

Hess

Hess PALERMO G220 1,5T User manual

Hess NOVARA L User manual

Hess

Hess NOVARA L User manual

Hess AVILA User manual

Hess

Hess AVILA User manual

Hess CAMPO User manual

Hess

Hess CAMPO User manual

Hess CENTO A User manual

Hess

Hess CENTO A User manual

Hess BURGOS User manual

Hess

Hess BURGOS User manual

Hess LEDIA GL A Series User manual

Hess

Hess LEDIA GL A Series User manual

Hess Novara OV User manual

Hess

Hess Novara OV User manual

Hess NOVARA ML User manual

Hess

Hess NOVARA ML User manual

Popular Lantern manuals by other brands

Twin-Star International POWERHEAT 10ILHU117-01 manual

Twin-Star International

Twin-Star International POWERHEAT 10ILHU117-01 manual

ETAP U7 Series Cleaning instructions

ETAP

ETAP U7 Series Cleaning instructions

Unilamp LUZONSE TYFON LED SENSOR instruction manual

Unilamp

Unilamp LUZONSE TYFON LED SENSOR instruction manual

Nitecore LR60 user manual

Nitecore

Nitecore LR60 user manual

Intermatic Malibu LZ305GR instructions

Intermatic

Intermatic Malibu LZ305GR instructions

Venture Lighting SELECT-PRO Series user manual

Venture Lighting

Venture Lighting SELECT-PRO Series user manual

Almat Stella Series Installation instruction

Almat

Almat Stella Series Installation instruction

Eaton Vaportight VT3 installation instructions

Eaton

Eaton Vaportight VT3 installation instructions

BEGA 84315 Instructions for use

BEGA

BEGA 84315 Instructions for use

Restoration Hardware RIBBON quick start guide

Restoration Hardware

Restoration Hardware RIBBON quick start guide

Coleman 1 WATT MICROPACKER LED instructions

Coleman

Coleman 1 WATT MICROPACKER LED instructions

MediaShop M35707 Instructions for use

MediaShop

MediaShop M35707 Instructions for use

Festive Lights SL145 manual

Festive Lights

Festive Lights SL145 manual

Signature Hardware Burruss EL2501ASGR/CMNT quick start guide

Signature Hardware

Signature Hardware Burruss EL2501ASGR/CMNT quick start guide

Visual Comfort & Co. Suffork Tall Scroll Arm Lantern Assembly instructions

Visual Comfort & Co.

Visual Comfort & Co. Suffork Tall Scroll Arm Lantern Assembly instructions

Cooper Menvier Beamlite installation instructions

Cooper Menvier

Cooper Menvier Beamlite installation instructions

Traxon Allegro Washer AC Accessories Mounting Guide

Traxon

Traxon Allegro Washer AC Accessories Mounting Guide

BEGA 99 326 Instructions for use

BEGA

BEGA 99 326 Instructions for use

manuals.online logo
manuals.online logoBrands
  • About & Mission
  • Contact us
  • Privacy Policy
  • Terms and Conditions

Copyright 2025 Manuals.Online. All Rights Reserved.