HID FARGO DTC 5500LMX User manual

hidglobal.com
FARGO®
DTC®5500LMX CARD PRINTER
MODEL X002100
USER GUIDE
PLT-02496
Version: 1.2
May 2017

PLT-02496, Version: 1.2 May 2017
Copyright
© 2016-2017 HID Global Corporation/ASSA ABLOY AB. All rights reserved.
This document may not be reproduced, disseminated or republished in any form without the prior
written permission of HID Global Corporation.
Trademarks
HID GLOBAL, HID, the HID Brick logo, DTC, FARGO, FARGO WORKBENCH™, and ICLASS, are
trademarks or registered trademarks of HID Global Corporation, or its licensors, in the U.S. and other
countries. All other trademarks, service marks, and product or service names are trademarks or
registered trademarks of their respective owners.
MIFARE and MIFARE DESFire are registered trademarks of NXP B.V. and are used under license.
Contacts
For additional offices around the world, see www.hidglobal.com corporate offices.
Americas and Corporate Europe, Middle East and Africa (EMEA)
611 Center Ridge Drive
Austin, TX 78753
USA
Phone: 866 607 7339
Fax: 949 732 2120
Haverhill Business Park Phoenix Road
Haverhill, Suffolk CB9 7AE
England
Phone: 44 (0) 1440 711 822
Fax: 44 (0) 1440 714 840
Asia Pacific Brazil
19/F 625 King’s Road
North Point, Island East
Hong Kong
Phone: 852 3160 9833
Fax: 852 3160 4809
Condomínio Business Center
Av. Ermano Marchetti, 1435
Galpão A2 - CEP 05038-001
Lapa - São Paulo / SP
Brazil
Phone: +55 11 5514-7100
HID Global Customer Support: www.hidglobal.com/support

Contents
May 2017 PLT-02496, Version: 1.2
Chapter 1: Specifications . . . . . . . . . . . . . . . . . . . . . . . . . . . . . . . . . . . . . . . . . . . . . . . . . . . . . 1-1
1.1 Regulatory Compliance . . . . . . . . . . . . . . . . . . . . . . . . . . . . . . . . . . . . . . . . . . . . . . . . . . 1-1
1.1.1 Agency Listings . . . . . . . . . . . . . . . . . . . . . . . . . . . . . . . . . . . . . . . . . . . . . . . . . . 1-1
1.1.2 United States . . . . . . . . . . . . . . . . . . . . . . . . . . . . . . . . . . . . . . . . . . . . . . . . . . . .1-2
1.1.3 Canada . . . . . . . . . . . . . . . . . . . . . . . . . . . . . . . . . . . . . . . . . . . . . . . . . . . . . . . . .1-2
1.1.4 Taiwan . . . . . . . . . . . . . . . . . . . . . . . . . . . . . . . . . . . . . . . . . . . . . . . . . . . . . . . . . .1-2
1.1.5 Japan . . . . . . . . . . . . . . . . . . . . . . . . . . . . . . . . . . . . . . . . . . . . . . . . . . . . . . . . . . .1-2
1.1.6 Korea . . . . . . . . . . . . . . . . . . . . . . . . . . . . . . . . . . . . . . . . . . . . . . . . . . . . . . . . . . .1-2
1.2 Safety Messages . . . . . . . . . . . . . . . . . . . . . . . . . . . . . . . . . . . . . . . . . . . . . . . . . . . . . . . 1-3
1.2.1 Safety Messages—United States . . . . . . . . . . . . . . . . . . . . . . . . . . . . . . . . . . .1-3
1.2.2 Safety Messages—French Canada . . . . . . . . . . . . . . . . . . . . . . . . . . . . . . . . . 1-4
1.2.3 Safety Messages—Taiwan . . . . . . . . . . . . . . . . . . . . . . . . . . . . . . . . . . . . . . . . .1-5
1.2.4 Safety Messages—China . . . . . . . . . . . . . . . . . . . . . . . . . . . . . . . . . . . . . . . . . .1-6
1.3 Technical Specifications . . . . . . . . . . . . . . . . . . . . . . . . . . . . . . . . . . . . . . . . . . . . . . . . 1-7
1.4 Functional Specifications. . . . . . . . . . . . . . . . . . . . . . . . . . . . . . . . . . . . . . . . . . . . . . . . 1-8
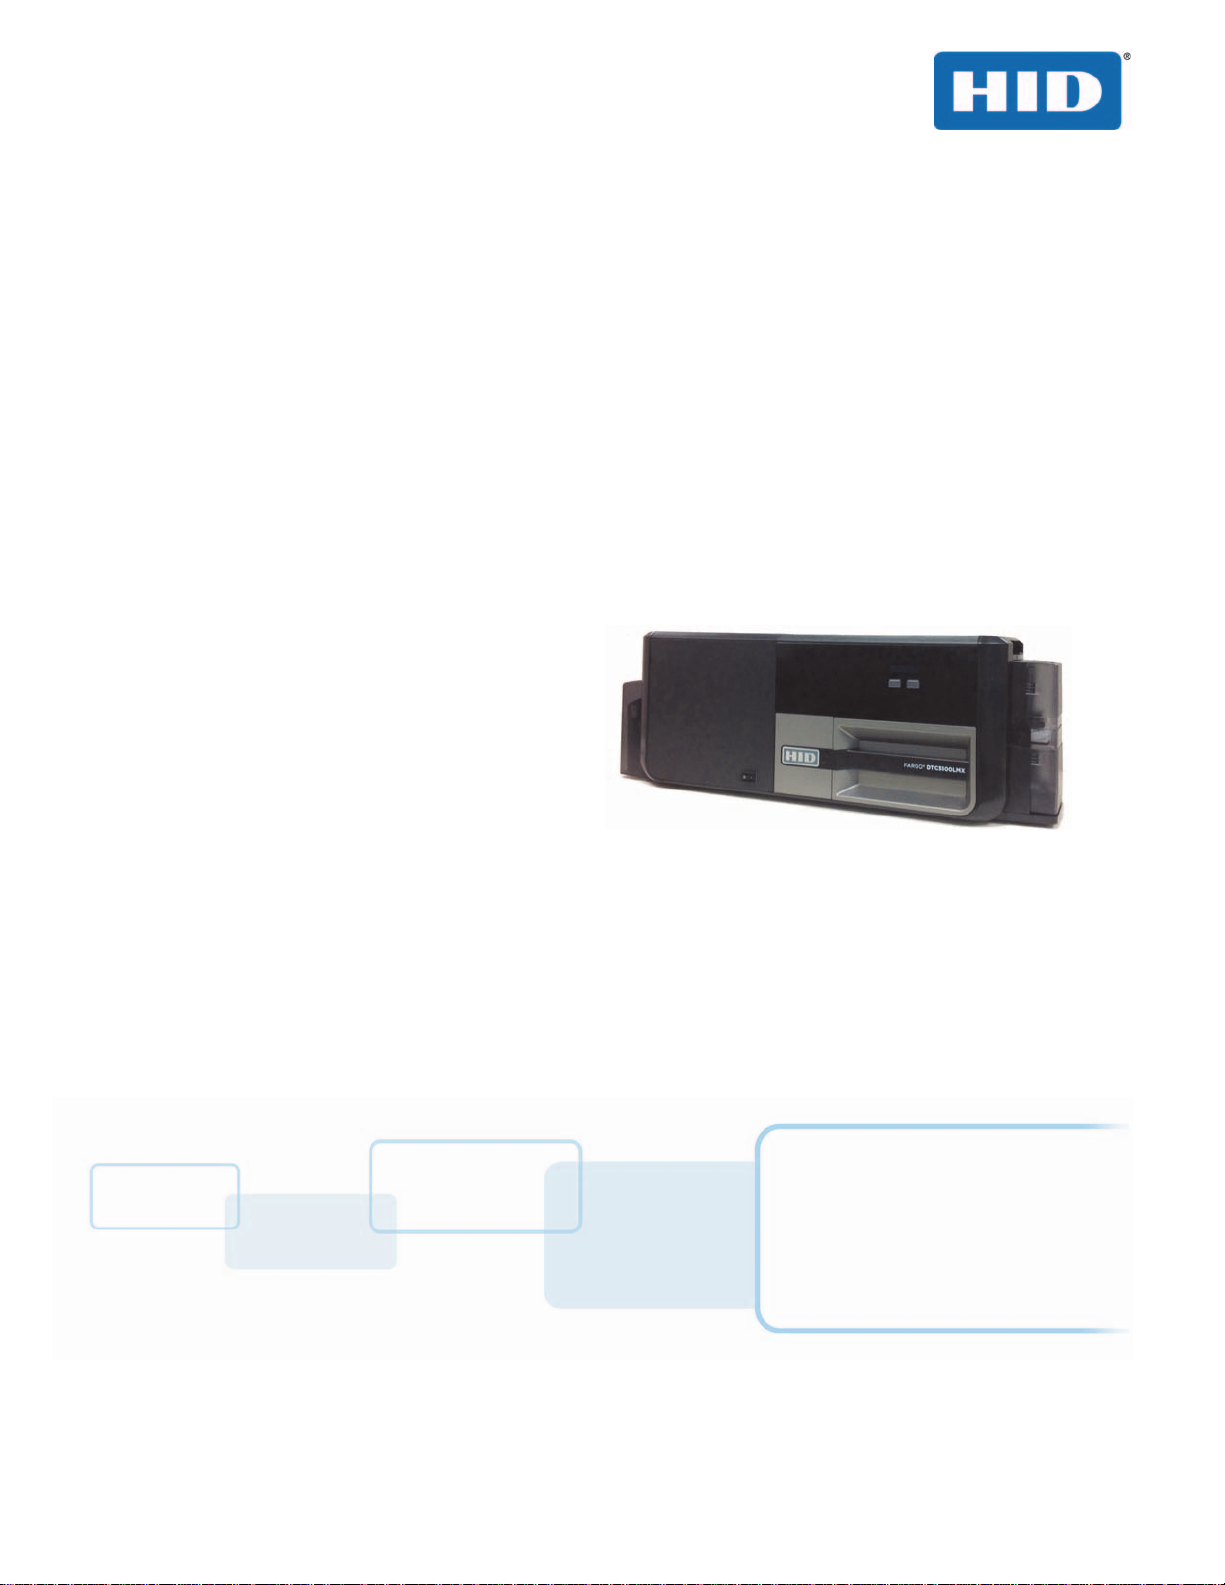
1.5 Printer Components: Print Ribbons. . . . . . . . . . . . . . . . . . . . . . . . . . . . . . . . . . . . . . . 1-9
1.6 Printer Components: Blank Cards . . . . . . . . . . . . . . . . . . . . . . . . . . . . . . . . . . . . . . . 1-10
Chapter 2: Installation and Setup Procedures . . . . . . . . . . . . . . . . . . . . . . . . . . . . . . . . . . . . 2-1
2.1 Selecting a Good Location . . . . . . . . . . . . . . . . . . . . . . . . . . . . . . . . . . . . . . . . . . . . . . 2-1
2.1.1 About Moisture Condensation . . . . . . . . . . . . . . . . . . . . . . . . . . . . . . . . . . . . .2-1
2.2 Unpacking and Inspection. . . . . . . . . . . . . . . . . . . . . . . . . . . . . . . . . . . . . . . . . . . . . . . 2-2
2.3 Print Driver Installation . . . . . . . . . . . . . . . . . . . . . . . . . . . . . . . . . . . . . . . . . . . . . . . . . 2-2
2.3.1 Driver Installation Instructions . . . . . . . . . . . . . . . . . . . . . . . . . . . . . . . . . . . 2-3
2.4 Installing the Print Ribbon. . . . . . . . . . . . . . . . . . . . . . . . . . . . . . . . . . . . . . . . . . . . . . . 2-4
2.5 Installing Blank Cards into the Input Card Hopper. . . . . . . . . . . . . . . . . . . . . . . . . . 2-5
2.6 Printer Power . . . . . . . . . . . . . . . . . . . . . . . . . . . . . . . . . . . . . . . . . . . . . . . . . . . . . . . . . . 2-6
Chapter 3: Printing Preferences . . . . . . . . . . . . . . . . . . . . . . . . . . . . . . . . . . . . . . . . . . . . . . . . 3-1
3.1 Card Tab . . . . . . . . . . . . . . . . . . . . . . . . . . . . . . . . . . . . . . . . . . . . . . . . . . . . . . . . . . . . . . 3-1
3.2 Device Options Tab . . . . . . . . . . . . . . . . . . . . . . . . . . . . . . . . . . . . . . . . . . . . . . . . . . . . 3-3
3.3 Image Color Tab . . . . . . . . . . . . . . . . . . . . . . . . . . . . . . . . . . . . . . . . . . . . . . . . . . . . . . . 3-5
3.3.1 Advanced Image Color Tab . . . . . . . . . . . . . . . . . . . . . . . . . . . . . . . . . . . . . . 3-7
3.4 Image Calibrate Tab . . . . . . . . . . . . . . . . . . . . . . . . . . . . . . . . . . . . . . . . . . . . . . . . . . . . 3-8
3.5 Magnetic Encoding Tab . . . . . . . . . . . . . . . . . . . . . . . . . . . . . . . . . . . . . . . . . . . . . . . . . 3-9
3.5.1 ISO Encoding Option . . . . . . . . . . . . . . . . . . . . . . . . . . . . . . . . . . . . . . . . . . . . 3-11
3.5.2 Custom Encoding Option . . . . . . . . . . . . . . . . . . . . . . . . . . . . . . . . . . . . . . . .3-12
3.5.3 Raw Binary Encoding Option . . . . . . . . . . . . . . . . . . . . . . . . . . . . . . . . . . . . 3-13

Page iv
PLT-02496, Version: 1.2 May 2017
3.5.4 JIS II Encoding Option . . . . . . . . . . . . . . . . . . . . . . . . . . . . . . . . . . . . . . . . . . 3-14
3.5.5 ISO Track Locations . . . . . . . . . . . . . . . . . . . . . . . . . . . . . . . . . . . . . . . . . . . . 3-14
3.5.5.1 Sending the Track Information . . . . . . . . . . . . . . . . . . . . . . . . . . . 3-15
3.6 Lamination Tab . . . . . . . . . . . . . . . . . . . . . . . . . . . . . . . . . . . . . . . . . . . . . . . . . . . . . . . 3-17
3.7 Overlay/Print Area Tab . . . . . . . . . . . . . . . . . . . . . . . . . . . . . . . . . . . . . . . . . . . . . . . . 3-19
3.7.1 Define a Print Area . . . . . . . . . . . . . . . . . . . . . . . . . . . . . . . . . . . . . . . . . . . . . 3-21
3.8 K-Panel Resin Tab . . . . . . . . . . . . . . . . . . . . . . . . . . . . . . . . . . . . . . . . . . . . . . . . . . . . 3-22
3.9 Printer Info Tab . . . . . . . . . . . . . . . . . . . . . . . . . . . . . . . . . . . . . . . . . . . . . . . . . . . . . . 3-24
Chapter 4: ToolBox . . . . . . . . . . . . . . . . . . . . . . . . . . . . . . . . . . . . . . . . . . . . . . . . . . . . . . . . . .4-1
4.1 Configuration Tab . . . . . . . . . . . . . . . . . . . . . . . . . . . . . . . . . . . . . . . . . . . . . . . . . . . . . 4-2
4.2 Calibrate Laminator Tab . . . . . . . . . . . . . . . . . . . . . . . . . . . . . . . . . . . . . . . . . . . . . . . 4-3
4.3 Calibrate Ribbon Tab . . . . . . . . . . . . . . . . . . . . . . . . . . . . . . . . . . . . . . . . . . . . . . . . . . 4-4
4.4 Clean Laminator Tab . . . . . . . . . . . . . . . . . . . . . . . . . . . . . . . . . . . . . . . . . . . . . . . . . . 4-5
4.5 Clean Printer Tab. . . . . . . . . . . . . . . . . . . . . . . . . . . . . . . . . . . . . . . . . . . . . . . . . . . . . . 4-6
4.6 Advanced Settings Tab . . . . . . . . . . . . . . . . . . . . . . . . . . . . . . . . . . . . . . . . . . . . . . . . 4-7
4.6.1 Settings Information . . . . . . . . . . . . . . . . . . . . . . . . . . . . . . . . . . . . . . . . . . . . . 4-8
Chapter 5: Troubleshooting . . . . . . . . . . . . . . . . . . . . . . . . . . . . . . . . . . . . . . . . . . . . . . . . . . . 5-1
5.1 System Overview . . . . . . . . . . . . . . . . . . . . . . . . . . . . . . . . . . . . . . . . . . . . . . . . . . . . . . 5-1
5.1.1 Sequence of Operations . . . . . . . . . . . . . . . . . . . . . . . . . . . . . . . . . . . . . . . . . .5-1
5.2 Printer Error Buttons . . . . . . . . . . . . . . . . . . . . . . . . . . . . . . . . . . . . . . . . . . . . . . . . . . . 5-2
5.2.1 Printer Error Button and On-screen Messages . . . . . . . . . . . . . . . . . . . . . . 5-2
5.2.2 Error Messages . . . . . . . . . . . . . . . . . . . . . . . . . . . . . . . . . . . . . . . . . . . . . . . . . 5-3
5.2.3 Troubleshooting with the Error Message Table . . . . . . . . . . . . . . . . . . . . . 5-3
5.2.4 Printer-Specific Tools . . . . . . . . . . . . . . . . . . . . . . . . . . . . . . . . . . . . . . . . . . . 5-12
5.2.4.1 Additional Printer Specific Tools . . . . . . . . . . . . . . . . . . . . . . . . . 5-13
Chapter 6: Firmware Upgrades . . . . . . . . . . . . . . . . . . . . . . . . . . . . . . . . . . . . . . . . . . . . . . . .6-1
6.1 Upgrade Information . . . . . . . . . . . . . . . . . . . . . . . . . . . . . . . . . . . . . . . . . . . . . . . . . . . 6-1
Chapter 7: Technical Support . . . . . . . . . . . . . . . . . . . . . . . . . . . . . . . . . . . . . . . . . . . . . . . . . . 7-1
7.1 Technical Support . . . . . . . . . . . . . . . . . . . . . . . . . . . . . . . . . . . . . . . . . . . . . . . . . . . . . . 7-1
7.1.1 Reading the Serial Numbers on a FARGO Printer . . . . . . . . . . . . . . . . . . . .7-1

Chapter 1
May 2017 PLT-02496, Version: 1.2
Specifications
The purpose of this section is to provide specific information on the Regulatory Compliances, Agency
Listings, Technical Specifications and Functional Specifications for the HDP5500LMX Card Printer.
1.1 Regulatory Compliance
1.1.1 Agency Listings
Agency Regulatory Compliance
UL The Card Printer is listed under UL 60950-1 (2nd edition) Information Technology Equipment.
File Number: E145118
CSA
The printer manufacturer has been authorized by UL to represent the Card Printer as CSA
Certified under CSA Standard C22.2 No. 60950-1-07 2nd edition
File Number: E145118
FCC The Card Printer complies with the requirements in Part 15 of the FCC rules for a Class A digital
device.
CE
The Card Printer has been tested and complies with EN300-330-1, EN300-330-2, EN301-489-
1, EN60950-1:2006 + A11:2009
Note: Based on the above testing, the printer manufacturer certifies that the card printer
complies with the following of the European Community and has placed the CE mark on the
Card Printer.
LVD 2006/95/EC, EMC 2004/108/EC, R&TTE 1999/5/EC, ROHS 2011/65/EU
Agency Listing
Emissions and
Immunity Standards
FCC Part 15 Class A, RSS-GEN, RSS 210, CNS 13438, EN55022 Class A, EN55024,
EN6100-3-2, EN6100-3-3, EN300-330-1, EN300-330-2, EN301-489-1, EN301-489-3,
GB9254, GB17625
Safety Standards UL IEC 60950-1 (2nd edition), CSA C22.2 No. 60950-1-07 (2nd edition), EN60950-1,
GB4943, CNS14336
Additional Agency
Listings
CCC, BSMI, KC

Page 1-2 Specifications
PLT-02496, Version: 1.2 May 2017
1.1.2 United States
This device complies with Part 15 of the FCC rules. Operation is subject to the following two
conditions:
1. This device may not cause harmful interference.
2. This device must accept any interference received, including interference that may cause
undesired operation.
Note: This equipment has been tested and found to comply with the limits for a Class A digital
device, pursuant to part 15 of the FCC Rules. These limits are designed to provide reasonable
protection against harmful interference when the equipment is operated in a commercial
environment. This equipment generates, uses, and can radiate radio frequency energy and, if not
installed and used in accordance with the instruction manual, may cause harmful interference to
radio communications. Operation of this equipment in a residential area is likely to cause harmful
interference; in which case, correction of the interference is at the users expense.
IMPORTANT: Changes or modifications to an intentional or unintentional radiator not expressly
approved by the party responsible for compliance could void the user’s authority to operate the
equipment.
1.1.3 Canada
This device complies with Industry Canada license-exempt RSS standard(s). Operation is subject to
the following two conditions: (1) this device may not cause interference, and (2) this device must
accept any interference, including interference that may cause undesired operation of the device.
Le présent appareil est conforme aux CNR d'Industrie Canada applicables aux appareils radio
exempts de licence. L'exploitation est autorisée aux deux conditions suivantes: (1) l'appareil ne doit
pas produire de brouillage, et (2) l'utilisateur de l'appareil doit accepter tout brouillage
radioélectrique subi, même si le brouillage est susceptible d'en compromettre le fonctionnement.
1.1.4 Taiwan
䴻✳⺷娵嫱⎰㟤Ỷ≇澯⮬柣暣㨇炻朆䴻姙⎗炻℔⎠ˣ⓮嘇ㆾἧ䓐侭⛯澵⼿㑭冒嬲
潏柣澯ˣ≈⣏≇澯ㆾ嬲潏⍇姕妰䈡⿏⍲≇傥ˤỶ≇澯⮬柣暣㨇ἧ䓐澵⼿⼙枧梃
凒⬱ℐ⍲⸚㒦⎰㱽忂ᾉ烊䴻䘤䎦㚱⸚㒦䎦尉㗪炻ㅱ灅⌛ 䓐炻㓡┬军䃉⸚㒦㗪㕡
⼿两临ἧ䓐ˤ⇵枭⎰㱽忂ᾉ炻㊯ὅ暣ᾉ㱽夷⭂ἄ㤕䃉䶂暣忂ᾉˤỶ≇澯⮬柣暣㨇
枰⽵⍿⎰㱽忂ᾉㆾⶍ㤕ˣ䥹⬠⍲慓瀏䓐暣㲊灕⮬⿏暣㨇姕⁁⸚㒦ˤ
1.1.5 Japan
ɱʌ㻻㖤ʍ㐅ⴷʌශᕅᇐʰɯʄɢʜɷȾ
㐅ⴷᇐ⮠ʍㅢ $& ʅɷ
ᵢ㼳ʍ䴱⌘ʰֵ⭞ɵɽ 5),'ₕಞʌ䃣ʝʨᴮɫ䗲ʝ㻻㖤ʅɷȾ
ɻʌɽʟֵ⭞ɷʩ⭞䙊ᡶʉʦʁʄʍȽⱸₕಞʉᖧ丵ʰфɦʩᚆʪɪɠʨʜɷ
1.1.6 Korea
㢨Gὤὤ⏈G㛹ⱨ㟝 Oh Ἵ PG㤸㣄䑀G㤵䚝ὤὤ⦐㉐G䑄⬘㣄G❄⏈G㇠㟝㣄⏈G㢨G㥄㡸G㨰㢌䚌㐐ὬGⵈ⢰⮤ SGᴴ㥉G㞬㢌G㫴
㜡㜄㉐G㇠㟝䚌⏈Gᶷ㡸G⯝㤵㡰⦐ U

May 2017 PLT-02496, Version: 1.2
Specifications Page 1-3
1.2 Safety Messages
1.2.1 Safety Messages—United States
Symbol Critical Instructions for Safety Purposes
Danger: Failure to follow these guidelines results in personal injury or death.
To prevent personal injury or death:
Reference the following safety messages before performing an operation.
Always remove the power cord prior to performing repair procedures, unless otherwise
specified.
Ensure only qualified personnel perform these procedures.
ESD:
This device is electro statically sensitive. Damage to the device may occur if exposing it to
static electricity discharges.
To prevent damage:
Reference the following safety messages before performing an operation.
Observe all established Electrostatic Discharge (ESD) procedures while handling cables in or
near the circuit board and printhead assemblies.
Always wear an appropriate personal grounding device.
Always remove the ribbon and cards from the printer before making any repairs, unless
otherwise specified.
Remove jewelry and thoroughly clean hands before working on the printer.
Caution:
This symbol warns of an electrical hazard that could result in personal injury or death.
Caution:
For safety purposes, do not use Ethernet for a direct connection outside of the building.

Page 1-4 Specifications
PLT-02496, Version: 1.2 May 2017
1.2.2 Safety Messages—French Canada
Symbole Instructions critiques visant la Sécurité
Danger:
Si ces directives ne sont pas suivies les résultats peuvent être des lésions corporelles ou la
mort.
Pour éviter des lésions corporelles ou la mort:
Rapportez-vous aux avis suivants de sécurité avant de procéder à une opération.
Retirez toujours le câble d’alimentation avant d’effectuer des procédures de réparation, sauf
spécification contraire.
Assurez-vous qu’uniquement des personnes qualifiées réalisent des procédures.
ESD:
Ce dispositif est sensible à l’électricité statique. Il peut souffrir des dommages s’il est exposé à
des décharges électrostatiques.
Pour éviter des dommages:
Rapportez-vous aux messages suivants avant de procéder à une opération.
Suivez toutes les procédures de Décharges Electrostatiques (ESD) en vigueur durant le
maniement des câbles dans ou à proximité des Ensembles de Cartes de Circuit Imprimé et
Tête d’Impression.
Portez toujours un dispositif de mise à la terre personnelle appropriée.
Retirez toujours le ruban et les Cartes de l’Imprimante avant d’effectuer toute réparation, sauf
spécification contraire.
Retirez tous bijoux et lavez soigneusement vos mains avant de travailler à l’Imprimante.
Attention:
Ce symbole est un avis de péril électrique passible de résulter en lésion corporelle ou mort.
Attention:
Pour des motifs de sécurité, n’utilisez pas Ethernet pour une connexion directe hors du
bâtiment.

May 2017 PLT-02496, Version: 1.2
Specifications Page 1-5
1.2.3 Safety Messages—Taiwan
䷩橼㔯ġ⮬柣䘤⮬⍲⬱ℐ㊯Ẍġ⬱ℐ妲〗 炷⮷⽫㩊㞍炸
㧁姀 慵天䘬⬱ℐḳ枭婒㖶
⌙晒 Ļ 㛒㊱䄏婒㖶⬱墅⎗傥忈ㆸṢ⒉ ṉˤ
⛐⎗傥䓊䓇㼃⛐⬱ℐ⓷柴䘬⛘㕡㚱嬎䣢㧁姀ˤ
炷⤪ⶎ⚾䣢炸ˤ
䁢Ḯ性Ṣ⒉ ⭛炻⛐忚埴㚱㬌嬎䣢㧁姀䘬㑵ἄ⇵炻婳⍫侫⬱ℐ屯妲㍸䣢ˤ
䁢Ḯ性Ṣ⒉ ⭛炻⛐㰺㚱䈡⇍婒㖶䘬ね㱩ᶳ炻ᾖ䎮⇵婳斄㌱暣㸸攳斄ˤ
⮷⽫ Ļ
㬌姕⁁⮵朄暣⼰㓷デˤ⤪㝄⍿⇘朄暣㓦暣炻姕⁁㚫㎵⢆ˤ
⛐⎗傥䓊䓇㼃⛐朄暣⬱ℐ⓷柴䘬⛘㕡㚱嬎䣢㧁姀ˤ
炷⤪ⶎ⚾䣢炸ˤ
䁢Ḯ性㎵⢆姕⁁炻⛐忚埴㚱㬌嬎䣢㧁姀䘬㑵ἄ⇵炻婳⍫侫⬱ℐ屯妲㍸䣢ˤ
䁢Ḯ性㎵⢆姕⁁炻⛐㌺㓦暣嶗㜧⌘⇟柕倗⎰墅伖墉朊ㆾ旬役䘬暣䶂㗪炻婳㲐シ奨⮇㚱䘬
朄暣㓦暣姕⁁ˤ
䁢Ḯ性㎵⢆姕⁁炻婳晐㗪ἑ㇜⎰怑䘬㍍⛘墅伖 炷㭼⤪烉ㇳ僽ᶲ㇜ᶨᾳ檀⑩岒䘬㍍⛘ㇳ僽ⷞẍ
⍿⇘⎗傥䘬 ⭛炸ˤ
䁢Ḯ性㎵⢆姕⁁炻⤪㝄㰺㚱䈡㬲婒㖶炻⛐ ảỽᾖ䎮⇵炻婳⍾ᶳ⌘堐㨇ᶲ䘬刚ⷞ⌉ˤ
䁢Ḯ性㎵⢆姕⁁炻⛐ἧ䓐⌘堐㨇⇵炻婳㐀ᶳㆺ㊯ㇳᶲ梦⑩炻Ṽ䳘㶭㲿ㇳᶲ䘬㱡傪ˤ

Page 1-6 Specifications
PLT-02496, Version: 1.2 May 2017
1.2.4 Safety Messages—China
ᆹޘ⎸ ˄䈧Ԅ㓶䰵䈫˅
ㅖ ⎹৺ᆹޘⲴ䟽㾱䗷〻
ড䲙 ྲн䚥ᗚ䘉Ӌᆹ㻵ᤷই䘋㹼ˈ㜭Պሬ㠤䟽Քˈ⭊㠣↫ӑDŽ
㜭ᕅᆹޘ䰞仈Ⲵؑ⭡䆖ㅖ ˄ྲᐖമᡰ⽪˅ᶕ㺘⽪DŽ
ѪҶ⺞؍Ӫ䓛ᆹޘˈ൘ᢗ㹼ࡽ䶒ᑖᴹ↔ㅖⲴѻࡽˈ䈧ݸ䰵䈫л䶒Ⲵᆹޘ⎸DŽ
ѪҶ⺞؍Ӫ䓛ᆹޘˈ䲔䶎ᴹ㿴ᇊˈࡉ൘ᢗ㹼㔤؞䗷〻ࡽˈ㓸ᓄᯝᔰ⭥ⓀDŽ
ሿᗳ
↔䇮༷Ѫ䶉⭥ᝏ䇮༷DŽྲ᳤䵢൘䶉⭥⭥⍱лˈ㜭Պᦏൿ䇮༷DŽ
㜭ᕅ䶉⭥ᆹޘ䰞仈Ⲵؑ⭡䆖ㅖ ˄ྲᐖമᡰ⽪˅ᶕ㺘⽪DŽ
ѪҶ䱢→䇮༷ᡆӻ䍘ᦏˈ൘ᢗ㹼ࡽ䶒ᑖᴹ↔ㅖⲴѻࡽˈ䈧ݸ䰵䈫л䶒Ⲵᆹޘ⎸DŽ
ѪҶ䱢→䇮༷ᡆӻ䍘ᦏˈ䈧൘༴⨶⭥䐟ᶯ઼ᢃঠཤ䜘Ԧѝᡆ䱴䘁Ⲵ⭥㔶ᰦˈ䚥ᆸᡰᴹ㿴ᇊⲴ䶉
⭥᭮⭥(6'䗷〻DŽ
ѪҶ䱢→䇮༷ᡆӻ䍘ᦏˈ䈧㓸֙ᑖ䘲ᖃⲴњӪ᧕ൠ䇮༷ ˄ֻྲˈᐢ᧕ൠ䚯ݽࠪ⧠▌൘ᦏൿ
Ⲵ儈䍘䟿㞅ᑖ˅DŽ
ѪҶ䱢→䇮༷ᡆӻ䍘ᦏˈ䲔䶎ᴹ㿴ᇊˈࡉ൘ᢗ㹼ԫօ㔤؞䗷〻ࡽˈ㓸ᓄሶ㢢ᑖ઼䇱о
ᢃঠᵪ࠶DŽ
ѪҶ䱢→䇮༷ᡆӻ䍘ᦏˈ൘ᢃঠᵪࡽˈ䈧лᤷ઼кⲴ⨐ᇍ侠⢙ˈᒦሶкⲴ⋩઼
⊑ᖫᓅ⍇ᒢ߰DŽ
ӵ㏧⏝னᾏᣆ 2000m ௨ୗᆅ༊Ᏻ⏝
ӵ㏧⏝ன㠀✝ᑖẻೃ᮲௳ୗᏳ⏝
⧟ຳ؍ᣔ ѝഭ 5R+6
⧟؍֯⭘ᵏᱟสҾᵜӗ૱⭘Ҿ࣎ޜ⧟ຳDŽ

May 2017 PLT-02496, Version: 1.2
Specifications Page 1-7
1.3 Technical Specifications
Component Description
Card Cleaning Card cleaning roller integrated into the ribbon.
Card Size and Type
Supported
CR-80 (3.375" L x 2.125" W / 85.6mm L x 54mm W)
Card (Standard) Sizes CR-80 edge-to-edge (3.36" L x 2.11" W / 85.3mm L x 53.7mm W)
Card Thickness .027” - 043” / 30mil – 40 mil / .686mm – 1.016mm
Display Graphical Display
Encoding Options
Supported
• 125kHz (HID Prox) reader
• 13.56 MHz (iCLASS®, MIFARE, ISO 14443 A/B, ISO 15693) read/write
encoder
• Contact Smart Card Encoder reads from and writes to all ISO7816 1/2/3/4
memory and microprocessor smart cards (T=0, T=1) as well as
synchronous cards.
• ISO Magnetic Stripe Encoding, dual high- and low-coercivity, Tracks 1, 2
and 3.
• JIS II Encoding
Hopper (input) Card
Capacity
Dual hopper: 200 cards (.030” / .762 mm)
Hopper (output) Card
Capacity
100 cards (.030” / .762.mm)
Hopper (Reject) Card
Capacity
100 cards (.030” /. 762.mm)
Interface USB 2.0 and Ethernet with internal print server
Operating Conditions Operating Temperature: 65° to 90° F (18° to 32° C)
Humidity: 20 - 80% non-condensing
Operating Systems
• Windows 7, 8/8.1, and 10 (32 / 64-bit only)
• Windows Server 2003 R1 & R2 (32-bit only)
Windows Server 2008 R1 & R2 (R2 64-bit only)
• Windows Server 2012, 2012 R2
• Mac 10.5, 10.6, 10.7, 10.8, 10.9, 10.10
Options
• Single wire Ethernet and USB 2.0 interface for inline printing and encoding
(Standard equipment)
• Single wire Ethernet encoding is only available for iCLASS and Contact
Smart Card Encoding (Standard equipment)
• Smart Card Encoding (contact / contactless) – Upgradable
• Magnetic Stripe Encoding – Upgradable
• Printer Cleaning Kit
Print Colors Up to 16.7 million colors / 256 shades per pixel
Print Method Dye-Sublimation / Resin Thermal Transfer
Print Resolution 300 DPI (11.8 dots per mm); continuous tone
Print Ribbon Options Wide array of ECO-friendly print ribbons from K to YMCKOKO are available
from HID.

Page 1-8 Specifications
PLT-02496, Version: 1.2 May 2017
1.4 Functional Specifications
This card printer utilizes two different, yet closely related printing technologies to achieve its
remarkable direct-to-card print quality for dye-sublimation and resin thermal transfer.
Print Speed
• 6 seconds per card (K*)
• 8 seconds per card (KO*)
• 16 seconds per card (YMCKO*)
• 24 seconds per card (YMCKOK*)
• Print speed indicates an approximate batch print speed and is measured
from the time a card feeds into the printer to the time it ejects from the
printer.
• Print speeds do not include encoding time or the time needed for the PC
to process the image.
• Process time is dependent on the size of the file, the CPU, amount of RAM
and the amount of available resources at the time of the print.
* Indicates the ribbon type and the number of ribbon panels printed where
Y=Yellow, M=Magenta, C=Cyan, K=Resin Black, O=Overlay, F=Fluorescing Resin
Printer Memory 128 MB RAM
Power Source Voltage,
Amp & Frequency
Supply Voltage/Amp: 100-240 VAC, 1.6A Max
Supply Frequency: 50 Hz and 60 Hz
Printer / Laminator RFID
Frequency
Printer 13.5600 Mhz
Laminator 13.5606 Mhz
Ship Weight 38.6 lbs. / 17.5 Kg
Software FARGO Workbench™ Diagnosis Utility
Warranty • Printer- 3 years
• Printhead: 3 years unlimited pass with UltraCard®
Component Description

May 2017 PLT-02496, Version: 1.2
Specifications Page 1-9
1.5 Printer Components: Print Ribbons
The card printer utilizes both dye-sublimation and/or resin thermal transfer methods to print images
directly onto blank cards. Because the dye-sublimation and the resin thermal transfer print methods
each provide their own unique benefits, Print Ribbons are available in resin-only, dye-sublimation-only
and combination dye-sublimation/resin versions.
To make it easier to remember which print ribbons are which, a letter code has been developed to
indicate the type of ribbon panels found on each ribbon. This letter code is as follows:
= Dye-Sublimation Yellow Panel
= Dye-Sublimation Magenta Panel
= Dye-Sublimation Cyan Panel
= Resin Black Panel (Premium unless otherwise stated)
= Clear Protective Overlay Panel
= Fluorescing Panel

Page 1-10 Specifications
PLT-02496, Version: 1.2 May 2017
1.6 Printer Components: Blank Cards
Type Description
Card Size The Card Printer accepts standard CR-80 sized cards.
Card Surface
Suitable cards must have a polished PVC surface free of fingerprints, dust or any
other types of embedded contaminants. In addition, cards must have a completely
smooth, level surface in order for the printer to achieve consistent color coverage.
Certain types of proximity cards have an uneven surface that inhibits consistent
color transfer.
Certain types of smart card chips are raised slightly above the card’s surface, which
also results in poor color transfer.
UltraCard Brand
Cards
The UltraCard product line, available exclusively as part of HID Global® FARGO®
brand secure card issuance solutions, has a long standing reputation among dealers
and end-users for consistent quality in construction.
• In addition to blank stock, the UltraCard line is available in a variety of
configurations for magnetic stripe, custom holograms and other additional
anti-counterfeiting feature.
• UltraCard Premium is the preferred card for Direct-to-Card (DTC®) applications
that require a higher quality card. The UltraCard Premium’s composite material
construction provides for maximum durability, flexibility and card life, with
optimal resolution print quality for lamination and fluorescent panel Ribbon
printing applications.
UltraCard PVC cards are medium-durability cards that HID does not recommend for
laminating applications.

Chapter 2
May 2017 PLT-02496, Version: 1.2
Installation and Setup Procedures
This section describes the setup and installation for the DTC5500LMX Card Printer.
2.1 Selecting a Good Location
The following guidelines help to ensure optimal printing performance:
Place the unit in a location with adequate air circulation to prevent internal heat buildup.
Use the printer's dimensions as a guideline for the minimum clearances to the unit.
Note: Allow for adequate clearance in front of the unit to accommodate the unit with its covers
open.
Do not install unit near heat sources such as radiators or air ducts or in a place subject to direct
sunlight, excessive dust, mechanical vibration or shock.
2.1.1 About Moisture Condensation
If the unit is brought directly from a cold to a warm location or is placed in a very damp room,
moisture may condense inside the unit. Should this occur, print quality may not be optimal.
Leave the unit unplugged in a warm, dry room for several hours before using to evaporate any
moisture.
Caution: For safety purposes, Ethernet is not intended for a direct connection outside of
the building.
Attention: Pour des raisons de sécurité, Ethernet n'est pas conçu pour une connexion
directe à l'extérieur du bâtiment.

Installation and Setup Procedures Page 2-2
PLT-02496, Version: 1.2 May 2017
2.2 Unpacking and Inspection
While unpacking the printer, inspect the carton to ensure that no damage has occurred during
shipping.
Make sure that all supplied accessories are included with the unit:
Software Installation CD (includes Printer Driver, Online User Guide and Printer Diagnostic Tool)
US/EU Power Cable
USB Cable (2.0)
Warranty Statement
2.3 Print Driver Installation
This section describes the printer driver installation requirements and standard procedures.
Requirements are listed below. The DTC5500LMX print driver supports the following:
Windows 7 (32/64-bit only)
Windows 8/8.1 (32/64-bit only)
Windows 10 (32/64-bit only)
Windows Server 2003 R1
Windows Server 2003 R2 (32-bit only)
Windows Server 2008 R1
Windows Server 2008 R2 (64-bit only)
Windows Server 2012
Windows Server 2012 R2
Mac 10.5, 10.6, 10.7, 10.8, 10.9, 10.10
For more information on supported operating systems, please visit the HID Global support page.

May 2017 PLT-02496, Version: 1.2
Page 2-3 Installation and Setup Procedures
2.3.1 Driver Installation Instructions
Start the installation process by inserting the Driver CD into the computer; then, follow the
Installation Wizard screen prompts.
1. Select Install the Printer Driver to go through the driver installation wizard.
2. Select the Install the FARGO Workbench to install the Diagnostic program.
3. All versions of Windows require Administrator rights.
4. Go to Start > Devices & Printers, right-click the DTC5500LMX printer icon and select Printing
preferences to setup the printer driver after it has been installed.

Installation and Setup Procedures Page 2-4
PLT-02496, Version: 1.2 May 2017
2.4 Installing the Print Ribbon
FARGO Direct-to-Card Printers require highly specialized to function properly.
The FARGO DTC5500LMX Card Printer/Laminator uses an Eco-friendly refillable ribbon drawer.
To maximize printer durability, reliability and printed card quality, you must use only FARGO-certified .
Your FARGO warranty is void, where not prohibited by law, if you use other than FARGO-certified .
Printer cleaning is recommended with each ribbon change to ensure quality printed cards.
Resin-only print ribbons consist of a continuous roll of a single resin color. No protective overlay panel
(O) is provided because resin images do not require the protection of an overlay.
To Install the Print Ribbon:
1. Pull open the Ribbon Drawer.
2. Insert the print ribbon into the Ribbon Drawer.
3. Re-insert the Ribbon Drawer.

May 2017 PLT-02496, Version: 1.2
Page 2-5 Installation and Setup Procedures
2.5 Installing Blank Cards into the Input Card Hopper
The FARGO DTC5500LMX Card Printer is capable of printing multiple feed cards (batch mode).
1. Load the cards with the print side down and (if applicable) the magnetic strip up and towards
the front of the printer.
Information: Do not run the cards with a contaminated, dull or uneven surface through the
Printer.
Printing onto such cards may lead to poor print quality and can greatly reduce the life of
the printhead.
Card types include PVC or PVC finish.
Cards eject into the output hopper or reject hopper.
Each input hopper holds 100 cards.
Certain types of smart card chips are raised slightly above the cards surface, which may
result in poor color transfer. Design the card with white space surrounding the chip.
2. Open the input card hopper door.
3. Press the card hopper load lever down until the card tray locks into place.
4. Load up to 100 cards into the hopper with the print side down.
Note: If using cards with a magnetic stripe, the magnetic stripe should be loaded with the
stripe up and to the front of the Printer.
5. Close the input card hopper door to release the lever to the printing position.

Installation and Setup Procedures Page 2-6
PLT-02496, Version: 1.2 May 2017
2.6 Printer Power
To connect power to the printer, follow this procedure.
Note: Do not connect the printer’s USB cable until prompted during the printer driver installation.
1. Plug the power cable into the back of the printer.
2. Plug the wall power cable into a standard 100-240VAC power outlet.
3. Press the printer’s ON/OFF button to power on the printer.
Note:The printer powers down during the “sleep time” but automatically powers up when a
print job is sent.
Receptor for power cable
Printer ON/Off Button
Printer Back
Printer Front
Table of contents
Other HID Printer manuals

HID
HID FARGO DTC 1000 User manual

HID
HID FARGO HDP5000 User manual

HID
HID Fargo DTC5500LMX User manual

HID
HID FARGO DTC 1000 User manual

HID
HID FARGO DTC II Guide

HID
HID FARGO DTC ii Plus User manual

HID
HID FARGO HDP5000 User manual

HID
HID FARGO DTC1500XE User manual

HID
HID FARGO HDP5000 User manual

HID
HID FARGO DTC4500e User manual

HID
HID DTC4000 User manual

HID
HID FARGO HDP 6600 Guide

HID
HID FARGO HDP 6600 User manual

HID
HID FARGO C50 User manual

HID
HID FARGO HDP5000 User manual

HID
HID FARGO HDP5000 User manual

HID
HID Fargo HDP8500 User manual

HID
HID Fargo DTC4500 User manual

HID
HID FARGO INK1000 User manual

HID
HID Fargo DTC5500LMX Manual