manuals.online logo
Brands
  1. Home
  2. •
  3. Brands
  4. •
  5. Hirobo
  6. •
  7. Toy
  8. •
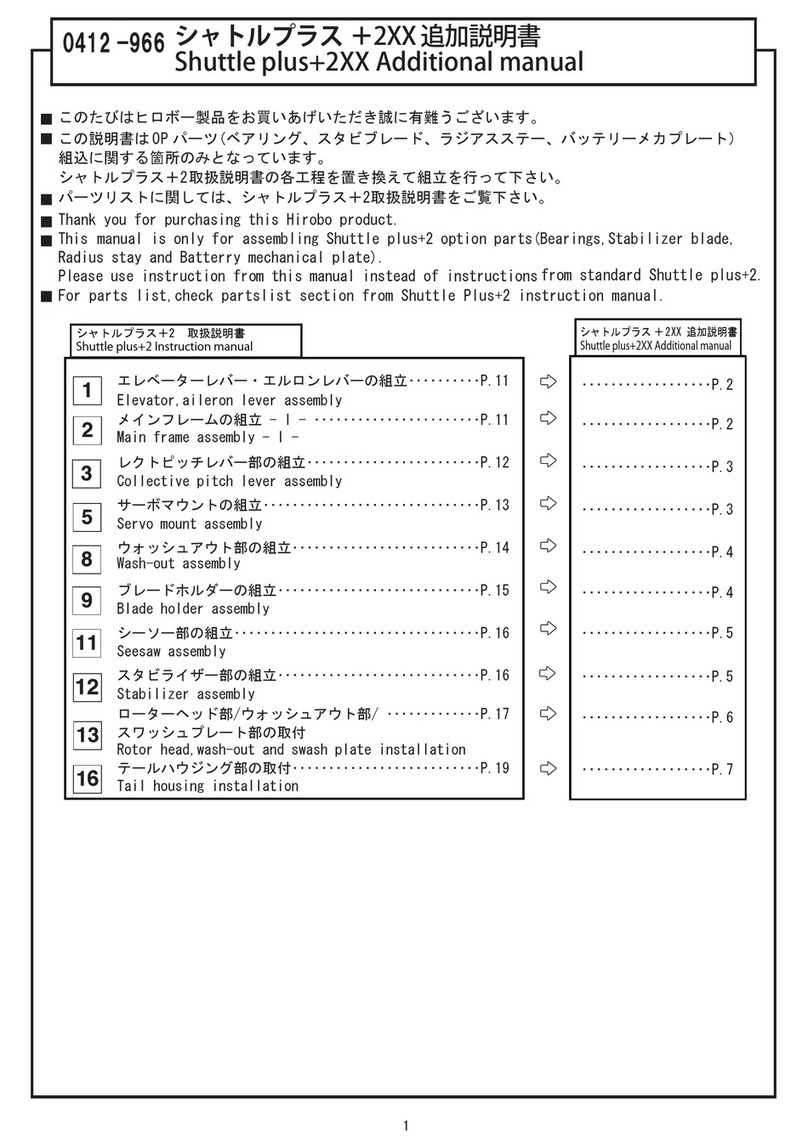
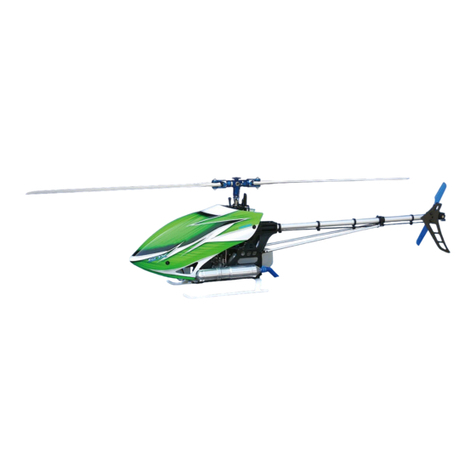
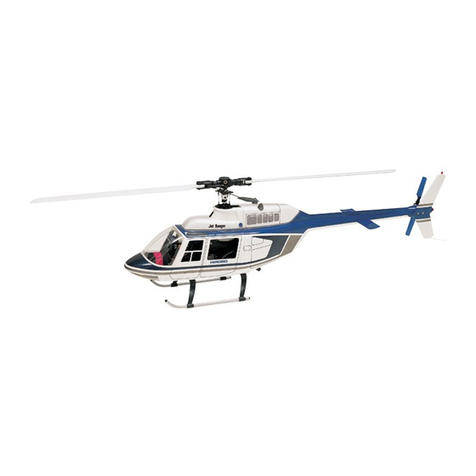
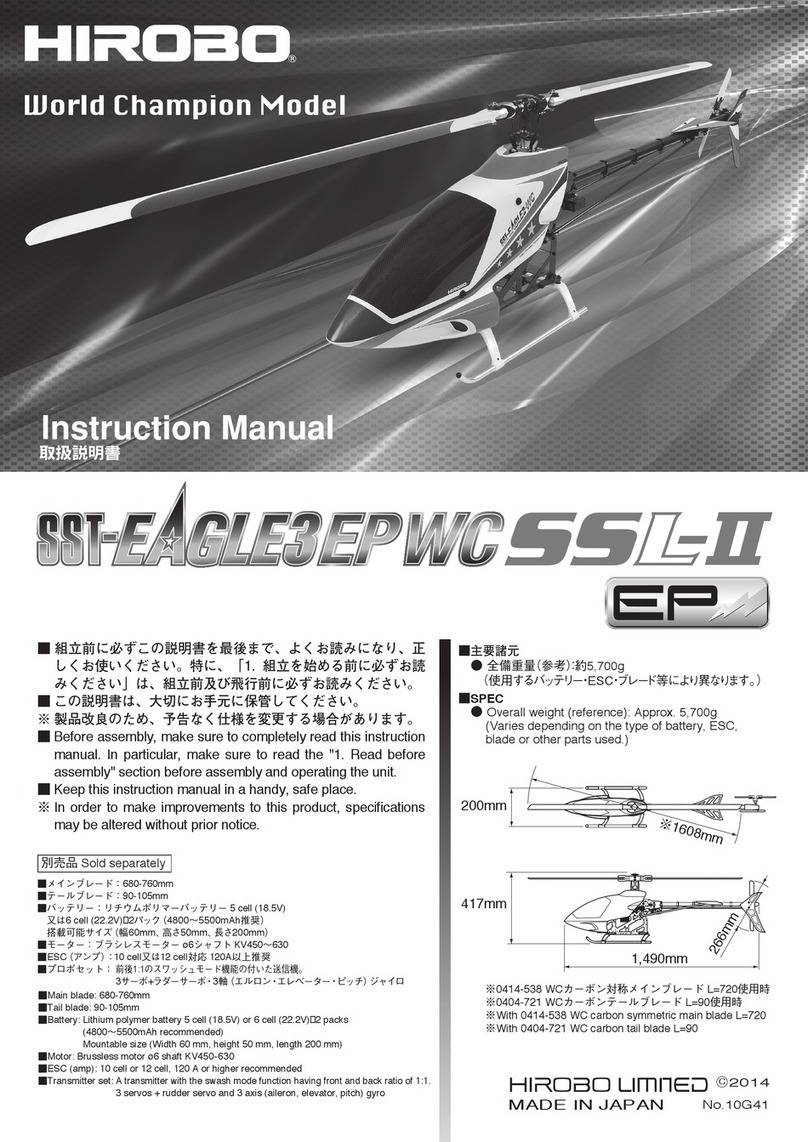
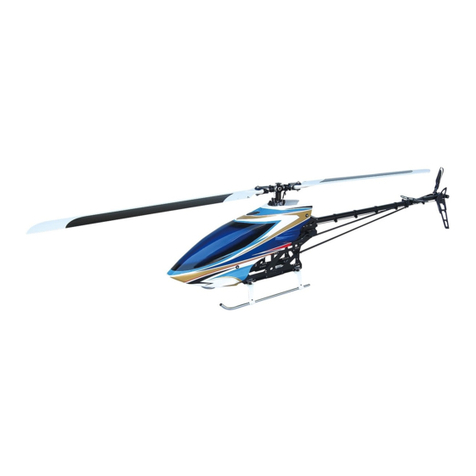
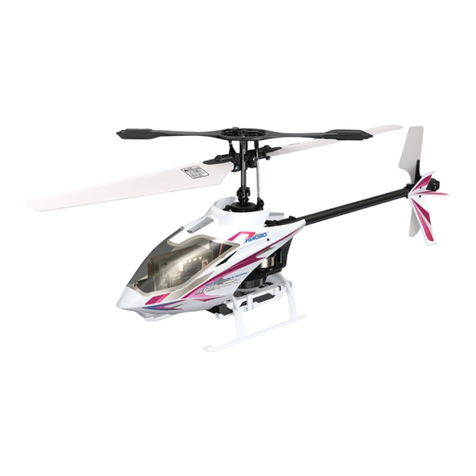
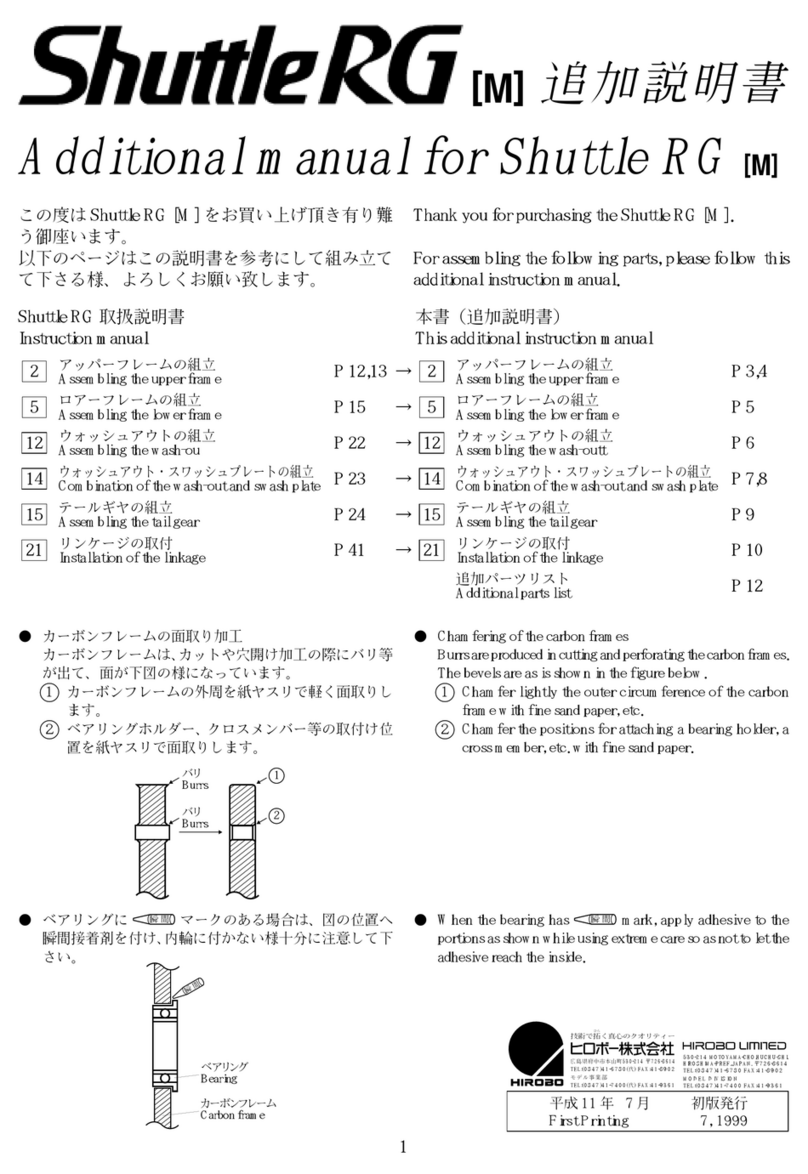
  9. Hirobo Shuttle RG User manual

Hirobo Shuttle RG User manual

1
●Inordertopreventfires,burnsandotherinjuries,alwaysfollow
therulesforsafetyshowninthenextpage.
●Beforeflyingyourmodel,besuretoreadallcautionaryitems,
andconfirmthatthemodelcanbeoperatedsafely.Pleaseenjoy
operatingyourmodelresponsibly.
●Afterreadingthismanual,storeitwhereitcanbeeasilyusedfor
reference.
ThankyouforyourpurchaseofaHiroboproduct.
Inordertoensuresafeoperation,pleasereadthismanualinitsen-
tiretybeforeattemptingtoflythehelicopter.
Pleasebesureyouhavecompleteunderstandingofthecautionaryitems
regardingtheflightof,thecapabilitiesof,andtheproperoperating
methodofthemodel.Also,pleaseobserveallrulesandmannerswhen
flyingthemodel.
Themeaningofsymbolsandterms
(NOTE): denotesimportantinformationregardingassembly,opera-
tionormaintenance.
Hereisanexplanationofthemeaningofthesymbolandtermshown
attheheadofcautionaryitems.
Evenitemsmarked Cautionascanresultinseriousharm,depend-
ingofthecircumstancesinvolved.
① はじめに ................................................................................. P.1
② 目次 ......................................................................................... P.1
③ 安全のために必ずお守りください ..................................... P.1〜5
④ この説明書の見方 ................................................................. P.6
⑤ ネジの種類とサイズの見方 ................................................. P.7
⑥ 本機をフライトするために
キット以外に必要なもの ..................................................... P.8
⑦ 各部の名称 ............................................................................. P.9
⑧ 組立編 ..................................................................................... P.10〜46
⑨ フライト編 ............................................................................. P.47〜57
⑩ メンテナンス編 ..................................................................... P.58
⑪ 補修パーツについて ............................................................. P.59
⑫ パーツリスト ......................................................................... P.60〜75
①INTRODUCTION........................................................ P.1
②CONTENTS ................................................................. P.1
③ALWAYSFOLLOWTHESERULESFORSAFETY..... P.1〜5
④USINGMETHODOFTHISMANUAL ..................... P.6
⑤SCREWS&READINGSIZES ................................... P.7
⑥NECESSARYITEMSNOTINCLUDED
INTHISKIT(NOTINCLUDED)............................... P.8
⑦NAMEOFEACHPART............................................. P.9
⑧ASSEMBLINGSECTION........................................... P.10〜46
⑨FLIGHTTRAININGSECTION.................................. P.47〜57
⑩MAINTENANCE......................................................... P.59
⑫PARTSLIST ................................................................ P.60〜75
 このたびは、ヒロボー製品をお買上げいただきありがとうございま
す。
 安全にお使いいただくために、飛行前にこの取扱説明書を最後まで
よくお読みください。
 飛行上の注意事項、本機の能力、飛行方法などを十分ご理解のうえ
正しく、安全にルールやマナーを守って飛行くださるようお願いいた
します。
『シンボルとシグナル用語』の意味について
● 火災、火傷、ケガなどの事故を少なくするため、次項からの安全上
の注意を必ず守ってください。
● 飛行前に、これら全ての注意事項を読み、安全を確認してから責任
をもってお楽しみください。
● 説明書は、お読みになった後も、お使いになる方がいつでも見られ
る所に必ず保管してください。
(注):製品の組立、操作、メンテナンスに関する重要なご注意。
 注意文の頭部に表示の「シンボルとシグナル用語」の意味を説明しま
す。
 なお、 注意に記載した事項でも、状況によっては重大な結果
に結びつく可能性があります。
①はじめに INTRODUCTION
②目 次 CONTENTS
③安全のために必ずお守りください ALWAYS FOLLOW THESE RULES FOR SAFETY
警告
注意
誤った取扱をしたときに、死亡や重傷等の重大な
結果に結び付く可能性が大きいもの。
誤った取扱をしたときに、状況によっては重大な
結果に結び付く可能性があるもの。
Warning
Caution
Failuretofollowtheseinstructionsmayresultin
severepersonalinjuryorevendeath.
Failuretofollowtheseinstructionsmayresultin
seriousharm.
 このたびは弊社製品「シャトルRG」をお買上げいただき誠にありが
とうございます。
 1985年8月に初代シャトルを発売以来、1987年にNSシリーズ、1989
年にZシリーズ、1993年にニューZシリーズと成長を繰り返しながら
12年もの間、愛され続けてまいりました。
 シャトルの「従来品との互換性」を基本に、皆さまのご要望を盛り
込んだヒロボー五代目シャトルRG(Revolution,Gold)が今ここ
に誕生しました。
Thankyouforpurchasingour"ShuttleRG".
SincetheintroductionofthefirstproductinAugust1985,theNS-
serieswasintroducedin1987,Z-seriesin1989,andNewZ-seriesin
1993,havingbeingyourfavoriteitemsforthelast12years.
ThisisthefifthgenerationoftheShuttle,"RG"(Revolution,Gold)
presentedtoyoubasedontheconceptof"inter-changeabilitywith
thepastmodels,"andinwhichourcustomers'pastcommentshave
beenincorporated.
2
1. Cleartheairfieldasmuchaspossible.
◆Cleartheairfieldofpebbles,glass,nails,wire,ropeandanyothertrash.
2. Givesufficientconsiderationtoyoursurroundings.
◆Donotflythehelicopterinstrongwinds,rain,oratnight.
◆Neverstartoroperatetheengineinapoorlyventilatedareaorinsideabuild-
ing.
◆Donotflythehelicopterinanareawheretherearemanypeople.
◆Donotflythehelicopternearhomes,schoolsorhospitals.
◆Donotflythehelicopternearroads,railwaysorelectricallines.
◆Donotflythehelicopterwherethereisthepossibilityofinterferenceonthe
radiofrequencyfromanotherhelicopter.
3. Thehelicoptershouldnotbeoperatedby:
◆Children.
◆Anyonewhoismenstruating,orpregnant.
◆Anyonewhoistired,sickorinebriated.
◆Anyonewhoisundertheinfluenceofdrugs,orwhosejudgmentisother-
wiseimpaired.
◆Ifyouareabeginner,orifyouhaveborrowedsomeoneelse'shelicopter,be
surethatyouarefamiliarwiththemodel,andhavereceivedsafetyinstruc-
tionbeforestarting.
4. Donotusethehelicopterforpurposesitwasnotdesignedfor.
◆Donotremodelorreconfigurethehelicopter.
◆Alwaysoperatewithinthedesignatedlimitationsforthehelicopter.
◆Donotuseforaerialphotography,orfortheaerialapplicationofchemicals.
5. Wearappropriateclothing.
◆Pleasewearalongsleeveshirtandlongtrousers.
◆Donotwearjewelry,orotheritemsthatmayeasilybecomeentangled.
◆Longhairshouldbeboundtoshoulderlength.
◆Alwayswearshoes,toensuregoodfooting.
◆Wearglovesasnecessary.
6. Alwaysputawayscrewdrivers,wrenchesandothertools.
◆Beforestarting,alwayscheckthattoolsusedintheassembly,ormainte-
nanceofthehelicopterhavebeenputaway.
7. Checkeachsectionofthehelicopter.
◆Beforestarting,alwayschecktobesurethatthereisnodamagetoanypart,
andthatthemodeloperatesandfunction˜properly.
◆Alwayschecktobesurethatallmovingpartshavebeenpositionedprop-
erly,allnutsandboltshavebeentightenedproperly,andthatthereisnopart
thatisdamagedorimproperlyattachedoranotherpartorplaceinacondi-
tionthatwouldadverselyaffecttherightofthehelicopter.
◆Alwayscheckticbesurethattheelectricalsupplyfortheradiocontrolshave
beenfullycharged.
◆Repairorreplacedamagedorotherwiseunstablepartspertheinstructionsin
theoperatingmanual.Forconditionsnotcoveredintheoperatingmanual,
consultyourdealer,orourengineeringservicesection.
◆Beforestarting,checktobesurethatallscrewshavebeentightened,the
designatedlocationshavebeenoiled,thefueltankisfullandthereareno
fuelleaks.
8. Useofficialreplacementparts.
◆Donotusepartsotherthanthoseshowninthisoperatingmanual,orin
HiroboCatalogues.Thereisdangerofaccidentsorinjury.
9. Practiceoperatingthehelicopterwithoutturningtheengineon.
◆Beforestartingtheengine,practiseoperatingeachpart.
◆Donotstarttheengineuntilyouacquireenoughoperationskill.
◆Also,ifsomeabnormityisfoundinoperating,donotstarttheengine.
1. UseonlyGLOWfuelformodelengines.
◆Donotusegasolineorkerosinetooperatethisengine.
◆GLOWfuelisapowerfulandhighlyflammablesubstance,alwaysusewith
care.
◆Useasappropriateforyourenginetype.
2. Iftheengineusesgasoline,besuretouseamixtureof2-cycleengineoiland
gasoline(1:25).
3. Alwayswaituntiltheenginehascooleddownbeforerefueling.
4. Neverrefuelnearanopenflame.Neversmokewhilerefueling.
◆Becarefulnottospillthefuel,butshouldaspilloccur,wipethemodelclean
witharag.
◆Inhalingfuelandexhaustfumescanbeharmful.Alwaysrefuelinawell
ventilatedarea.
◆Donotincinerateemptyfuelcans,astheymayexplode.
5. Becarefulnottoaccidentallydrinkortoallowthefuelincontactwiththe
eyes.
◆Shouldanaccidentoccur,inducevomitingorwashtheaffectedareaasnec-
essaryandconsultaphysicianimmediately.
6. Afterrefueling,restarttheengineinanareaatleast3metersfromthespotof
refueling.
7. Capthefuelcantightlyandstoreinacool,darkplaceoutofthereachof
children.
1. 可能な限り、飛行場を清掃してください。
◆小石、ガラス、くぎ、針金、ひも、浮遊物等の異物を飛行場から取り除
いてください。
2. 周囲の状況を考慮してください。
◆強風、雨のとき、及び夜間は飛行させないでください。
◆換気の悪い場所や建物の中では絶対にエンジンを始動、運転しないでく
ださい。
◆人が多い場所では飛行させないでください。
◆家、学校、病院などの近くでは飛行させないでください。
◆道路、線路、電線などの近くでは飛行させないでください。
◆同じ周波数の無線操縦模型が近くにいる時は飛行させないでください。
3. 次のような人、または状況下では飛行させないでください。
◆子供。
◆生理中、妊娠中の人。
◆疲れている時、病気の時、酔っている時。
◆薬物の影響、その他の理由で正常な操作ができない人。
◆初心者の方や、他人の機材を借りる場合、あらかじめ模型を良く知って
いる人から安全指導を受けてから始めてください。
4. 無理して使用しないでください。
◆機能に適さない改造や加工をしないでください。
◆使用限界が示されている物は、必ずその範囲で使用してください。
◆空中撮影や薬剤散布には使用しないでください。
5. きちんとした服装ではじめてください。
◆長そで、長ズボンを着用してください。
◆宝石や、物に引っかかりやすいものは、身につけないでください。
◆長い髪は、肩までの長さに結わえてください。
◆足下保護のため、必ず靴を着用してください。
◆状況に応じて手袋をしてください。
6. ドライバーやレンチ等の工具は取り外してください。
◆始動する前に組立、取付、整備等に用いた工具類が取り外してあること
を確認してください.
7. 各部の点検をしてください。
◆始動前に、各部品に損傷がないか十分点検し、正常に作動するか、また
所定の機能を発揮するか確認してください。
◆可動部分の位置調整、及び各部のボルト、ナットの締付状態、部品の損
傷、取付状態、その他飛行に影響を及ぼす全ての箇所に異常がないか確
認してください。
◆無線機器の電源電圧(電池の量)は十分か確認してください。
◆損傷した部品、その他部品交換や修理は、説明書の指示に従ってくださ
い。説明書に指示されていない場合は、お買上げ販売店、またはヒロ
ボー(株)営業本部エンジニアリングサービスで修理を行なってくださ
い。
◆始動前に、必ず各部のネジがゆるんでいないか、指定部へ給油(オイル/
グリス)、燃料が入っているか、漏れがないかを点検してください。
8. 純正部品を使用してください。
◆本説明書、及びヒロボーカタログに記載されている、純正部品以外のも
のを使用しないでください。事故やけがの原因となる恐れがあります。
9. エンジンを回さないで、各部の操作方法を練習してください。
◆エンジンを始動させる前に、各部の操作方法を練習してください。
◆操作を充分に修得するまではエンジンを始動させないでください。
◆機械の動きに異常がみられる場合もエンジンを始動させないでくださ
い。
1. 模型用エンジンは模型専用のグロー燃料が必要です。
◆ガソリンや灯油は使用できません。
◆グロー燃料は揮発性が高く引火しやすいので取り扱いには十分注意して
ください。
◆エンジンのタイプ(ABC又はリング付 /用途別)により使い分けをして
ください。
2. ガソリンエンジンの場合は、ガソリン25に対し2サイクルエンジンオイ
ル 1の割合で混合させたものを、必ず使用してください。
3. 燃料を補給するときは、必ずエンジンを停止させて、十分冷えてから行
なってください。
4. 火気の近くでは、絶対に燃料補給しないでください。特にタバコを吸い
ながらの作業は行なわないでください。
◆燃料はこぼさないように補給し、こぼれた時は必ず拭き取ってください。
◆燃料の蒸気、排気ガスは有害ですので、必ず屋外で取り扱ってください。
◆空缶は火中には投入しないでください。爆発の恐れがあります。
5. 燃料は間違えて、飲んだり目に入ると有害です。
◆万一事故が起きた場合には、吐かせる、洗眼するなどをした後すぐに医
師の診察をうけてください。
6. 給油後は、給油場所から3m以上離れて、エンジンを始動してください。
7. 燃料はキャップをしっかりしめ、幼児の手の届かない冷暗所に保管して
ください。
エンジン始動の前に Before starting the engine
燃料について About the fuel
警 告 WARNING
3
1.Maintainagoodposture.
◆Donotoperatewhilesittingorlyingontheground.
◆Itiseasytoloseyourfootingonslopes.Pleasetakecare.
2.Alwaysstoptheengine:
◆Whenadjustingthehelicopterbodyortransmitter.
◆Whenattachingorreplacingparts.
◆Whenthehelicopterbodyrequiresrepair,orwhenunusualnoiseor
vibrationsoccur.
◆Duringanyotherpotentiallydangeroussituation.
3.Whenstartingtheengine,observethefollowingrules:
◆Makesurethattherearenootherpeopleorobstaclesinthearea.
◆Holdthehelicopterbodysecurely.
◆Besurethatthetransmitterthrottleandtheenginecarburetorarein
theirlowestpositions(idlingposition).
4.Becauseofthedangerofinjury,neverplaceyourhandoranyob-
jectneartherotatingparts.
5.Operateyourmodelinarelaxedandcourteousmanner.
◆Fatiguefromcontinuousoperationoveralongperiodoftimecan
leadtoimpairedjudgmentandunexpectedaccidents.Alwaystake
sufficientrestperiodically.
◆Maintainasavedistancebetweenyourselfandthehelicopterwhile
operating.
◆Alwaysoperatethehelicopterwithinthelimitsofyourability.Un-
reasonablemaneuverscanleadtoaccidentsandinjury.
6.Becauseofthedangerofburns,donottouchtheengineorthemuf-
flerafterstartingorimmediatelyafterstoppingtheengine.
1.Besuretocheckthefollowingitems:
◆Checkeachsectionofthehelicopter,andtightenorreplacescrews
asnecessary.
◆Wipecleananyoil,dirtorwater.
◆Whenstoringforlongperiodsoftime,alwaysremoveanyremain-
ingfuelfromthecarburetorandfueltank.
◆Alwaysconductlubricationandpartreplacementasdescribedin
theoperatingmanual.
2.Alwaysstorewithcare.
◆Storeinadryplace,outofthereachofchildren.
3.Consultyourdealer,orourengineeringservicesectionregardingre
pairs.
◆Repairsundertakenbypersonswithoutsufficientknowledge,orlack-
ingthepropertools,canresultinimpairedperformance,leadingto
accidentsorinjury.
◆Alwaysstoptheenginebeforemakingrepairsoradjustments.
◆Shouldyourmodelbedamaged,alwaysrepairitbeforestoring.
Alwaysusethedesignatedgenuinereplacementpartstorepairyour
model.
◆Remodelingorreconfigurationofthehelicopterbody,orappurte-
nantpartscanresultinimpairedperformanceandshouldnotbe
attempted.
◆Whenstoringortransportingyourmodel,alwayssecureitfirmlyto
avoidlossoffuel,damageorinjury.
1. 無理な姿勢で操縦しないでください。
◆寝転んだり、座り込んだりした姿勢で操縦しないでください。
◆傾斜地は、滑りやすいので足下に十分注意してください。
2. 次の場合は、エンジンを停止させてください。
◆機体の調整および、送信機の調整を行なうとき。
◆付属品および部品を交換するとき。
◆機体の調子が悪かったり、異常音や異常振動を発生したとき。
◆その他危険が予想されるとき。
3. エンジンを始動するときは、次のことに注意してください。
◆周囲に人、動物、障害物がないか十分に確認してから始動してくだ
さい。
◆しっかりと機体を固定または保持してください。
◆送信機のスロットルのスティック位置及び、エンジンのキャブレ
ター開度が、最スローの位置(アイドリング状態)にあることを確
認してください。
4. 怪我の恐れがありますので回転部分に手や物を入れないでください。
5. 飛行はゆとりとマナーを守ってお楽しみください。
◆一度に長時間の操縦や、連続して長時間の操縦は、疲労により判断
力を鈍らせ、思わぬ事故の原因となりますので、適当に休憩を取る
ようにしてください。
◆操縦しているときは、あまり機体に近づかないでください。
◆本人の技量にあった飛行をしてください。無理な飛行は思わぬ事故
や怪我につながります。
6. エンジン始動後はもとより停止直後は、マフラーやエンジン本体は
高温になっております。火傷防止のためマフラーやエンジンに触れ
ないようにしてください。
1. 注意深く点検をしてください。
◆すぐに各部の点検を行ない、ネジのゆるみや脱落があれば必ず補修
してください。
◆油、よごれ、水滴等はすぐに拭き取ってください。
◆長時間保管する場合には燃料タンク、キャブレター内の燃料をすべ
て抜き取ってください。
◆注油や部品の交換は、説明書に従ってください。
2. きちんと保管してください。
◆乾燥した場所で、幼児の手の届かないところに保管してください。
3. 修理は、お買上げの販売店、またはヒロボー(株)営業本部エンジ
ニアリングサービスにお申し付けください。
◆修理の知識のない方や専用工具を持っていない方が修理をすると、
十分な性能を発揮しないだけでなく、事故や怪我の原因となります。
◆修理、調整をするときは、エンジンを停止して行なってください。
◆損傷、故障箇所がある場合には、修理してから保管してください。こ
の場合、部品は、指定の純正部品を必ず使用してください。
◆本体及び周辺機器の加工や改造は、本来の性能を発揮できなくなる
場合がありますので行なわないでください。
◆保管時や輸送時は、燃料の損失、破損や怪我を防ぐため、機体をしっ
かりと固定してください。
騒音について
飛行に際し、周囲に迷惑をかけないように十分に消音効果のあるマフ
ラー(サイレンサー)を必ず装着してください。
About noise
Inordertoavoiddisturbingpeoplenearby,alwaysusethemuffler.
警 告 WARNING
飛行中は While in flight
飛行後は After operating the helicopter
4
Strictpre-flightinspectionsaremandatoryforrealplanes.Although
theR/Chelicopterissmallandcanbeflownwithease,itdoesnot
differfromrealplanesinthatitfliesthroughtheskyandifithappens
tohitapersonoravehicle,itmaycausemuchtroubleandleadto
severeinjuryordamage.
Foraccidentswhichoccurduringtheflight,thepilotmayberespon-
sible.Therefore,besuretohaveradiocontrolinsurance.Fordetails,
refertotheshopwhereyoupurchasedthishelicopter.
Besuretoinspectthehelicopterbeforeflightandinthecaseofan
anomaly.Iftherotorbladehitsthegroundduringflight,minutecracks
andlooseningmayoccuratvariouspartseveniftherearenoapparent
damages.Ifthehelicopterisflowninsuchacondition,thecrackson
therotormayenlargeandleadingtosevereaccidents.Forexample,
theweightmayflyofffromtheinterioroftherotorwhichrotatesrap-
idlyataround1200-2000rpmortherotormayflyofffromtheblade
holder.
Immediatelyreplacepartsifanysuspiciousconditionisnoted.Besure
touseHiroboparts.
実機の場合、飛行前には厳しい点検が義務付けられています。無線操
縦(R/C)ヘリコプターは小型で手軽に飛行させることができますが、
空を飛ぶことは実機と何ら変わりがありません。万一、人や車などに
ぶつかれば、大けがや破損につながり、多大な迷惑を与えます。
飛行中の事故は操縦者が責任者扱いされる場合がありますので、必ず
ラジコン保険に加入してください。詳しくは本機をお買い求めになっ
た販売店へお問い合わせください。
飛行の前や異常が発生した時には、必ず点検をしてください。飛行中
に、ローターブレードで地面をたたいた場合、何も損傷がないようで
も、各部に微細な亀裂やゆるみが発生していることがあります。その
ままで飛行していると、ローターの亀裂が大きくなり、毎分 1200 〜
2000回前後の高速回転をしているローターの内部からウエイトが飛び
出したり、ローターがブレードホルダーから抜けたりする大事故にな
ります。
少しでも疑わしい状態が発生したら、すぐに部品交換をしてください。
部品は必ず純正部品を使用してください。
先に、無線操縦エンジン模型として共通の注意事項を述べましたが、
ヘリコプターの場合、さらに次に述べる注意事項を守ってください。 Althoughthecommoncautionswerementionedfortheradiocontrol
enginemodel,forthehelicopters,alsonotethefollowing.
1. Beginnersshouldreceivesafetyandoperatinginstructionfrom
someonecapable.Tryingtoteachyourselfisextremelydanger-
ous.
2. Checktobesurethattherearenolooseormissingnutsandbolts.
3. Checktobesurethatthereisnoplayorslackinthelinkagerodsor
controllers.
4. Checktobesurethattherearenolooseboltsintheenginemount.
5. Checktobesurethatthereisnodamageorweartotherotorblades,
especiallynearthebladeholders.
6. Checktobesurethattherotorbladeweighthasbeensafelyfas-
tened.
7. Checktobesurethatthetransmitter,receiver,starterandplug
heatbatterieshavebeenfullycharged.
8. Checkthefuelandfuellines.Bentfuellines,cloggedfiltersand
especiallyoldfuelnotonlymaketheenginedifficulttostart,they
canalsoleadtoinflightenginefailurethatcanresultincrashes.
9. Checktheglowplugs.Oldplugsnotonlymaketheenginediffi-
culttostart,theycanalsoleadtoinflightenginefailurethatcan
resultincrashes.
10. Checktheeffectiveoperatingdistanceoftheradiocontrols.
11. Checktobesurethatallservosoperatesmoothly.Operatingmis-
takesandmalfunctionscanresultinlossofcontrolandaredanger-
ous.
12. Checktobesurethatthegyrooperatesproperly.Inparticularcheck
thedirectionofoperationduringthestartup.
13. Checktobesurethatthetensionofthetailrotordrivebelthas
beenproperlyadjusted.
14. Checktobesurethatthehelicopterbodyisproperlylubricated.
1. 初心者の方は、指導できる方から安全及び技術指導を受けてくだ
さい。独学は非常に危険です。
2. 各部のナットやボルトにゆるみ、脱落がないか確認してください。
3. リンケージのロッドやアジャスターにガタやゆるみがないか確認
してください。
4. エンジンマウントのボルトにゆるみがないか確認してください。
5. ローターブレードに傷や亀裂がないか、ブレードホルダー周辺は
入念に確認してください。
6. ローターブレードのウエイトは安全に固定されているか確認して
ください。
7. 送信機、受信機、スターター、プラグヒート用のバッテリー容量
は十分か確認してください。
8. 燃料及び配管の状態を確認してください。燃料チューブの折れ曲
がりやフィルターの目づまり、又、特に古くなった燃料等は始動
性が悪いばかりではなく、飛行中のエンジン停止から墜落事故に
つながる場合があります。
9. グロープラグの状態を確認してください。特に古くなったプラグ
は始動性が悪いばかりではなく、飛行中のエンジン停止から墜落
事故につながる場合があります。
10. 電波の届く距離を確認してください。
11. 全てのサーボがスムーズに動作するか確認してください。誤動作
やムリな動作は操縦不能の原因となり、たいへん危険です。
12. ジャイロは正しく作動するか確認してください。特に初期状態に
おいては動作方向を確認してください。
13. テールローターの駆動ベルトのテンションは適当か確認してくだ
さい。
14. 機体各部の潤滑油の給油を確認してください。
エンジン始動の前に Before starting the engine
無線操縦模型ヘリコプターについて Radio Control Model Helicopter
警 告 WARNING
5
1. Beforestartingtheengine,checktobesurethattherenoobjects
nearbythatmightbehitby,orbecomeentangledintherotor.
2. Aftercheckingtobesurethatnooneelseintheareaisusingthe
samefrequency,firstturnonthetransmitterandthenthereceiver.
Setthethrottleandtrimtotheirenginestartuppositions.Atthis
point,dependingonthetypeoftransmitteryouhave,andonthe
positionoftheidleupIthrottleholdIflightmodeswitches,the
carburetormaynotbeinthecorrectpositionforenginestartup.
Alwaysreturnittothestartupposition.
3. Whenstartingtheengine,alwaysholdtherotorheadsecurelywith
yourhandsothatitdoesnotrotate.
4. Aftertheenginehasstarted,theengineandthemufflerbecome
veryhot,sobecarefulnottoburnyourself.
5. Whentakingoff,thehelicoptershouldbeinapositionatleast15
metersawayfromthestartupposition,andtheoperator.Givecare-
fulconsiderationtothesurroundingconditions,makingsurethat
therearenootherpeopleorobstaclesinthearea.
6. Beforethehelicopterliftsoff,adjustthetrackingofeachrotor.
Verifyingthetrackingshouldbedonefromadistanceof5meters
fromthehelicopter.
7. Shouldunusualvibrationsornoiseoccurwhileinflight,landthe
helicopter,stoptheengineandinvestigatethesourceoftheprob-
lemimmediately.
8. Recklessoperationcanresultinaccidentsandinjury.Pleasefol-
lowallrulesandenjoythesafeandresponsibleoperationofyour
model.
1. エンジンを始動するときは周辺に当たるものや、巻き込まれそうな
ものがないか確認してください。
2. 周囲に同じ周波数の使用者がいないことを確認して、送信機→受信
機の順番にスイッチを入れ、送信機のスロットルスティック及びト
リムをエンジン始動の位置にセットしてください。このとき送信機
によっては、アイドルアップ/スロットルホールド/フライトモー
ド等のスイッチ位置によりキャブレターの開度がエンジン始動位置
にいない場合がありますので、必ず始動位置に戻してください。
3. エンジン始動には、必ずローターヘッドをしっかりと回転しないよ
うに手で押さえてください。
4. エンジン始動後は、エンジン及びマフラー部が高温になりますの
で、火傷に注意してください。
5. 飛行をはじめるヘリコプターの位置は、エンジン始動位置および、
操縦者より 15m 以上離れた場所で行なってください。また、周囲
の状況を十分把握し、飛行場内に他の人や危険物、障害物がないか
確認してください。
6. 機体が浮かび上がる直前に、トラッキング(各ローターの軌跡)調
整を行なってください。トラッキングを確認する場合でも、機体か
ら 5m以内に近づかないでください。
7. 飛行中に異常な振動や、異常な音が発生した場合、すぐに着陸さ
せ、エンジンを停止させ原因を確認してください。
8. 無理な飛行や無謀な操縦は、事故や怪我の原因となりますので、
ルールやマナーを守り、安全に責任をもってお楽しみください。
1. エンジン始動後は、必ず送信機のスロットルトリム最スローの位置
でエンジン停止が行なえることを確認してください。
2. エンジンのスロー絞りの調整をアイドリング中に行なう場合は、必
ずローターヘッドが回転しないようにしっかりと押さえて、行なっ
てください。また、排気ガスには十分注意してください。
1. Afterstartingtheengine,alwaysbesurethatthetransmitterthrottle
isinitslowestpositionwhenstoppingtheengine.
2. Whenadjustingtheidlingspeedoftheengine,alwaysholdthe
rotorheadsecurelysothatitdoesnotrotate.Also,becarefulof
exhaustgas.
1. 直射日光のあたる場所、高温になる場所(車内等)に放置しないで
ください。必ず風通しのよい日陰で保管してください。 1. Donotleavethehelicopterindirectsunlightoraplacewhose
temperatureremarkablyincreases(inacaretc).Besuretostoreit
intheshadewherethewindblowsconstantly.
1. 飛行が終わったら、すぐに各部の点検を行なってください。ネジの
ゆるみや脱落があれば、必ず補修してください。各部に傷や破損が
あれば、交換してください。
2. 油汚れ等をきれいに拭き取ってください。
3. 長時間(期間)飛行させない場合は、燃料タンク及びキャブレター
内の燃料を抜き取ってください。
1. Aftertheflight,inspecteverypartimmediately.Ifthescrewsare
looseormissing,besuretorepairthem.Ifsomecracksordamage
arefoundinanyparts,replacethem.
2. Wipeoffanyoil.
3. Iftheflighttimeisnotlong,emptythefueltankandthecarbure-
tor.
注 意 CAUTION
警 告 WARNING
保管場所 Storage
飛行の後で After the flight
エンジン始動から飛行まで Between starting the engine and taking off
6
STEP 1 エレベーターレバー
Elevator lever
1エルロン /エレベーターレバー類の組立
Assembling the aileron and elevator lever, etc.
1. Pleasereadtheseinstructionsandfamiliarizeyourselfwiththe
structureandassemblymethodsofthemodelbeforeattemptingto
assembleit.Failuretoassemblethemodelproperlycouldresult
notonlyinpoorperformance,butindangeraswell.
2. Pleaseconfirmthetypeandquantityofallpartsbeforeassem-
blingthemodel.Partscannotbeexchangedorreplacedafterthe
packhasbeenopened.Shouldtherebeanymissingordefective
parts,havetheuser'scardvalidatedattheplaceofpurchase,and
senditalongwithacompletedescriptionofthepartanditscondi-
tiontothesalesdepartmentofHirobo.
① PleaseuseHOBBYTIGHT(threadlockingagent)inplacesmarked
ロック
.
② Thepartsnecessaryforeachstepofassemblyareinthebagmarked
withthesamenumberasthatsection.Refertothecolumnonthe
lefthandsideofthepagetocheckthepartquantities.
1. 組立る前に説明書を良く読んで、おおよその構造及び組立手順を理
解してから組立に入ってください。正しい組立を行わないと、本来
の性能を発揮できなくなるばかりでなく、大変キケンです。
2. 組立る前に、部品の数・内容をお確かめください。パック開封の後
は、部品の交換、返品等については応じかねます。万一部品の不足・
不良があった場合には、お手数ですが、愛用者カードに販売店の印
をもらい、ヒロボー株式会社・営業本部まで、部品名と内容を明記
の上ご連絡ください。
①
ロック
のマークがある箇所は、ホビータイト(ネジロック剤)を
使用してください。
② 各組立工程で必要な部品及び小物類は、工程と同じ番号の袋に入っ
ています。
説明書の左欄を参考にして、小物類の数量チェックを行ってくださ
い。
組立前の注意 Before assembling the model
④この説明書の見方 USING METHOD OF THIS MANUAL
本製品の改造、又、弊社以外の部品交換について、十分なテスト
を行なっていませんので、事故発生の可能性もあります。その場
合、一切の責任を負いかねますのでご了承ください。
Thereconfigurationofthismodel,ortheuseofpartsotherthan
thosemanufacturedbyHirobomayresultinaccidentsduetoa
lackofpropertesting.Hirobocannotberesponsibleforaccidents
causedinthismanner.
Warning
警告
M2ロッドエンド
M2rodend
アームボス
Armboss
A型エレベーターアーム
A-typeelevatorarm
M3×15クロスメンバー
M3×15crossmember
M3×15クロスメンバー
M3×15crossmember
M2×12CS
M2×12CS
M3×6ボタンボルト
M3×6buttonbolt
M3×6ボタンボルト
M3×6buttonbolt
M3×6ボタンボルト
M3×6buttonbolt
M3×6ボタンボルト
M3×6buttonbolt
M3×3SS
M3×3SS
φ3×4.5×0.5FW
Brg.φ3×φ7×2F
Brg.φ3×φ7×2F
φ4×24エレベーターシャフト
φ4×24Elevatorshaft
エレベーターレバー
Elevatorlever
φ3×4.5×0.5FW
φ4×27エレベーターシャフト
φ4×27Elevatorshaft
M2ロッドエンド
M2rodend
アームボス
Armboss
A型エレベーターアーム
A-typeelevatorarm
Brg.φ3×φ7×2F
ロック
ロック
説明例 Example
小物部品の名前、原寸図、使用数
Key number, Part name, True-to-
scale diagram, Quantity used.
使用する袋詰め
Part bags used.
Brg.φ3×φ7×2F ........................ 1
アームボス .................................. 2
Armboss
M2ロッドエンド .......................... 2
M2rodend
M3×15クロスメンバー .............. 2
M3×15crossmember
φ4×2 4  エレベ ーターシャフト...... 1
φ4×24elevatorshaft
φ4×2 7  エレベ ーターシャフト...... 1
φ4×27elevatorshaft
M 3× 6 ボタンボルト..................... 8
M3×6buttonbolt
M2×12CS .................................2
M3×3SS .................................... 4
φ3×4.5×0.5FW......................... 8
7
セットスクリュー
Setscrew
M3×4SS
段付ビス
Shoulderedscrew
M2×4.5段付
M2×4.5
Shoulderedscrew
タッピングビス1種
Tappingscrew1
M3×10TS-1
タッピングビス2種
Tappingscrew2
M3×8TS-2
皿ビス
Countersunkscrew
M3×12皿ビス
M3×12
Flushheadscrew
皿タッピングビス
Flushheadtapping
screw
M3×10皿TS-1
M3×10
FlushheadTS-1
フラットワッシャー
Flatwasher
ベアリング
Bearing
Brg.φ4×φ8×4
Brg.φ4×φ8×2.5F
φ3×9×1FW
ナット
Nut
M3ナット
M3Nut
EXφ5ボール
EXφ5Ball
EXφ5ボール
EXφ5Ball
ナイロンナット
Nylonnut
M3ナイロンナット
M3Nylonnut
Eリング
E-ring
φ6Eリング
φ6E-ring
メタル
Bushing
S3×6×7
キャップスクリュー
Capscrew
M3×8CS
ナベ頭ビス
Panheadscrew
M3×12PH
3mm
5.5mm
3mm
3mm
8mm
6mm
3mm
9mm
1mm
3mm
4mm
3mm
12mm
カラー
Collar
Cφ5×8×5.5
スラストベアリング
Thrustbearing
Brg.φ6×12
ボタンボルト
Buttonbolt
M3×8
3mm
10mm
3mm ミゾ付
8mm
3mm
12mm
3mm
10mm
2mm
4.5mm
4mm
4mm
8mm
4mm
2.5mm
8mm
5mm
3mm
7mm
6mm
5.5mm
8mm
5mm
12mm
6mm
3mm
8mm
本説明書の文中に記載している記号は、次の約束になっています。
● 単位はミリメートルです。以下、文中で長さなどに表示されている
単位はミリメートルです。
Symbolsusedinthisexplanatorypamphletareindicatedasfollows.
●Unitofmeasurement-millimeters.
TPビスは、部品にネジを切りながら締めつけるビスです。しめこみが固い場合があ
りますが、部品が確実に固定されるまでしめこんでください。ただし、しめすぎる
とネジがきかなくなりますので、部品が変形するまでしめないでください。
SelfTapping(TP)screwscutthreadsintothepartswhenbeingtightened.
ExcessiveforcemaypermanentlydamagepartswhentighteningTPscrews.Itis
recommendedtostoptighteningwhenthepartisattachedorwhensomeresistance
isfeltafterthethreadedportionenterstheplastic.
⑤ネジの種類とサイズの見方 SCREWS & READING SIZES
しめすぎ
Overtightened. ネジがきかない
Thethreadsarestripped.
Correct
Wrong
8
+ドライバー
大・中
Screwdriverlarge
andmedium
瞬間接着剤
ZAPAGAPCA+
2515-011 ¥1,000
5.5mm:M3用
7mm:M4用
ボックスドライバー

5.5mm:ForM3
7mm:ForM4
Boxdriver
ホビータイト
Threadlocking
agent
2513-023 ¥600
十字レンチ
Crosswrench
ハードタイプ
ネジロック剤
Z-42THREAD
LOCKER
2515-016 ¥500
四ツ目キリ
Crossgimlet
ロッドエンド
ドライバー
Balllinkdriver
2513-024 ¥600
ホビーオイル
Hobbyoil カッターナイフ
Cutterknife
ラジオペンチ
Needlenose
pliers
ロッドエンド
ペンチ
Balllinkpliers
2513-041 ¥3,500
プーラー
Puller
フライホイルレンチ

Flywheelwrench
2513-035 ¥980
2513-034 ¥1,800
2515-003 ¥300
ハサミ
Scissors
L型レンチ
(1.5,2.0,2.5mm)
Allenwrench
⑥本機をフライトするためにキット以外に必要なもの(別売)
NECESSARY ITEMS NOT INCLUDED IN THIS KIT (NOT INCLUDED)
組立に必要な工具 Tools necessary for assembly
当機を楽しむためには、以下のものが必要です。(別売)
Inordertooperatethismachineyouneedtopurchasethefollowingitemswhicharenotincludedinthiskit.
スターターシャフト
Startershaft
①プロポセット
 Radioset

本機で使用するプロポは
以下のものをおすすめします。
Thefollowingtransmittersare
recommended.
 Futaba:FF8-H
 JR

:X3810
 SANWA:Stylus
② ジャイロ
 Gyro
エンジンスターター用バッテリー12V
12VBatteryforenginestarter

(リコイルスター
ター付エンジンの
場合は不要)
(Notrequiredfor
theenginewith
recoilstarter)
エンジン始動用スターター
Enginestarter エンジン32クラス
Engine32class
組立半完成は
付属しています
Sub-assembly
componentis
attached.
プラグブースターコード
Plugboostercord 模型用グロー燃料
(ヘリコプター用)
Glowfuel(forhelicopter)
0402-271 ¥2,500
エンジンプラグ
ヒート用バッテリー
Batteryforengine
plugheating
2404-004 ¥1,400
32用マフラー
Mufflerfor32class
(組立半完成は、マフラー付)
(Themufflerisincludedinthe
semiassembledkit.)
0402-603
 
SEマフラー
¥5,800  SEmuffler
30クラス用メインブレード
Mainbladefor30class
(組立半完成は、メインブレード付)
(Themainbladeisincludedin
thesemiassembledkit.)
0402-621
¥7,500
SEメインブレードL=550(FRP)
SEmainbladeL=550(FRP)
プラグレンチ
Plugwrench
燃料フィルター
Fuelfilter
燃料ポンプ
Fuelpump ピッチゲージ
Pitchgauge
2513-025
¥2,500
2513-040
¥2,800
2513-026
¥1,000
送信機
Transmitter
受信機
Receiver サーボ
Servo ジャイロ
Gyro
スイッチ
Switch
スイッチ
Switch
コントロールアンプ
ControlAmp.
Ni-cdバッテリー
Ni-cdBattery
9
メインブレード
Mainrotorblade スタビライザーブレード
Stabilizerblade
テールブレード
Tailrotorblade
メインローターヘッド
Mainrotorhead
キャビン
Cabin
テールブームブレース
Tailboombrace
水平尾翼
Horizontalstabilizer
垂直尾翼
Verticalstabilizer
テールブーム
Tailboom
⑦各部の名称 NAME OF EACH PART
10
⑧組立編 ASSEMBLING SECTION
1エルロン/エレベーターレバー類の組立
Assembling the aileron and elevator lever, etc.
STEP 2 エルロンレバー
Aileron lever
STEP 1 エレベーターレバー
Elevator lever
M2×6CS ................................... 3
EXφ5ボール ............................. 3
EXφ5ball
φ3×4.5×0.5FW......................... 4
M3×3SS.................................... 4
M2ロッドエンド .......................... 2
M2rodend
M3×15クロスメンバー............... 2
M3×15crossmember
M3×6ボタンボルト..................... 8
M3×6buttonbolt
M2×12CS ................................. 2
Brg.φ4×φ8×2.5F ..................... 2
アームボス.................................. 2
Armboss
Cφ4×6×3 .................................. 1
M2ロッドエンド
M2rodend
アームボス
Armboss
A型エレベーターアーム
A-typeelevatorarm
M3×15クロスメンバー
M3×15crossmember
M3×15クロスメンバー

M3×15crossmembe
r
M2×12CS
M2×12CS
M3×6ボタンボルト
M3×6buttonbolt
M3×6ボタンボルト
M3×6buttonbolt
M3×6ボタンボルト
M3×6buttonbolt
M3×6ボタンボルト

M3×6buttonbolt
M3×3SS
M3×3SS
φ3×4.5×0.5FW
Brg.φ3×φ7×2F
Brg.φ3×φ7×2F
φ4×24エレベーターシャフト
φ4×24Elevatorshaft
エレベーターレバー
Elevatorlever
φ3×4.5×0.5FW
φ4×27エレベーターシャフト
φ4×27Elevatorshaft
M2ロッドエンド
M2rodend
アームボス
Armboss
A型エレベーターアーム
A-typeelevatorarm
Brg.φ3×φ7×2F
ロック
ロック
エルロンレバー
Aileronlever
EXφ5 ボール
EXφ5ball
Brg.φ4×φ8×2.5F
M2×6CS
Cφ4×6×3
Brg.φ4×φ8×2.5F
EXφ5 ボール
EXφ5ball
M2×6CS
φ4×27 エレベーターシャフト ...... 1
φ4×27elevatorshaft
Brg.φ3×φ7×2F ........................ 1
φ4×24 エレベーターシャフト ...... 1
φ4×24elevatorshaft
11
STEP 3 X型レバー
X-type lever
M2×6CS ................................... 8
EXφ5ボール ............................. 8
EXφ5ball
Brg.φ3×φ8×4........................... 4
S3×5×5..................................... 2
X型レバー(R)
X-typelever
X型レバー(L)
X-typelever
EXφ5 ボール
EXφ5ball
EXφ5 ボール
EXφ5ball
EXφ5ボール
EXφ5ball
EXφ5ボール
EXφ5ball
EXφ5ボール
EXφ5ball
EXφ5 ボール
EXφ5ball
Brg.φ3×8×4
Brg.φ3×8×4
Brg.φ3×8×
4
Brg.φ3×8×
4
M2×6CS
M2×6CS
M2×6CS
M2×6CS
M2×6CS
M2×6CS
S3×5×5
S3×5×5
リンケージの際、EXφ5ボールの取り付けた裏側のボスがロッドエンドと干 渉 する
場合、ボス部をヤスリ等で削り取ってください。

IfthebossattherearwhereEXφ5ballisinstalledinterfereswiththerodend,
removeapartofthebossusingafile.

注意 Caution
12
テールブームホルダー
Tailboomholder
M3×6ボタンボルト
M3×6buttonbolt
M3×26クロスメンバー
M3×26crossmember
M3×6ボタンボルト
M3×6buttonbolt
M3×6ボタンボルト
M3×6buttonbolt
M3×35CS(仮組み)

(Temporarily
)

M3ナイロンナット
M3nylonnut
Brg.φ6×φ10×3F
φ3×φ8×0.5FW
φ19Brg.ホルダー(Brg.圧入済)
φ19Brg.holder(Brg.press-fit)
φ19Brg.ホルダー
φ19Brg.holder
φ19Brg.ホルダー取付方向
Directiontoinstallφ19Brg.holder
φ19Brg.ホルダーには取付方向があります。
左図を参考に向きを確認して取り付けてください。
φ19Brg.holdershouldbeinstalledasspecifieddirection.
Installφ19Brg.holderasshowninthefigureontheleft.
フレームは水平面に対して直角になるよう、ネジを締め
付けてください。
Tightenthescrewsothatframeispositionedvertically
withhorizontalline.
エレベーターレバー
Elevatorlever
注:エレベーターレバーの向き(上から見た図)
Note: Directionofelevatorlever(lookingfromabove)
機首方向
Nose
右
Right
左
Left
M3×8CS
M3×33クロスメンバー
M3×33crossmember
M3×6ボタンボルト
M3×6buttonbolt
M3×33クロスメンバー
M3×33crossmember
M3×35CSは仮組みにし、P27で

テールブームを取付ける際締め

付けてください。
ScrewM3×35CStemporary
first,andtightenthemwhen
installingtailboomwithP27.
90゜90゜
フレーム
Frame
2アッパーフレームの組立
Assembling the upper frame
STEP 1
φ3×8×0.5FW............................ 4
M 3 ナイロンナット........................ 4
M3nylonnut
M3×35CS ................................. 4
Brg.φ6×10×3F ........................ 2
M3×26クロスメンバー............... 4
M3×26crossmember
M3×6ボタンボルト................... 20
M3×6buttonbolt
M3×8CS ................................... 2
13
M4×4SS
X型レバー(L)
X-typelever(L)
M3×25ボタンボルト
M3×25buttonbolt
M3×25ボタンボルト
M3×25buttonbolt
M4Uナット
M4Unut
M3ナイロンナット

M3nylonnut
φ3×4.5×0.5FW
φ4×6×0.5FW
Cφ4×6×2
Cφ3×7×4S
Cφ3×7×4S
X型レバー(R)
X-typelever(R)
エルロンレバー
aileronlever
エレベータートルクレバーは、エレベーターレバーと
垂直になるように取り付けてください。
Installelevatortorqueleverattherightanglewith
theelevatorlever.
エレベーターレバー
Elevatorlever
エレベータートルクレバー

Elevatortorquelever
90゜
STEP 2
M3×3SS .................................... 2
φ4×6×0.5FW............................ 2
M3×6ボタンボルト..................... 4
M3×6buttonbolt
M3×33クロスメンバー............... 2
M3×33crossmember
STEP 3
M4×4SS .................................... 1
φ3×4.5×0.5FW......................... 1
φ4×6×0.5FW............................ 1
M3×25ボタンボルト................... 2
M3×25buttonbolt
Cφ4×6×2 .................................. 1
Cφ3×7×4S ................................ 2
コレクトピッチレバー(R)
Collectivepitchlever(R)
コレクトピッチシャフト
Collectivepitchshaft
コレクトピッチレバー(L)
Collectivepitchlever(L)
M3×33クロスメンバー
M3×33crossmember
M3×6ボタンボルト
M3×6buttonbolt
M3×3SS
M3×6ボタンボルト
M3×6buttonbolt
φ6 シャフトストッパー
φ6shaftstopper
φ4×6×0.5FW
φ4×6×0.5FW
注:コレクトピッチレバー(L)のベアリングの向き
Note: Directionofcollectivepitchlever(L)bearin
g
機体

Fram
e
M3×33クロスメンバー
M3×33crossmember
φ6 シャフトストッパー
φ6shaftstopper
AとBが均等になるよう、コレクトピッチシャフトを
φ6 シャフトストッパーで固定してください。
Fixcollectivepitchshaftwithφ6shaftstopper
sothatAandBareequal.
AB
φ6 シャフトストッパー ................... 2
φ6shaftstopper
コレクトピッチシャフト................... 1
Collectivepitchshaft
14
3エンジン部の組立
Assembling the engine section
STEP 1
STEP 2
M2×12CS ................................. 4
M2×8CS ................................... 2
M3×6皿 ................................... 4
M3×6flushhead
M3×6皿
M3×6Flushhe
ad
SEフライホイール
SEflywheel
クーリングファン
Coolingfan
ロック
ロック
クランクシャフト
Crankshaft
M3×12CS
M3×12CS
M3×8CS
ドライブナット(エンジン付属)
Drivenut(partofengine)
フライホイール用座金
Flywheelwasher
SEシャフトスタータークラッチシュー

SEshaftstarterclutchshoe
テーパーカラーをクランク
シャフトにはめ込むときに、
テーパーカラーのスリワリ
部の位置に注意してくだ
さい。

Check the direction of
thetapercollar.
注意 Caution
注意 Caution
エンジンによって、フライ
ホイール用座金が入りに
くいことがあります。
そのようなときは、クランク
シャフトのネジ部分を軽く
ヤスリがけしてください 。

Ifitisdifficulttoinstall
the flywheel washer
onto the crank shaft,
please file the shaft
slightly.
ドライブワッシャーを
取外します。
Removedrivewasher
テーパーカラーの種類
Typesoftapercollar
・OS
・スーパータイガー
 Supertiger
・マグナム
 Magnum
・ ENYA
クランクシャフトのDカット部
DcutofCrankshaft
スリワリ部 
Aslit テーパーカラー
Tapercollar
クランクシャフトのDカット部
DcutofCrankshaft
スリワリ部 
Aslit テーパーカラー
Tapercollar
15
STEP 1
4燃料タンクの組立
Assembling the fuel tank
Z ZX ZXX
M5ナット.................................... 1
M5nut
φ5×φ12×0.8FW........................ 1
φ5×φ10×1FW........................... 1
φ5×10×1FW
φ5×12×0.8FW
M5ナット
M5nut
燃料タンクニップル
Fueltanknipple
燃料タンク
Fueltank
燃料タンクオモリ
Fueltankweight
タンク防振ゴム
Tankvibration
preventingrubb
er
タンク防振ゴム
Tankvibration
preventingrubber
燃料タンクキャップ
Fueltankcap
シリコンパイプφ3×5×150
Siliconpipe
シリコンパイプφ2.3×3.6×75
Siliconpipe
シリコンパイプφ3×5×90
Siliconpipe
ジョイントパイプ
Jointpipe
φ3強化ワッシャー
φ3Reinforcementwashe
r
φ3強化ワッシャー
φ3Reinforcementwasher
M3×57クロスメンバー
M3×57crossmember
M3×57クロスメンバー
M3×57crossmember
M3×10CS(仮組み)
(Temporarily)
M3×10CS(仮組み
)
(Temporarily
)
M3×6ボタンボルト
M3×6buttonbolt
M3×6ボタンボルト
M3×6buttonbolt
M3×6ボタンボルト
M3×6buttonbolt
M3×6ボタンボルト
M3×6buttonbolt
M3×8TSトラス-2
M3×8TStruss-2
M3×8TSトラス-2
M3×8TStruss-2
M3×8TSトラス-2
M3×8TStruss-2 クーリングファンカバー
Coolingfancover
フレームに固定したとき、押されて変形
する場合は、0.5mm程度ずつ削り取っ
てください。
Iftheseportionsaredeformedwhen
installedontheframe,cutthese
portionsoffby0.5mmeach.
スロットルレバーが干渉
する場合は、切り取って
ください。
Ifthethrottleleverinterferes,
cutthisportionoff.
エンジンによってはエンジンヘッドが干渉することがあります。
干渉しないように削り取ってください。
Engineheadmayinterferewiththesedependingonengine
types.Ifso,cutthereportionsoff.
注意 Caution
M3×8TSトラス-2 ...................... 4
M3×8TStruss-2
M3×6ボタンボルト..................... 4
M3×6buttonbolt
M3×10CS ................................. 4
φ3  強 化ワッシャー ...................... 4
φ3Reinforcementwasher
M3×57クロスメンバー............... 2
M3×57crossmember
5ロアーフレームの組立
Assembling the lower frame
STEP 1
16
6アッパー/ロアーフレームの組立
Combination of the upper and lower frame
STEP 1
M3×6ボタンボルト..................... 8
M3×6buttonbolt
M3×25ボタンボルト................. 18
M3×25buttonbolt
Cφ3×7×14 .............................. 18
φ4×6×0.5FW............................ 1
M3×26クロスメンバー............... 8
M3×26crossmember
SEクラッチベル
SEclutchbell
φ4×6×0.5FW
スターターシャフトL=64
StartershaftL=64
Cφ3×7×14
Cφ3×7×14
メカプレート
Mechanicalplate
クロスメンバーブロック15×26
Crossmemberblock15×26
グリス塗布
Applygrease
Cφ3×7×14
M3×25ボタンボルト
M3×25buttonbolt
M3×6ボタンボルト
M3×6buttonbolt
M3×2 6 クロスメンバー
M3×2 6 crossmember
M3×2 6 クロスメンバー
M3×2 6 crossmember
注意 Caution
クラッチベルの軸とエンジンシ
ャフトが一 直線となるように調
整します。
エンジンを上に押し付けた状
態から0.5mm下げて固定して
ください 。

Adjustthecenterlineof
clutchbellshaftand
engineshafttobestraight.
Fixtheengineinaposition
0.5mmlowerthanits
highestpossiblelocation.
17
M3ナット
M3nut
M3×6ボタンボルト
M3×6buttonbolt
M3×8TSトラス-2
M3×8TSTruss-2
M3×8TSトラス-2
M3×8TSTruss-2
M3×6ボタンボルト
M3×6buttonbolt
メカプレートサポート
Mechanicalplatesupport
バッテリーメカマウント
Batterymechanicalmount
メカプレートサポート
Mechanicalplatesupport
燃料タンクとタッピングスクリューの干渉を防ぐため、
間に両面テープを二重に貼り付けてください。
Topreventinterferencebetweenfueltankand
tappingscrew,fix2piecesofdouble-sided
adhesivetapesbetweenthem.
燃料タンク
Fueltank
10×20にカットした両面
テープを二重に貼る
Fix2piecesofdouble-
sidedadhesivetapes
(10x20mm). 10mm
20mm
(2枚)
(2pcs)
M3×8TSトラス-2 ...................... 6
M3×8TSTruss-2
7バッテリーメカマウント/燃料タンクの組立
Combination of the battery mechanical mount and fuel tank
STEP 1
M3×6ボタンボルト..................... 4
M3×6buttonbolt
M3ナット.................................... 2
M3nut
18
スキッドパイプ
Skidpipe
スキッドパイプキャップ
Skidpipecap
瞬間接着剤
ZAPAGAPCA+
スキッドフット
Skidfoot
10mm
M3×5SS
M3ナイロンナット
M3nylonnut
M3ナイロンナット
M3nylonnut
φ3×φ9×1FW
M3×5SS
φ3×φ9×1FW
アンテナガイドチューブ

Antennaguidetube
M3×5SSの締めすぎに注意してください。
Neverover-tightenM3x5SSscrews.
注意 Caution
M3×15CS
8ランディングギヤの取付
Installation of the landing gear
STEP 1
M3×5SS.................................... 4
φ3×φ9×1FW............................. 4
M3×15CS ................................. 4
M 3 ナイロンナット........................ 4
M3nylonnut
19
ストップリングS-12
StopringS-12
メインギヤAssy
Maingearassembbly
M3×25CS
φ12×18×0.2FWは
調整用としてご使用
ください。
Useφ12×18×0.2FW

foradjustment.
φ12×18×0.5FW
オートロ駆動軸
Auto-rotationdriveshaft
P-12Oリング(グリス)
P-12O-ring(greaseup)
オートロトルクリミッター
Auto-rotationtorquelimiter
M3ナイロンナット
M3nylonnut
マストを上へ引張った状態で
マストロックを固定します。
(M3×3SS)
Fixthemastlockwiththemast
pulledup. マストロック
Mastlock
M3×3SS
9メインギヤの取付
Installation of the main gear
STEP 1
M3×25CS ................................. 1
P-12Oリング .............................. 1
P-12O-ring
φ12×18×0.5FW........................ 1
φ12×18×0.2FW........................ 1
(調整用)
(Foradjustment)
M 3 ナイロンナット........................ 1
M3nylonnut
M3×3SS .................................... 2
20
10 シーソー部の組立
Assembling the seesaw
M2×6CS ................................... 4
φ3×4.5×0.5FW....................... 12
STEP 1
11 スタビライザー部の組立
Assembling the stabilizer
STEP 1
M4×4SS.................................... 2
EXφ5ボール台付 ..................... 2
EXφ5ballwithstand
Brg.φ3×φ7×3........................... 2
Brg.φ3×φ6×2.5F ..................... 6
M2×6CS ................................... 4
EXφ5ボール ............................. 2
EXφ5ball
M3×12ボタンボルト................... 2
M3×12buttonbolt
φ3×φ4.5×0.5FW
φ3×φ4.5×0.5FW
φ3×φ4.5×0.5FW
Brg.φ3×φ7×3ZZ
Brg.φ3×φ6×2.5FZZ
Brg.φ3×φ6×2.5FZZ
EXφ5 ボール
EXφ5ball
EXφ5ボール台付
EXφ5ballwithstand
M3×6ボタンボルト
M3×6buttonbolt
M3×12ボタンボルト
M3×12buttonbolt
M2×6CS
M2×6CS
センターハブ
Centerhub シーソー
Seesaw
ロック
ロック
ロック
スタビコントロールアーム
Stabilizercontrolarm
スタビライザーバー
Stabilizerbar
  の袋に入っています
Thispartinbag  .
仮止め
Temporarilyse
t
M2×6CS
M2×6CS
M4×4SS
M4×4SS
スタビライザーコントロールロッド(2set)
Stabilizercontrolrod
30mm
12mm
ロック
ロック
ロック
ロック
M2ロッドエンド .......................... 4
M2rodend
M3×6ボタンボルト..................... 2
M3×6buttonbolt

Other manuals for Shuttle RG

1

Other Hirobo Toy manuals

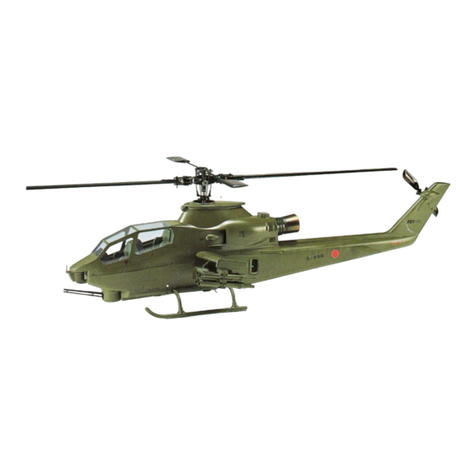
Hirobo TOWCOBRA AH-1S III BODY KIT User manual

Hirobo

Hirobo TOWCOBRA AH-1S III BODY KIT User manual

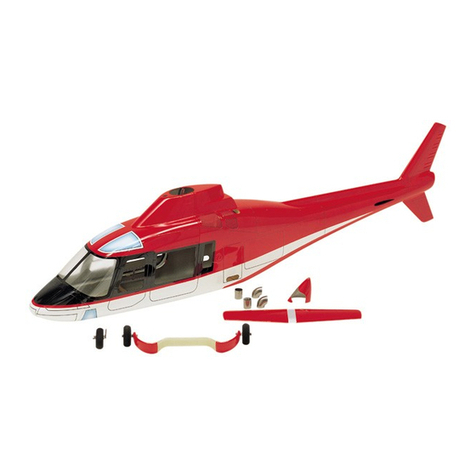
Hirobo AGUSTA A109 User manual

Hirobo

Hirobo AGUSTA A109 User manual

Hirobo 0412-903 User manual

Hirobo

Hirobo 0412-903 User manual

Hirobo X.R.B. Lama User manual

Hirobo

Hirobo X.R.B. Lama User manual

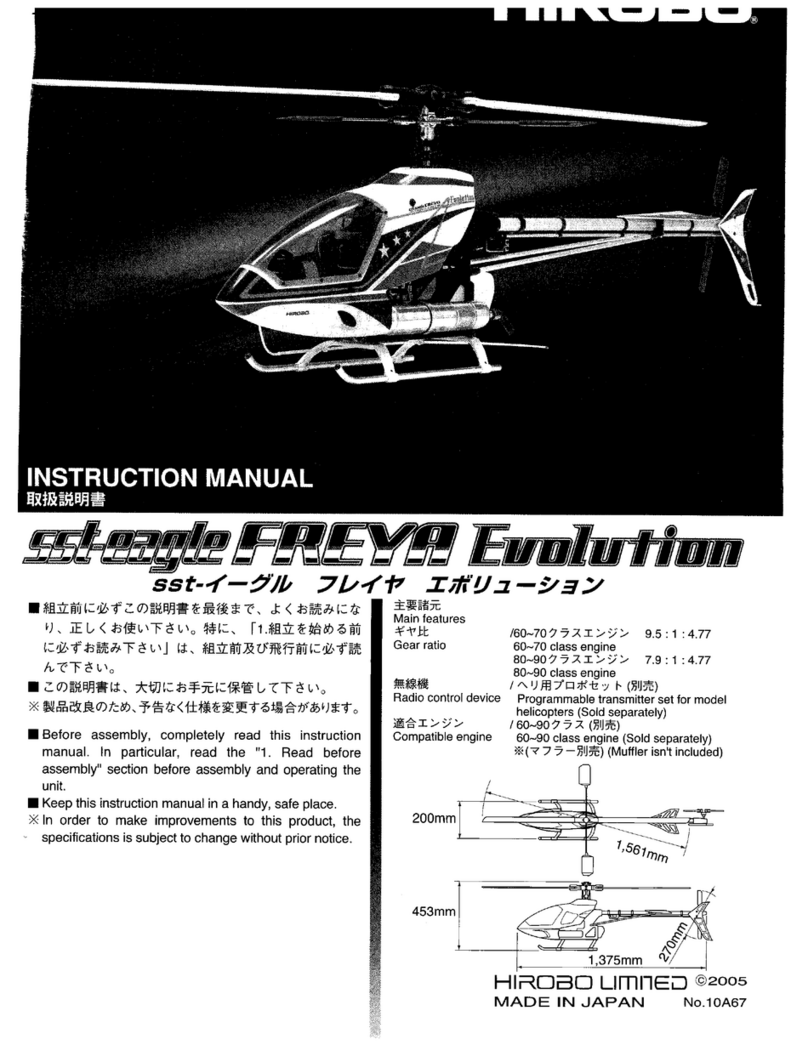
Hirobo sst-eagle FREYA Evolution User manual

Hirobo

Hirobo sst-eagle FREYA Evolution User manual

Hirobo SUPERCOBRA AW-1W User manual

Hirobo

Hirobo SUPERCOBRA AW-1W User manual

Hirobo 30 Lama EP User manual

Hirobo

Hirobo 30 Lama EP User manual

Hirobo S.R.B. Quark User manual

Hirobo

Hirobo S.R.B. Quark User manual

Hirobo GIGAS 550E User manual

Hirobo

Hirobo GIGAS 550E User manual

Hirobo SCEADU Evolution EX User manual

Hirobo

Hirobo SCEADU Evolution EX User manual

Hirobo EC135 User manual

Hirobo

Hirobo EC135 User manual

Hirobo Shuttle plus+2 Series User manual

Hirobo

Hirobo Shuttle plus+2 Series User manual

Hirobo SDX D3 SWM SL User manual

Hirobo

Hirobo SDX D3 SWM SL User manual

Hirobo JET RANGER User manual

Hirobo

Hirobo JET RANGER User manual

Hirobo jm2-0307903 User manual

Hirobo

Hirobo jm2-0307903 User manual

Hirobo Lepton EX User manual

Hirobo

Hirobo Lepton EX User manual

Hirobo Shuttle RG User manual

Hirobo

Hirobo Shuttle RG User manual

Hirobo BELL 222 User manual

Hirobo

Hirobo BELL 222 User manual

Hirobo Lama SA-315B User manual

Hirobo

Hirobo Lama SA-315B User manual

Hirobo sst-eagle FREYA Evolution User manual

Hirobo

Hirobo sst-eagle FREYA Evolution User manual

Hirobo SST-EAGLE3-WC User manual

Hirobo

Hirobo SST-EAGLE3-WC User manual

Hirobo SCEADU Evolution EX H.P.M User manual

Hirobo

Hirobo SCEADU Evolution EX H.P.M User manual

Hirobo SST-EAGLE4EXEP SSL-III User manual

Hirobo

Hirobo SST-EAGLE4EXEP SSL-III User manual

Hirobo Shuttle Sceadu Evolution User manual

Hirobo

Hirobo Shuttle Sceadu Evolution User manual

Popular Toy manuals by other brands

ECX Circuit ECX03330T1 instruction manual

ECX

ECX Circuit ECX03330T1 instruction manual

Hangar 9 Twist 3D .40 ARF HAN2660 Assembly manual

Hangar 9

Hangar 9 Twist 3D .40 ARF HAN2660 Assembly manual

KIDdesigns Tech2Go ADVENTURE KIT PW-V302 manual

KIDdesigns

KIDdesigns Tech2Go ADVENTURE KIT PW-V302 manual

LEGO STAR WARS 75525 Building instructions

LEGO

LEGO STAR WARS 75525 Building instructions

Eduard B5N2 quick start guide

Eduard

Eduard B5N2 quick start guide

marklin Vierachsiger Personenwagen user manual

marklin

marklin Vierachsiger Personenwagen user manual

Fisher-Price DNV31 owner's manual

Fisher-Price

Fisher-Price DNV31 owner's manual

K'Nex Education Robot quick start guide

K'Nex Education

K'Nex Education Robot quick start guide

THE WORLD MODELS Barbera Jean 52 instruction manual

THE WORLD MODELS

THE WORLD MODELS Barbera Jean 52 instruction manual

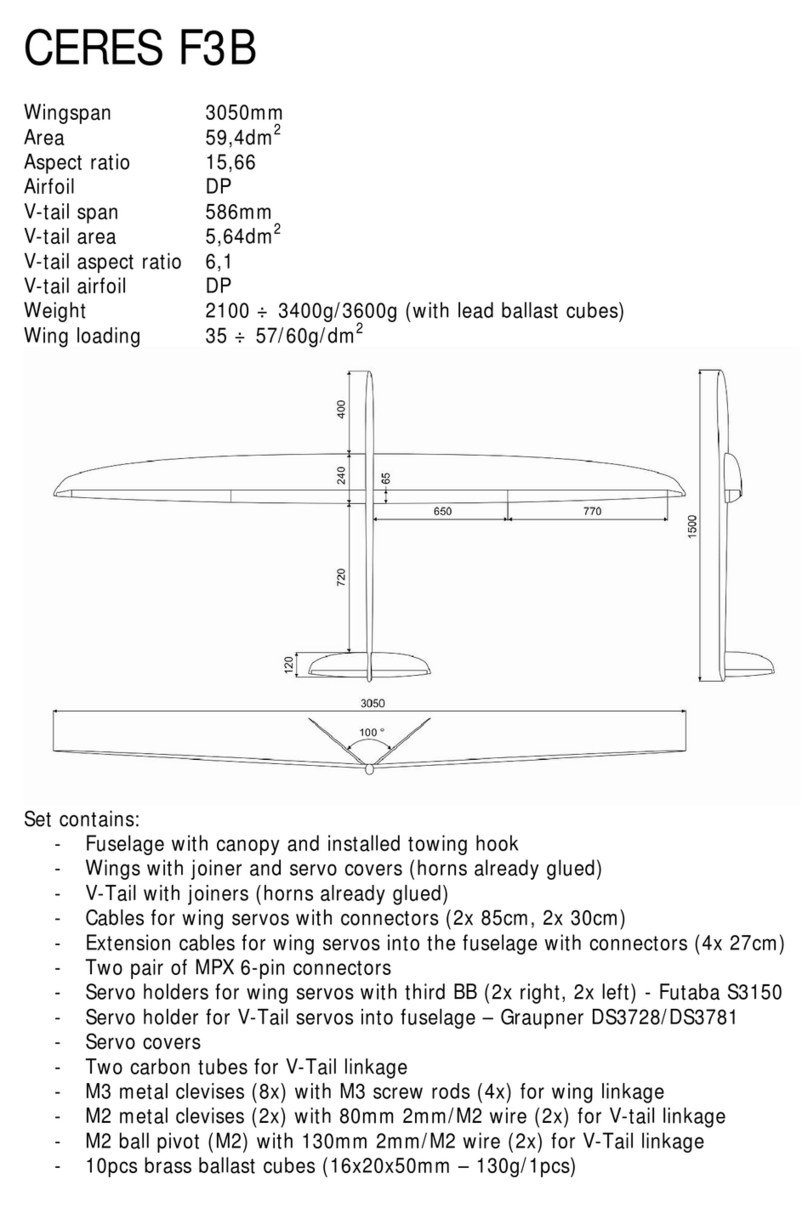
CERES F3B user guide

CERES

CERES F3B user guide

Fisher-Price TOODLERZ 77855 instruction sheet

Fisher-Price

Fisher-Price TOODLERZ 77855 instruction sheet

Burl Rice PS 5077 user manual

Burl Rice

Burl Rice PS 5077 user manual

LEGO CITY 60336 manual

LEGO

LEGO CITY 60336 manual

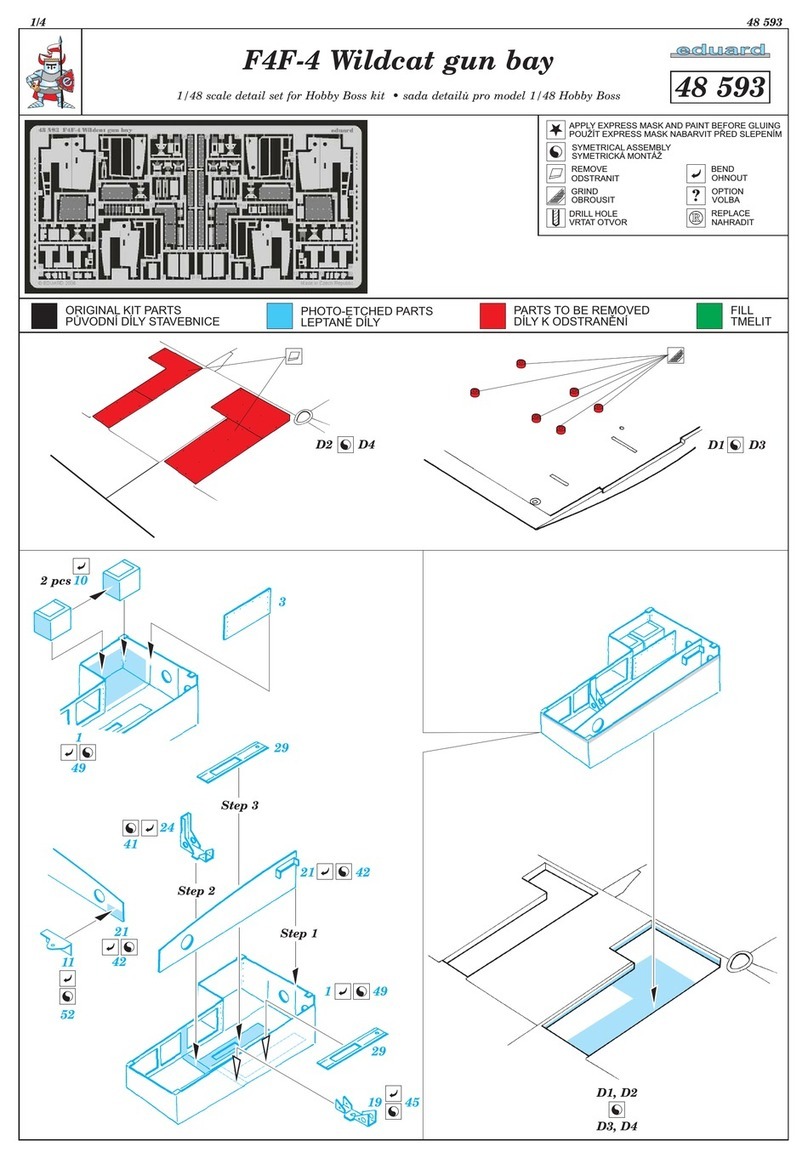
Eduard F4F-4 Wildcat gun bay manual

Eduard

Eduard F4F-4 Wildcat gun bay manual

Fisher-Price Musical Scoop Coupe manual

Fisher-Price

Fisher-Price Musical Scoop Coupe manual

Eduard WEEKEND 84160 manual

Eduard

Eduard WEEKEND 84160 manual

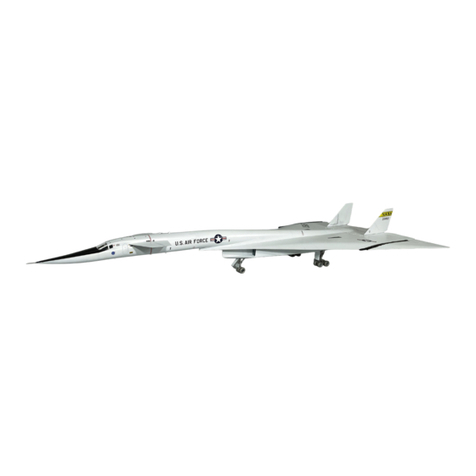
Italeri XB-70 Valkyrie 1282 Assembly instructions

Italeri

Italeri XB-70 Valkyrie 1282 Assembly instructions

Fisher-Price Baby Smartronics! Jivin' Jukebox 71664 instructions

Fisher-Price

Fisher-Price Baby Smartronics! Jivin' Jukebox 71664 instructions

manuals.online logo
manuals.online logoBrands
  • About & Mission
  • Contact us
  • Privacy Policy
  • Terms and Conditions

Copyright 2025 Manuals.Online. All Rights Reserved.