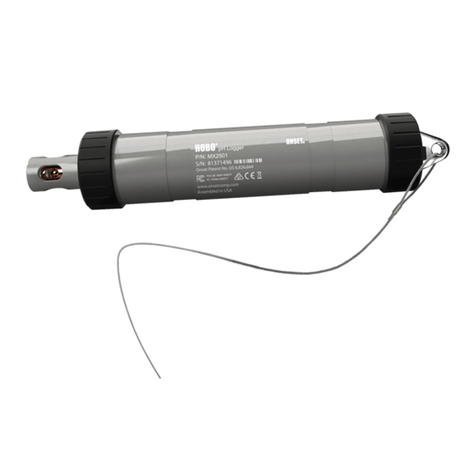
Quick Start for the HOBO® MX pH and Temperature Logger (MX2501)
22510-L MAN-MX2501-QSG
IMPORTANT: The logger is shipped with the pH electrode installed and submerged in storage solution. The pH sensor must be kept in
storage solution when not being calibrated or deployed in water. The hydration layer surrounding the sensor starts to break down after
10 minutes if the pH sensor is not submerged in storage solution or calibration solution, or deployed in water.
IMPORTANT: The pH electrode is uncalibrated. You must calibrate the logger as described in step 2 before configuring and deploying it.
1 Download and open HOBOconnect.
a. Download HOBOconnect® to a phone or tablet from the App Store® or Google Play™. Download HOBOconnect to a
Windows® computer from www.onsetcomp.com/products/software/hoboconnect.
b. Open HOBOconnect. If prompted, enable Bluetooth® in your device settings.
c. Wake up the logger by pushing the switch on the mounting end of the logger into the gap beneath the mounting lanyard
(see diagram on back). Tap Devices and make sure the logger appears. If it does not, make sure it is within range of your
phone, tablet, or computer.
2 Calibrate the logger.
Before you begin: To complete these steps, you will need
deionized or distilled water, a squirt bottle, calibration
solution (also known as buffer solution), and beakers.
Note: pH values of calibration buffers and samples vary
depending on their temperature. As a result of this, it is
important that the logger is calibrated in buffers that have
the same temperature as that of the sample. Refer to the
chart on the calibration buffer bottles or in the logger manual
for the effect of temperature on the buffer pH values.
a. Pour each calibration solution into its own beaker (pH
7.00 solution and either one or both of pH 4.01 and pH
10.00 solutions). You need enough solution in the beaker
to cover the sensor end cap and closure cap on the
logger.
b. Unscrew the clear storage cap filled with storage solution
and remove it from the logger. Keep the cap filled with
storage solution nearby in case you need to reinstall it
after calibrating and before deploying the logger.
c. Screw the closure cap onto the logger.
d. Use a squirt bottle to rinse the pH sensor with deionized
or distilled water.
e. Tap Devices (if necessary) and tap the logger tile in the
app to connect to the logger.
f. Tap Calibrate.
g. Place the sensor end of the logger in the pH 7.00
solution. Make sure the sensor end cap, temperature
sensor, and closure cap are submerged in the solution as
shown in the illustration. Tap Start. Follow the
instructions on the screen. Once the pH reading is stable,
tap Confirm.
h. Rinse the pH sensor with deionized or distilled water.
i. If you are using the pH 4 buffer, place the sensor end in
the pH 4 solution and tap Start. If you are not using the
pH 4 buffer, tap Skip and go to step k.
j. Once the pH reading is stable, tap Confirm. Rinse the pH
sensor with deionized or distilled water.
k. If you are using the 10 buffer, place the sensor end in the
pH 10 solution and then tap Start. Once the pH reading is
stable, tap Confirm. If you are not using the pH 10 buffer,
tap Skip.
l. Verify that the slope and offset is acceptable and tap
Save. If the slope and offset are not acceptable, then tap
the back arrow and repeat the calibration steps in this
section as needed.
m. Rinse the pH sensor with deionized or distilled water.
If you are not deploying the logger immediately, place the
pH electrode back into the storage solution. Unscrew the
sensor end cap you installed in step c. Make sure the storage
solution reaches the marked fill line on the clear storage cap;
pour more into the cap if necessary. Carefully screw the clear
cap with storage solution onto the logger. Only use storage
solution in the clear cap; do not use water. Do not use the
copper guard when the pH electrode is in storage solution.
Unscrew the clear
cap filled with
storage solution
from the logger
Screw the closure
cap onto the logger
before calibrating
Closure cap
Sensor end cap Temperature sensor
