Affirm Breast Biopsy Guidance System Service Manual
Table of Contents
MAN-05754 Revision 002 ix
List of Figures
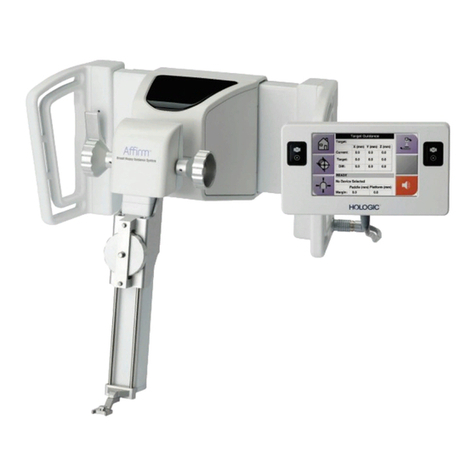
Figure 1: Affirm Biopsy System on the Selenia Dimensions Mammography System .............................................7
Figure 2: How to Lift the Biopsy Guidance Module .....................................................................................................8
Figure 3: How to Store the Biopsy Guidance Module ..................................................................................................8
Figure 4: Biopsy Guidance Module Label Location....................................................................................................11
Figure 5: Lateral Arm Serial Number Label Location ................................................................................................11
Figure 6: Affirm System Icon Location .........................................................................................................................16
Figure 7: Biopsy Guidance Module............................................................................................................................... 17
Figure 8: Biopsy Control Module ..................................................................................................................................19
Figure 9: Gantry/Biopsy Guidance Module Cables ....................................................................................................20
Figure 10: Installation of the Biopsy Guidance Module ............................................................................................. 21
Figure 11: Attachment of the Biopsy Control Module................................................................................................22
Figure 12: Home Screen .................................................................................................................................................. 24
Figure 13: Service Screen ................................................................................................................................................24
Figure 14: Installation of the Needle Guide Holder on the Standard Device Mount............................................. 27
Figure 15: Installation of the Needle Guide on the Standard Needle Guide Holder .............................................27
Figure 16: Attaching a Biopsy Device Adapter to Device Mount (Standard) .........................................................28
Figure 17: Lateral Arm Components............................................................................................................................. 29
Figure 18: Left Needle Approach of Lateral Arm (Blue)............................................................................................ 31
Figure 19: Right Needle Approach of Lateral Arm (Yellow)..................................................................................... 31
Figure 20: Installing Lateral Arm Stand over Image Receptor.................................................................................. 32
Figure 21: Removing the Needle Guide Holder from the Standard Device Mount............................................... 33
Figure 22: Installing Lateral Arm to Device Mount .................................................................................................... 34
Figure 23: Lateral Arm Mounting Side Selection Screen............................................................................................ 35
Figure 24: Attaching Blue Needle Guide Holder to Needle Guide Rods (Left Needle Approach)...................... 36
Figure 25: Attaching Yellow Needle Guide Holder to Needle Guide Rods (Right Needle Approach)............... 36
Figure 26: Installing Disposable Needle Guide on Needle Guide Holder (Lateral Arm)...................................... 37
Figure 27: Carriage Lever Locked and Unlocked Positions....................................................................................... 37
Figure 28: Locked and Unlocked Positions of Device Mount Lever......................................................................... 38
Figure 29: Installing Device Mount onto Lateral Arm Carriage ...............................................................................38
Figure 30: Lock Levers in Fully Locked Position......................................................................................................... 39
Figure 31: Scales and Positioning for X-Stop and Carriage........................................................................................ 40
Figure 32: Installing X-Stop on Lateral Arm ................................................................................................................ 41
Figure 33: Affirm System Tabletop Stand ....................................................................................................................43
Figure 34: Lateral Arm and Storage Case.....................................................................................................................44
Figure 35: Admin Screen Showing QAS Test .............................................................................................................. 54
Figure 36: QAS Test Info Dialog Box ............................................................................................................................ 55
Figure 37: Device Field in the Biopsy Tab ....................................................................................................................55
Figure 38: Admin Screen Showing Lateral Arm QAS Test........................................................................................57
Figure 39: Lateral QAS Test Info Dialog Box ............................................................................................................... 58
Figure 40: Device Field in the Biopsy Tab ....................................................................................................................58
Figure 41: Affirm Biopsy Guidance Module................................................................................................................ 65
Figure 42: Lateral Arm....................................................................................................................................................66

