manuals.online logo
Brands
  1. Home
  2. •
  3. Brands
  4. •
  5. Honeywell
  6. •
  7. Control Unit
  8. •
  9. Honeywell S89E User manual

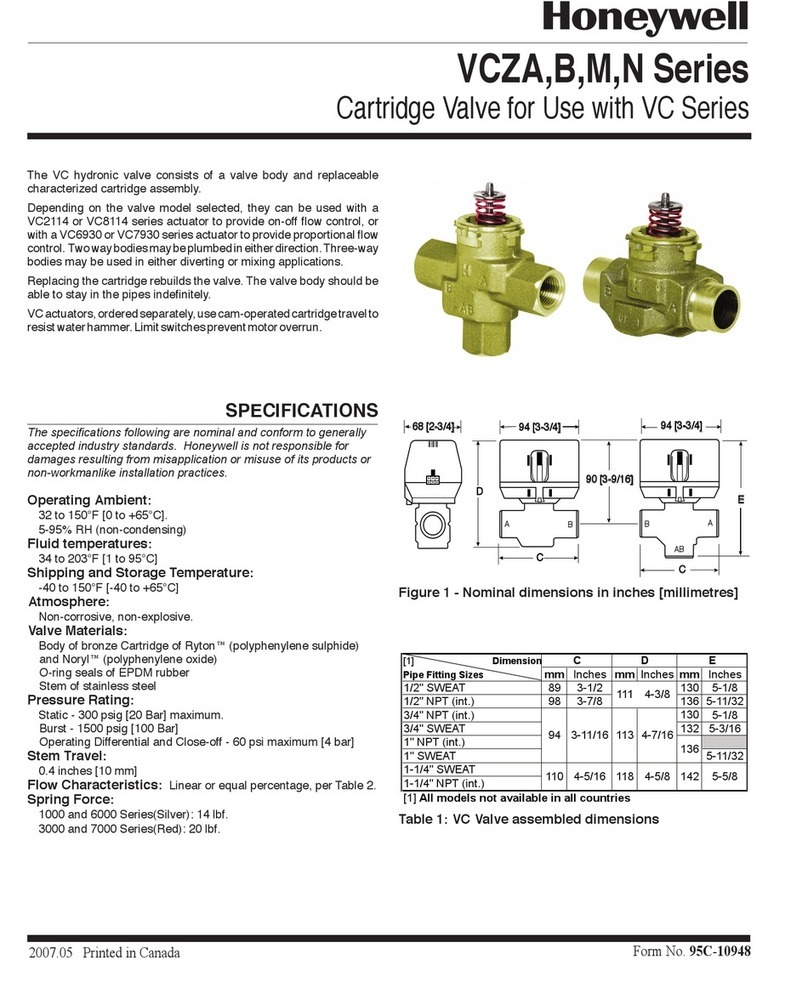
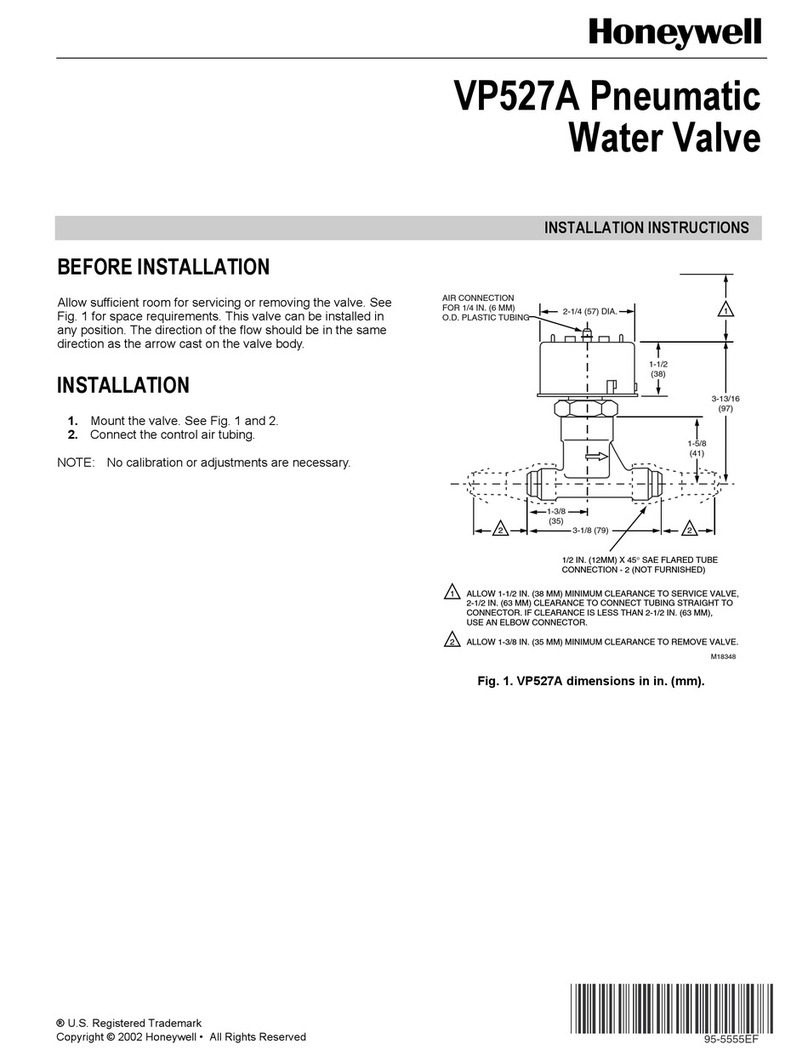
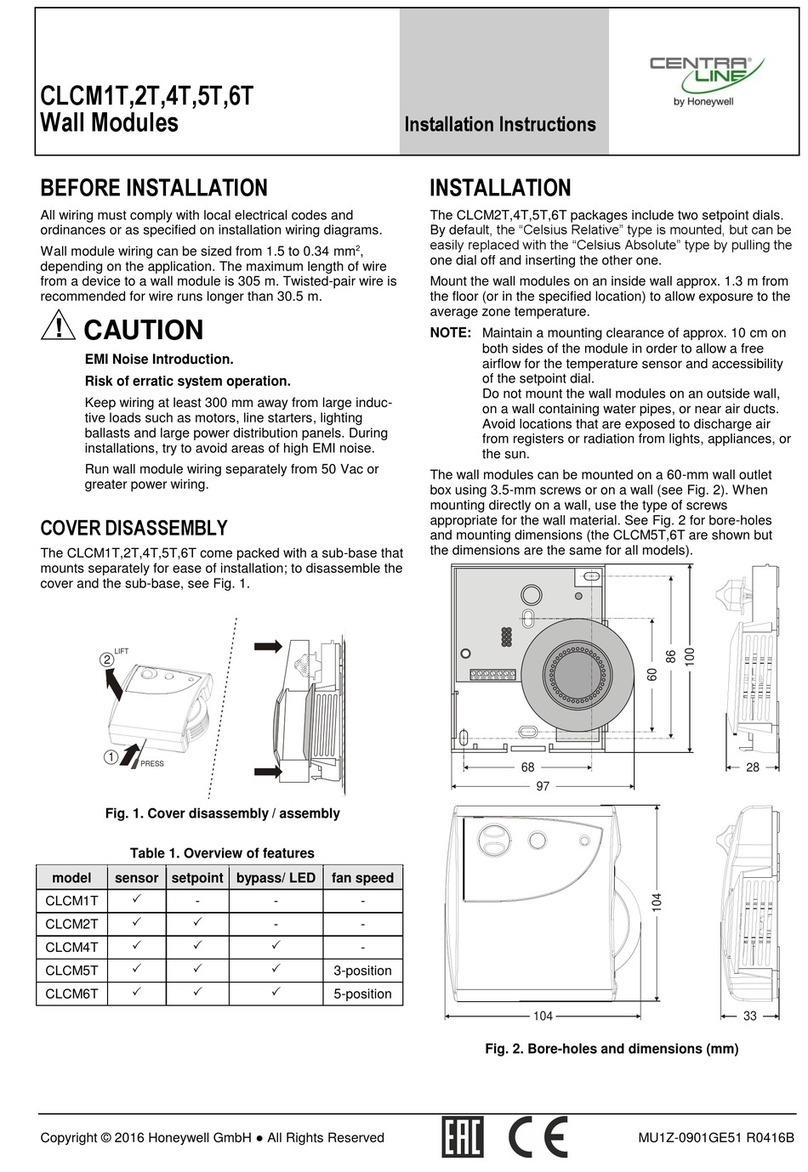
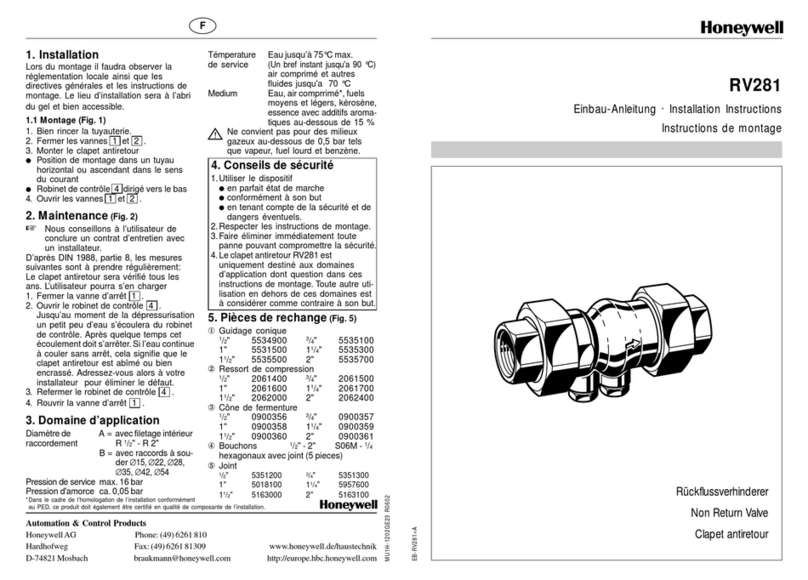
Honeywell S89E User manual

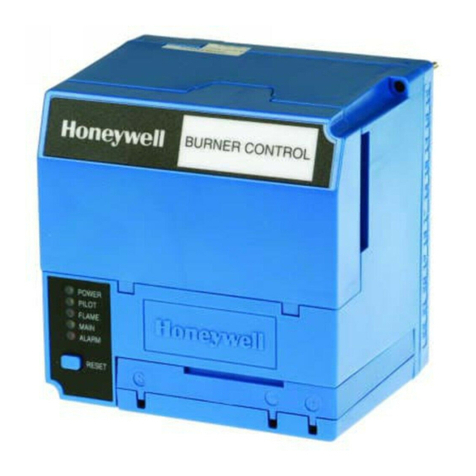
PRODUCT DATA
68-0066-4
® U.S. Registered Trademark
Copyright © 2003 Honeywell International Inc.
All Rights Reserved
S89E,F
Direct Spark Ignition Control Module
APPLICATION
The Honeywell S89E,F Direct Spark Ignition Control Modules
control the ignition sequence and gas control operation in
direct spark systems used primarily on gas-fired atmospheric
and power burners in residential furnaces and heating
appliances.
FEATURES
• Requires separate 120 Vac spark generator.
• S89E has 10-second maximum delay for safe start
check before ignition.
• S89F has 38-second maximum delay for safe start
check plus valve on delay before ignition.
• Available with 4 or 11 second (nominal) lockout timing.
• 100 percent shutoff for use with all heating gases.
• Ambient temperature rating is -40°F to +175°F (-40°C to
+80°C).
• Separate electrodes for spark ignition and flame
sensing.
• Uses Honeywell or any other 2A or less dual valve
combination gas control designed for Direct Spark
Ignition (DSI) applications.
• Locks out system after trial for ignition if main burner
fails to ignite.
• Flame rectification principle used to monitor flame;
false flame signals resulting from short to ground
results in safety shutdown.
• After safety shutdown, S89E and F can be reset from
the thermostat.
Contents
Application ........................................................................ 1
Features ........................................................................... 1
Specifications ................................................................... 2
Ordering Information ........................................................ 2
Installation ........................................................................ 3
Wiring ............................................................................... 4
Start-Up and Checkout ..................................................... 4
Operation .......................................................................... 6
Troubleshooting ................................................................ 7
S89E,F DIRECT SPARK IGNITION CONTROL MODULE
68-0066—4 2
ORDERING INFORMATION
When purchasing replacement and modernization products from your TRADELINE® wholesaler or distributor, refer to the
TRADELINE® Catalog or price sheets for complete ordering number.
If you have additional questions, need further information, or would like to comment on our products or services, please write or
phone:
1. Your local Honeywell Automation and Control Products Sales Office (check white pages of your phone directory).
2. Honeywell Customer Care
1885 Douglas Drive North
Minneapolis, Minnesota 55422-4386
In Canada—Honeywell Limited/Honeywell Limitée, 35 Dynamic Drive, Scarborough, Ontario M1V 4Z9.
International Sales and Service Offices in all principal cities of the world. Manufacturing in Australia, Canada, Finland, France,
Germany, Japan, Mexico, Netherlands, Spain, Taiwan, United Kingdom, U.S.A.
SPECIFICATIONS
IMPORTANT
The specifications given in this publication do not
include normal manufacturing tolerances. Therefore,
this unit may not match the listed specifications
exactly. Also, this product is tested and calibrated
under closely controlled conditions, and some minor
differences in performance can be expected if those
conditions are changed.
Models:
S89 Direct Spark Ignition Control Modules. Provide electronic
control of direct spark ignition system on gas-fired
atmospheric and power burners.
S89E: 10-second maximum delay for safe start check.
S89F: 38-second maximum delay for safe start check plus
valve on delay.
Complete DSI system also includes:
120 Vac Spark Generator with 1.5A or less current draw.
Q347 Spark Igniter or equivalent.
Q354 Flame Sensor or equivalent.
VR845, VR854, VR8450, or VR8305 Combination Gas
Controls or any dual valve rated 2A or less and
designed for DSI applications.
24 to 30 Vac Thermostat.
HIgh Temperature Limit Controller.
24V Transformer. See Table 1 for VA rating.
Electrical Ratings:
Power supply: Requires two power supply connections—24
and 120 Vac, 50/60 Hz.
Current at 24V input: 2.2A maximum.
Valve Contacts: 2.0A maximum run, 20A maximum inrush at
24 Vac.
Spark Generator Relay Contacts: 1.5A at 120 Vac, 50/60 Hz.
Transformer Rating: See Table 1.
Thermostat Heat Anticipator Setting: 0.2A plus gas control
current.
Delay Timing:
S89E: Safe Start Check—10 seconds maximum.
S89F: Safe Start Check plus Valve On Delay—38 seconds
maximum.
Table 1. Transformer Rating.
Safety Lockout Timing: 4 or 11 seconds nominal. Ignition is
on during approximately the first 80 percent of lockout
timing and off during the last 20 percent for flame proving.
Specify lockout timing when ordering.
Flame Failure Response Time: 2 seconds maximum with
2.5 µA flame current.
Flame Current Signal: 0.8 µA minimum.
Ambient Temperature Range: -40°F to +175°F (-40°C to
+80°C).
Wiring Connections:
24 Vac—3/16 in. quick-connects.
120 Vac—12 in. (305 mm) color-coded leadwires.
Sensing Lead: Up to 36 in. (0.9m). Insulation must be rated
for 100 megohm resistance between wire and ground.
Mounting: Mounts in any position.
Dimensions: See Fig. 1.
S89 Current
(in Amperes)
Gas Control Current
(In Amperes)
Transformer VA
Rating Required
Transformer
Model No.
0.2 0 to 0.6 20 AT20A or AT120A
0.2 0.6 to 1.0 30 AT72D or AT140A
0.2 1.0 to 1.4 40 AT72D or AT140A
0.2 1.4 to 2.0 50 AT87A or AT150A
S89E,F DIRECT SPARK IGNITION CONTROL MODULE
3 68-0066—4
Approvals:
Underwriters Laboratories Inc. Component Recognized: File
No. MP268, Guide No. MCCZ2.
CSA International Certified: 158158-1047805.
Fig. 1. S89 dimensions in in. (mm).
INSTALLATION
When Installing This Product…
1. Read these instructions carefully. Failure to follow them
could damage the product or cause a hazardous
condition.
2. Check the ratings given in the instructions and on the
product to make sure the product is suitable for your
application.
3. Installer must be a trained, experienced service
technician.
4. After installation is complete, check out product
operation as provided in these instructions.
WARNING
Fire or Explosion Hazard.
Can cause severe injury, death or property
damage.
1. Disconnect power supply before wiring to avoid
electrical shock, explosion, or equipment damage.
2. If a new gas control is being installed, turn off gas
supply before starting installation. Conduct Gas
Leak Test after gas control is installed.
3. In an LP gas installation, remember that LP gas is
heavier than air and will not vent upward naturally.
Do not operate electric switches, lights, or
appliances until you are sure that work area is free
of gas.
4. Never install an S89 where water can flood, drip, or
condense on the device. It can malfunction if it gets
wet.
5. Never try to use a device that has been damp or
wet—replace it.
6. If the control might be exposed to water or moisture,
install it in a suitable waterproof enclosure.
7. Any replacement S89 must have the same or
shorter lockout time and the same or longer delay
timing as the original control.
Replacement Application Requirements
If this is a replacement application, follow the appliance
manufacturer instructions, if available. The manufacturer
usually provides wiring diagrams, start-up and checkout
7/8 (22)
3-3/8 (86)
3-3/8 (86)
4-1/16 (103)
7/8 (22)
4-1/16
(103)
2 (51)
M2331
12 (305) LEADS
5-13/16
(132)
2 (51)
7/8
(22)
2-7/8 (73)
1/4 IN. Q.C.
3/8 (86)
HOLE (4)
1/4 IN. Q.C. (1)
3/16 IN. Q.C. (5)
3/8 (10)
S89E,F DIRECT SPARK IGNITION CONTROL MODULE
68-0066—4 4
instructions, and service procedures for their appliance. If the
manufacturer instructions are not available, use the general
guidelines that follow.
Mount the S89
Select a convenient location on the burner or furnace chassis
or cabinet, protected from moisture due to splashing, dripping,
or condensation. Allow room to easily reach the S89 terminals
for wiring and servicing. Do not exceed the ratings given in the
Specifications section.
The S89 may be mounted in any position. See Fig. 1 for
mounting dimensions. Mount with 1 in. (25 mm) long, no. 6-32
machine screws or no. 8 sheet metal screws. Fasten securely.
Mount Auxiliary Controls
Mount the spark generator, igniter, flame sensor, thermostat,
transformer, gas control, and any other auxiliary controls
according the control manufacturer instructions.
WIRING
CAUTION
Equipment Damage Hazard.
Can cause equipment malfunction or damage.
1. The sensor leadwire must be no more than 3 ft
(0.9m) long. Do not allow the wire to touch
grounded metal surfaces.
2. A common ground is required for the S89, the spark
ignitor and the main burner. The 24V (GND)
terminal internally grounds one side of the
transformer. Auxiliary controls or limits must be in
the ungrounded leg.
WARNING
Electrical Shock Hazard.
Can cause severe injury, death or property
damage.
Disconnect the power supply before beginning wiring.
More than one disconnect may be required.
Use wiring diagrams and instructions provided by the
appliance manufacturer, if available. Otherwise, follow the
general procedures and diagrams outlined below.
All wiring must comply with all applicable electrical codes and
ordinances.
1. Make sure the transformer has adequate power (VA)
rating. See Table 1 in Specifications section.
2. If you are replacing an S89 that was used with an
external valve on delay timer, you must disconnect the
external timer and use an S89F to provide the delay
function. External timers cannot be used with either
S89E or S89F controllers because the safety circuit in
the controls may repeatedly set the timer to zero,
preventing burner start. Always disconnect the external
timer when using an S89E or F. To disconnect the timer:
a. Turn off power.
b. Cut the two leadwires at the external timer.
c. Strip the ends of the wires 1/2 in. (13 mm) and
connect with a solderless connector.
d. Restore power.
3. Wire system components and S89 as shown in Fig. 2
and 3. Refer to appliance manufacturer instructions for
connections to other auxiliary controls.
4. Make sure the L1 (Hot) and L2 (Ground) leads are
connected to the right leads. If they are reversed, the
S89 will not detect the flame and will go into safety
lockout.
5. Connect spark igniter, flame sensor, main burner, and
S89 to a common ground. Use thermoplastic insulated
wire with a minimum rating of 221°F (105°C) for the
ground wire. Connect the ground wire as follows:
a. Connect one end of the ground wire to the
quick-connect GND (burner) terminal on the S89,
using a 1/4 in. (6 mm) quick-connect (AMP 41772 or
equivalent).
b. Strip the other end of the wire and fasten it under the
igniter bracket mounting screw.
c. If necessary, install a shield to protect the wire from
radiant heat generated by the burner.
d. The burner serves as the common ground. If
metal-to-metal contact between the burner and the
appliance cabinet is poor, run a lead from the burner
to the cabinet. The cabinet must be earth-grounded.
START-UP AND CHECKOUT
If this is a replacement application, refer to the specific
instructions provided by the heating appliance manufacturer
(if available). Also, since the auxiliary controls used on any
system may differ, refer to the control manufacturer
instructions for start-up and checkout procedures for other
system components.
Perform Gas Leak Test
WARNING
Fire or Explosion Hazard.
Can cause severe injury, death or property
damage.
1. Never use a flame to check for gas leaks, only a
soap and water solution.
2. Test for gas leaks whenever work is done on a gas
system.
3. Soap and water must not touch the S89.
With the main burner in operation, paint the pipe joints and
gas control gasket edges with a rich soap and water solution.
Bubbles indicate a gas leak. To stop the leak, tighten joints
and screws, or replace the gas control. Never use a flame to
check for gas leaks.
S89E,F DIRECT SPARK IGNITION CONTROL MODULE
5 68-0066—4
Fig. 2. S89E typical hookup in direct spark control system. See Fig. 8 for control system ladder diagram.
Check Out S89
NOTE: If operation is not as described below, refer to
Troubleshooting section.
1. Set thermostat to call for heat.
2. Turn on power and gas supply.
3. Igniter starts to spark and gas control opens after safe
start check (S89E: 10 seconds maximum) or safe start
check plus valve on delay (S89F: 30 seconds
minimum).
4. Main burner lights while igniter is on.
NOTE: If the gas control has been replaced or serviced,
lightoff may be unsatisfactory until air has been
purged from the gas line or the gas input and
combustion air have been adjusted (see appliance
manufacturer instructions).
5. Turn off gas supply.
6. Gas control closes.
7. The module begins the safe start check (S89E: 10
seconds maximum) or safe start check plus valve on
delay (30 seconds minimum) after which the igniter
starts and gas control opens.
8. Time system until gas control closes. S89 is now in
safety lockout. The lockout time should be within the
specifications in Table 2.
9. Open gas supply. System remains off and no gas flows
to the main burner.
BLUE
WHITE
GROUND
BURNER
IGNITER
M19836
FLAME
SENSOR
120 V SPARK
GENERATOR
BLACK
DUAL VALVE
COMBINATION
GAS CONTROL
THERMOSTAT OR
CONTROLLER
GND (BURNER)
24V (GND)
24V
VALVE
S89E GAS PRIMARY
TRANSFORMER
L2
L1
(HOT)
LIMIT
CONTROLLER
VALVE (GND)
SENSE
BLUE
1
4
2
3
3
2
1
4
POWER SUPPLY. PROVIDE DISCONNECT MEANS AND OVERLOAD PROTECTION AS REQUIRED.
ALTERNATED LIMIT CONTROLLER LOCATION.
IMPORTANT:
• CONNECT L1 TO THE BLACK LEAD.
• CONNECT L2 TO THE WHITE LEAD. OTHERWISE THE S89 WILL NOT DETECT THE FLAME AND WILL LOCK OUT.
FACTORY TEST TERMINAL. DO NOT USE.
S89E,F DIRECT SPARK IGNITION CONTROL MODULE
68-0066—4 6
Fig. 3. S89F typical hookup in direct spark control system. See Fig. 9 for control system ladder diagram.
10. Turn off gas supply.
11. Gas control closes.
12. The module begins the safe start check (S89E: 10
seconds maximum) or safe start check plus valve on
delay (38 seconds maximum) after which the igniter
starts and gas control opens.
13. Time system until gas control closes. S89 is now in
safety lockout. The lockout time should be within the
specifications in Table 2.
14. Open gas supply. System remains off and no gas flows
to the main burner.
Table 2. S89 Lockout Times.
Resetting S89 After Safety Lockout
Once the S89 locks out, it must be reset before the system will
operate. To reset, set the thermostat below room temperature,
wait at least 45 seconds, then turn the thermostat up to call for
heat. The system should start normally. If adjusting the
thermostat does not reset the S89, turn off power to the
appliance for 45 seconds and then turn it on.
Final Checkout
With power and gas supply on, set thermostat to call for heat
and observe operation through at least one complete cycle to
make certain that all controls are operating safely.
OPERATION
The S89 is powered by a 24V transformer. It operates in
response to a call for heat from the thermostat.
BLUE
WHITE
GROUND
BURNER
IGNITER
M19837
FLAME
SENSOR
120 V SPARK
GENERATOR
BLACK
AIR
PROVING
SWITCH
DUAL VALVE
COMBINATION
GAS CONTROL
COMBINATION
AIR BLOWER
RELAY
THERMOSTAT OR
CONTROLLER
COMBUSTION AIR
BLOWER MOTOR
GND (BURNER)
24V (GND)
24V
VALVE
S89F GAS PRIMARY
TRANSFORMER
L2
L1
(HOT)
L2
L1
(HOT)
LIMIT
CONTROLLER
VALVE (GND)
SENSE
BLUE
1
4
2
3
3
2
1
4
POWER SUPPLY. PROVIDE DISCONNECT MEANS AND OVERLOAD PROTECTION AS REQUIRED.
ALTERNATED LIMIT CONTROLLER LOCATION.
IMPORTANT:
• CONNECT L1 TO THE BLACK LEAD.
• CONNECT L2 TO THE WHITE LEAD. OTHERWISE THE S89 WILL NOT DETECT THE FLAME AND WILL LOCK OUT.
FACTORY TEST TERMINAL. DO NOT USE.
Lockout Time
Shown on S89
Module
Safety Lockout Time
Minimum Maximum
4 seconds 3.0 seconds 5.5 seconds
11 seconds 8.0 seconds 15.0 seconds
S89E,F DIRECT SPARK IGNITION CONTROL MODULE
7 68-0066—4
On every call for heat, the S89 performs a safe start check. If
a flame or a flame simulating condition is present, the S89
locks out without starting the igniter and must be reset.
Following the safe start check and, on the S89F, a valve on
delay period, the S89 spark generator contacts close to
energize the spark generator and the igniter. At the same time
the gas control, powered through the gas valve relay contacts
in the S89, opens so gas can flow to the burner. The igniter is
on during approximately the first 80 percent of the ignition, or
lockout timing, period. During the balance of the lockout timing
period, the ignition is off and the flame sensor attempts to
prove the flame. The flame is proved when current from the
flame sensor through the burner flame to ground reaches
0.8 µA dc.
If flame is proved, the gas control remains open and the
burner on until the call for heat ends.
If flame is not proved, the gas control closes and the system is
locked out until the S89 is reset.
If flame is lost after being proved, the S89 will close the gas
control, perform a safe start check, and, on the S89F, valve on
delay, then return ignition as described above.
The S89 is reset by turning the thermostat below room
temperature or removing power to the system for 45 seconds.
Fig. 4. Normal sequence of operation.
TROUBLESHOOTING
WARNING
Fire or Explosion Hazard.
Can cause severe injury, death, or property
damage.
Any replacement S89 must have the same or shorter
lockout timing and the same or longer delay timing as
the original control.
START
SAFE
START
CHECK
V
ALVE-ON DELAY
(S89F ONLY)
POWER INTERRUPTION.
SYSTEM SHUTS OFF. RESTARTS
WHEN POWER IS RESTORED.
IF FLAME SIMULATION
CONDITION IS PRESENT,
SYSTEM WILL NOT START.
IF NO SPARK, S89 LOCKS OUT
AND SHUTS DOWN SYSTEM.
MUST BE RESET.
IF FLAME CURRENT IS ABSENT,
WEAK, OR UNSTEADY, S89
LOCKS OUT AND SHUTS DOWN
SYSTEM. MUST BE RESET.
IF FLAME IS LOST, S89 CLOSES
GAS CONTROL, THEN RESTARTS
SAFE START CHECK AND TRIAL
FOR IGNITION.
THERMOSTAT
CALLS FOR HEAT.
SAFE START
CHECK
SPARK GENERATOR
POWERED. IGNITION
BEGINS AND GAS
CONTROL OPENS.
BURNER LIGHTS.
IGNITION STOPS
AND FLAME
CURRENT IS
SENSED.
BURNER RUNS
S89 MONITORS
FLAME CURRENT.
THERMOSTAT
SATISFIED. GAS
CONTROL CLOSES,
BURNER GOES OFF.
TRIAL FOR
IGNITION
BURNER
OPERATION
END M19838A
1
2
3
4
5
6
VALVE-ON DELAY
(S89F ONLY)
COMBUSTION
AIR BLOWER
STARTS.
2A
S89E,F DIRECT SPARK IGNITION CONTROL MODULE
68-0066—4 8
IMPORTANT
1. The following service procedures are provided as a
general guide. Follow appliance manufacturer ser-
vice instructions, if available.
2. All meter readings must be taken within the trial for
ignition period. Once the ignition period ends, the
system must be reset by setting the thermostat down
for at least 45 seconds before continuing.
3. If any component does not function properly, make
sure it is correctly installed and wired before
replacing it.
4. The ignition module cannot be repaired. If it
malfunctions, it must be replaced.
5. Only trained, experienced service technicians should
service direct spark ignition systems.
Before beginning troubleshooting, review the normal
operating sequence of the S89. See the Operation section.
Then follow the steps in Fig. 5 to identify the source of the
problem. Some steps are explained in greater detail below.
Besides standard hand tools, you will need the following to
complete the troubleshooting:
1. Honeywell W136 Test Meter or equivalent.
2. Test lead: a length of ignition cable or other heavily
insulated wire with both ends stripped 1/2 in. (13 mm).
Check Ignition System Grounding
Nuisance shutdowns are often caused by a poor or erratic
ground.
A common ground is required for the module, igniter, flame
sensor and main burner.
1. Check for good metal-to-metal contact between the
igniter bracket and the main burner.
2. Check the ground lead from the GND (Burner) terminal
on the module to the igniter bracket. Make sure
connections are clean and tight. If the wire is damaged
or deteriorated, replace it with no. 14 to 18 gauge,
moisture-resistant, thermoplastic insulated wire with a
221°F (105°C) minimum rating. Use a shield if
necessary to protect the ground wire from radiant heat.
Check Spark Ignition Circuit
The S89 spark generator relay switches 120 Vac to the
remote-mounted spark generator, which, in turn, powers the
spark igniter at the burner. Check as follows:
1. Shut off gas supply to the gas control.
2. Disconnect the ignition cable at the spark generator
stud terminal.
3. Set the thermostat to call for heat.
4. Reset the S89 by removing power to the module for 45
seconds.
WARNING
Electrical Shock Hazard.
Can cause severe injury, death, or property
damage.
In the next step, do not touch either the stripped end of
the test lead or the stud terminal.
5. Restore power. Before the S89 locks out, touch one end
of the test lead firmly to the S89 GND terminal. Do not
remove the existing ground lead.
6. Slowly move the other end of the test lead toward the
stud terminal on the spark generator until sparking
stops.
7. Slowly pull the wire away from the stud terminal and
note the size of the gap when sparking stops.
8. Follow instructions in Table 3.
Table 3. Spark Ignition Troubleshooting.
Check Flame Sensor and Igniter
1. Make sure burner flame is capable of providing a good
rectification signal. See Fig. 7.
2. Make sure about 3/4 to 1 in. (19 to 25 mm) of the flame
sensor is continuously immersed in the flame for best
flame signal. See Fig. 7. Bend the bracket or flame
sensor, or relocate the sensor as necessary. Do not
relocate the igniter.
3. Make sure flame does not touch sensor or ignitor
ceramic insulator and that insulators are below he
flame. Excessive heat (over 1000°F [538°C]) will cause
short to ground. Move sensor to cooler location or shield
insulators if excessive heat is suspected. Do not
relocate the igniter.
4. Check for cracked igniter or sensor ceramic insulator,
which can cause short to ground, and replace unit if
necessary.
5. Make sure electrical connections are clean and tight.
6. Replace damaged wire with moisture-resistant no. 18
wire rated for continuous duty up to 221°F (105°C).
If the Gap Was: Then:
1/8 in. (3 mm) or more Generator output voltage is okay.
Less than 1/8 in. (3 mm)
or no spark
Check for 120 Vac at the spark
generator terminals. If okay,
replace the spark generator.
S89E,F DIRECT SPARK IGNITION CONTROL MODULE
9 68-0066—4
Fig. 5. Troubleshooting S89E,F.
START
REVIEW NORMAL
OPERATING SEQUENCE.
TURN GAS SUPPLY ON.
TURN THERMOSTAT UP
TO CALL FOR HEAT.
POWER TO S89 (24 VAC
AND 120 VAC NORMAL)
S89E - 10 SEC. MAX.
DELAY FOR SAFE
START CHECK
S89F ONLY—
38 SECOND MAXIMUM
VALVE-ON DELAY
SPARK ACROSS
IGNITER GAP
MAIN BURNER LIGHTS
SPARK STOPS BEFORE
END OF IGNITER TIMING
SYSTEM RUNS UNTIL
CALL FOR HEAT ENDS
CALL FOR HEAT ENDS;
SYSTEM SHUTS OFF
TROUBLESHOOTING ENDS
CHECK LINE VOLTAGE POWER. LOW VOLTAGE TRANSFORMER,
LIMIT CONTROLLER, THERMOSTAT AND WIRING. ALSO, AIR
PROVING SWITCH ON PREPURGE SYSTEMS (SEE WIRING HOOKUPS.)
REPLACE S89.
NO
NO
YES
YES
YES
YES
YES
YES
YES
YES
NO
NO
NO
NO
M19839A
NO
NO
CHECK SPARK
IGNITION CIRCUIT.
SEE COMPONENT
CHECKS.
SPARK OKAY?
• CHECK FOR 120V TO SPARK GENERATOR.
• REPLACE SPARK GENERATOR IF VOLTAGE OK.
• IF NO VOLTAGE, REPLACE S89.
• MAKE SURE IGNITION CABLE
– PROVIDES ELECTRICAL CONTINUITY.
– DOES NOT TOUCH ANY METAL SURFACES.
– CONNECTIONS ARE METAL SURFACES.
– SHOWS NO SIGNS OF MELTING OR BUCKLING.
REPLACE AND SHIELD CABLE IF NECESSARY.
• MAKE SUE BURNER SPARK IGNITER AND S89 GROUND
(BURNER) TERMINAL HAVE EFFECTIVE COMMON
GROUND. POOR OR ERRATC GROUND WILL CAUSE
NUISANCE SHUTDOWNS.
• CHECK FOR CRACKED INSULATOR ON IGNITER OR
FLAME SENSOR. REPLACE DEVICE WITH CRACKED
INSULATOR TO PREVENT SHORT TO GROUND.
NOTE: IF S89 LOCKS OUT, RESET BEFORE CONTINUING.
• CHECK FOR 24 VAC ACROSS VALVE AND VALVE (GROUND)
TERMINALS ON S89. IF NO VOLTAGE, REPLACE S89.
• MAKE SURE IGNITER AND SENSOR ARE PROPERLY
POSITIONED. SEE COMPONENT CHECKS.
• CHECK ELECTRICAL CONNECTIONS BETWEEN S89 AND
GAS CONTROL. IF OKAY, REPLACE GAS CONTROL.
NOTE: IF S89 LOCKS OUT, RESET BEFORE CONTINUING.
• MAKE SURE FLAME CURRENT IS AT LEAST 0.8 MICRO AMPS.
SEE COMPONENT CHECKS.
• MAKE SURE L1 AND L2 ARE CONNECTED TO THE PROPER TERMINALS.
• MAKE SURE FLAME DOES NOT TOUCH SENSOR INSULATOR AND
THAT SENSOR INSULATOR IS BELOW FLAME. EXCESSIVE HEAT
(OVER 1000 F [538 C]) WILL CAUSE SHORT TO GROUND.
RELOCATE SENSOR OR SHIELD INSULATOR IF EXCESS HEAT
IS SUSPECTED.
• IF CHECKS ARE OKAY, REPLACE S89 MODULE.
• CHECK FOR PROPER TEMPERATURE CONTROLLER OPERATION.
• REMOVE VALVE LEAD AT S89: IF VALVE CLOSES, RECHECK
TERMPERATURE CONTROLLER AND WIRING; IF NOT , REPLACE GAS
CONTROL.
REPEAT PROCEDURE UNTIL TROUBLE FREE OPERATION IS OBTAINED.
REPLACE S89.
S89E,F DIRECT SPARK IGNITION CONTROL MODULE
68-0066—4 10
Measure Flame Current
The S89 provides ac power to the flame sensor which the
flame rectifies to direct current. If the flame signal back to the
S89 is less than 0.8 µA, the S89 will shut down the system.
To measure the flame current:
1. Connect a meter, set to the dc microammeter scale, in
series with the flame sensor as shown in Fig. 6. Use the
Honeywell W136 Test Meter or equivalent. Connect the
meter as follows:
a. Disconnect the sensor lead at the S89.
b. Connect the red (positive) meter lead to the S89
sense terminal.
c. Connect the black (negative) meter lead to the free
end of the sensor lead.
2. Restart the system and read the meter. The flame
sensor current must be at least 0.8 µA and steady.
3. If the meter reads less than 0.8 µA or reading is
unsteady, recheck points under Check Flame Sensor
and Igniter, above.
Fig. 6. S89 flame current measurement.
Fig. 7. Check burner flame condition.
GND (BURNER)
24V (GND)
24V
VALVE
VALVE (GND)
SENSE
TO
SENSOR
BLACK
(–)
RED (+)
M19840
FLAME SENSOR CURRENT CHECK–USE µA SCALE
0.8 µA DC MINIMUM
(AND STEADY)
DISCONNECT
WIRE FROM
SENSE
TERMINAL
W136 (OR EQUIV.)
MULTIPURPOSE METER
CHECK BURNER FLAME CONDITION
NOISY LIFTING FLAME
BURNER
WAVING FLAME
SMALL BLUE FLAME
LAZY YELLOW FLAME
GOOD RECTIFYING FLAME
1 IN. (25.4 MM)
1/4 TO 1/2 IN. (6.4 TO 12.7 MM)
M18055
CHECK FOR:
• HIGH GAS PRESSURE
• EXCESS PRIMARY AIR
OR DRAFT
CHECK FOR:
• POOR DRAFT
• EXCESS DRAFT
• HIGH VELOCITY OR
SECONDARY AIR
INSTALL SHIELD IF NECESSARY
.
CHECK FOR:
• CLOGGED PORTS OR
ORIFICE FILTER
• WRONG SIZE ORIFICE
CHECK FOR
LACK OF AIR FROM:
• DIRTY PRIMARY
AIR OPENING
• LARGE PORTS
OR ORIFICES
S89E,F DIRECT SPARK IGNITION CONTROL MODULE
11 68-0066—4
Fig. 8. S89E simplified control system schematic.
M19842A
LIMIT
CONTROL
24 V
THERMOSTAT
SAFE START
CHECK
CIRCUIT
ALTERNATE
LIMIT
ON-OFF
SWITCH
24 V
(GND)
GND
(BURNER)
SENSE
WHITE FLAME
SENSOR
SPARK
IGNITER
RELAY
BLUE
BLUE
BLACK
WIRING EXTERNAL TO S89
WIRING INSIDE S89
2K1
1K2
2K2
SPARK
IGNITER
SPARK
GENERATOR
VALVE
SPARK
IGNITER
RELAY
1K
2K
VALVE
(GND)
SENSOR
CIRCUIT
TIMING
CIRCUIT
DUAL
VALVE
L1
(HOT) L2
68-0066—4 G.R. Rev. 12-03 www.honeywell.com
Automation and Control Solutions
Honeywell International Inc. Honeywell Limited-Honeywell Limitée
1985 Douglas Drive North 35 Dynamic Drive
Golden Valley, MN 55422 Scarborough, Ontario
M1V 4Z9
Printed in U.S.A. on recycled
paper containing at least 10%
post-consumer paper fibers.
S89E,F DIRECT SPARK IGNITION CONTROL MODULE
Fig. 9. S89F simplified control system schematic.
M19843A
LIMIT
CONTROL
AIR PROVING
SWITCH
COMBUSTION
AIR BLOWER
24 V
THERMOSTAT
SAFE START
CHECK/
VALVE-ON
DELAY
CIRCUIT
COMBUSTION
AIR BLOWER
RELAY
ALTERNATE
LIMIT
ON-OFF
SWITCH
24 V
(GND)
GND
(BURNER)
SENSE
WHITE FLAME
SENSOR
SPARK
IGNITER
RELAY
BLUE
BLUE
BLACK
WIRING EXTERNAL TO S89
WIRING INSIDE S89
2K1
1K2
2K2
SPARK
IGNITER
SPARK
GENERATOR
VALVE
SPARK
IGNITER
RELAY
1K
2K
VALVE
(GND)
SENSOR
CIRCUIT
TIMING
CIRCUIT
DUAL
VALVE
L1
(HOT)
L1
(HOT)
L2
L2

This manual suits for next models

1

Other Honeywell Control Unit manuals

Honeywell SV2 Series User manual

Honeywell

Honeywell SV2 Series User manual

Honeywell 39358 User manual

Honeywell

Honeywell 39358 User manual

Honeywell Kromschroder TC 1 User manual

Honeywell

Honeywell Kromschroder TC 1 User manual

Honeywell ControLinks S7999 Operation manual

Honeywell

Honeywell ControLinks S7999 Operation manual

Honeywell A4021 Series User manual

Honeywell

Honeywell A4021 Series User manual

Honeywell LCBS Connect User manual

Honeywell

Honeywell LCBS Connect User manual

Honeywell Braukmann D06G User manual

Honeywell

Honeywell Braukmann D06G User manual

Honeywell 7800 SERIES User manual

Honeywell

Honeywell 7800 SERIES User manual

Honeywell NOTIFIER M710E-CZ User manual

Honeywell

Honeywell NOTIFIER M710E-CZ User manual

Honeywell VC Series User manual

Honeywell

Honeywell VC Series User manual

Honeywell BA295I User manual

Honeywell

Honeywell BA295I User manual

Honeywell NOTIFIER FCM-1 User manual

Honeywell

Honeywell NOTIFIER FCM-1 User manual

Honeywell V5852A Service manual

Honeywell

Honeywell V5852A Service manual

Honeywell EIM Installation guide

Honeywell

Honeywell EIM Installation guide

Honeywell DirectLine DL423 User manual

Honeywell

Honeywell DirectLine DL423 User manual

Honeywell S8921D User manual

Honeywell

Honeywell S8921D User manual

Honeywell FIRE-LITE ALARMS CRF-300 User manual

Honeywell

Honeywell FIRE-LITE ALARMS CRF-300 User manual

Honeywell NK298S User manual

Honeywell

Honeywell NK298S User manual

Honeywell VR8305 User manual

Honeywell

Honeywell VR8305 User manual

Honeywell 7800 SERIES User manual

Honeywell

Honeywell 7800 SERIES User manual

Honeywell VISTA User manual

Honeywell

Honeywell VISTA User manual

Honeywell MAXON 8730 Series User manual

Honeywell

Honeywell MAXON 8730 Series User manual

Honeywell NetAXS-123 User manual

Honeywell

Honeywell NetAXS-123 User manual

Honeywell NK295C User manual

Honeywell

Honeywell NK295C User manual

Popular Control Unit manuals by other brands

Elsner MSG1-UP Technical specifications and installation instructions

Elsner

Elsner MSG1-UP Technical specifications and installation instructions

Manitowoc Multiplex CO2 Control Kit instructions

Manitowoc

Manitowoc Multiplex CO2 Control Kit instructions

Powers HYDROGUARD MM430 Series Technical instructions

Powers

Powers HYDROGUARD MM430 Series Technical instructions

SIGNALCORE SC5406B Operating & programming manual

SIGNALCORE

SIGNALCORE SC5406B Operating & programming manual

Stobag SRCR 100 A Instructions and warnings for the fitter

Stobag

Stobag SRCR 100 A Instructions and warnings for the fitter

NXP Semiconductors freescale TWR-MCF51JG user manual

NXP Semiconductors

NXP Semiconductors freescale TWR-MCF51JG user manual

Siemens SINUMERIK 840D Description of Functions

Siemens

Siemens SINUMERIK 840D Description of Functions

On Automation EC1E instruction manual

On Automation

On Automation EC1E instruction manual

Toshiba Adjustable Speed Drive H7 Series specification

Toshiba

Toshiba Adjustable Speed Drive H7 Series specification

KSB Cervomatic EDP.2 Installation & operating manual

KSB

KSB Cervomatic EDP.2 Installation & operating manual

Fasel Elektronik FCU2000-IR series operating manual

Fasel Elektronik

Fasel Elektronik FCU2000-IR series operating manual

Lucent Technologies Stinger Guide

Lucent Technologies

Lucent Technologies Stinger Guide

Watts NVFN Series Technical data sheet

Watts

Watts NVFN Series Technical data sheet

Nortel 8660 SDM Installing

Nortel

Nortel 8660 SDM Installing

National Instruments SCXI SCXI-1102 Application note

National Instruments

National Instruments SCXI SCXI-1102 Application note

MT 4156 quick start guide

MT

MT 4156 quick start guide

Flowserve 94 Series Installation, operation and maintenance instructions

Flowserve

Flowserve 94 Series Installation, operation and maintenance instructions

Samson 41-23 Series Mounting and operating instructions

Samson

Samson 41-23 Series Mounting and operating instructions

manuals.online logo
manuals.online logoBrands
  • About & Mission
  • Contact us
  • Privacy Policy
  • Terms and Conditions

Copyright 2025 Manuals.Online. All Rights Reserved.