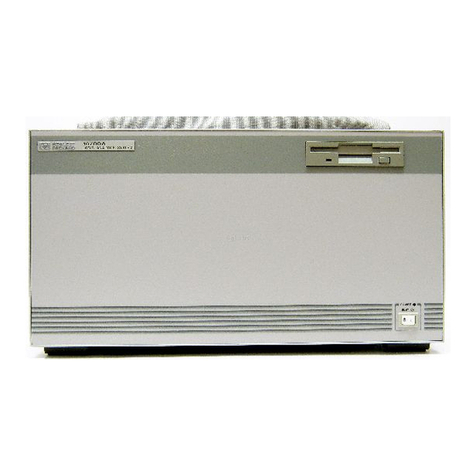
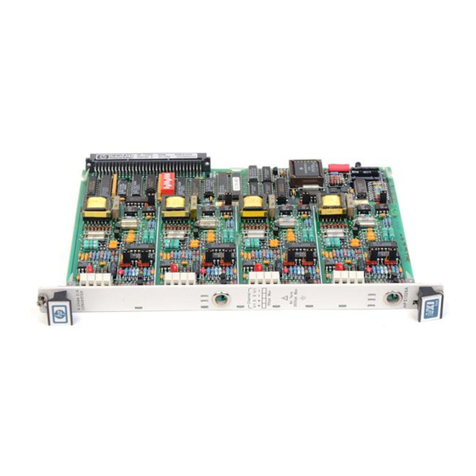
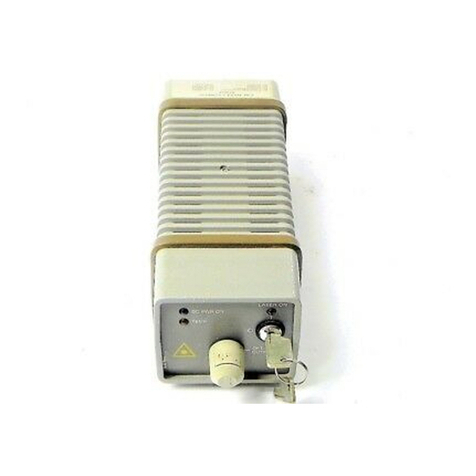
HP 54753A User manual

User’s Guide
Publication number 54753-97010
Second edition, January 1999
For Safety information, Warranties, and Regulatory information, see pages
behind the index
© Copyright Hewlett-Packard Company 1999
All Rights Reserved
HP 54753A and HP 54754A TDR
Plug-in Modules

ii
HP 54753A and HP 54754A Plug-in Modules
The HP 54753A and 54754A TDR plug-in modules provide you with TDR
and TDT measurement features. In addition to the TDR and TDT
measurement features, the TDR plug-ins provide two accurate
oscilloscope measurement channels with user selectable bandwidths of
12.4 or 18 GHz. The lower bandwidth mode provides excellent
oscilloscope noise performance for accurate measurement of small
signals. The high bandwidth mode provides high-fidelity display and
measurement of very high-speed waveforms.
The HP 54753A TDR plug-in module provides:
• Automatic and manual single-ended TDR and TDT measurement
capability
• Automatic and manual waveform, histogram, FFT, waveform math,
eye pattern measurements, statistical measurements, and limit
testing capabilities.
• User selectable 12.4 or 18 GHz bandwidth (Channel 1).
• User selectable 12.4 or 20 GHz bandwidth (Channel 2).
• 2.5 GHz bandwidth trigger channel.
• 3.5 mm (m) connectors.
The HP 54754A TDR plug-in module provides:
• Automatic and manual single-ended and differential TDR and TDT
measurement capability.
• Automatic and manual waveform, histogram, FFT, waveform math,
eye pattern measurements, statistical measurements, and limit
testing capabilities.
• User selectable 12.4 or 18 GHz bandwidth.
• 2.5 GHz bandwidth trigger channel.
• 3.5 mm (m) connectors.

iii
Accessories Supplied
The following accessories are supplied with the TDR plug-in modules:
One 50 ohm SMA (m) terminator, HP part number 1250-2153
Two SMA shorts (m), HP part number 0960-0055
TDR Demo Board, HP part number 54754-66503
One User’s Guide
One Programmer’s Guide
One Service Guide
Accessories Available
The following accessories are available for use with the TDR plug-in
modules.
Options
Option 0B1 Additional set of user documentation
Option 001 HP 83480A mainframe operating system upgrade
Option 002 HP 54750A mainframe operating system upgrade
Option 003 Delete demo board
HP 54755A TDR option for HP 83480A mainframe operating system upgrade
Optional Accessories
HP 10086A ECL terminator
HP 54006A 6 GHz divider probe
HP 54007A accessory kit
HP 54008A 22 ns delay line
HP 54118A 500 MHz to 18 GHz trigger
HP 54701A 2.5 GHz Active Probe with Option 001
Connection Devices
SMA (f-f) adapter, HP part number 1250-1158
APC 3.5 (f-f) adapter, HP part number 1250-1749

iv
In This Book
This book is the operating manual for the HP 54753A and HP 54754A TDR plug-
in modules, and contains 13 chapters.
General Information Chapter 1 contains overview information, menu
and front panel key information, trigger information, and calibration
information. Chapter 2 contains important information on the care of the
TDR plug-in connectors.
TDR Front Panel and Menu Keys Chapter 3, 4, 5 and 6 describe the
front panel keys and all the menu keys.
Task Oriented Examples Chapter 7 contains example single-ended
TDR measurements using a demo board included with each TDR plug-in
module. Chapter 8 contains example differential TDR measurements.
TDR Theory Chapters 9, 10, and 11 contain in-depth theory of TDR
transmission lines and how to use TDR in designing systems.
Specifications and Characteristics Chapter 12 contains the
specifications and characteristic for the TDR plug-in modules.
Problems and Error Messages Chapter 13 contains troubleshooting
information and error messages.

Contents
Contents-1
1 The Instrument at a Glance
Menu and Key Conventions 1-3
The HP 54753A, 54754A TDR Plug-In Modules 1-4
Plug-in Module Purpose 1-4
Front Panel of the Plug-in Module 1-4
Getting the Best Performance 1-5
Installing a Plug-in Module 1-6
Trigger 1-6
2 Care and Handling of Precision Connectors
3.5 mm Connector Care 2-3
Connector Wear 2-3
Operator Skill 2-3
Device Specifications 2-3
Accuracy Considerations 2-6
Visual Inspection 2-8
Mechanical Inspection 2-8
Connecting the Devices 2-16
3 Setup Channel Menu
Displaying the Setup Channel menu 3-4
Display 3-4
Scale 3-4
Offset 3-5
Bandwidth. . . 3-6
Alternate scale. . . 3-6
Calibrate . . . 3-8
Calibration Overview 3-12
Factory Mainframe Calibration 3-13
User Calibrations 3-16
4 HP 54753A TDR/TDT Setup Menu
Displaying the TDR/TDT Setup Menu 4-4
Stimulus 4-4
TDT 1 dest 4-4

Contents
Contents-2
TDR 1 dest 4-5
Normalize response . . . 4-5
TDR rate automatic . . . (250 kHz) 4-8
Preset TDR/TDT 4-8
5 HP 54754A TDR/TDT Setup Menu
Displaying the TDR/TDT Setup Menu 5-7
Stimulus 5-7
TDT 1 dest 5-8
Normalize response . . . 5-8
TDR rate automatic . . . (250 kHz) 5-11
Preset TDR/TDT 5-12
TDT 2 dest 5-13
Normalize response . . . 5-13
TDR rate automatic . . . (250 kHz) 5-16
Preset TDR/TDT 5-17
TDT 1 dest 5-18
TDT 2 dest 5-18
Normalize 1 response . . .
Normalize 2 response . . . 5-19
TDR rate automatic . . . (250 kHz) 5-21
Preset TDR/TDT 5-22
TDR/TDT 5-23
TDR response 1 5-23
TDR response 2 5-24
TDT response 1 5-25
TDT response 2 5-25
Establish ref plane 5-26
TDR rate automatic . . . (250 kHz) 5-27
Preset TDR/TDT 5-28
TDT 1 dest 5-30
TDR 1 dest 5-30
Normalize response . . . 5-31
TDR rate automatic . . . (250 kHz) 5-34
Preset TDR/TDT 5-34
6 Measure and Other TDR Specific Menus
TDR/TDT Measure Menu 6-4

Contents
Contents-3
Marker Menu 6-9
Reference 6-9
Marker units . . . 6-9
Response Menu Items 6-10
7 Single-ended TDR Measurements
Single-ended TDR Features 7-3
Establishing the Reference Plane and Normalizing 7-8
Measuring Transmission Line Impedance 7-19
Measuring Transmission Line Percent Reflection 7-25
Measuring Excess L/C 7-32
Measuring the Distance to a Discontinuity 7-37
8 Differential TDR Measurements
Differential TDR Features 8-3
Measuring Differential and Common Mode Impedance 8-5
Making Differential TDT Measurements 8-15
9 TDR Fundamentals
Propagation on a Transmission Line 9-4
Step Reflection Testing 9-6
Instrument Configuration 9-20
10 Improving Time Domain Network Measurements
Sources of Measurement Error 10-3
Removing Measurement Errors 10-6
11 Transmission Line Theory Applied to Digital Systems
Transmission Line Design 11-2
Signal Propagation Delay for Microstrip and Strip Lines with Distributed or Lumped
Loads 11-15
Microstrip Transmission Line Techniques Evaluated Using TDR Measurements 11-
21
References 11-38

Contents
Contents-4
12 Specifications and Characteristics
Specifications 12-3
Vertical Specifications 12-4
Environmental Specifications 12-5
Power Requirements 12-6
Weight 12-6
Characteristics 12-6
Trigger Input Characteristics 12-6
Product Regulations 12-7
13 In Case of Difficulty
If You Have Problems 13-3
If the Mainframe Does Not Operate 13-3
If the Plug-in Does Not Operate 13-4
Error Messages 13-5

1
The Instrument at a Glance

1-2
The Operating the Instrument
CAUTION The input circuits canbe damaged byelectrostatic discharge (ESD). Therefore,
avoid applying static discharges to the front-panel input connectors. Before
connecting any coaxial cable to the connectors, momentarily short the center
and outer conductors of the cable together. Avoid touching the front-panel
input connectors without first touching the frame of the instrument. Be sure
the instrument is properly earth-grounded to prevent buildup of static charge.
What you’ll find in this chapter
This chapter describes:
• the key conventions used in this manual
• the front panel, rear panel and keys that do
not
display menus on the screen
Understanding the information in this chapter will help you successfully operate
the instrument.

The Instrument at a Glance
Menu and Key Conventions
1-3
Menu and Key Conventions
The keys labeled Trigger, Disk, and Run are all examples of front-panel keys.
Pressing some front-panel keys accesses menus of functions that are displayed
along the right side of the display screen. These menus are called softkey
menus.
Softkey menus list functions other than those accessed directly by the front-
panel keys. To activate a function on the softkey menu, press the unlabeled key
immediately next to the annotation on the screen. The unlabeled keys next to
the annotation on the display are called softkeys.
Additional functions are listed in blue type above and below some of the front-
panel keys. These functions are called shifted functions. To activate a shifted
function, press the blue front-panel Shift key and the front-panel key next to
the desired function.
Throughout this manual front-panel keys are indicated by bold lettering of the
key label, for example, Time base. Softkeys are indicated by italic lettering of
the key label, for example,
Scale
. The softkeys displayed depend on the front-
panel key pressed and which menu is selected. Shifted functions are indicated
by the front-panel Shift key followed by the shaded shifted function, for example
the Local function (above the Stop/Single front-panel key) will be shown as Shift,
Local.
A softkey with On and Off in its label can be used to turn the softkey’s function
on or off. To turn the function on, press the softkey so On is highlighted. To
turn the function off, press the softkey so Off is highlighted. An On or Off softkey
function will be indicated throughout this manual as:
Test
On.
A softkey such as
Sweep Triggered Freerun
offers you a choice of functions. In
this case you could choose Triggered by pressing the softkey until Triggered is
highlighted, or choose Freerun by pressing the softkey until Freerun is
highlighted. Softkey choices will be indicated throughout this manual as:
Sweep
Triggered Freerun
Triggered.
When some softkeys, such as
Calibrate Probe
, are pressed the first time, a
calibration will be made. Some softkeys, such as
Offset
require the entry of a
numeric value. To enter or change the value, use the general purpose knob
located below the front-panel Measure section.

The Instrument at a Glance
The HP 54753A, 54754A TDR Plug-In Modules
1-4
The HP 54753A, 54754A TDR Plug-In Modules
The TDR plug-in modules are two of several plug-in modules available for the
HP 83480A and HP 54750A mainframes.
Plug-in Module Purpose
The purpose of the plug-in module is to provide measurement channels,
including sampling, for the mainframe. The plug-in module scales the input
signal, sets the bandwidth of the system, and allows the offset to be adjusted so
the signal can be viewed. The output of the plug-in module is an analog signal
that is applied to the ADCs on the acquisition boards inside the mainframe. The
plug-in module also provides a trigger signal input to the time base/trigger board
inside the mainframe.
Front Panel of the Plug-in Module
The plug-in module takes up two, of the four, mainframe slots. The front panel
of the plug-in module has two channel inputs and an external trigger input. The
front panel also has two probe power connectors for HP 54700-series probes,
an auxiliary power connector for general purpose use, and a key for each
channel that displays the softkey menu. The softkey menu allows you to access
the channel setup features of the plug-in module for the selected input.
The front-power Probe Power connector allows automatic channel scaling and
probe calibration with HP 54700 series probes. The front-panel Aux Power
connector provides only power to HP 54700 series probes for use as a trigger
input. Probe calibration and scaling are not required for a trigger input.

The Instrument at a Glance
Getting the Best Performance
1-5
Figure 1-1
Front panel of the plug-in module.
Getting the Best Performance
To ensure you obtain the specified accuracy, you must perform a plug-in module
vertical calibration. The calibration must also be performed when you move a
plug-in module from one slot to another or to a different mainframe. Refer to
"Performing a Plug-in Module Vertical Calibration" in Chapter 3 for information
on performing a plug-in module vertical calibration.

The Instrument at a Glance
Installing a Plug-in Module
1-6
Installing a Plug-in Module
You do not need to turn off the mainframe to install or remove a plug-in module.
The plug-in module can be installed in slots 1 and 2 or 3 and 4 on the HP 83480A,
54750A mainframe. The plug-in module will not function if it is installed in slots
2 and 3.
To make sure the instrument meets all of the published specifications, there
must be a good ground connection from the plug-in module to the mainframe.
The RF connectors on the rear of the plug-in module are spring loaded, so finger-
tighten the knurled screw on the front panel of the plug-in module to make sure
the plug-in is securely seated in the mainframe.
CAUTION Do not use extender cables to operate the plug-in module outside of the
mainframe. The plug-in module and/or mainframe can be damaged by
improper grounding when using extender cables.
Trigger
The external trigger level range for this plug-in module is ±1 V. The trigger
source selection follows the slots the plug-in moduleis installedin. For example,
if the plug-in module is installed in slots 1 and 2, then the trigger source is listed
as trigger 2. If it is installed in slots 3 and 4, then the trigger source is listed as
trigger 4. Because the external trigger capability of this module is restricted to
signals of 2.5 GHz or less, use of the HP 54753A and HP 54754A modules with
Option 100, extended trigger, is not recommended.
CAUTION The maximum safe input voltage is ±2 V + peak ac (+16 dBm). Therefore, to
avoid damaging the trigger input circuitry, do not apply any voltage outside
this range.
CAUTION The input circuits can be damaged by electrostatic discharge (ESD).
Therefore, avoid applying static discharges to the front-panel input connectors.
Before connecting any coaxial cable to the connectors, momentarily short the
center and outer conductors of the cable together. Avoid touching the front-
panel input connectors without first touching the frame of the instrument. Be
sure the instrument is properly earth-grounded to prevent buildup of static
charge.
!

2
Care and Handling of Precision
Connectors

2-2
The Care and Handling of Precision
Connectors
CAUTION The inputcircuits can be damagedby electrostatic discharge (ESD). Therefore,
avoid applying static discharges to the front-panel input connectors. Before
connecting any coaxial cable to the connectors, momentarily short the center
and outer conductors of the cable together. Avoid touching the front-panel
input connectors without first touching the frame of the instrument. Be sure
the instrument is properly earth-grounded to prevent buildup of static charge.
What you’ll find in this chapter
This chapter describes:
• 3.5 mm connector care
• connector wear
• device specifications
• accuracy considerations
• visual inspection
• mechanical inspection
• connecting devices
Understanding the information in this chapter will help you successfully operate
the instrument.

Care and Handling of Precision Connectors
3.5 mm Connector Care
2-3
3.5 mm Connector Care
This chapter shows you how to take care of 3.5 mm connectors so that you can
maintain high levels of accuracy, repeatability, and system performance. Taking
appropriate care of your connectors will also extend their service life. Most of
the information can also be applied to 2.4 mm connectors. For additional
information on 2.4 mm connectors, refer to operating note "2.4 mm Adapters
and Calibration Accessories" HP part number 11900-90903.
Connector Wear
Connector wear will eventually degrade performance. The calibration devices,
which are typically used only a few times each day, should have a very long life.
However, because the connectors often undergo many connections a day, they
wear rapidly. Therefore, it is essential that all connectors on the HP 54753A or
HP 54754A TDR plug-in modules be inspected regularly, both visually (with a
magnifying glass) and mechanically (with a connector gage), and replaced as
necessary. Procedures for visual and mechanical inspection are given in the
next section of this manual. It is easier and cheaper to replace a worn adapter
than a worn channel connector.
Operator Skill
Operator skill in making good connections is essential. The mechanical
tolerances of the precision 3.5 mm connectors used in the HP 54007A kit are
two or three times better than the tolerances in regular 3.5 mm connectors.
Slight errors in operator technique that would go unnoticed with regular
connectors often appear with precision connectors in the calibration kit.
Incorrect operator technique can often result in lack of repeatability. Carefully
study and practice the connection procedures that are explained later in this
manual until your calibration measurements are consistently repeatable.
Device Specifications
Electrical specifications depend upon several mechanical conditions. A 3.5 mm
connector is a precision connector dedicated to very specific tolerances. SMA
connectors are not precision mechanical devices. They are not designed for
repeated connections and disconnections and are very susceptible to

Care and Handling of Precision Connectors
Device Specifications
2-4
mechanical wear. They are often found, upon assembly, to be out of
specification. This makes them potentially destructive to any precision 3.5 mm
connectors to which they might be mated.
Use extreme caution when mating SMA connectors with 3.5 mm precision
connectors. Prevent accidental damage due to worn or out-of-specification
SMA connectors. Such connectors can destroy a precision 3.5 mm connector,
even on the first connection.
Hewlett-Packard recommends that you keep three points clearly in mind when
you mate SMA and precision 3.5 mm connectors: SMA inspection, alignment,
and mechanical mismatch.
SMA Inspection
Before mating an SMA connector (even a new one) with a precision 3.5 mm
connector, carefully inspect the SMA connector, both visually and mechanically
with a precision connector gauge designed to measure SMA connectors. A male
SMA connector pin that is too long can smash or break the delicate fingers on
the precision 3.5 mm female connector. Gauging SMA connectors is the most
important step you can take to prevent damaging your equipment.
Alignment
Be careful when aligning the connectors. Push the two connectors together
with the male contact pin precisely concentric with the female. Do not
overtighten or rotate either center conductor. Turn only the outer nut of the
male connector and use a torque wrench (5 lb.in., 60 N-cm) for the final
connection. Note that this torque is less than that when mating precision 3.5
mm connectors with each other. A torque wrench suitable for SMA connectors
preset to 5 lb.in. is available (HP part number 8710-1582, CD 0).
The TDR plug-in modules come with adaptors already installed to prevent
damage to the channel connectors. Then, if accidental damage does occur, the
adapter is all that needs to be replaced. It is easier and cheaper to replace a
damaged adapter than a channel connector. SMA connectors can then be mated
with precision 3.5 mm connectors without difficulty or fear of expensive and
time-consuming repairs.
Mechanical Mismatch
Significant structural and dimensional differences exist between these two
types of connectors. Precision 3.5 mm connectors, also known as APC-3.5
connectors, are air-dielectric devices. Only air exists between the center and
outer conductors. The male or female center conductor is supported by a plastic
"bead" within the connector. In SMA connectors, a plastic dielectric supports

Care and Handling of Precision Connectors
Device Specifications
2-5
the entire length of the center conductor. In addition, the diameter of both the
center and outer conductors of an SMA connectors differ from that of a precision
3.5 mm connector.
If these precautions and recommendations are followed, SMA connectors can
be mated with 3.5 mm precision connectors without fear of expensive and time
consuming repairs.
Figure 2-1
SMA and a Precision 3.5 mm Connectors
When an SMA connector is mated with a precision 3.5 mm connector, the
connection exhibits a continuity mismatch (SWR), typically about 1.10 at 20
GHz. This mismatch is less than when precision 3.5 mm connectors are mated.
Keep this fact in mind when making measurements on SMA and precision 3.5
mm coupled junctions.

Care and Handling of Precision Connectors
Accuracy Considerations
2-6
Figure 2-2
Typical SWR of SMA and Precision 3.5 mm Connectors
Accuracy Considerations
Accuracy requires that 3.5 mm precision connectors be used. However, SMA
connectors can be used if special care is taken when mating the two, and all
connectors are undamaged and clean. Before each use, the mechanical
dimensions of all connectors must be checked with a connector gauge to make
sure that the center conductors are positioned correctly. All connections must
be made for consistent and repeatable mechanical (and therefore electrical)
contact between the connector mating surfaces.
Carefully study and practice all procedures in this chapter until you can
successfully perform them repeatedly. Accuracy and repeatability are critical
for good high frequency measurements. Note that the device connection
procedures differ in several important ways from traditional procedures used
in the industry. Hewlett-Packard procedures have been developed through
careful experimentation.
This manual suits for next models
1
Table of contents
Other HP Control Unit manuals

HP
HP HPE FM 2072 User manual

HP
HP DESKJET 1050 Product manual

HP
HP JG589A Assembly instructions

HP
HP HP E1361A User manual

HP
HP 81533B User manual

HP
HP 13255 Manual

HP
HP 70427A User manual

HP
HP 16600A Series User manual

HP
HP ProCurve PCM+ Agent on ONE zl Module Assembly instructions

HP
HP R6000 - UPS - Lead Acid Expandable User manual

HP
HP E1328A User manual

HP
HP HP 85091A User manual

HP
HP HP 81531A User manual

HP
HP Synergy 480 Gen9 User manual

HP
HP 7500 48p 1000BASE-T w/PoE+ SE Mod Installation instructions

HP
HP 83487A User manual

HP
HP 81541MM Owner's manual

HP
HP 3484A Service manual

HP
HP 3497A Installation manual

HP
HP HP 81554SM Owner's manual