HTC HTC EVO 3D Specification sheet

Get
Started
All you need to know to get going.

Welcome!
Sprint is committed to developing technologies that give you the ability to get
what you want when you want it, faster than ever before. This booklet introduces
you to the basics of getting started with Sprint and your HTC EVO 3D.
Visit sprint.com/support for the complete User Guide, along with videos, tutorials,
and community forums for your phone.
Only on the Now Network.

Using This Guide
Get Ready − page 1 − Find out what
you need to do before you use your
device the first time, including inserting
a battery and activating Sprint service
on your device.
Android Basics − page 4 − Learn
some basics about how to move
around on your device, use the home
screen, and enter text. If you’re familiar
with Android devices, you can probably
skip these pages (although a refresher
course never hurt anyone).
Use Your Device − page 12 − Take
advantage of your device’s features
and Sprint services, from the basics
(Making Calls) to the more advanced
(using Facebook, Qik, and more).
Tools & Resources − page 33 − Find
useful tips for your device and discover
resources and other helpful Sprint
information. For additional information
including the full User Guide, videos,
tutorials, and community forums, visit
sprint.com/support.
Using This Guide
This Get Started guide is designed to help you set up and use your new
HTC EVO 3D. It’s divided into four sections to help you find the information you
need quickly and easily.

visit sprint.com/support for complete user guide 1
Your HTC EVO 3D
Headset Jack
Charger/Accessory
Jack
Camera
lenses
Dual flash
Volume
Buttons
Camera button
2D/3D switch
Power Button
Display
Screen
Earpiece
Front camera
Back
Key
Search
Key
Home
Key
Menu
Key

Get Ready
visit sprint.com/support for complete user guide 1
Install the Battery
1. Insert a coin or other flat object into the slot at the
bottom of the battery compartment cover and lift
the cover off gently.
2. Insert the battery, contacts end first, and gently
press into place.
3. Replace the cover, making sure all tabs have
seated and there are no gaps.
Charge the Battery
1. Plug the USB connector of the AC adapter into
the charger/accessory jack on the upper left side
of your device.
2. Plug the AC adapter into an electrical outlet.
Turn the Device On
•Press the power button ( ) to turn your
device on (black button located at the top of the
device on the right).
Unlock the Screen
•Press and hold the unlock ring and then
drag it upward (until the whole ring appears
onscreen).
Get Your Device Ready

2
visit sprint.com/support for complete user guide 3
Activate Your Device
•If you purchased your device at a Sprint Store, it
is probably activated and ready to use.
•If you received your device in the mail, and it is a
new Sprint account or a new phone number, your
device is designed to activate automatically when
you first turn it on. You will see a Hands Free
Activation screen at startup. When it’s finished, tap
OK to continue. To confirm your activation, make a
phone call.
•If you received your device in the mail and it
is going to be activated on an existing
number (you’re swapping phones), go to
sprint.com/activate and follow the instructions.
When you have finished, make a phone call to
confirm your activation. If your device is still not
activated or you do not have access to the Internet,
contact Sprint Customer Service at 1-888-211-
4727 for assistance.
Turn the Screen On and Off
•To quickly turn the display screen off, press the
power button on top of the device ( ).
•To turn the screen on and display the unlock
screen, press .
Turn the Device Off
•Press and hold and then tap
Power off > OK to turn the device off.
Activate Your Device

2
Get Ready
visit sprint.com/support for complete user guide 3
When you turn on your device for the first time,
you will get to a setup application that allows you
to set up various options and applications,
including setting up your Google™ account.*
Complete the Setup Application
1. When the device is first turned on, you will see
the Hands Free Activation screen, which may
be followed by a PRL Update screen and a
Firmware Update screen. Tap OK after each of
these steps.
2. When you see the setup application, follow the
instructions to complete each step. To skip any
section, tap Skip or Next.
•Using the onscreen keyboard – Complete the
steps to learn how to use the onscreen
keyboard features such as auto-correct and
accented and special characters.
•Use Google location – Tap the check marks to
select your Google location options.
•Set up accounts – Follow the instructions to
set up your email accounts: Google account,
corporate Microsoft Exchange ActiveSync
account, and Other mail accounts as needed.
•Set up social networks - Quickly set up your
Facebook, Flickr, and Twitter accounts on your
device.
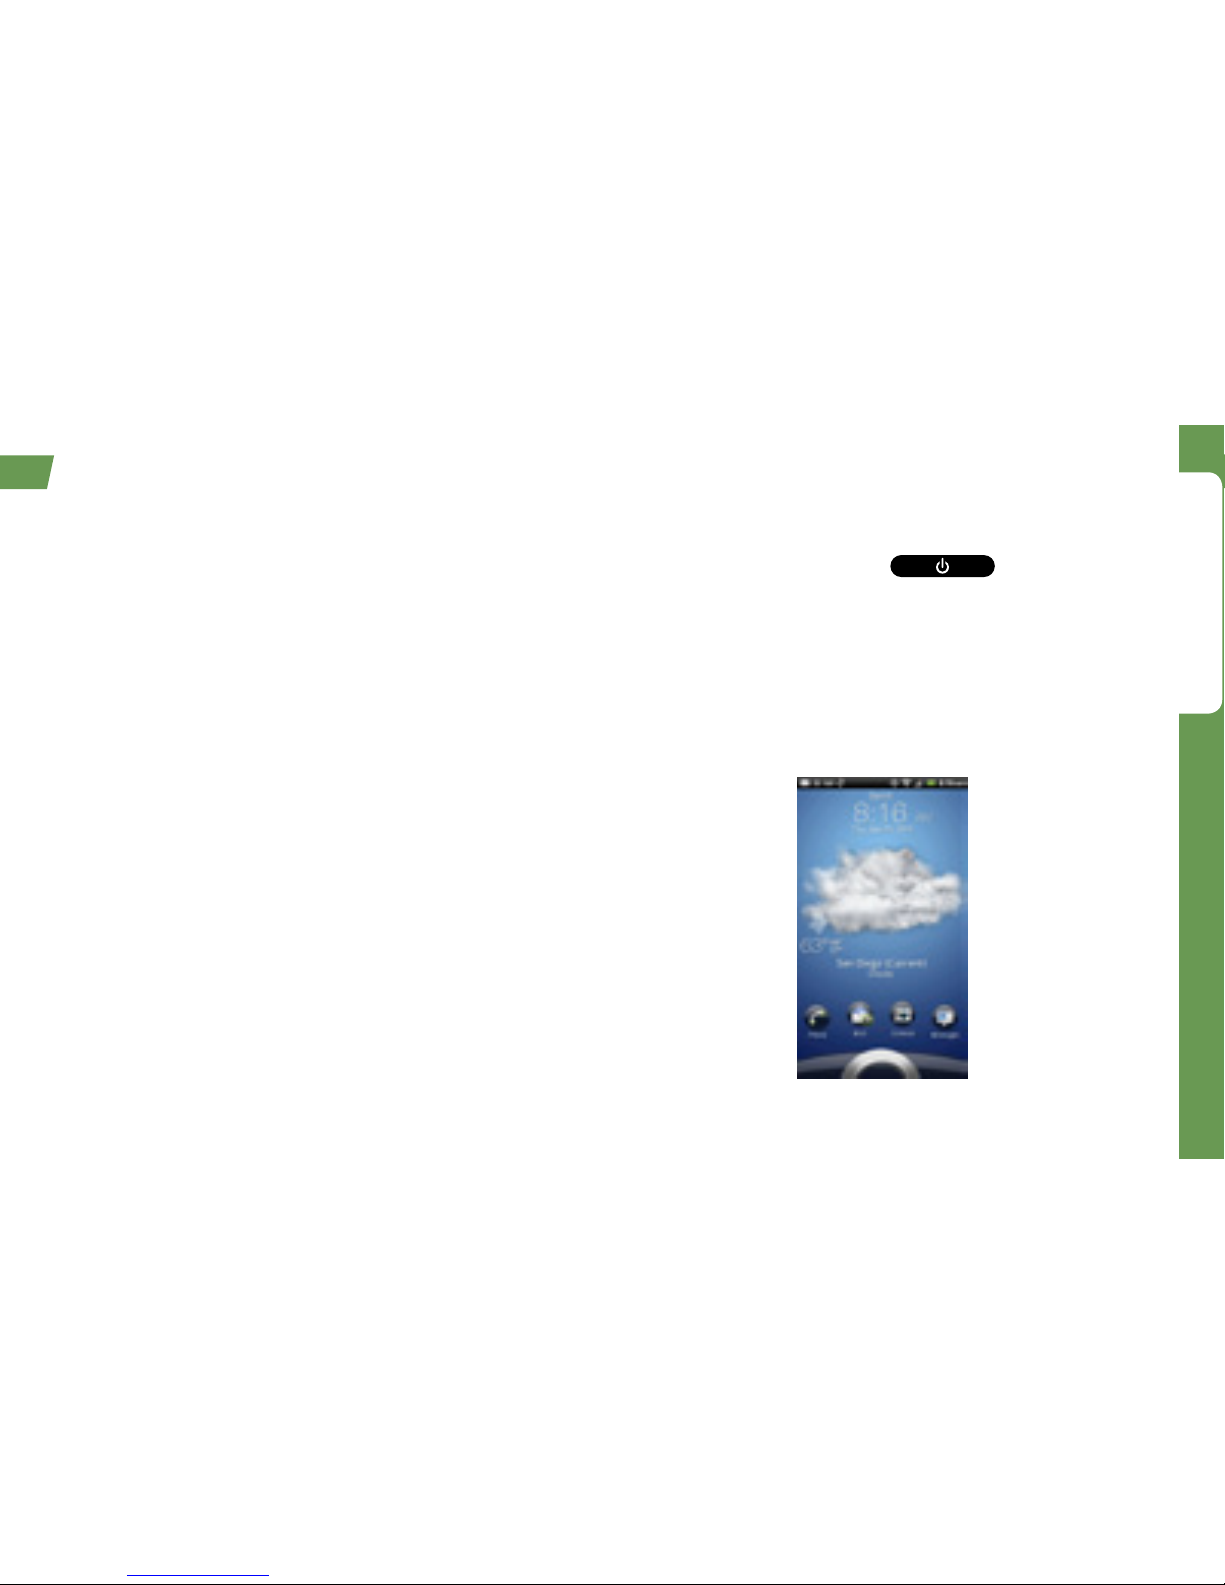
3. Tap Next when you have finished setup. You will
see your home screen.
Launch Setup Application at Any Time
To return to the setup application at any time after
you’ve already used your device:
•Press and then tap > Setup.
* You do not need to sign up for a Google account to use
your device; however, to download applications from the
Android Market, you must link your device to a Google
account.
Setup Application

4
visit sprint.com/support for complete user guide 5
Move Around Your Device’s Menus
and Screens Using Gestures
Your device’s touchscreen lets you control
everything through various types of touches,
or gestures.
Tap: When you want to type using the onscreen
keyboard, select items such as application and
settings icons, or press onscreen buttons, simply
tap them with your finger. A light touch works best.
Press and hold: To open the available options for
an item (for example, a link in a Web page),
simply press and hold the item.
Flick: Move your finger in lighter, quicker strokes
than swiping. This finger gesture is always used in
a vertical motion, such as when flicking through
contacts or a message list.
Tap
Flick
Press
and hold
Android Basics: Getting Around Your Device

4
Android Basics
visit sprint.com/support for complete user guide 5
Swipe or slide: Quickly drag your finger vertically
or horizontally across the screen.
Drag: Press and hold your finger with some
pressure before you start to move it. Do not
release your finger until you have reached the
target position.
Pinch: “Pinch” the screen using your thumb and
forefinger to zoom out or zoom in when viewing a
picture or a Web page. (Move fingers inward to
zoom out and outward to zoom in.)
Rotate: Automatically change the screen
orientation from portrait to landscape by turning
the device sideways. (To disable auto-rotation,
press > Settings > Display and clear the
Auto-rotate screen check box.)
Swipe, Slide or
Drag
Rotate
Pinch

6
visit sprint.com/support for complete user guide 7
Viewing Your Home Screen
Your device’s Home screen extends horizontally to
six additional screens. This gives you room to
customize your device and put the things you
need front and center, just a swipe away.
•To display the main (center) Home screen,
press from any screen.
•To view extended screens, swipe the screen left or
right. There are three additional screens on each
side of the main Home screen.
•To quickly select an extended screen, press
from the Home screen or pinch an extended
screen to display thumbnails of all seven screens.
Tap a thumbnail to display the screen.
Your Home Screen

6
Android Basics
visit sprint.com/support for complete user guide 7
Add Items to Your Home Screen
1. Press and tap Personalize.
2. On the Personalize screen in the Add Items to
Home section, tap the item you wish to add
(such as Widget or Shortcut).
For example, to add a Facebook widget:
1. From the Personalize screen, tap Widget >
Facebook.
2. If the widget is too large for the free space on the
screen, press , slide to a screen with sufficient
space, and tap a free space on the screen.
From your new Facebook widget, you can
access your Profile, Friends, Photos, and many
other of your favorite Facebook features.
Customize Your Home Screen
Use your device’s Personalize menu to customize
your Home screen appearance.
1. Press and tap .
2. Tap Scene,Skin,or Wallpaper in the Personalize
display section.
•Scene lets you quickly apply a preset screen
layout with predetermined widgets and apps.
•Skin lets you change the appearance of the
icons and other elements that appear on above
layer above the wallpaper.
•Wallpaper lets you select a Home screen
background from a library or your gallery.
3. Select your options, and tap Preview to see your
changes, or tap Apply to make the changes and
return to the Home screen. key as needed to
return to the Home screen.)
Note: You can customize and save your own scenes
by adding or rearranging Home screen items and
pressing > Scenes > Current (unsaved) > Save.
Enter a scene name and tap Done to finish saving.

8
visit sprint.com/support for complete user guide 9
Status Bar
The status bar at the top of the Home screen lets
you quickly see both your device status
(connections, signal strength, battery, GPS) and
any current notifications.
Notifications Panel
When you see a notification icon on the left side
of the status bar, drag down on the status bar and
make sure the Notifications tab is selected. Tap a
notification to open the related application, such
as alerts, messages, or events.
To close the panel, drag the bottom bar up or
press .
Your Home Screen
Tip: To quickly access
many of your device’s
settings, select the Quick
settings tab instead after
dragging down on the
status bar.
Status Bar

8
Android Basics
visit sprint.com/support for complete user guide 9
EVO Buttons and Keys
The bottom front of your device contains a row of
four static keys that let you perform specific
functions. Above the buttons, there is a program-
dependent row of keys (they’re always available
from the unlocked Home screen).
•Home Key ( ) – Press to return to the main
Home screen.
•Menu Key ( ) – Press to open context-specific
menus.
•Back Key ( ) – Press to return to the previous
screen view.
•Search Key ( ) – Press to launch a search
within the current screen or application.
•Phone Button ( ) – Tap to open the
phone screen.
•Applications Button ( ) – Tap to display the
applications list.
•Personalize Button ( ) – Tap to add shortcuts,
widgets, or folders to the current Home screen.
Open Applications
•If an application is on one of your Home screens,
just tap it to open it.
•If an application is not available from your Home
screen, press (if you’re not already on the
Home screen), tap to display the
applications list, and then tap the application from
the alphabetical list. You may have to scroll down
to find the application you’re looking for.
Buttons and Keys
Home
Key
Applications
Button
Personalize
Button
Menu
Key
Back
Key
Search
Key

10
visit sprint.com/support for complete user guide 11
The Touch Input Keyboard
When you select a field that requires text or
numbers, the Touch Input keyboard appears so
you can enter the information, type your message,
update your Facebook status, or send out a Tweet.
(If you don’t see the keyboard when, for instance,
you’re entering contact information, just touch the
field you’re working on to bring it up.) The Touch
Input keyboard can be used in either portrait or
landscape mode.
Text Entry
Entering text with the Touch Input keyboard is easy:
just tap the letters to type the words. Here are a few
tips to help you:
•To enter the alternate (gray) character on a key
(such as numbers or punctuation), press and hold
the key.
•Tap to enter all numbers or symbols.
•Tap (shift) to enter uppercase letters. (Tap twice
for caps lock.)
•Tap (enter) to create a new line or paragraph.
•Tap (backspace) to delete the previous character.
•Tap (space) to enter a space. When using
predictive text, tapping accepts the suggested
word and adds a space.
•Tap to hide the keyboard.
Using Trace to Enter Text
Instead of tapping the keys on the Touch Input
keyboard, you can “trace” through a word’s letters to
enter that word. For example, if you want to type “the,”
tap the “t” key, and without lifitng your finger, slide to
the “h” key and then the “e” key. When you lift your
finger, you'll see “the” in the text entry window.
Note: Sometimes if mutiple words are possible or if
your keystrokes are off-center, a choice list will
appear. Simply tap the correct word in the list, or
tap Xto cancel.
Entering Text With the Onscreen Keyboard

10
Android Basics
visit sprint.com/support for complete user guide 11
Using Swype to Enter Text
Similar to trace, Swype®lets you slide your finger
to enter words.
Switching Keyboards
1. Tap and hold any text entry area.
2. Tap Input method, and then tap the keyboard
type you wish to use (Swype or Touch Input).
Changing Touch Input Keyboard Settings
You can customize your onscreen keyboard
settings to suit your needs:
•Press > Settings > Language &
keyboard > Touch Input to access your options.
•International keyboard lets you select a
language for the keyboard.
•Bilingual prediction shows word predictions for
a second language (other than the default
language you have chosen).
•Text input provides options for prediction, spell
correction, sound and vibration, and calibration.
•Tutorial runs you through the basics of using
the keyboard.
•Trace keyboard lets you change the setting for
the trace line that appears when you slide on
the keyboard.
•Personal dictionary lets you add, edit, and
delete words in your custom dictionary.
Changing Swype Settings
•Press > , and then tap Settings >
Language & Keyboard > Swype.

12
visit sprint.com/support for complete user guide 13
Set Up Your Voicemail
All unanswered calls are automatically transferred
to your voicemail, even if your phone is in use or
turned off. You should set up your voicemail and
personal greeting as soon as your phone is
activated:
1. Press and then tap > Voicemail.
2. In the Personalize your voicemail window, tap
Personalize now.
3. Follow the voice prompts to create your passcode
and record your name and greeting.
Sprint strongly recommends setting a voicemail
passcode. Without a passcode, anyone who
has access to your phone can access your
messages.
Retrieve Your Voicemail
1. From the Home screen, tap > Voicemail.
2. Tap a message to listen to it.
From any other phone:
1. Dial your wireless phone number.
2. When your voicemail answers, press *.
3. Enter a passcode if needed.
Use Your Device: Voicemail
Voicemail Passcode
(do not share): __________________

12
Use Your Device
visit sprint.com/support for complete user guide 13
Make a Phone Call
1. Press and tap .
2. Tap the digits of the number you want to call on
the Phone keypad. (The number will appear just
above the keypad as you enter it. Tap to
delete one or more digits.)
3. As you enter digits, any matches with numbers
already in People (contacts) will appear. Tap an
entry to call the matching number or continue
entering the rest of the phone number.
4. Tap to place the call.
Answer an Incoming Call
•If the display is on, tap Answer.
•If the display is off, the display will turn on showing
the Lock screen. Drag the lock bar down to
answer the call.
Reject an Incoming Call
•If the display is on, tap Decline.
•If the display is off, the display will turn on showing
the Lock screen. Press and then tap Decline
to reject the call and send it to voicemail.
Mute the Ringer on a Call
•To mute the ringer, do any of the following:
•Press the volume down button.
•Press and tap Mute. (You can do this
even on the Lock screen.)
•Place the device face down on a level surface.
Make and Answer Calls

14
visit sprint.com/support for complete user guide 15
Your device’s People function lets you access
and manage contacts from a variety of sources,
including Gmail, Exchange, Facebook, Twitter,
Flickr, contacts synced from your computer, and
old-fashioned contacts entered by hand.
Viewing People (Contacts)
•To view People, press and then tap
> People. The menu bar at the bottom of
the screen lets you select which category you want
to view.
•All to view all your contacts.
•Groups to view and manage groups (useful for
texting and emailing multiple contacts).
•Online directories to access online contacts
from your company directory, Facebook, Twitter,
or Flickr.
•Call history to view all your incoming and
outgoing calls.
Save a Phone Number
1. Press and tap .
Enter a phone
number using the onscreen keypad.
2. Tap Save to People at the top of the screen.
(This appears after at least six digits have been
entered.)
3. Tap Create new contact or Save to existing
contact.
4. If prompted, select an account under which to
save the contact, for example, Exchange
ActiveSync, Google, or Phone.
5. Use the keyboard to enter the new contact name
and tap Save.
— or —
Tap an existing contact name and tap Save to
save the new number.
People

14
Use Your Device
visit sprint.com/support for complete user guide 15
Retrieve a Phone Number
1. Press , tap > People, and
then press .
2. Enter the first letter or letters of an entry.
3. Tap the contact to display the contact’s phone
number(s).
Add a New Entry to People
1. Press and then tap > People.
2. On the All tab, tap Add contact at the top of the
screen.
3. Tap the Name box, enter the first and last name
of the contact, choose the order in which to
display the names, and tap OK.
4. Enter the contact information in the boxes
provided, and then scroll to the bottom of the
screen and tap Save.
Linking People With Social Networking
Profiles
Since many of your contacts may have profiles or
accounts on Facebook, Twitter, or Flickr, your
device lets you link your contacts entries with their
social networking profiles.
Note: Before using this feature, you must have your
social networking accounts set up on the device.
See "Facebook, Flickr, and Twitter" on page 26.
1. Press and then tap > People.
2. Tap a contact and tap in the upper right
corner.
•If your device has found a link on its own, click
Link in the upper right corner to see the
suggestion.
3. Select an account type (such as Facebook),
select an account, and tap Done. The contact’s
Facebook picture and updates will appear in the
contact listing in People.

16
visit sprint.com/support for complete user guide 17
Send a Text Message
1. Press and tap
> Messages.
2. On the All messages screen, tap or
tap
> Compose.
3. Enter a phone number or email address in the To
text box, or tap to search for and select a
contact.
4. Type your message in the Add text panel.
5. When you are finished, tap Send.
Send a Picture or Video Message
(Multimedia Messaging)
1. Follow steps 1 – 4 for sending a text message.
2. Tap
.
3. Tap a media type (such as Picture or Video)
and then tap an available album.
4. Tap a picture or clip to select it and tap Done.
5. Add additional pictures or clips, if desired, and tap
Done.
6. If you are satisfied with your message, tap Send.
Note: For information on taking pictures and videos
with your device, see
“
Camera & Camcorder
”
on
page 18.
Messaging
Other manuals for HTC EVO 3D
6
Table of contents
Other HTC Cell Phone manuals

HTC
HTC U11 life User manual

HTC
HTC HTC Status User manual

HTC
HTC PM23300 User manual

HTC
HTC Desire Z User manual

HTC
HTC HTC Desire X User manual

HTC
HTC Love User manual

HTC
HTC HTC P3300 User manual

HTC
HTC Desire 616 dual sim User manual

HTC
HTC Desire 510 User manual

HTC
HTC Hero - Smartphone - WCDMA User manual

HTC
HTC HTC Sensation 4G User manual

HTC
HTC HD2 User manual

HTC
HTC Desire 530 User manual

HTC
HTC One (M8) User manual

HTC
HTC HTC One User manual

HTC
HTC U11 EYEs User manual

HTC
HTC -Magic - Smartphone - WCDMA User manual

HTC
HTC Hero HERO200 User manual

HTC
HTC Desire 601 User manual

HTC
HTC Touch Touch Diamond User manual