HTC One X9 dual sim User manual

User guide
HTC One X9 dual sim

Contents
Features you'll enjoy
Android 6.0 Marshmallow 8
Imaging 9
Sound 10
Personalization 11
HTC app updates 12
Unboxing
HTC One X9 13
Dual nano SIM cards 14
Storage card 15
Charging the battery 17
Switching the power on or off 17
Want some quick guidance on your phone? 18
Phone setup and transfer
Setting up HTC One X9 for the first time 19
Restoring from your previous HTC phone 19
Transferring content from an Android phone 20
Ways of transferring content from an iPhone 21
Transferring iPhone content through iCloud 21
Other ways of getting contacts and other content 21
Transferring photos, videos, and music between your phone and computer 22
Using Quick Settings 22
Getting to know your settings 23
Updating your phone's software 23
Getting apps from Google Play 25
Downloading apps from the web 26
Uninstalling an app 27
Your first week with your new phone
Basics 28
HTC Sense Home widget 35
Motion Launch 37
Lock screen 40
Notifications 43
Working with text 44
HTC Help 48
Personalizing
Themes 49
More ways to personalize 52
2 Contents

HTC BlinkFeed
What is HTC BlinkFeed? 59
Turning HTC BlinkFeed on or off 60
Restaurant recommendations 60
Ways of adding content on HTC BlinkFeed 61
Customizing the Highlights feed 63
Posting to your social networks 63
Removing content from HTC BlinkFeed 63
Camera
Camera basics 64
Selfies and people shots 69
Zoe camera 71
Panoramic shots 71
Hyperlapse 72
Pro mode 72
Gallery
Viewing photos and videos in Gallery 74
Adding photos or videos to an album 75
Copying or moving photos or videos between albums 76
Searching for photos and videos 76
Changing the video playback speed 76
Viewing Zoe photos in Gallery 77
Trimming a video 77
Editing a Hyperlapse video 78
Viewing, editing, and saving a Zoe highlight 78
Photo Editor
Basics 79
Editing continuous shots 81
Creative effects 82
RAW photos 87
Phone calls
Phone calls 88
Messages
Sending a text message (SMS) 94
Sending a multimedia message (MMS) 94
Sending a group message 95
Resuming a draft message 95
Replying to a message 95
Forwarding a message 96
Moving messages to the secure box 96
Blocking unwanted messages 97
Copying a text message to the nano SIM card 97
Deleting messages and conversations 97
3 Contents

Power and storage management
Battery 99
Storage 102
File Manager 107
Sync, backup, and reset
Online sync 109
Backup 110
HTC Sync Manager 113
Reset 115
People
Your contacts list 117
Setting up your profile 118
Adding a new contact 118
Editing a contact’s information 119
Getting in touch with a contact 120
Importing or copying contacts 120
Merging contact information 121
Sending contact information 122
Contact groups 122
Private contacts 123
Calendar and Email
Calendar 125
Mail 129
Google Search and apps
Google Now 134
Google Search 136
Google apps 138
Other apps
HTC Dot View 139
Clock 141
Weather 142
Voice recorder 142
FM Radio 143
Internet connections
Turning the data connection on or off 144
Managing your data usage 144
Wi-Fi connection 146
Connecting to VPN 147
Using HTC One X9 as a Wi-Fi hotspot 148
Sharing your phone's Internet connection by USB tethering 149
4 Contents

Wireless sharing
HTC Connect 150
Bluetooth 153
NFC 156
Settings and security
Toggling modes in HTC BoomSound 158
Using HTC BoomSound with headphones 158
Turning location services on or off 158
Do not disturb mode 159
Airplane mode 160
Automatic screen rotation 161
Setting when to turn off the screen 161
Screen brightness 161
Touch sounds and vibration 161
Changing the display language 162
Installing a digital certificate 162
Disabling an app 163
Controlling app permissions 163
Setting default apps 163
Setting up app links 163
Managing your nano SIM cards with Dual network manager 164
Assigning a PIN to a nano SIM card 164
Accessibility features 165
Accessibility settings 166
Turning Magnification gestures on or off 166
Navigating HTC One X9 with TalkBack 166
Trademarks and copyrights
Index
5 Contents

About this guide
In this user guide, we use the following symbols to indicate useful and important information:
This is a note. A note often gives additional information, such as what happens when you choose
to do or not to do a certain action. A note also provides information that may only be applicable
to some situations.
This is a tip. A tip gives you an alternative way to do a particular step or procedure, or lets you
know of an option that you may find helpful.
This indicates important information that you need in order to accomplish a certain task or to
get a feature to work properly.
This provides safety precaution information, that is, information that you need to be careful
about to prevent potential problems.
Some apps may not be available in all regions or with your mobile operator.
6 About this guide

Important note on recoverable data
Files and other data that have been deleted, cleared, removed, or erased from your device
may still be recoverable by third-party data recovery software. Even a factory reset may not
permanently erase all data from your mobile device, including personal information.
7 Important note on recoverable data

Features you'll enjoy
Android 6.0 Marshmallow
Android™6.0 Marshmallow brings new features that make your mobile life more convenient.
Now on Tap
Now on Tap intuitively searches and delivers related information right in the app. This means that
you'll never have to leave the conversation or the website you're browsing to search for information.
Just press and hold and Now on Tap displays related information, apps, and actions. See Now on
Tap on page 136.
Manage phone memory
Use Memory in Settings to monitor the average memory use and performance of HTC One X9. You
can also use this setting to check which apps use the most memory.
Major change to how you use storage cards
If you have an existing storage card with media and other files, use it as removable storage so you
can insert the card and access your files on any Android phone.
If you have a brand new storage card, you can use the card to expand the internal storage. See
Should I use the storage card as removable or internal storage? on page 103 and Setting up your
storage card as internal storage on page 103.
Network settings reset
Quickly reset all network settings when HTC One X9 has a hard time connecting to the mobile data
or Wi-Fi®network or Bluetooth®device. See Resetting network settings on page 115.
Google settings
Easily manage settings for Google®apps and features on HTC One X9. Tap Google in Settings and
change your preferences.
Smarter app linking
Android 6.0 Marshmallow automatically opens the correct app for links that you tap in a text or
email message or website. With smarter app linking, there's no more guessing which app can handle
the links you tap.
In Settings, you can change the default apps to link to. For details, see Setting default apps on page
163 and Setting up app links on page 163.
8 Features you'll enjoy

App permissions
To help protect your phone and privacy, Android 6.0 Marshmallow has improved the way apps are
given access to certain data or features, such as contacts or the microphone. For details, see
Controlling app permissions on page 163.
Imaging
Made to help you capture your memories to share with family and friends.
RAW enhancement
With RAW image enhancement, you can take your photos to a whole new level. After snapping a
shot in Pro mode, the camera saves a RAW file in DNG format. The RAW file provides more image
information for post processing in Photo Editor or a graphics program on your computer. See
Taking a RAW photo on page 73.
Hyperlapse
Compress a long video into a smooth, entertaining video. Hyperlapse lets you speed up the action up
to 12 times, and select sections of the video to change its speed. See Recording a Hyperlapse video on
page 72.
Anti-shake lens
Optical Image Stabilization (OIS) reduces blur from hand movements while you shoot. You'll get
sharper, brighter photos with more clarity, even in low light.
Front camera features
Enjoy selfie-friendly features in the Camera app.
§Live Makeup – Before taking your selfie, use Live Makeup to smoothen your skin. See
Applying skin touch-ups with Live Makeup on page 69.
§Instant selfie shots – Flash a smile, and the camera instantly captures your smiling face. Or,
just say "Cheese!" See Using Auto Selfie on page 69 and Using Voice Selfie on page 70.
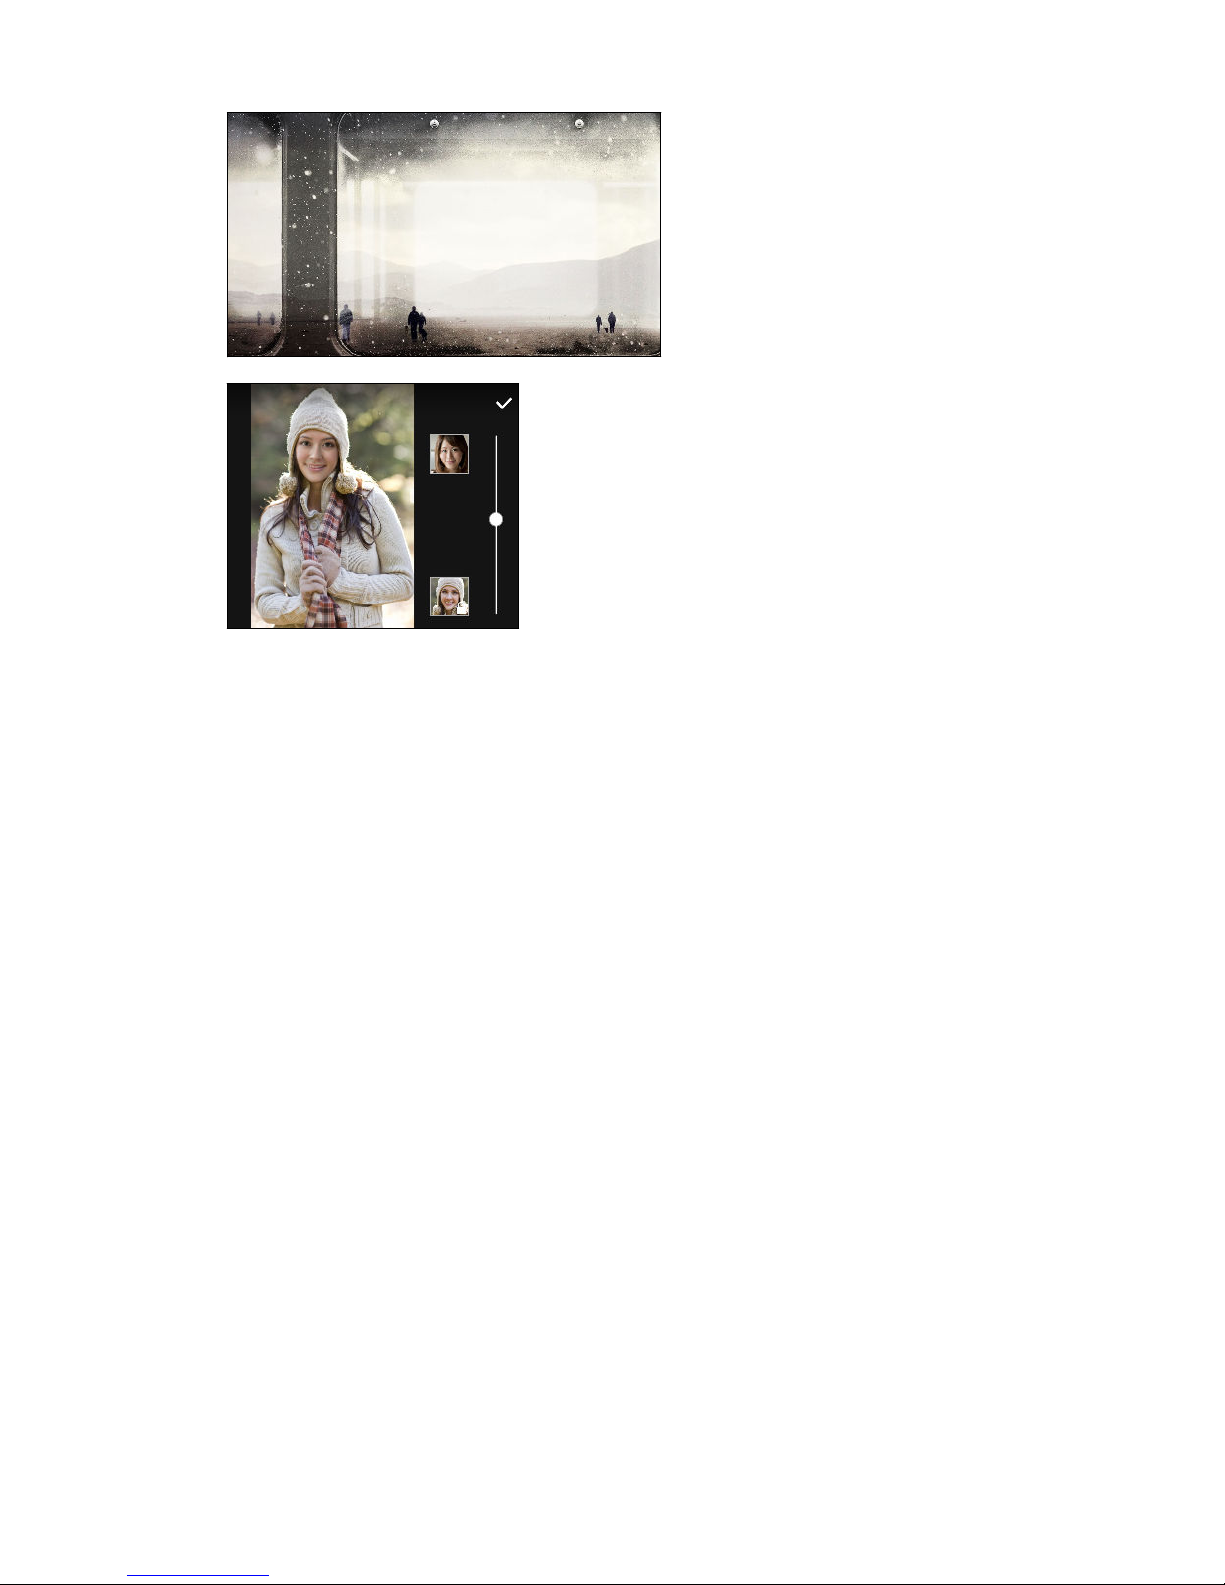
Photo Editor
The Photo Editor app enhances your photos, from basic edits to elegant effects!
Make a photo surreal. Blend in shapes,
elements, and prismatic effects. See
Prismatic on page 84.
9 Features you'll enjoy

Superimpose one image onto another and
create a unique composition only you can
imagine! See Double Exposure on page
85.
Face Fusion uses two photos such as your selfie and a
photo of your favorite celebrity to merge your looks
together. See Face Fusion on page 87.
Sound
Plug in headphones and discover audio bliss on HTC One X9. Easily connect wireless speakers to
your phone.
HTC BoomSound with Dolby Audio
Hear what you've been missing. HTC BoomSound™gives you a rich, authentic sound experience,
whether you’re listening to music, watching a video, or playing a game. To find out more, see Using
HTC BoomSound with headphones on page 158.
HTC Connect
Simply swipe up the screen with three fingers to stream music or video from HTC One X9 to your
speakers or TV. Control the volume and playback with your phone! You can even enjoy your favorite
music on multiple speakers. See What is HTC Connect? on page 150.
10 Features you'll enjoy

Personalization
Designed with you in mind, HTC One X9 is filled with innovations that help it to adapt to your life.
Themes
Make HTC One X9 feel more personal by
customizing how it looks with your own photos and
then mix and match with different sets of icons,
sounds, color schemes, and more. See What is the
Themes app? on page 49.
HTC Sense Home
Your Home screen adapts to your needs at home, at work, and on the go. See What is the HTC Sense
Home widget? on page 35.
Lock screen notifications make it easier to find what you've missed, see upcoming events, and more.
See Turning lock screen notifications on or off on page 41.
HTC BlinkFeed
Get your favorite topics, news, social media, and more
conveniently delivered to one place on your phone. Even get
suggestions for places to eat! See What is HTC BlinkFeed? on
page 59.
11 Features you'll enjoy

HTC app updates
From time to time, HTC adds or enhances features in apps such as HTC Sense™Home, Camera,
Gallery, and more. Download and install the latest updates of HTC and other apps from
Google Play™to enjoy the new and improved features. Some HTC apps that are not preloaded in
certain phones can also be downloaded from Google Play.
The information in this guide may not be most up-to-date if there are more recent app updates
available.
12 Features you'll enjoy

Unboxing
HTC One X9
1. POWER
2. VOLUME buttons
3. nano SIM card slot
4. Dual speakers
5. 3.5mm headset jack
6. Notification LED
7. Front camera
8. Proximity sensor
9. nano SIM card slot
10. microSD™card slot
11. USB connector
You need a 4G/LTE™plan to use your operator's 4G/LTE network for voice calls and data
services. Check with your operator for details.
§If you want to use a case or screen protector, don’t cover and block the proximity sensor.
Purchase a case or screen protector designed for HTC One X9.
§Avoid liquid or dust from entering the microphone hole to prevent damage to the microphone.
§Avoid connecting third-party headsets or accessories with metallic charms that dangle near the
headset jack. Using these may affect signal reception.
13 Unboxing

Dual nano SIM cards
HTC One X9 has two nano SIM card slots. You can insert a LTE/WCDMA/GSM nano SIM card in
either slot.
When you have two cards inserted, only one card can connect to a mobile data network. The other
card will connect to the 2G network only. Go to Settings > Dual network manager to set which card
connects to mobile data network.
Use a standard nano SIM card only. Inserting a modified card that is thicker than the standard
nano SIM card may cause the card to not fit properly or damage the card slot.
Inserting nano SIM cards
1. Make sure HTC One X9 is off and hold it securely with the front facing down.
2. Open the left slot cover with your thumb or finger.
3. Pull the tray out from the nano SIM slot.
4. Place a nano SIM card into the tray with the card's gold contacts facing up and its cut-off
corner facing out.
14 Unboxing

5. When reinserting the tray, make sure it is facing up so that the nano SIM card doesn’t fall out.
Slide the tray all the way into the slot.
6. Close the slot cover. Press from the top to the bottom of the slot cover to lock it in place.
7. Open the right slot cover, and do the same steps as above to insert your second nano SIM card
in the tray that's in the SIM 2 slot.
To close the right slot cover, slide the plastic hinge into the side and press the cover until it
clicks into place.
Removing a nano SIM card
Make sure to switch off HTC One X9 before removing the card.
1. Open the left or right slot cover with your thumb or finger.
2. Pull the tray out from the nano SIM slot, and remove the nano SIM card.
3. Close the slot cover. Press from the top to the bottom of the slot cover to lock it in place.
Storage card
Use a storage card to store your photos, videos, and music. When you need to free up phone storage
space, you can also move certain apps to the storage card, if the apps support this feature.
The storage card is optional and sold separately.
15 Unboxing

Inserting the storage card
1. Open the slot cover with your thumb or finger.
2. With HTC One X9 facing down, insert a microSD into the storage card slot, with its gold
contacts facing up and towards the slot.
3. To close the slot cover, slide the plastic hinge into the side and press the cover until it clicks
into place.
Unmounting the storage card
When you need to remove the storage card while HTC One X9 is on, unmount the storage card first
to prevent corrupting or damaging the files in the storage card.
If your storage card is used as internal storage and there are apps that were moved to the card,
you will not be able to open these apps after unmounting the card.
1. From the Home screen, tap > Settings > Storage & USB.
2. Do one of the following:
§If your storage card appears under Removable storage, tap > Eject next to the card
name.
§If your storage card appears under Internal storage, tap the card name, and then tap
> Eject.
Removing the storage card
1. Open the slot cover with your thumb or finger.
2. Push the storage card in to eject it from its slot.
3. To close the slot cover, slide the plastic hinge into the side and press the cover until it clicks
into place.
16 Unboxing

Charging the battery
Before you turn on and start using HTC One X9, it is recommended that you charge the battery.
§If the battery has been discharged for several days, you may need to charge HTC One X9 for
several minutes before powering it on.
§Use only the adapter and the USB cable that came with HTC One X9 to charge the battery. When
the battery power is too low, make sure to use the power adapter to charge, not the USB cable
connection with your computer.
1. Insert the small end of the USB cable into the USB connector.
2. Insert the other end of the USB cable into the power adapter.
3. Plug in the power adapter to an electrical outlet to start charging the battery.
§As a safety precaution, the battery may stop charging to avoid overheating.
§Avoid charging the battery in hot environments.
§When you're using the web browser and charging the battery, HTC One X9 may become
warmer. This is normal.
§To conserve energy, unplug the power adapter from the electrical outlet after you finish
charging.
Switching the power on or off
Switching the power on
Press the POWER button until HTC One X9 vibrates.
When you turn on HTC One X9 for the first time, you’ll need to set it up.
17 Unboxing

Switching the power off
1. If the display is off, press the POWER button to turn it back on.
2. Press and hold the POWER button for a few seconds.
3. Tap Power off on the options menu.
Want some quick guidance on your phone?
Check out the friendly walkthroughs and the FAQs in the Help app to learn how to use your phone.
§When you see a Tips & Help tile in HTC BlinkFeed™, just tap the tile to know more about the
tip.
§From the Home screen, tap , and then find and tap Help.
You can then tap Search help articles & videos, and enter what you're looking for. Or you
can tap to browse how-tos, FAQs, and more.
18 Unboxing

Phone setup and transfer
Setting up HTC One X9 for the first time
When you switch on HTC One X9 for the first time—or after you've done a factory reset—you’ll be
asked to set it up.
You can enable TalkBack to navigate by voice feedback before selecting the language. Press and
hold two fingers on the screen until you hear a message saying that accessibility mode is enabled.
Walk through the on-device setup to choose your Internet connection, sign in to your Google
Account, set up device protection for HTC One X9, and more.
Use Android Backup Service if you've used it to back up your old phone before. On the Get your app
& data screen, tap Restore from this backup. From the menu, choose your old phone if you want to
restore your apps from a previous phone that was backed up using Android Backup Service.
Otherwise, tap Set up as new device.
Some features that need to connect to the Internet such as location-based services and auto-sync
of your online accounts may incur extra data fees. To avoid incurring data fees, disable these
features under Settings. For more information on location services, see Turning location
services on or off on page 158.
Restoring from your previous HTC phone
If you were using HTC Backup on your previous HTC phone, you need to download and use the
HTC Restore app on HTC One X9 to restore your backup.
Depending on the amount of content, restoring a backup to HTC One X9 through your data
connection may incur additional data costs and take a long time. Using a Wi-Fi connection is
recommended.
1. After you've finished setting up HTC One X9, slide the Notifications panel open, and then tap
the Transfer or restore your content notification.
2. Tap Restore from HTC backup.
If the HTC Restore app is not installed on the phone, you'll be prompted to download and
install HTC Restore.
3. Tap Restore from HTC backup.
4. Sign in with the account you used to back up your old phone.
5. Choose the backup to restore to HTC One X9.
19 Phone setup and transfer

6. If prompted, choose whether to use a mobile data or Wi-Fi connection for restoring your
backup.
7. Follow the onscreen instructions to restore your backup.
8. Slide open the Notifications panel to check if there's any notification to finish restoring your
backup.
Free apps from Google Play will be restored in the background, and you can track the progress via a
notification in the status bar. To restore paid apps, you need to download and install them from
Google Play.
Your apps will appear on the Apps screen as they are installed. The Apps and Home screen shortcuts
will be reorganized as in your backup after all of your apps have been installed. You can continue
using HTC One X9 while apps are being restored.
Transferring content from an Android phone
On your old Android phone, download the HTC Transfer Tool and use it to transfer your content to
HTC One X9.
The types of locally stored content on your old phone that the HTC Transfer Tool can transfer
include contacts, messages, calendar events, music, photos, videos, and some settings. More types of
data such as call histories, email accounts, and some HTC app settings can be transferred from HTC
phones that have HTC Sense 5.5 or higher.
You need Android version 2.2 or later to use the HTC Transfer Tool on your old phone.
1. From the Home screen, tap > Settings > Get content from another phone.
2. Choose whether to transfer from an HTC Android phone or other Android phone.
3. On the Get content from another phone screen, tap Next.
4. Follow the steps shown on HTC One X9 to download the HTC Transfer Tool from
Google Play to your old phone, install it, and open the tool.
5. When you see a PIN on your old phone, make sure the same PIN also appears on HTC One X9
before you continue.
If the PIN code doesn't appear, tap Retry on your old phone. If it still won't appear, this may
mean that your old phone is unable to connect to HTC One X9. When this happens, try
another transfer method.
6. Tap Confirm on your old phone.
7. On your old phone, choose the types of content you want to transfer, tap Transfer, and then
tap Yes.
8. Wait for the transfer to finish.
9. Tap Done on both phones.
20 Phone setup and transfer
Other manuals for One X9 dual sim
1
Table of contents
Other HTC Cell Phone manuals

HTC
HTC Touch Pro RAPH500 User manual

HTC
HTC Dash 3G HS S200 User manual

HTC
HTC Desire 620 dual sim User manual

HTC
HTC Radar 4G User manual

HTC
HTC S720 User manual

HTC
HTC DESIRE 20+ Owner's manual

HTC
HTC One A9 User manual

HTC
HTC Desire 555 User manual

HTC
HTC Desire 628 Owner's manual

HTC
HTC 7 Mozart User manual

HTC
HTC Touch Diamond DIAM100 User manual

HTC
HTC Desire 516 dual sim User manual

HTC
HTC Touch US Cellular User manual

HTC
HTC HTC Touch Dual User manual

HTC
HTC Radar 4G Cincinnati Bell User manual

HTC
HTC Desire 830 dual sim User manual

HTC
HTC Hero Android 2.1 User manual

HTC
HTC 0P6B100 User manual

HTC
HTC One E9 dual sim User manual

HTC
HTC Desire 630 dual sim User manual