Pub. 42004-352K
GAI-Tronics Corporation P.O. Box 1060, Reading, PA 19607-1060 USA
610-777-1374 800-492-1212 Fax: 610-796-5954
VISIT WWW.GAI-TRONICS.COM FOR PRODUCT LITERATURE AND MANUALS
GAI-TRONICS® CORPORATION
A HUBBELL COMPANY
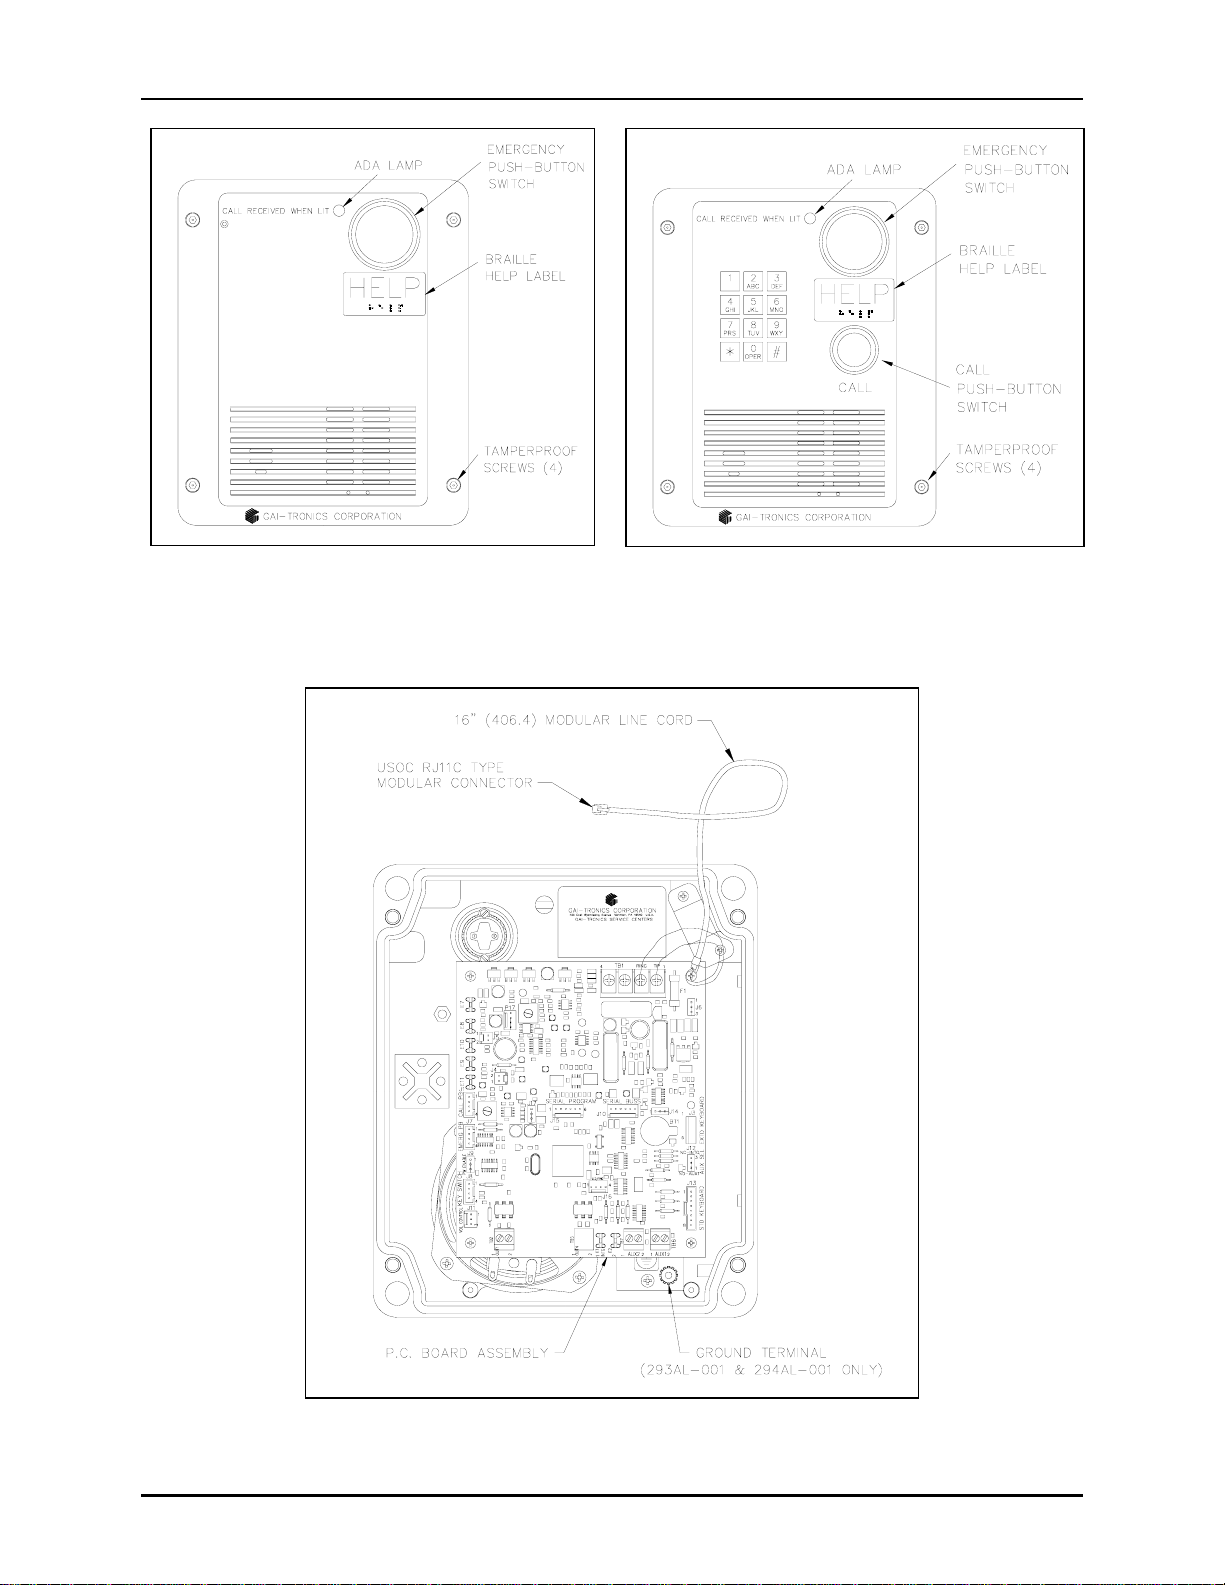
Model 293-001, 293AL-001, 297-001,
298-001, and 294AL-001 Emergency Phones
TABLE OF CONTENTS
Getting Started ................................................................................................................................1
Product Overview ...................................................................................................................................1
Standard Operation................................................................................................................................3
Placing an Emergency Call...................................................................................................................................3
Placing a Non-Emergency Call (Models 294AL-001 and 298-001 Only)............................................................3
Americans with Disabilities Act (ADA) Functionality.........................................................................4
Installation ......................................................................................................................................5
Safety Guidelines.....................................................................................................................................5
General Installation Guidelines.............................................................................................................5
Tamper-Resistant Hardware .................................................................................................................................5
Conduit Installation Details ..................................................................................................................................6
Models 293-001, 293AL-001, and 294AL-001.......................................................................................7
Models 297-001 and 298-001..................................................................................................................9
Setup..............................................................................................................................................12
Hardware Configuration......................................................................................................................12
Audio Level Adjustments.....................................................................................................................14
Programming ................................................................................................................................16
Remote Programming ..........................................................................................................................16
Local Programming..............................................................................................................................17
Programming Sequences......................................................................................................................19
Dialing Options...................................................................................................................................................19
Password.............................................................................................................................................................21
Silent Monitoring Feature...................................................................................................................................21
Off-Hook Ringing...............................................................................................................................................21
Disconnect Options.............................................................................................................................................22
Americans with Disabilities Act (ADA) Programming......................................................................................23
Automatic Line Level Compensation for Optimum Audio Performance...........................................................23
Maintenance..................................................................................................................................25
Specifications ................................................................................................................................26
Confidentiality Notice...................................................................................................................29