Put insert
inside the
brine tubing
Insert Sleeve
Hole
TOLL-FREE: 1-877-288-9888
Regina, SK • Cambridge, ON • Whitestown, IN • Houston, TX • Phoenix, AZ
www.hydrotechwater.com 55227 2023-02-15
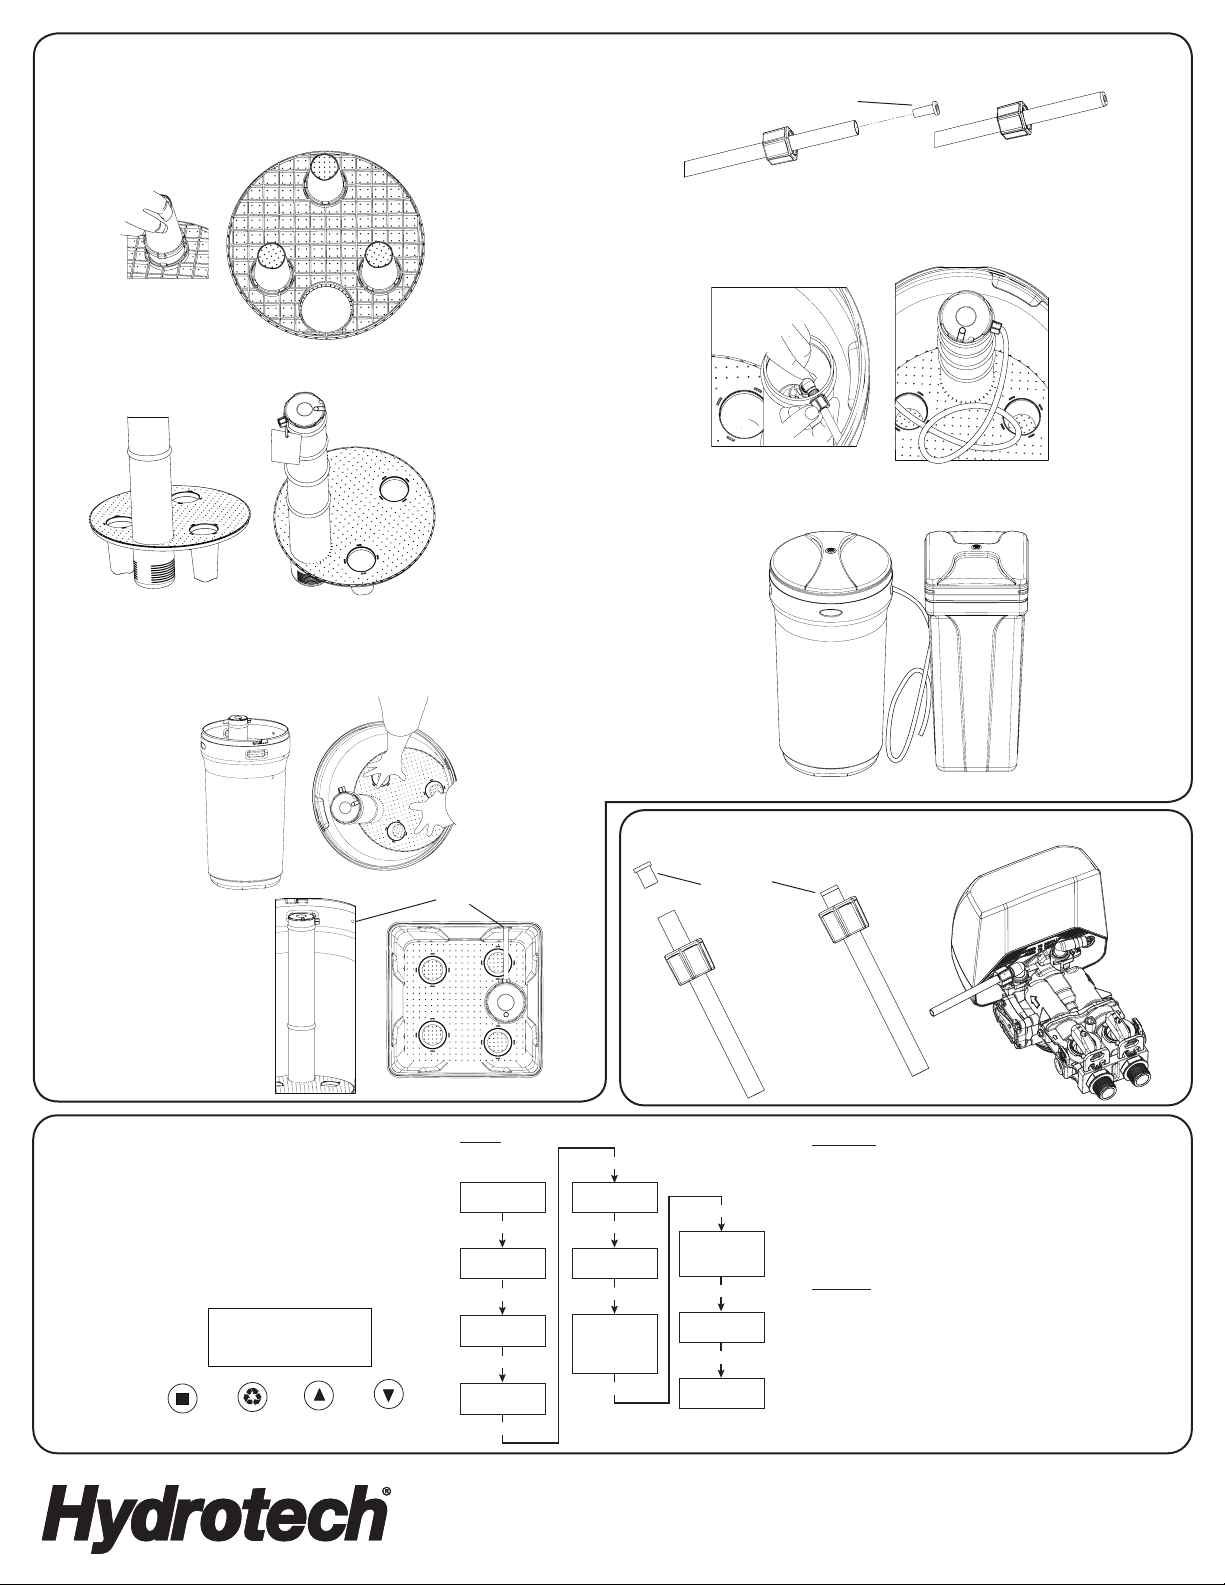
Step 5 – Power and Program Valve
Key Pad Conguration
SETTINGS This function is to enter the basic set up information required at the
time of installation.
MANUAL This function is to initiate an immediate or delayed manual
REGEN regeneration.
DOWN / Increase or decrease the value of the settings while in the
UP programming mode.
Step 3 – Assembling Brine Tank
a. Attach the three brine grid legs to grid plate. The legs will snap on to the tabs of
the salt plate making a “click” sound. For square brine tank there are four legs.
Step 4 – Attaching Brine Tubing to the Valve
b. Insert the brine well assembly inside the grid plate as well below.
c. Drop the brine grid with brine well inside the brine tank such that the nut fitting
faces the hole on the brine tank. Then press the grid evenly inside the brine tank
until the brine grid legs touches the bottom of the brine tank.
The hole in the brine tank
should line up with the brine
line as shown for round and
square brine tank.
d. Take the brine tube and insert the nut and plastic sleeve as shown below.
e. Insert the tube in the float assembly elbow and hand tighten the nut. In many
cases the brine line already come installed from the factory. Leave the other end
of the brine line tube inside the brine tank
f. For installation of brine tank at the installation site, pull the other end of the
brine tube from the hole on the brine tank. The completed assembly is
shown below.
Follow the Instruction Manual to Complete
the Installation of the Product
IMPORTANT: IN
ROUND BRINE TANK,
IT IS IMPORTANT TO
ALIGN THE HANDLE TO
THE BRINE WELL AS
SHOWN
6(77,1*60$18$/
5(*(1
83
2:1
SALT SETTING
Choose HIGH EFFICIENCY to minimize salt usage. Your system will regenerate
a little more often but your salt usage can be reduced by 20% compared to
the STANDARD setting. Choose STANDARD when you need to maximize your
capacity but still operate the system with good efficiency. Choose IRON & MN
if you have problem water containing these minerals. The high salt setting
will be needed since these minerals are more difficult to clean out of the
resin bed. Note: A resin cleaner will also need to periodically added to the
brine tank to insure proper operation.
WATER TYPE
This setting will determine if the BACKWASH OVERIDE function will be on
or off. Select MUNICIPAL if the water source is clean (<1NTU turbidity) and
the system will skip the back wash cycle based on the setting in BACKWASH
OVERIDE. Select WELL / OTHER if any Iron or Manganese is present or if the
water source is not clean (< 1NTU turbidity). The system will back wash
every time.
his setting determines the time of day to perform a scheduled regeneration.
TIME OF DAY
12:01 PM
YEAR
2016
MONTH
AUGUST
DAY
21
REGEN TIME
2:00 AM
PROGRAMMING
COMPLETE
SET HARDNESS
20 GRAINS
SET PEOPLE
4
SALT SETTING
HIGH EFFICIENCY
STANDARD
IRON & MN
WATER TYPE
MUNICIPAL
WELL / OTHER
Press SETTINGS key
Press SETTINGS key Press SETTINGS key
Press SETTINGS key
Press SETTINGS key
Press SETTINGS key
Press SETTINGS key
Press SETTINGS key
Press SETTINGS key
Press SETTINGS key
Press SETTINGS key
Settings
Press SETTINGS key
(3 SECONDS / BEEP)


