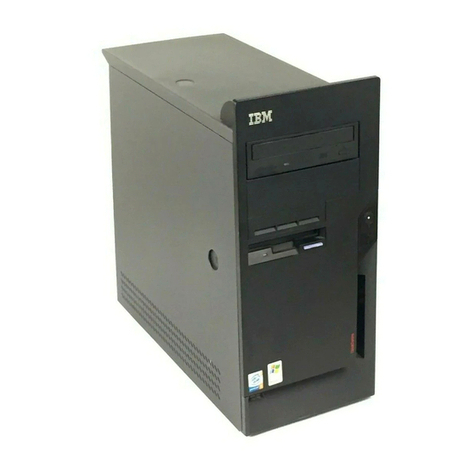
IBM Intellistation POWER 9112 265 User manual

Intellistation POWER 9112 Model 265
User’s Guide
SA38-0608-00
IBM


Intellistation POWER 9112 Model 265
User’s Guide
SA38-0608-00
IBM

First Edition (February 2002)
Before using this information and the product it supports, read the information in “Safety Notices” on page xi,
Appendix A, “Environmental Notices” on page 159, and Appendix B, “Notices” on page 161.
A reader’s comment form is provided at the back of this publication. If the form has been removed, address comments
to Information Development, Department H6DS-905-6C006, 11400 Burnet Road, Austin, Texas 78758-3493. To send
comments electronically, use this commercial internet address: [email protected]. Any information that you
supply may be used without incurring any obligation to you.
©International Business Machines Corporation, 2002. All rights reserved. Note to U.S. Government Users --
Documentation related to restricted rights -- Use, duplication or disclosure is subject to restrictions set forth is GSA
ADP Schedule Contract with IBM Corp.

Contents
Safety Notices ........................xi
Electrical Safety........................xi
Laser Safety Information ....................xiii
Laser Compliance......................xiii
Data Integrity and Verification ..................xv
About This Book ......................xvii
ISO 9000 .........................xvii
Online Publications ......................xvii
Related Publications......................xviixvii
Ergonomic Information .....................xviii
Trademarks ........................xviii
Chapter 1. Introducing the System .................1
System Features .......................1
Bus Architecture.......................1
Processors ........................1
Memory .........................1
Media Drives ........................1
Other Drives ........................1
Power supply........................1
Keyboard .........................1
Mouse ..........................2
Operator Panel .......................2
Input/Output Ports ......................2
Security Features ......................2
Front View.........................3
Rear View.........................4
Operator Panel .......................5
Chapter 2. Using the System ...................7
Starting the System Unit .....................7
Stopping the System Unit.....................7
Reading the Operator Panel Display .................7
Operator Panel .......................8
Attention LED and Lightpath LEDs..................9
Operator Panel Display....................9
Indicator Panel .......................10
Component LEDs ......................11
Reporting the Problem ....................12
Using the Keyboards ......................13
Using the Three-Button Mouse ..................14
Handling the Mouse Correctly ..................14
Caring for the Mouse.....................14
Cleaning the Mouse .....................15
Using the 3.5-Inch Diskette Drive..................1616
iii

Write-Protecting 3.5-Inch Diskettes ................16
Loading and Unloading the 3.5-Inch Diskette .............17
Using the CD-ROM Drive ....................17
Front View of CD-ROM Drive ..................18
Understanding the Status Lights .................18
Handling Compact Discs ...................19
Other Handling Considerations .................19
Loading a Compact Disc ...................20
Opening the Tray Manually...................20
Playing an Audio CD .....................20
Using the Service Processor and Service Director Features .........21
Service Processor......................21
Service Director ......................22
Chapter 3. Using the Service Processor...............23
Service Processor Menus ....................25
Service Processor Menu Inactivity................25
Accessing Service Processor Menus Locally .............25
Accessing Service Processor Menus Remotely ............25
Saving and Restoring Service Processor Settings ...........25
General User Menu ......................26
Privileged User Menus .....................28
Main Menu ........................28
Service Processor Setup Menu .................29
Passwords ........................29
Serial Port Snoop Setup Menu .................32
System Power Control Menu ..................33
System Information Menu ...................37
Language Selection Menu ...................40
Call-In/Call-Out Setup Menu ..................41
Modem Configuration Menu ..................42
Serial Port Selection Menu ...................42
Serial Port Speed Setup Menu .................43
Telephone Number Setup Menu .................43
Call-Out Policy Setup Menu ..................45
Customer Account Setup Menu .................46
Call-Out Test .......................46
System Power-On Methods ...................46
Service Processor Call-In Security .................47
Service Processor Reboot/Restart Recovery ..............48
Boot (IPL) Speed ......................48
Failure During Boot Process ..................48
Failure During Normal System Operation ..............48
Service Processor Reboot/Restart Policy Controls ...........48
Processor Boot-Time Deconfiguration (CPU Repeat Gard) ........48
Memory Boot-Time Deconfiguration (Memory Repeat Gard) ........49
Service Processor System Monitoring - Surveillance ...........50
System Firmware Surveillance..................50
Operating System Surveillance .................50
Call Out .........................51
iv User’s Guide

Console Mirroring .......................52
System Configuration for Console Mirroring .............52
Service Processor Firmware Updates ................53
Service Processor Error Log ...................53
Service Processor Operational Phases ................54
Pre-Standby Phase .....................54
Standby Phase.......................54
Bring-Up Phase ......................55
Run-time Phase ......................55
Service Processor Procedures in Service Mode .............56
Chapter 4. Using System Management Services............57
Graphical System Management Services ...............57
Config...........................60
Multiboot ..........................61
Utilities..........................63
Password ........................65
Spin Delay ........................69
Error Log.........................70
RIPL ..........................71
SCSI ID .........................76
Firmware Update .......................77
Firmware Recovery .....................77
Text-Based System Management Services ..............78
Select Language .......................79
Change Password Options ....................80
Set Privileged-Access Password .................80
Unattended Start Mode ....................80
View Error Log ........................81
Setup Remote IPL (Initial Program Load) ...............82
Change SCSI Settings .....................85
Select Console........................85
Select Boot Options ......................86
Select Boot Device .....................87
Configure Nth Boot Device ...................88
View System Configuration Components ...............89
System/Service Processor Firmware Update ..............90
Firmware Recovery ......................90
Chapter 5. Using the Standalone and Online Diagnostics ........91
Standalone and Online Diagnostics Operating Considerations ........91
Selecting a Console Display ..................91
Identifying the Terminal Type to the Diagnostics Programs ........91
Undefined Terminal Types ...................92
Running Online Diagnostics from CD-ROM .............92
Running Standalone Diagnostics from a Network Installation Management (NIM)
Server .........................92
Running Online Diagnostics ...................96
Running the Diagnostics from a TTY Terminal .............97
Online Diagnostics Mode of Operation ................97
Contents v

Running the Online Diagnostics in Service Mode (Service Mode IPL).....97
Running the Online Diagnostics in Concurrent Mode ..........98
Running the Online Diagnostics in Maintenance Mode..........99
Standalone Diagnostic Operation .................100
Running the Standalone Diagnostics ...............100
Chapter 6. Introducing Tasks and Service Aids............101
Tasks ..........................101
Add Resource to Resource List ..................102
AIX Shell Prompt ......................103
Analyze Adapter Internal Log...................103
Backup and Restore Media ...................103
Certify Media ........................103
Change Hardware Vital Product Data ................107
Configure Dials and LPF Keys ..................107
Configure ISA Adapter .....................107
Configure Reboot Policy ....................108
Configure Remote Maintenance Policy ...............109
Configure Ring Indicate Power On Policy...............111
Configure Surveillance Policy...................111
Create Customized Configuration Diskette ..............112
Delete Resource from Resource List ................112
Disk Maintenance ......................112
Disk to Disk Copy .....................112
Display/Alter Sector .....................113
Display Configuration and Resource List ...............113
Display Firmware Device Node Information ..............113
Display Hardware Error Report ..................114
Display Hardware Vital Product Data ................114
Display Machine Check Error Log .................114
Display Microcode Level ....................114
Display or Change Bootlist ...................115
Display or Change Diagnostic Run-Time Options ............115
Display Previous Diagnostic Results ................116
Display Resource Attributes ...................116
Display Service Hints .....................116
Display Software Product Data ..................117
Display System Environmental Sensors ...............117
Examples ........................118
Display Test Patterns .....................119
Download Microcode .....................119
Download Microcode to PCI SCSI RAID Adapter ...........119
Download Microcode to Disk Drive Attached to a PCI SCSI RAID Adapter 119
Download Microcode to a PCI FC-AL Adapter ............119
Download Microcode to DVD-RAM Attached to a PCI SCSI Adapter.....120
Download Microcode to Disk Attached to PCI SCSI Adapter .......120
Download Microcode to Other Devices ..............120
Fibre Channel RAID Service Aids .................121
Flash SK-NET FDDI Firmware ..................122
Format Media........................122
vi User’s Guide

Hardfile Attached to SCSI Adapter (non-RAID) ............122
Hardfile Attached to PCI SCSI RAID Adapter ............123
Optical Media .......................123
Diskette Format ......................124
Gather System Information ...................124
Generic Microcode Download ..................124
Hot Plug Task........................125
PCI Hot Plug Manager ....................125
SCSI Hot Swap Manager ...................127
RAID Hot Plug Devices ...................128
Local Area Network Analyzer...................128
Log Repair Action ......................128
Periodic Diagnostics .....................129
PCI RAID Physical Disk Identify..................129
Process Supplemental Media ..................129
Run Diagnostics .......................130
Run Error Log Analysis ....................130
Run Exercisers .......................130
Exerciser Commands (CMD)..................131
Abbreviations .......................131
Memory Exerciser .....................131
Tape Exerciser ......................132
Diskette Exerciser .....................132
CD-ROM Exerciser .....................132
Save or Restore Hardware Management Policies ............132
SCSI BUS Analyzer......................133
SCSI Tape Drive Service Aid...................134
Spare Sector Availability ....................135
SSA Service Aid .......................135
System Fault Indicator .....................135
System Identify Indicator ...................136
Update Disk-Based Diagnostics ..................136
Update System or Service Processor Flash ..............137
7135 RAIDiant Array Service Aid .................138
Adapter Microcode Download .................138
Physical Disk Microcode Download................139
Physical Disk Format ....................139
Physical Disk Certify ....................139
Physical Disk Identify ....................139
7318 Serial Communications Network Server Service Aid .........139
Chapter 7. Using the System Verification Procedure ..........141
Step 1. Considerations before Running This Procedure ..........141
Step 2. Loading the Diagnostics..................141
Step 3. Running System Verification ................142
Step 4. Additional System Verification ................142
Step 5. Stopping the Diagnostics .................143
Chapter 8. Hardware Problem Determination ............145
Problem Determination Using the Standalone or Online Diagnostics......145
Contents vii

Step 2. .........................145
Problem Determination When Unable to Load Diagnostics .........152
Chapter 9. Repair Action ...................157
Appendix A. Environmental Notices................159
Product Recycling and Disposal..................159
Environmental Design .....................159
Acoustical Noise Emissions ...................159
Declared Acoustical Noise Emissions ...............159
Appendix B. Notices .....................161
Appendix C. General Attributes Required When Using a TTY Terminal ...163
Additional Communication Attributes ................164
Additional Keyboard Attributes ..................165
Additional Printer Attributes ...................166
Appendix D. Firmware Updates .................167
Checking the Current Firmware Levels ...............167
Updating System Firmware ...................167
Appendix E. Service Processor Setup and Test ...........169
Service Processor Setup Checklist .................169
Testing the Setup ......................170
Testing Call-In ......................170
Testing Call-Out ......................170
Serial Port Configuration ...................171
Appendix F. Modem Configurations................173
Sample Modem Configuration Files ................173
Generic Modem Configuration Files ...............173
Specific Modem Configuration Files ...............173
Configuration File Selection ...................174
Examples for Using the Generic Sample Modem Configuration Files ....176
Customizing the Modem Configuration Files.............176
IBM 7852-400 DIP Switch Settings................177
Xon/Xoff Modems .....................177
Ring Detection ......................177
Terminal Emulators .....................178
Recovery Procedures ....................178
Transfer of a Modem Session ..................178
Recovery Strategy .....................179
Prevention Strategy .....................180
Modem Configuration Sample Files ................181
Sample File modem_m0.cfg ..................181
Sample File modem_m1.cfg ..................183
Sample File modem_z.cfg...................185
Sample File modem_z0.cfg ..................187
viii User’s Guide

Sample File modem_f.cfg ...................189
Sample File modem_f0.cfg ..................192
Sample File modem_f1.cfg ..................195
Index ..........................199
Contents ix

xUser’s Guide

Safety Notices
A
danger
notice indicates the presence of a hazard that has the potential of causing
death or serious personal injury. Danger notices appear on the following pages:
vxi
A
caution
notice indicates the presence of a hazard that has the potential of causing
moderate or minor personal injury. Caution notices appear on the following pages:
vxi
vxiii
v17
Note: For a translation of these notices, see
System Unit Safety Information
, order
number SA23-2652.
Electrical Safety
Observe the following safety instructions any time you are connecting or disconnecting
devices attached to the workstation.
DANGER
An electrical outlet that is not correctly wired could place hazardous voltage
on metal parts of the system or the devices that attach to the system. It is the
responsibility of the customer to ensure that the outlet is correctly wired and
grounded to prevent an electrical shock.
Before installing or removing signal cables, ensure that the power cables for
the system unit and all attached devices are unplugged.
When adding or removing any additional devices to or from the system,
ensure that the power cables for those devices are unplugged before the
signal cables are connected. If possible, disconnect all power cables from the
existing system before you add a device.
Use one hand, when possible, to connect or disconnect signal cables to
prevent a possible shock from touching two surfaces with different electrical
potentials.
During an electrical storm, do not connect cables for display stations, printers,
telephones, or station protectors for communications lines.
CAUTION:
This product is equipped with a three–wire power cable and plug for the user’s
safety. Use this power cable with a properly grounded electrical outlet to avoid
electrical shock.
xi

DANGER
To prevent electrical shock hazard, disconnect all power cables from the
electrical outlet before relocating the system.
xii User’s Guide

Laser Safety Information
CAUTION:
This product may contain a CD-ROM which is a class 1 laser product.
Laser Compliance
All lasers are certified in the U.S. to conform to the requirements of DHHS 21 CFR
Subchapter J for class 1 laser products. Outside the U.S., they are certified to be in
compliance with the IEC 825 (first edition 1984) as a class 1 laser product. Consult the
label on each part for laser certification numbers and approval information.
CAUTION:
All IBM laser modules are designed so that there is never any human access to
laser radiation above a class 1 level during normal operation, user maintenance,
or prescribed service conditions. Data processing environments can contain
equipment transmitting on system links with laser modules that operate at
greater than class 1 power levels. For this reason, never look into the end of an
optical fiber cable or open receptacle. Only trained service personnel should
perform the inspection or repair of optical fiber cable assemblies and receptacles.
Safety Notices xiii

xiv User’s Guide

Data Integrity and Verification
IBM computer systems contain mechanisms designed to reduce the possibility of
undetected data corruption or loss. This risk, however, cannot be eliminated. Users who
experience unplanned outages, system failures, power fluctuations or outages, or
component failures must verify the accuracy of operations performed and data saved or
transmitted by the system at or near the time of the outage or failure. In addition, users
must establish procedures to ensure that there is independent data verification before
relying on such data in sensitive or critical operations. Users should periodically check
the IBM support websites for updated information and fixes applicable to the system and
related software.
xv

xvi User’s Guide

About This Book
This book provides information about the 9112 Model 265, specifically how to use the
system, use diagnostics and service aids, and verify system operation. In this book, the
9112 Model 265 are hereafter referred to as the ″system.″
ISO 9000
ISO 9000 registered quality systems were used in the development and manufacturing
of this product.
Online Publications
IBM Eserver pSeries publications are available online. To access the online books,
visit our Web site at: http://www.ibm.com/servers/eserver/pseries/library/hardware_docs/
Related Publications
The following publications provide additional information about your system unit:
vThe
IntelliStation POWER 9112 Model 265 Installation Guide
, order number
SA38-0607, contains information on how to set up and cable the system, install and
remove options, and verify system operation.
vThe
IntelliStation POWER 9112 Model 265 Service Guide
, order number SA38-0609,
contains reference information, maintenance analysis procedures (MAPs), error
codes, removal and replacement procedures, and a parts catalog.
vThe
RS/6000
Eserver
pSeries Diagnostic Information for Multiple Bus Systems
,
order number SA38-0509, contains diagnostic information, service request numbers
(SRNs), and failing function codes (FFCs).
vThe
RS/6000
Eserver
pSeries Adapters, Devices, and Cable Information for
Multiple Bus Systems
, order number SA38-0516, contains information about
adapters, devices, and cables for your system. This manual is intended to
supplement the service information found in the
RS/6000
Eserver
pSeries
Diagnostic Information for Multiple Bus Systems
.
vThe
Site and Hardware Planning Guide
, order number SA38-0508, contains
information to help you plan your installation.
vThe
System Unit Safety Information
, order number SA23-2652, contains translations
of safety information used throughout this book.
vThe
PCI Adapter Placement Reference
, order number SA38-0538, contains
information regarding slot restrictions for adapters that can be used in this system.
xvii

Ergonomic Information
After you have set up your system, we encourage you to visit the Healthy Computing
Web site. Good ergonomic practice is important to get the most from your workstation
and to avoid discomfort. This means that the equipment and the workplace should be
arranged to suit your individual needs and the kind of work you do.
The Healthy Computing Web site gives ergonomic guidelines to help you understand
the ergonomic considerations that you should know when working at a computer
workstation. The address is: http://www.us.pc.ibm.com/healthycomputing
Trademarks
The following terms are trademarks of International Business Machines Corporation in
the United States, other countries, or both:
vAIX
vIBM
vPowerPC
vpSeries
ve (logo)
vIntelliStation
Other company, product, and service names may be trademarks or service marks of
others.
xviii User’s Guide
Table of contents
Other IBM Desktop manuals

IBM
IBM Aptiva User manual

IBM
IBM 6219 - IntelliStation M - Pro Owner's manual

IBM
IBM NetVista User manual

IBM
IBM PC 300 User manual

IBM
IBM NetVista A21 Setup guide

IBM
IBM RS/6000 7043 43P Series User manual

IBM
IBM 5280 Setup guide

IBM
IBM NetVista A21 User manual

IBM
IBM NetVista A20 User manual

IBM
IBM ThinkCentre A30 8198 User manual
Popular Desktop manuals by other brands

Marchetti
Marchetti System 120x200 Instructions for use and maintenance

HP
HP Xw6400 - Workstation - 4 GB RAM Declaration of conformity

Sinclair
Sinclair 2068 user manual

Toshiba
Toshiba Portege R100 Resource Guide

Lenovo
Lenovo NetVista A40 quick reference

Compaq
Compaq Evo D300 - Convertible Minitower Hardware reference guide