Icom ID–800H Mini–Operating Guide by W5JCK, September 2007 Page 5 of 6
Operating through a Repeater
Normally, you will operate the ID-800H through repeater frequencies that have been pre-
programmed into the radio’s Memory channels. However, the occasion may arise in which you
need to operate through a repeater that has not been pre-programmed. This section instructs
you in setting up the ID-800H to operate through a repeater.
1. Activate VFO mode: Press [V/MHz●SCAN]to activate the VFO mode.
2. Select the Frequency Band: See “Selecting a Frequency Band” for instructions.
3. Set the Receive Frequency: See “Operating in VFO Mode” for instructions. This is the
frequency on which your radio receives the repeater’s transmissions. (For example, you
will receive the Tarrant County R.A.C.E.S. repeater on 146.940 MHz.)
4. If necessary, Set the Repeater Shift:
Note: If the Auto Repeater Function is set to On and the repeater
uses a standard repeater shift, this step will not be necessary as the
ID-800H will automatically set the shift.
To manually set the repeater shift:
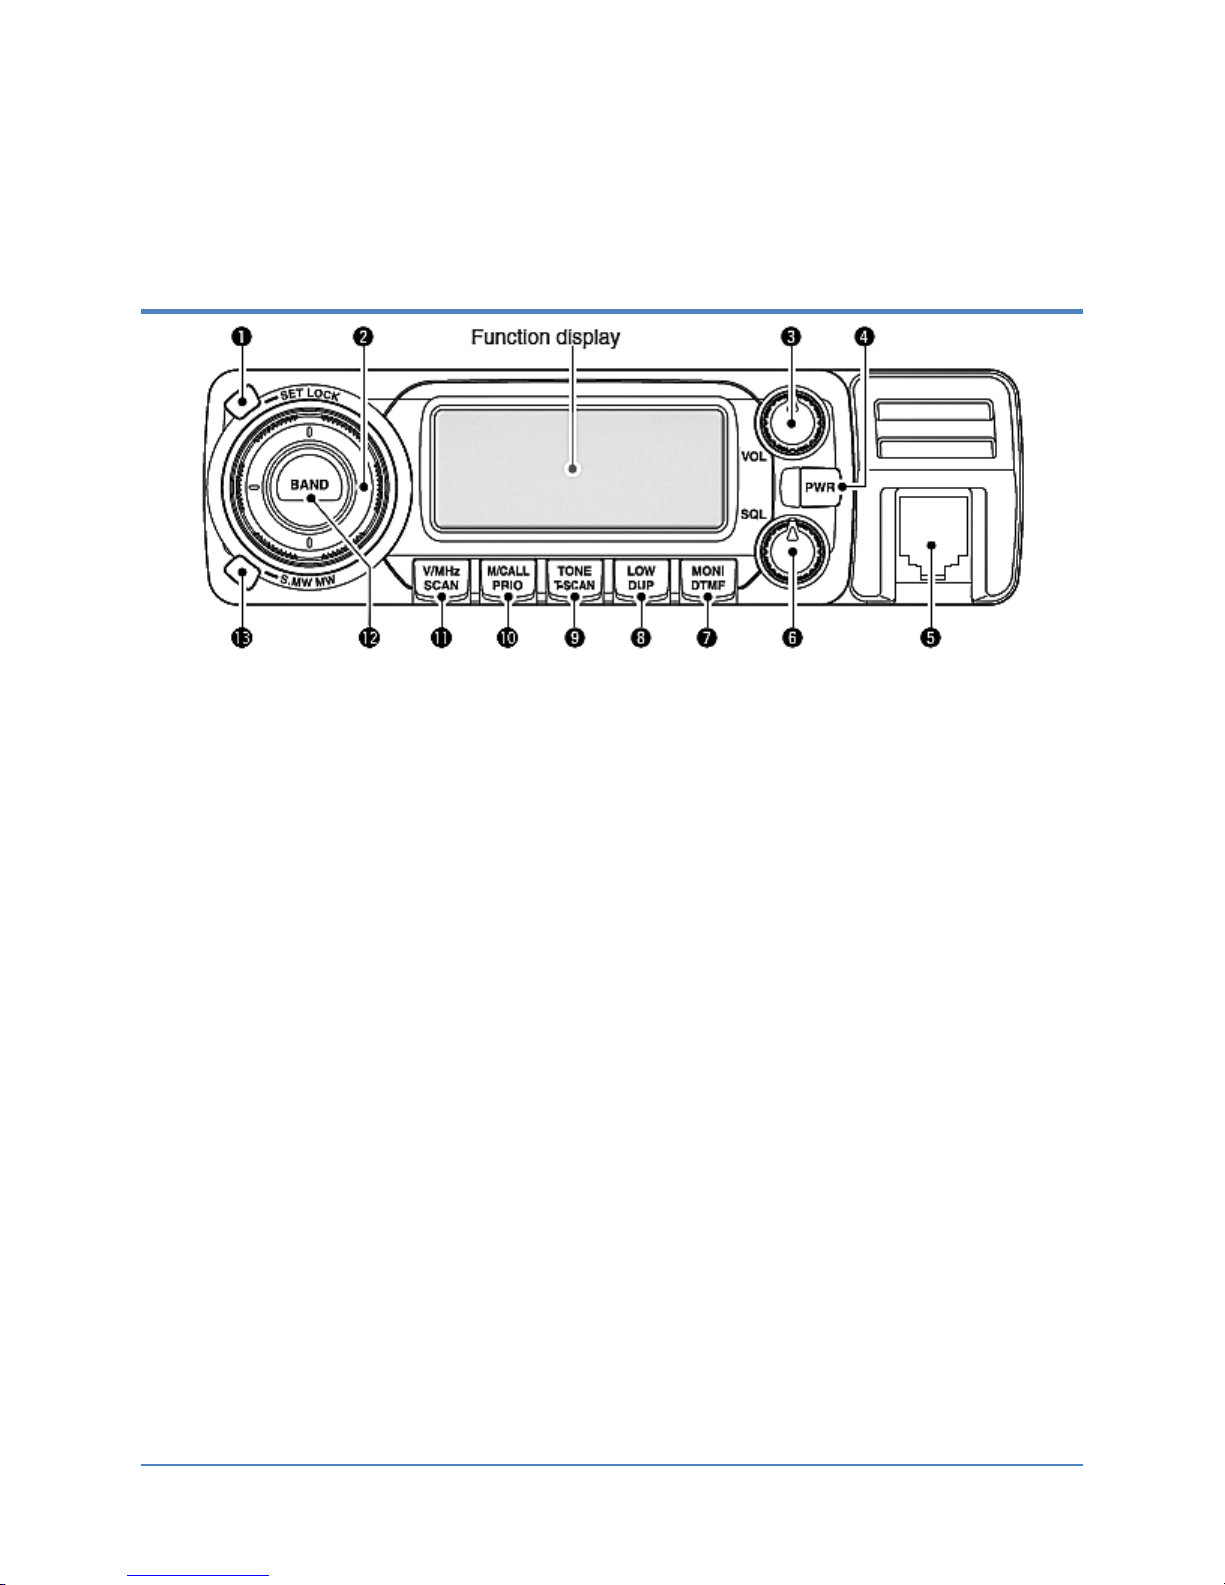
Press and hold [LOW●DUP]for 1 sec., once or twice, to select minus
duplex or plus duplex shift.
● For minus duplex, “DUP−” appears on the LCD screen. The
repeater’s receive freq. is set lower than its transmit frequency.
● For plus duplex, “DUP” appears on the LCD screen. The
repeater’s receive freq. is set higher than its transmit frequency.
● If the repeater uses an offset frequency amount other than 0.6
MHz for 2m band or 5 MHz for 70cm band, manually set the offset
in Step 5.
Example: Set the 146.940
repeater shift to minus
duplex “DUP−“. This sets
the repeater’s receive
frequency to 146.340 MHz.
5. If necessary, Set the Repeater Offset Frequency Amount:
Note: This step is only necessary if the repeater’s offset frequency
is an amount other than 0.6 MHz on the 2m band or 5 MHz on the
70cm band.
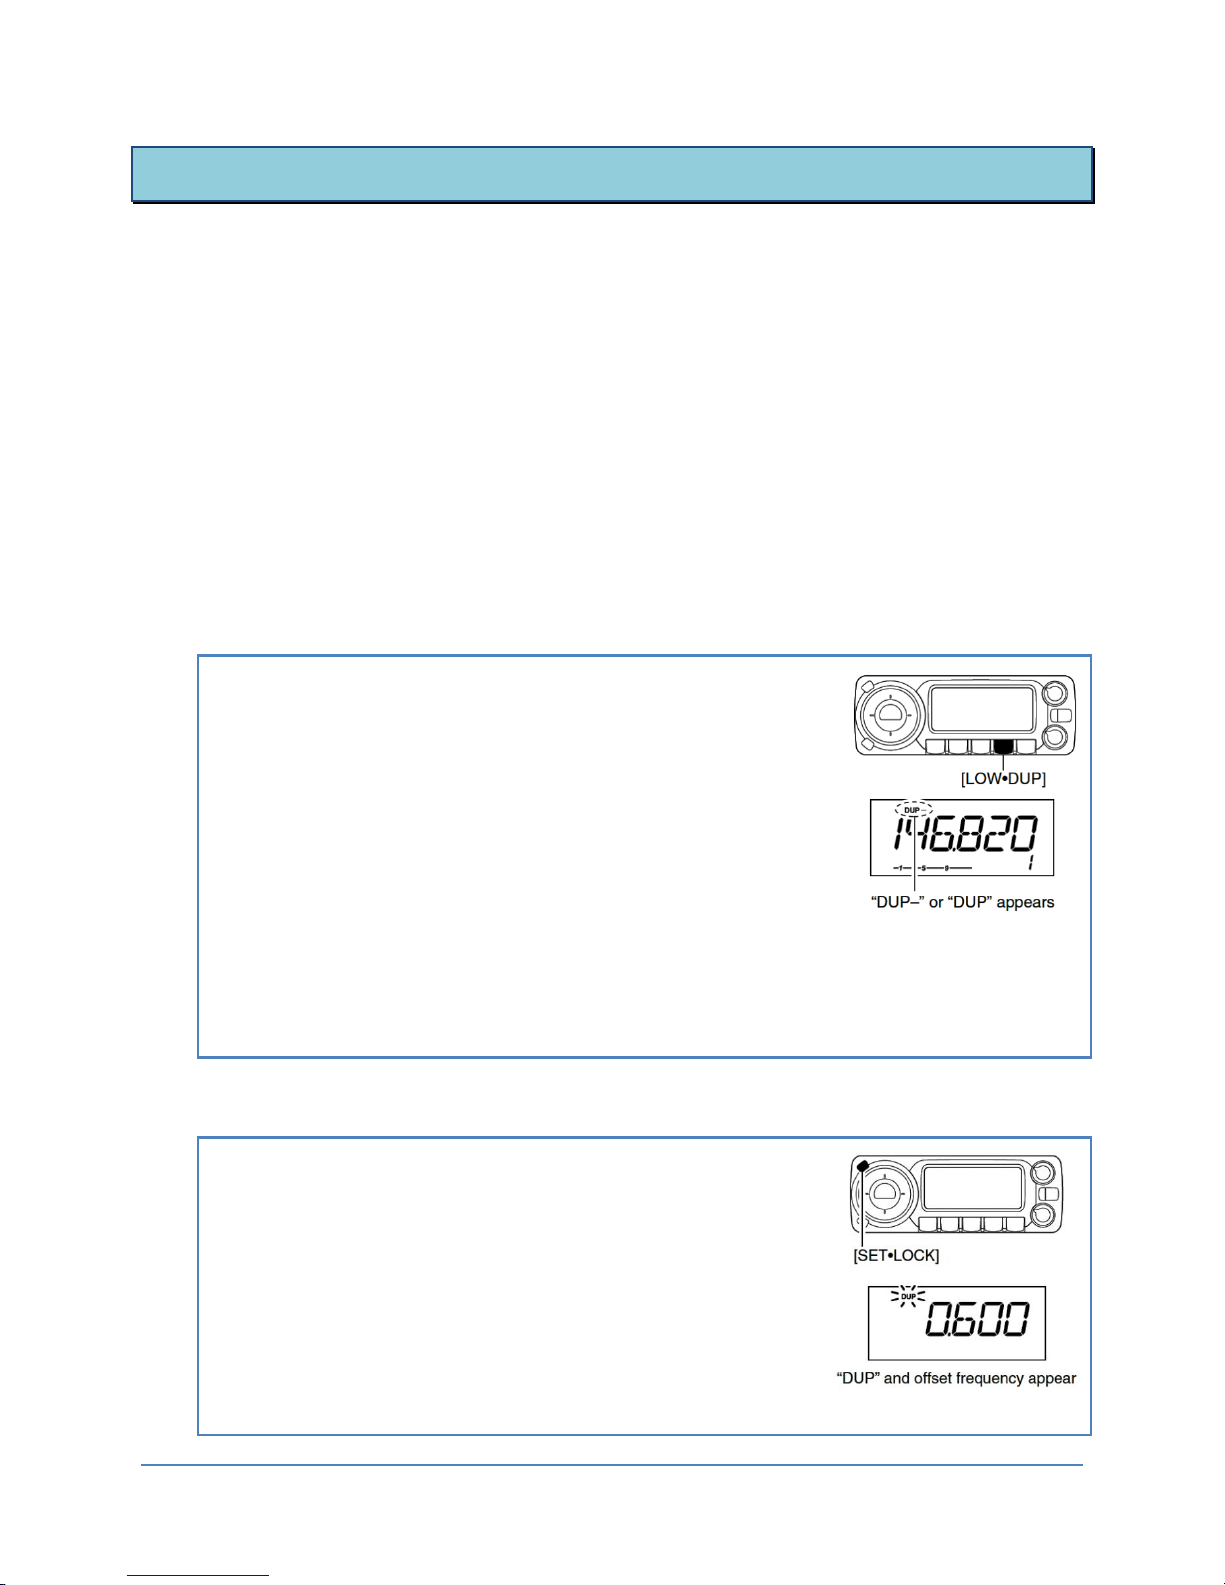
a. Press [SET●LOCK]to activate Set mode.
b. If necessary, rotate [DIAL]to select SET.
c. Press [SET●LOCK]one or more times until “DUP” and offset
frequency appear.
d. Rotate [DIAL]to select the offset frequency.
e. Press [TONE●T-SCAN]to set the offset and exit Set mode.