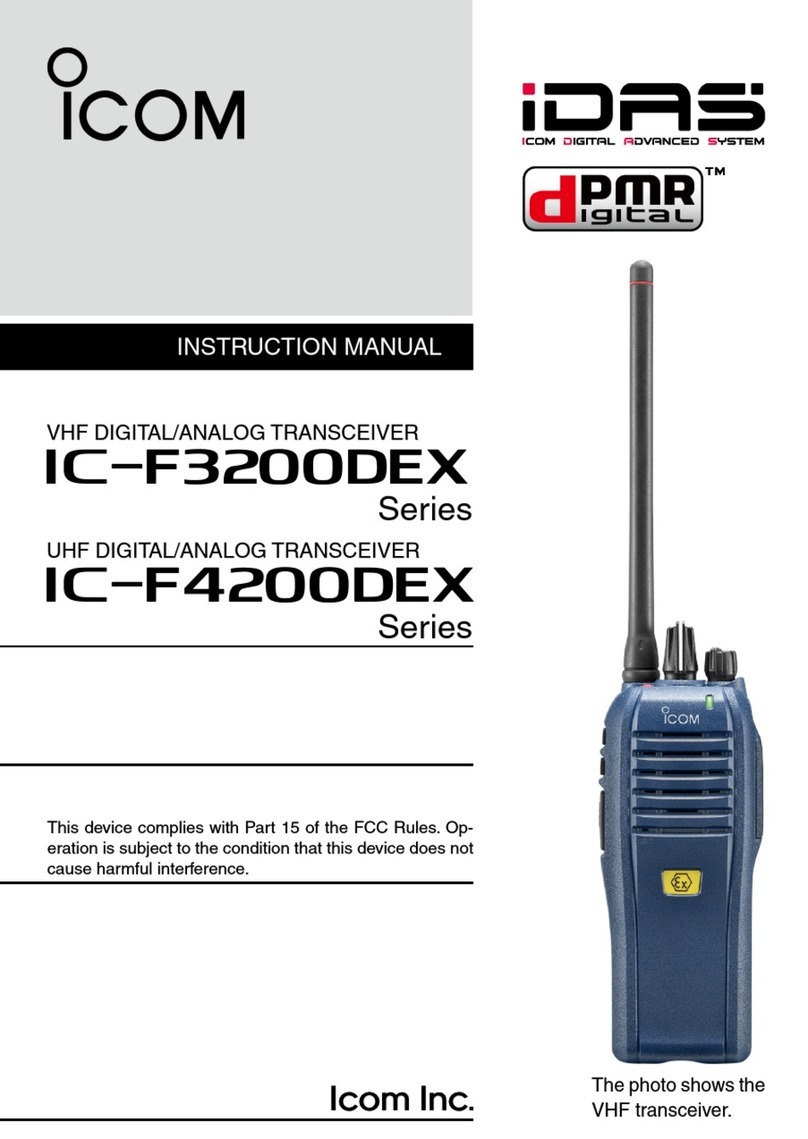
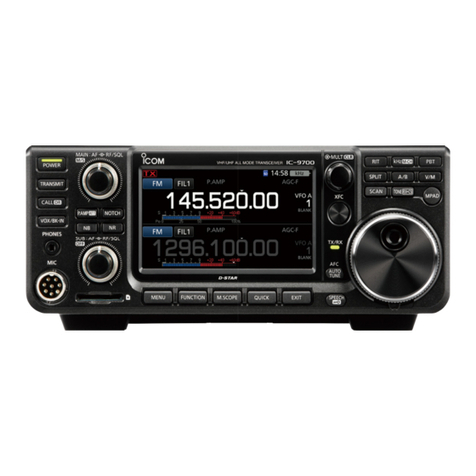
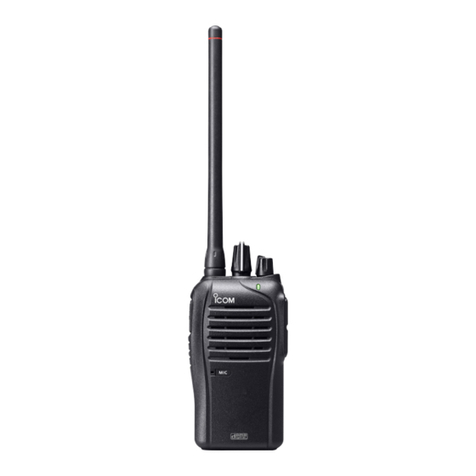
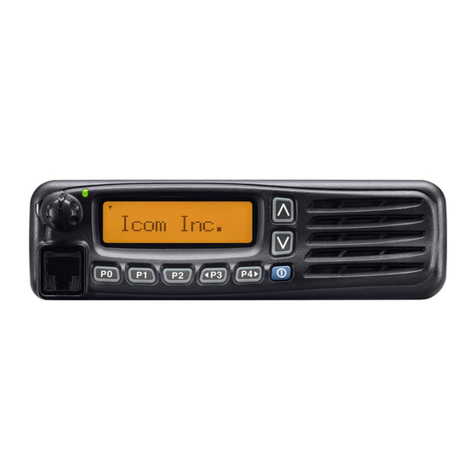
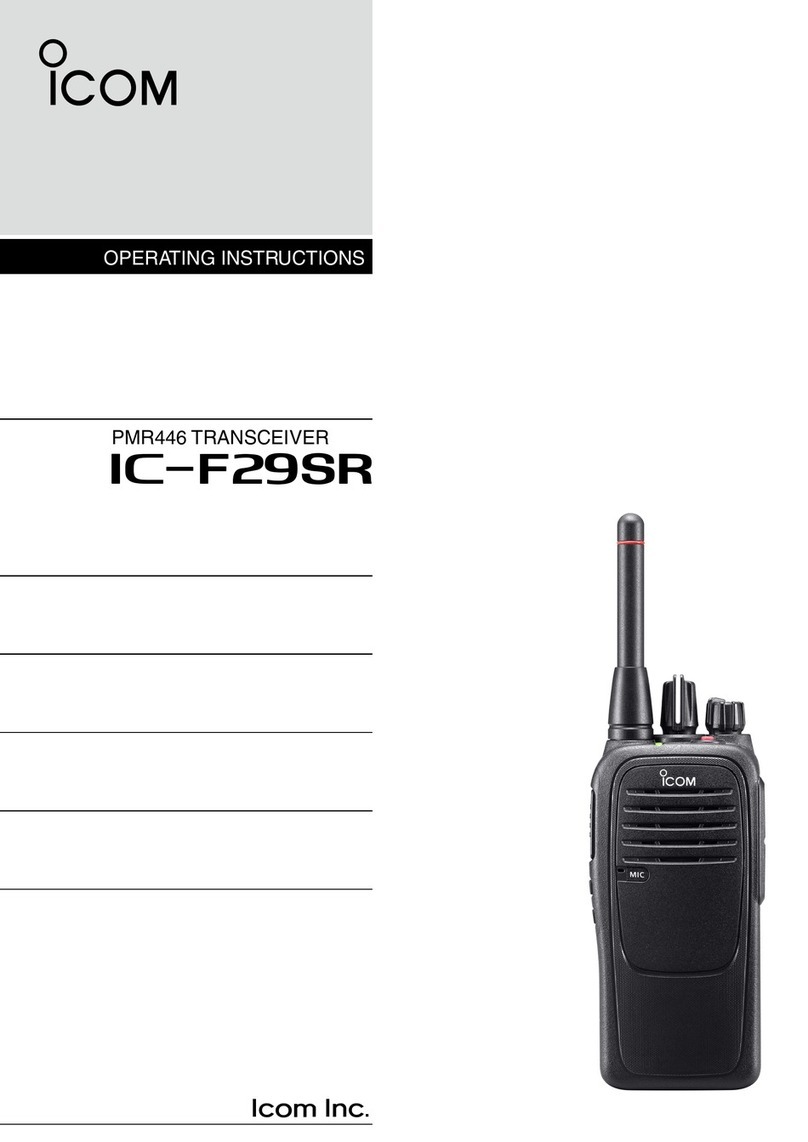
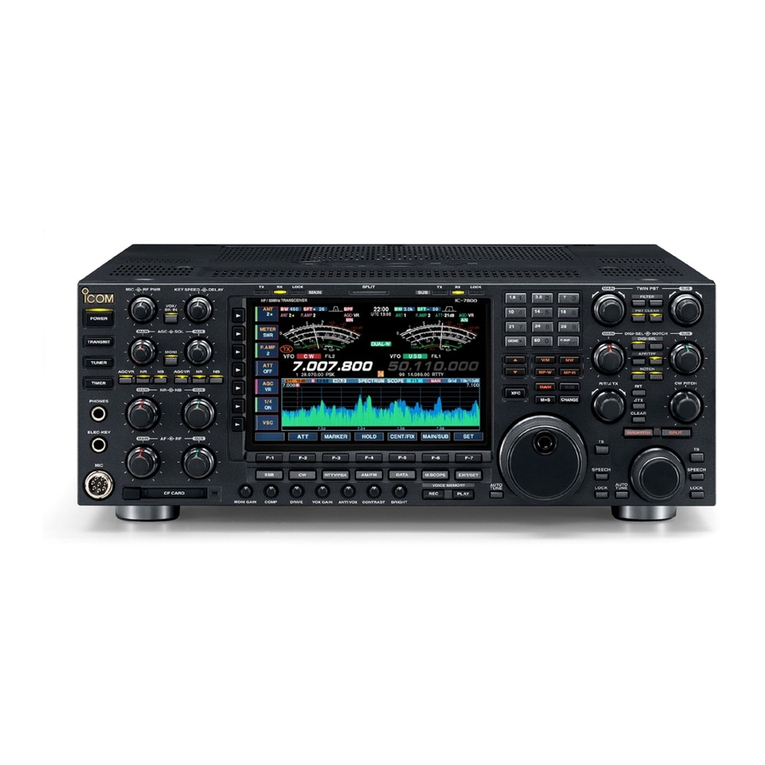
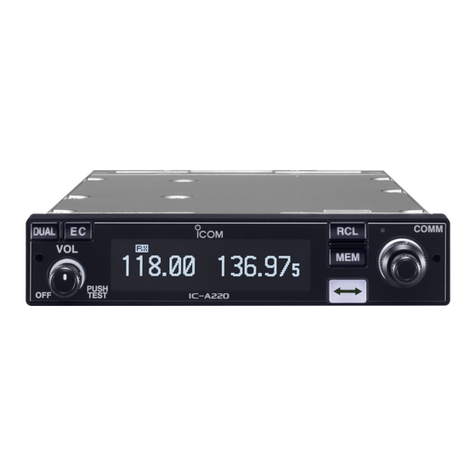
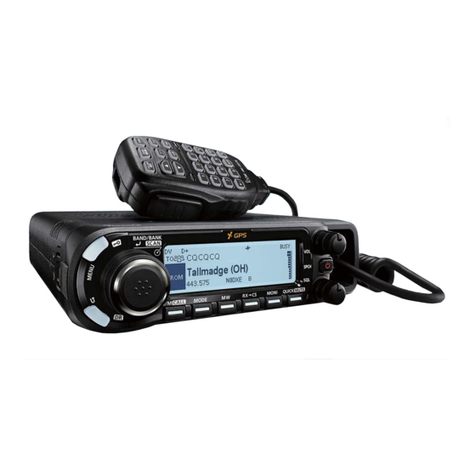
Icom IC-F9011B User manual

INSTRUCTION MANUAL
UHF P25 TRUNKING
HANDHELD TRANSCEIVERS
iF9011B/S/T
The photo shows the 10-key
type VHF transceiver.
iF9023B/S/T
iF9021B/S/T
VHF P25 TRUNKING
HANDHELD TRANSCEIVERS

i
IMPORTANT
READ ALL INSTRUCTIONS carefully and com-
pletely before using the transceiver.
SAVE THIS INSTRUCTION MANUAL — This
instruction manual contains important operating instructions
for the IC-F9011B/S/T VHF P25 TRUNKING HANDHELD
TRANSCEIVERS and the IC-F9021B/S/T, IC-F9023B/S/T
UHF P25 TRUNKING HANDHELD TRANSCEIVERS.
✔When the optional UT-125 aes/des encryption
unit is installed:
When you attempt to re-export this product and/or AES en-
cryption of this product is activated, you must comply with the
export regulations of your country, which can be highly restric-
tive. YOUR FAILURE TO COMPLY WITH EXPORT REGULA-
TIONS MAY SUBJECT YOU TO FINES OR PENALTIES. AES
encryption products including this software fall under the con-
trol of the Japanese Government as described in Appendix I:
Export Legal Controls and Appendix: Exchange Legal Con-
trols. Please consult with your dealer or sales representative
for details.
EXPLICIT DEFINITIONS
WORD DEFINITION
RDANGER! Personal death, serious injury or an explo-
sion may occur.
RWARNING! Personal injury, fire hazard or electric
shock may occur.
CAUTION Equipment damage may occur.
NOTE
If disregarded, inconvenience only. No risk
of personal injury, fire or electric shock.
See the operating guide for details of Analog, MDC and
P25 Trunking/Conventional system operations. Consult
your Icom dealer or system operator for details concern-
ing your transceivers programming.
✔ INFORMATION:
In this instruction manual, the following descriptions are used;
IC-F9011B/IC-F9021B/IC-F9023B : “Non-display type”
IC-F9011S/IC-F9021S/IC-F9023S : “Simple type”
IC-F9011T/IC-F9021T/IC-F9023T : “10-key type”
10-key typeSimple typeNon-display type
Icom, Icom Inc. and the Icom logo are registered trademarks of Icom Incor-
porated (Japan) in Japan, the United States, the United Kingdom, Germany,
France, Spain, Russia and/or other countries.
All other products or brands are registered trademarks or trademarks of their
respective holders.

ii
1
2
3
4
5
6
7
8
9
10
11
12
13
14
15
16
FCC INFORMATION
• FOR CLASS B UNINTENTIONAL RADIATORS:
This equipment has been tested and found to comply with
the limits for a Class B digital device, pursuant to part 15 of
the FCC Rules. These limits are designed to provide reason-
able protection against harmful interference in a residential
installation. This equipment generates, uses and can radiate
radio frequency energy and, if not installed and used in ac-
cordance with the instructions, may cause harmful interfer-
ence to radio communications. However, there is no guaran-
tee that interference will not occur in a particular installation.
If this equipment does cause harmful interference to radio
or television reception, which can be determined by turning
the equipment off and on, the user is encouraged to try to
correct the interference by one or more of the following mea-
sures:
• Reorient or relocate the receiving antenna.
• Increase the separation between the equipment and re-
ceiver.
• Connect the equipment into an outlet on a circuit differ-
ent from that to which the receiver is connected.
• Consult the dealer or an experienced radio/TV techni-
cian for help.
ABOUT IPR
This device is made under license under one or more of the
following U.S. Patents: #4,590,473; #4,636,791; #5,148,482;
#5,185,796; #5,271,017; #5,377,229; #4,716,407; #4,972,460;
#5,502,767; #5,146,497; #5,164,986; #5,185,795; #5,164,986,
#5,185,795, and #5,146,497.
* IPR means ‘Intellectual Property Rights.’
VOICE CODING TECHNOLOGY
The AMBE+2™ voice coding Technology embodied in this
product is protected by intellectual property rights including
patent rights, copyrights and trade secrets of Digital Voice
Systems, Inc. This voice coding Technology is licensed sole-
ly for use within this Communications Equipment. The user
of this Technology is explicitly prohibited from attempting to
extract, remove, decompile, reverse engineer, or disassem-
ble the Object Code, or in any other way convert the Object
Code into a human-readable form. U.S. Patent Nos.
#5,870,405, #5,826,222, #5,754,974, #5,701,390,
#5,715,365, #5,649,050, #5,630,011, #5,581,656,
#5,517,511, #5,491,772, #5,247,579, #5,226,084 and
#5,195,166.
iii
RDANGER! NEVER short the terminals of the bat-
tery pack.
RWARNING! NEVER hold the transceiver so that
the antenna is very close to, or touching exposed parts of
the body, especially the face or eyes, while transmitting. The
transceiver will perform best if the microphone is 5 to 10 cm
(2 to 4 in.) away from the lips and the transceiver is vertical.
RWARNING! NEVER operate the transceiver with a
headset or other audio accessories at high volume levels.
CAUTION: NEVER use non-Icom battery packs/charg-
ers to prevent the loss of the transceiver’s good performance
and warranty.
DO NOT push [PTT] when not actually desiring to transmit.
DO NOT use or place the transceiver in direct sunlight or
in areas with temperatures below –30°C (+22°F) or above
+60°C (+140°F).
The basic operations, transmission and reception of the
transceiver are guaranteed within the specified operating
temperature range. However, the LCD display may not oper-
ate correctly, or show an indication in the case of long hours
of operation, or after being placed in extremely cold areas.
DO NOT modify the transceiver. The transceiver warranty
does not cover any problems caused by unauthorized modi-
fication.
BE CAREFUL! The transceiver meets IP57 require-
ments for dust-protection and waterproof protection. How-
ever, once the transceiver has been dropped, dust-protection
and waterproof protection cannot be guaranteed due to the
fact that the transceiver may be cracked, or the waterproof
seal damaged, etc.
For U.S.A. only
CAUTION: Changes or modifications to this transceiver,
not expressly approved by Icom Inc., could void your author-
ity to operate this transceiver under FCC regulations.
Approved Icom optional equipment is designed for optimal
performance when used with an Icom transceiver.
Icom is not responsible for the destruction or damage to an
Icom transceiver in the event it is used with equipment that
is not manufactured or approved by Icom.
PRECAUTIONS

1
2
3
4
5
6
7
8
9
10
11
12
13
14
15
16
iv
TABLE OF CONTENTS
IMPORTANT.......................................................................... i
EXPLICIT DEFINITIONS....................................................... i
FCC INFORMATION ............................................................ ii
ABOUT IPR .......................................................................... ii
VOICE CODING TECHNOLOGY ......................................... ii
PRECAUTIONS................................................................... iii
TABLE OF CONTENTS....................................................... iv
1 ACCESSORIES ...........................................................1−2
■ Supplied accessories ...................................................1
■ Accessory attachments ................................................1
2 PANEL DESCRIPTION..............................................3−11
■ Front panel ...................................................................3
■ Function display (Simple/10-key types only) ................5
■ Programmable function keys........................................6
3 BASIC OPERATION................................................12−16
■ Turning power ON ......................................................12
■ Channel selection.......................................................12
■ Receiving and transmitting.........................................13
■ User set mode............................................................14
■ Clock function.............................................................15
■ LED indicator (Non-display type only) ........................16
4 BATTERY CHARGING ............................................17−20
■ Caution.......................................................................17
■ Optional battery chargers...........................................19
5 BATTERY CASE............................................................21
■ Optional battery case (BP-237)..................................21
6 SPEAKER MICROPHONE............................................22
■ Optional HM-184 description......................................22
■ To attach.....................................................................22
7 OPTIONS.................................................................23−25
8 SAFETY TRAINING INFORMATION.............................26

1
1ACCESSORIES
■Supplied accessories
The following accessories are supplied.
Flexible
antenna
Battery pack
Belt clip Connector cover
(with screw)
■Accessory attachments
DFlexible antenna
Connect the supplied flexible antenna to the antenna con-
nector.
CAUTION:
• NEVER carry the transceiver by
holding the antenna.
•
DO NOT connect the antenna other
than listed on p. 23.
• Transmitting without an antenna may
damage the transceiver.
DBattery pack
To attach the battery pack:
Slide the battery pack on the back of the transceiver in the direc-
tion of the arrow (q), then lock it with the battery release button.
• Slide the battery pack until the battery release button makes a ‘click’
sound.
To release the battery pack:
Slide the battery release button in the direction of the arrow
(w) as shown below. The battery pack is then released.
NEVER release or attach the battery pack when the trans-
ceiver is wet or soiled. This may result water or dust get-
ting into the transceiver/battery pack and may result in the
transceiver being damaged.
q
Battery release
button
Battery pack
w
NOTE: Keep the battery pack terminals clean. It’s a good
idea to clean the battery pack terminals once a week.

2
1
ACCESSORIES
1
2
3
4
5
6
7
8
9
10
11
12
13
14
15
16
DBelt clip
To attach the belt clip:
qRelease the battery pack if it is attached.
wSlide the belt clip in the direction of the arrow until the belt
clip is locked and makes a ‘click’ sound.
To detach the belt clip:
qRelease the battery pack if it is attached.
wPinch the clip (q), and slide the belt clip in the direction of
the arrow (w).
q
w
DConnector cover
Attach the connector cover when the optional equipment is
not used.
To attach the connector cover:
qInsert the connector cover
into the multi-connector.
wTighten the screw.
CAUTION:
Attach the connector cover
when the optional equipment
is not used. Otherwise the
terminals of the multi-con-
nector may be shorted by
metal object, etc., and this
could damage the transceiver.
To detach the connector cover:
qUnscrew the screw using a
phillips screwdriver.
wDetach the connector cover
for the optional equipment
connector.
Multi-
connector
Connector
cover
q
w
q
w

■Front panel
*1Simple/10-key types only
*210-key type only
Speaker
Microphone
Function display*1
(p. 5)
!0*1
!5
o*1
!1*2
!2*1
!4
!3
e
t
y
u
i
r
w
q
qANTENNA CONNECTOR
Connects the supplied antenna. (p. 1)
wDEALER-PROGRAMMABLE KEY [EMR]
Desired function can be programmed by your dealer. (p. 6)
• [Emergency] is pre-programmed as default. (See the operating
guide for details.)
eLED INDICATOR
➥
Lights green while receiving a signal, or when the
squelch is open.
➥ Lights red while transmitting.
➥
The LED indicator indicates some information. (Non-
display type only) (p. 16)
rDEALER-PROGRAMMABLE ABC SWITCH
Desired function can be programmed to each position
(A, B or C) independently by your dealer. (p. 11)
To activate the pre-programmed function, set the white line
of the ABC switch to the position A, B or C.
When the white line of the ABC switch is
set to the position C, the pre-programmed
function at position C will be activated.
White line
3
2PANEL DESCRIPTION

4
2
PANEL DESCRIPTION
1
2
3
4
5
6
7
8
9
10
11
12
13
14
15
16
tCHANNEL INDICATOR
➥
Lights white according to the “Backlight” setting of the
user set mode.
➥ When you rotate [Rotary selector] to select the channel
or zone, set the desired channel/zone number to this
point.
yDEALER-PROGRAMMABLE TOGGLE SWITCH
Desired function can be programmed by your dealer.
(p. 11)
When the toggle switch is set to the left side (‘ ’), the pre-
programmed function will be activated.
uVOLUME CONTROL [VOL]
Rotate to turn the power ON/OFF and adjust the audio
level.
iROTARY SELECTOR
Rotate to select the pre-programmed memory channels or
the operating zone. (Depending on the pre-setting)
• The channel/zone that is positioned to the channel indicator (t)
is selected as the operating channel/zone.
• Depending on the pre-setting, selecting channel 1 using the ro-
tary selector starts a scan. (Rotary Selector Home function)
oDEALER-PROGRAMMABLE KEYS
[I]/[II]/[III]/[Ω]/[≈]/[∫]/[√] (Simple/10-key types only)
Desired function can be programmed independently by
your dealer. (p. 6)
!0 APP KEY [APP] (Simple/10-key types only)
Desired function can be programmed by your dealer.
(p. 6)
!1 10-KEYPAD (10-key type only)
The keypad allows you to enter digits to:
• Select memory channels, tone channels and DTMF codes (while
in the DTMF code channel selection mode.)
• Start up with the password
• Input the Individual ID code for digital operation. (Depending on
the pre-setting)
!2 HOME KEY [HOME] (Simple/10-key types only)
Desired function can be programmed by your dealer.
(p. 6)
• [Home] is pre-programmed as default. (See p. 7 for details.)
!3 PTT SWITCH [PTT]
Push and hold to transmit; release to receive.
• Depending on the pre-setting, when an external unit with its own
PTT switch* is connected to the multi-connector, the transceiv-
er’s [PTT] is disabled.
* Such as an optional speaker-microphone or headset.
!4 DEALER-PROGRAMMABLE KEYS
[Side1]/[Side2]/[Side3]
Desired function can be programmed independently by
your dealer. (p. 6)
!5 MULTI-CONNECTOR
Connect optional equipment.
Connector cover
NOTE: Attach the connector cover when
the optional equipment is not used.
See p. 2 for details.

5
2PANEL DESCRIPTION
001
ch
-01
IC
-
F
9011
MON CLCK ZONE !1
q e y ou itrw
!0
qSIGNAL STRENGTH INDICATOR
Indicates relative signal strength level.
StrongWeak
wLOW POWER INDICATOR
Appears when low output power is selected.
• When high output power is selected, no indicator appears.
eAUDIBLE INDICATOR
Appears when the channel is in the ‘audible’ (unmute) con-
dition.
r COMPANDER INDICATOR
Appears when the compander function* is activated.
* Analog mode operation only.
t SCRAMBLER INDICATOR
Appears when the voice scrambler or encryption function
is activated.
y BELL INDICATOR
Appears/blinks when the matched signal is received, ac-
cording to the pre-programming.
u TELEPHONE INDICATOR
Appears when a phone call* is received.
* P25 operation only.
iSHORT MESSAGE INDICATOR
Appears when an Status message or Short message is
received.
o BATTERY INDICATOR
Appears or blinks when the battery power decreases to a
specified level.
Indication
Battery level Full Middle Charging
required No battery
blinks when the battery is exhausted.
■
Function display (Simple/10-key types only)

6
2
PANEL DESCRIPTION
1
2
3
4
5
6
7
8
9
10
11
12
13
14
15
16
!0 ALPHANUMERIC DISPLAY
Displays an operating channel number, channel name, Set
mode contents, DTMF code, etc.
!1 KEY INDICATOR
Indicate the programmed function of the front panel keys
([I], [II] and [III]).
See the operating guide for details of Analog, MDC and
P25 Trunking/Conventional system operations. Consult
your Icom dealer or system operator for details concern-
ing your transceiver’s programming.
■Programmable function keys
The following functions can be assigned to the following pro-
grammable function keys and switches;
[EMR], [Side1], [Side2], [Side3], [I]*, [II]*, [III]*, [Ω]*, [≈]*, [∫]*,
[√]*, [APP]*, [HOME]*, ABC switch and Toggle switch.
*Simple/10-key types only
Consult your Icom dealer or system operator for details con-
cerning your transceiver’s programming.
If the key indicator shows the programmed function key
name, push the front panel key ([I], [II] or [III]) under the key
indicator to activate the programmed function.
(The function key name in parentheses in the following expla-
nation is displayed for that key indicator; e.g. “UP”)
For Non-display type:
The programmable key functions are limited and some key
functions should be operated differently from Simple and
10-key types. (See pp. 8 and 9 for details.)
For ABC and Toggle switches:
The programmable key functions to ABC and Toggle switches
are limited. (See p. 11 for details.)

7
2PANEL DESCRIPTION
DFor All types (Common operation)
PRIO A AND PRIO B KEYS “PRA” “PRB”
Push to select Priority A or Priority B channel.
MR-CH 1, MR-CH 2, MR-CH 3 AND MR-CH 4 KEYS
“CH1” “CH2” “CH3” “CH4”
Push to select the memory channels 1, 2, 3 and 4 directly.
MONI KEY “MON”
➥Push to mute and release the CTCSS (DTCS), 2-tone,
NAC or Talkgroup ID squelch mute. Open any squelch/de-
activate any mute while pushing and holding this key.
• Depending on the pre-setting, the ‘Audible’ (unmute) condition
may automatically return to the ‘Inaudible’ (mute) condition, after
a specified time period.
➥Depending on the pre-setting, pushing and holding this
key for 1 sec. cancels the scan.
LOCK KEY “LOCK”
➥Push and hold for 1 sec. to electronically lock all program-
mable keys except the following:
[PTT], [Moni], [Light], [Lock], [Emergency], [Surveillance] and
[OPT 1/2/3].
➥Push and hold for 1 sec. again to turn the function OFF.
LIGHT KEY “LIGT”
Push to turn the transceiver’s backlight ON for about 5 sec.
when the backlight function is turned OFF in user set mode.
(p. 14)
HOME KEY “HOME”
Push to return to the stand-by mode.
• After editing some information that requires to be memorized, push
this key to save the editing contents in the memory before returning
to the stand-by mode.
OPT MOMENTARY KEYS “O1M” “O2M” “O3M”
Push to control the output signal level from the optional unit
connector.

8
2
PANEL DESCRIPTION
1
2
3
4
5
6
7
8
9
10
11
12
13
14
15
16
D
For All types (Different operation with Non-display type)
When the following key functions are programmed to Non-
display type, the key functions may be limited and some key
functions should be operated differently from Simple and
10-key types.
HIGH/LOW KEY “H/L”
Push to select the transmit output power temporarily or per-
manently, depending on the pre-setting.
• Ask your dealer for the output power level for each selection.
• Emits one beep when Low 1 is selected, two beeps when Low 2 is
selected and three beeps when High is selected. (Non-display type
only)
SCAN KEY “SCAN”
❍ For Simple/10-key types
➥Push to start and cancel scanning operation.
• When the Power ON Scan, Auto Scan, or Rotary Selector
Home function starts a scan, push this key to cancel the scan.
The canceled scan resumes after the specified time period has
passed.
➥
Push and hold this key for 1 sec. to indicate the scan list,
then push [CH Up] or [CH Down] to select a desired list.
(Depending on the presetting.)
❍ For Non-display type
Push to start and cancel scanning operation.
• When the Power ON Scan, Auto Scan, or Rotary Selector Home
function starts a scan, push this key to cancel the scan. The can-
celed scan resumes after the specified time period has passed.
• The LED indicator blinks green slowly while scanning.
SURVEILLANCE KEY “SURV”
When this function is turned ON, the beep is not emitted and
the LCD backlight does not light when a signal is received or
a key is pushed.
❍ For Simple/10-key types
Push to turn the surveillance function ON or OFF.
❍ For Non-display type
➥Push and hold for 1 sec. to turn the surveillance function
ON.
➥When the surveillance function is ON, push to turn the
function OFF.
TALK AROUND KEY “TA” (Conventional operation only)
The talk around function equalizes the transmit frequency to
the receive frequency for transceiver-to-transceiver commu-
nication.
❍ For Simple/10-key types
Push to turn the talk around function ON or OFF.
❍ For Non-display type
➥Push and hold for 1 sec. to turn the talk around function
ON.
➥When the talk around function is ON, push to turn the
function OFF.

2PANEL DESCRIPTION
9
PRIO A REWRITE AND PRIO B REWRITE KEYS
“PRAR” “PRBR”
❍ For Simple/10-key types
➥Push to select Priority A or Priority B channel.
➥Push and hold [Prio A (Rewrite)] or [Prio B (Rewrite)] for
1 sec. to rewrite the operating channel as the Priority A or
Priority B channel.
❍ For Non-display type
Push to select Priority A or Priority B channel.
COMPANDER KEY “COMP”
The compander function reduces noise components from
the transmitted audio to provide clear communication.
❍ For Simple/10-key types
Push to toggle the compander function ON and OFF.
❍ For Non-display type
➥Push and hold for 1 sec. to turn the compander function ON.
➥When the compander function is ON, push to turn the
function OFF.
OPT OUT KEYS “OP1” “OP2” “OP3”
❍ For Simple/10-key types
Push to control the output signal level from the optional unit
connector.
❍ For Non-display type
➥Push and hold for 1 sec. to control the output signal level
from the optional unit connector.
➥When this key function is activated, push to deactivate
the function.
DFor Simple/10-key types only
Following key functions cannot be programmed to Non-dis-
play types.
CH UP AND DOWN KEYS “UP” “DOWN”
➥ Push to select an operating channel. When [Rotary selec-
tor] selection mode is “operating channel,” this function is
not available.
➥Push to select a scan group after pushing and holding
[Scan].
ZONE KEY “ZONE”
Push this key, then push [CH Up] or [CH Down] to select the
desired zone.
When [Rotary selector] selects “operating zone,” push this
key to switch the range of selectable zones.
What is “zone”?— Selected channels are assigned to a zone
according to how they are to be used in a group. For example,
‘Staff A’ and ‘Staff B’ are assigned into a “Business” zone, and
‘John’ and ‘Cindy’ are assigned into a “Private” zone.
USER SET MODE KEY “SET”
➥Push and hold for 1 sec. to enter user set mode.
• During in the user set mode, push this key to select an item that
is enabled by your dealer, and change the value or condition by
pushing [CH Up] or [CH Down].
➥Push and hold this key for 1 sec. again to exit user set mode.
User set mode is also available via the ‘Power ON func-
tion.’ Refer to p. 14 also.

10
2
PANEL DESCRIPTION
1
2
3
4
5
6
7
8
9
10
11
12
13
14
15
16
CLOCK KEY “CLCK”
Push to indicate the current time on the LCD. (p. 15)
• While the current time is indicated, push and hold this key for
1 sec. to enter the time data edit mode.
SCAN ADD/DEL (TAG) KEY “SCAD”
➥
Push to add the selected channel to or delete it from the
scan list.
1. Push to indicate the scan list, then push [CH Up] or
[CH Down] to select the desired list.
2. Push to add the channel to or delete it from the select-
ed scan list.
3. Push and hold for 1 sec. to exit the scan list selection
mode.
➥
While a scan is paused on a non-priority channel, push this
key to delete the selected channel from the scan group.
• Depending on the pre-setting, the deleted channel is added
to the scan group again, after the scan is canceled. (Nuisance
Delete function)
MENU AND MENU ➤KEYS
([Menu ] and [Menu ➤] can only be assigned to [Ω]and
[≈], respectively.)
The menu mode is available when either [Menu ] or
[Menu ➤] is assigned to [Ω]or [≈].
During menu mode, the pre-programmed menu items (up to
15) become effective with [I], [II] and [III] keys.
Push [Menu ]/[Menu ➤] to switch the previous/next 3 menu
items, and push [I], [II] or [III] to activate the programmed
function.
During menu mode
Push [Menu
�
]
or [Menu�]
Push [Menu
�
]
or [Menu�]
Push [Menu
�
] or [Menu�]
001
ch
-01
IC
-
F
9011
MON CLCK ZONE
001
ch
-01
IC
-
F
9011
LOCK LIGT SET
001
ch
-01
IC
-
F
9011
SCNA PRA CH1
Menu items

2PANEL DESCRIPTION
11
DFor ABC and Toggle switches only
ZONE SWITCH
Selects the pre-programmed zone directly.
PRIO A AND PRIO B SWITCHES
Selects Priority A or Priority B channel.
MR-CH 1, MR-CH 2, MR-CH 3 AND MR-CH 4 SWITCHES
Selects the memory channels 1, 2, 3 and 4, directly.
TALK AROUND SWITCH (Conventional operation only)
Turns the talk around function ON and OFF.
• The talk around function equalizes the transmit frequency to the
receive frequency for transceiver-to-transceiver communication.
LOCK SWITCH
Turns the lock function ON and OFF.
All programmable keys except the following are locked:
[PTT], [Moni], [Light], [Lock], [Emergency], [Surveillance]
and [OPT 1/2/3].
HIGH/LOW SWITCH
Selects the transmit output power temporarily.
• Ask your dealer for the output power level for each selection.
SURVEILLANCE SWITCH
Turns the surveillance function ON or OFF.
When this function is turned ON, the beep is not emitted and
the LCD backlight does not light when a signal is received or
a key is pushed, etc.
COMPANDER SWITCH
Turns the compander function ON and OFF.
The compander function reduces noise components from
the transmitted audio to provide clear communication.
OPT MOMENTARY SWITCHES
Controls the output signal level from the optional unit con-
nector.

12
3
BASIC OPERATION
1
2
3
4
5
6
7
8
9
10
11
12
13
14
15
16
■Turning power ON
• Prior to using the transceiver for the first time, the battery
pack must be fully charged for optimum life and opera-
tion. (p. 17)
• When you use the transceiver for the first time, or after
the transceiver has sat unused for a long time, make
sure to check the date and time indication after turning
the power ON. If the time and date are not correct, reset
them. (p. 15)
qRotate [VOL] to turn the power ON.
wIf the transceiver is programmed for a start up password,
input the digit codes as directed by your dealer.
• 10-keypad can be used for password input depending on ver-
sion.
• The keys in the table below can be used for password input.
• The transceiver detects numbers in the same block as identical.
Therefore “01234” and “56789” are the same.
KEY
NUMBER 0
5
4
9
3
8
2
7
1
6
eWhen the “PASSWORD” indication does not clear after in-
putting 6 digits, the input code number may be incorrect.
Turn the power OFF and start over in this case.
When you operate Non-display type, the password setting
is not available.
■Channel selection
Several types of channel selections are available. Methods
may differ according to your system set up.
NOTE: Depending on the pre-setting, “EMPTY” appears
on the LCD when selecting an empty channel (no fre-
quency is programmed). (Simple/10-key types only)
NON-ZONE TYPE:
To select the desired operating channel:
• Push [CH Up] or [CH Down].
• Rotate [ROTARY SELECTOR]*.
- Up to pre-programmed 16 channels can be selected.
• Push one of [MR-CH 1] to [MR-CH 4].
ZONE TYPE:
To select the desired zone:
• Push [Zone], then push [CH Up] or [CH Down].
• Rotate [ROTARY SELECTOR]*.
- Up to pre-programmed 16 zones can be selected.
AUTOMATIC SCAN TYPE:
Channel setting is not necessary for this type. When turn-
ing power ON, the transceiver automatically starts scanning.
Scanning stops when receiving a call.
* Depending on the pre-setting.
When [Rotary selector] selects “Operating channel,” [CH Up]/[CH
Down] are not available, and when [Rotary selector] selects “Oper-
ating zone,” [Zone]/[Zone Up]/ [Zone Down] are not available.

■Receiving and transmitting
NOTE: Transmitting without an antenna may damage the
transceiver. See p. 1 for accessory attachments.
Receiving:
qRotate [VOL] to turn the power ON.
wPush [CH Up] or [CH Down], or rotate [ROTARY SELEC-
TOR]* to select a channel, in sequence.
*Depending on the pre-setting.
eWhen receiving a call, adjust the audio output level to a
comfortable listening level.
Transmitting:
Wait for the channel to become clear to avoid interference.
qWhile pushing and holding [PTT], speak into the micro-
phone at a normal voice level.
wRelease [PTT] to return to receive.
IMPORTANT: To maximize the audio quality of your signal;
1. Pause briefly after pushing [PTT].
2. Hold the microphone 5 to 10 cm (2 to 4 in.) from your
mouth, then speak into the microphone at a normal
voice level.
DTransmitting notes
• Transmit inhibit function
The transceiver has several inhibit functions which restrict
transmission under the following conditions:
- The channel is in mute condition (‘Inaudible’ condition;
“ ” does not appear.)
- The channel is busy.
- Un-matched (or matched) CTCSS is received.
(Depending on the pre-setting.)
- Un-matched (or matched) NAC is received*.
(Depending on the pre-setting.)
*Digital mode operation only.
- The selected channel is a ‘receive only’ channel.
• Time-out timer
After continuous transmission for the pre-programmed time
period, the time-out timer is activated, causing the trans-
ceiver to stop transmitting.
• Penalty timer
Once the time-out timer is activated, transmission is further
inhibited for a period determined by the penalty timer.
13
3BASIC OPERATION

14
3
BASIC OPERATION
1
2
3
4
5
6
7
8
9
10
11
12
13
14
15
16
■User set mode
The user set mode is accessed at power ON and allows you
to set seldom-changed settings.You can “customize” the trans-
ceiver operation to suit your preferences and operating style.
When you operate Non-display type, this function is not
available.
Entering the user set mode:
qWhile pushing and holding [I] and
[II], rotate [VOL] to turn the power
ON.
• Turn power OFF in advance.
• “SET MODE” appears for 1 sec. at
power ON.
wPush and hold [Ω] to enter user
set mode.
ePush [Ω] several times to select
the appropriate item.
Then push [∫] or [√] to set the
desired level/condition.
• Available set mode functions are
Backlight, LCD contrast, Beep,
Beep Level, Ringer Level, SQL
Level, AF Min Level, Mic Gain,
VOX Gain*, VOX Delay*, Horn,
Battery Voltage, Signal Moni,
Lone Worker and System info.
* Appears only when the external
VOX unit is connected.
rPush and hold [Ω] again to exit
the user set mode.
User set mode is also available using a programmable key.
Refer to p. 9 [User Set Mode] section for instructions regard-
ing using the key assigned for user set mode.
[User Set Mode] allows for quick item selection. Set “Enable”
for the often used items with the CS-F9010/F9510 cloning
sfotware. Ask your dealer for details.
NOTE: While in the user set mode, [Ω], [∫] and [√] acti-
vate regardless of the assigned key functions.
[VOL]
[I]/[II]
[Ω]
[Ω]
[∫]/[√]

3BASIC OPERATION
15
■Clock function
The transceiver indicates the current time and date when
[Clock] is pushed. And you can change the indication format
and time/date settings.
When you operate Non-display type, this function is not
available.
When you use the transceiver for the first time, or after the
transceiver has sat unused for a long time, make sure to
check the date and time indication after turning the power
ON. If the time and date are not correct, reset them. (See
‘Time and date settings’ to the right.)
DTime and date indication
q
Push [Clock] to indicate the current time and date on the LCD.
• When the indication format is set to 12-hour, “AM” or “PM” is
indicated.
• The LCD indication returns to the stand-by mode after 30 sec.
has passed with no operation.
12
HR
12:00
PM
YMD
08-04-01
MON CLCK ZONE
Date indication format (Y: Year, M: Month, D: Day)
The time indication format (12-hour/24-hour)
Time
Date
wPush [Clock] again to return to the stand-by mode.
DTime and date settings
qPush [Clock] to indicate the current time and date on the
LCD.
12
HR
12:00
PM
YMD
08-04-01
MON CLCK ZONE
wPush and hold [Clock] for 1 sec. to enter the time and date
setting mode.
• The time indication format, “24HR” or “12HR” blinks.
12
HR
12:00
PM
YMD
08-04-01
MON CLCK ZONE
ePush [Clock] to select the desired item to be changed.
Other manuals for IC-F9011B
3
This manual suits for next models
8
Table of contents
Other Icom Transceiver manuals
Popular Transceiver manuals by other brands

Vertex Standard
Vertex Standard VX-4200 Series Service manual

NETGEAR
NETGEAR AXM751 - ProSafe XFP Transceiver Module Product data

TERSUS
TERSUS RS460H user manual

StarTech.com
StarTech.com ECUSB3S22 quick start guide

Technisonic Industries Limited
Technisonic Industries Limited TDFM-136 manual

Alan
Alan 441 user manual