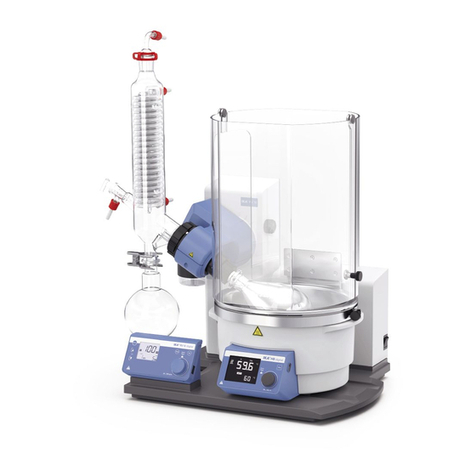
• Lesen Sie die Betriebsanleitung vor Inbetriebnahme vollständig und beachten Sie die Sicherheitshinweise.
• Beachten Sie die Sicherheitshinweise der Betriebsanleitung des Rotationsvedampfers.
• Bewahren Sie die Betriebsanleitung für Alle zugänglich auf.
• Beachten Sie, dass nur geschultes Personal mit dem Gerät arbeitet.
• Beachten Sie die Sicherheitshinweise, Richtlinien, Arbeitsschutz -und Unfallverhütungsvorschriften. Insbesondere bei Arbeiten unter Vakuum!
• Tragen Sie Ihre persönliche Schutzausrüstung entsprechend der Gefahrenklasse des zu bearbeitenden Mediums. Ansonsten besteht eine Gefährdung durch:
- Spritzen von Flüssigkeiten
- Erfassen von Körperteilen, Haaren, Kleidungsstücken und Schmuck.
- Verletzung durch Glasbruch.
• Achten Sie auf genügende Höhenfreiheit, da der Glasaufbau die Gerätehöhe überschreiten kann.
• Prüfen Sie vor jeder Verwendung Gerät, Zubehör und insbesondere Glassteile auf Beschädigungen. Verwenden Sie keine beschädigten Teile.
• Achten Sie auf einen spannungsfreien Glasaufbau! Berstgefahr durch:
- Spannungen infolge von fehlerhaftem Zusammenbau,
- mechanische Einwirkungen von außen,
- durch örtliche Temperaturspitzen.
• Der Betrieb mit Überdruck ist nicht zulässig (Kühlwasserdruck 0,5 bar, Kühlwasserdurchfluss min. 30 l/h, Kühlwasserdurchfluss max. 100 l/h).
• Belüften Sie immer den Glasaufbau bei Arbeit unter Normaldruck (z.B. offener Ausgang am Kühler), um einen Druckaufbau zu verhindern.
• Erhitzen Sie evakuierte Glasgefässe nicht einseitig. Der Verdampferkolben muss während der Heizphase rotieren.
• Der Glassatz ist für einen Vakuumbetrieb bis zu 1 mbar ausgelegt. Evakuieren Sie die Apparaturen vor Beginn des Aufheizens (siehe Betriebsanleitung
Rotationsverdampfer, Kapitel “Inbetriebnahme”). Belüften Sie die Apparaturen erst wieder nach dem Abkühlen. Nicht kondensierte Dämpfe müssen
auskondensiert oder gefahrlos abgeführt werden. Besteht die Gefahr, dass sich der Destillationsrückstand in Gegenwart von Sauerstoff zersetzt, darf nur
Inertgas zum Entspannen eingelassen werden.
• Verbrennungsgefahr! Das Heizbad, das Temperiermedium sowie der Verdampferkolben und Glasaufbau können während dem Betrieb und länge-
re Zeit danach heiß sein! Lassen Sie die Komponenten vor weiteren Arbeiten am Gerät abkühlen.
• Unterdruck im Glassatz nach Stromausfall am Rotationsverdampfer möglich!
• Unwuchten können zu unkontrolliertem Resonanzverhalten des Rotationsvedampfers, bzw. des Aufbaus führen. Glasapparaturen können beschädigt oder
zerstört werden. Schalten Sie den Rotationsvedampfer bei Unwucht oder außergewöhnlichen Geräuschen sofort aus oder reduzieren Sie die Drehzahl.
• Achtung! Glitschige Verdampferkolbenoberfläche bei Verwendung von Silikonöl als Temperiermedium im Heizbad!
Die Glassätze bestehen aus Borosilikatglas 3.3.
Die Beschichtung der beschichteten Glassätze ist aus dem Material SURLYN.
Die mit SURLYN beschichteten Glassätze sind geeignet für den Einsatz im Temperaturbereich von -30 bis +60 °C.
Pos. Bezeichnung Menge Glassatz diagonal Menge Glassatz vertikal
1 Auffangkolben 1 1
2 Klemme NS 29, Edelstahl 1 1
4 Absperrhahn 1 1
5 Rohr - 1
6 Kühler 1 Diagonalkühler 1 Vertikalkühler
7 Anschluss 1 Einleithülse 1 Vakuumanschluss
8 Klemme NS 29, Kunststoff 1 1
10 Verdampferkolben 1000 ml 1 1
11 Kugelschliff-Klammer RV 05.10 1 1
12 Schraubverbindung Kappe 4 4
13 Schlauchanschluss 4 4
18 Scheibe - 1
Sicherheitshinweise
Produktinformation
Lieferumfang
DE
Ursprungssprache
Montage Vakuumdichtung (vergrößerte Abbildung siehe Betriebsanleitung des Rotationsverampfers)
FR
Langue d‘origine: allemand
RU
Исходный язык: немéцкий
Vakuumdichtung einsetzen
Setzen Sie die Vakuumdichtung in die
Kühleraufnahme und montieren Sie
nun den Glassatz entsprechend seiner
Montageanleitung an das Gerät (Fig.
11 a, b und c).
Hinweis: Die Vakuumdichtung muss ganz
in die Kühleraufnahme eingeführt wer-
den. Achten Sie auf die korrekte Lage der
Vakuumdichtung.
Erstinbetriebnahme
Dampfdurchführungsrohr einsetzen (1).
Vakuumdichtung einsetzen (2). Beachten Sie
die Lage der Dichtung!
Lösen Sie die Überwurfmutter und die Rund-
feder vom Antriebskopf des Rotationsver-
dampfers und schieben Sie diese Teile über
den Kühlerflansch (Fig. 11d). Die Rundfeder
rastet in der Flanschvertiefung ein, so dass die
Überwurfmutter gesichert ist.
Montieren Sie die Kleinteile an den Kühler.
Sichern Sie Vertikalkühler mit dem Klettband
an der Stativstange.
Hinweis: Beachten Sie die Betriebsanleitung des
Rotastionsverdampfers!
1
2
3a
3b
Fig. 11a
Fig. 11b
Fig. 11c
Fig. 11d
Die Dichtung am Glaskühler sollte in regelmäßigen Abständen kontrolliert und gegebenenfalls ausgetauscht werden.
Ziehen Sie zum Reinigen den Netzstecker.
Für die Reinigung des Glassatzes ist ausschließlich Wasser mit einem tensidhaltigen Waschmittelzusatz oder bei stärkerer Verschmutzung Isopropylalkohol
zu verwenden.
Reinigung
• Перед вводом в эксплуатацию полностью прочитайте инструкцию по эксплуатации и соблюдайте указания по технике безопасности.
• Соблюдайте указания по технике безопасности инструкции по эксплуатации ротационного испарителя.
• Храните инструкцию по эксплуатации в доступном для всех месте.
• Следите за тем, чтобы с прибором работал только обученный персонал.
• Соблюдайте указания по технике безопасности, директивы, предписания по охране труда и предотвращению несчастных случаев. В частности
при работе под вакуумом!
• Используйте средства индивидуальной защиты в соответствии с классом опасности обрабатываемой среды. В противном случае возникает
опасность вследствие:
- разбрызгивания жидкостей;
- захвата частей тела, волос, одежды и украшений;
- травм из-за боя стекла.
• Следите за наличием достаточного места над прибором, так как стеклянная посуда в сборе может превышать высоту прибора.
• Перед каждым использованием проверяйте прибор, принадлежности и особенно стеклянные части на наличие повреждений. Не используйте
поврежденные детали.
• Следите за тем, чтобы стеклянная посуда в сборе не имела внутренних напряжений! Опасность растрескивания вследствие:
- напряжений из-за неправильной сборки;
- механических воздействий извне;
- локальных температурных пиков.
• Работа с избыточным давлением запрещена (давление охлаждающей воды 0,5 бар, мин. расход охлаждающей воды 30 л/ч, макс. расход
охлаждающей воды 100 л/ч).
• При работе под нормальным давлением (например, открытый выход охладителя) стеклянная посуда в сборе должна всегда проветриваться во
избежание повышения давления.
• Не нагревайте вакуумированные стеклянные сосуды с одной стороны. Во время фазы нагрева испарительная колба должна вращаться.
• Стеклянная посуда рассчитана на работу с вакуумом до 1 мбар. Перед началом нагрева выполните вакуумирование оборудования (см.
инструкцию по эксплуатации ротационного испарителя, глава «Ввод в эксплуатацию»). Проветривайте оборудование снова только после
охлаждения. Неконденсированные пары должны быть конденсированы или безопасно отведены. Если существует опасность разложения
остатка дистилляции в присутствии кислорода, для уменьшения давления разрешается подавать только инертный газ.
• Опасность получения ожогов! Нагревательная баня, теплопередающая среда, а также испарительная колба и стеклянная посуда
в сборе могут нагреваться во время работы и оставаться горячими в течение длительного времени после ее завершения! Перед
продолжением работ на приборе дайте компонентам охладиться.
• После исчезновения питания ротационного испарителя в стеклянной посуде возможно возникновение пониженного давления!
• Дисбаланс может привести к неконтролируемому резонансному поведению ротационного испарителя или конструкции. Стеклянное
оборудование может быть повреждено или разбито. При дисбалансе или необычных шумах немедленно выключите ротационный испаритель
или уменьшите скорость вращения.
• Внимание! Скользкая поверхность испарительной колбы при использовании силиконового масла в качестве теплопередающей среды
в нагревательной бане!
Стеклянная посуда выполнена из боросиликатного стекла 3.3.
Покрытие стеклянной посуды с покрытием выполнено из материала сурлин.
Покрытая сурлином стеклянная посуда пригодна для применения в диапазоне температур от -30 до +60 °C.
Поз. Наименование Количество для диагональной стеклянной посуды Количество для вертикальной стеклянной посуды
1 Приемная колба 1 1
2 Зажим NS 29, нержавеющая сталь 1 1
4 Запорный кран 1 1
5 Трубка - 1
6 Охладитель 1 диагональный охладитель 1 вертикальный охладитель
7 Подсоединение 1 входная гильза 1 вакуумное соединение
8 Зажим NS 29, пластмасса 1 1
10 Испарительная колба объемом 1000 мл 1 1
11 Шарнирный хомут RV 05.10 1 1
12 Винтовой колпачок 4 4
13 Штуцер для подключения шланга 4 4
18 Шайба - 1
Указания по технике безопасности
Информация об изделии
Комплект поставки
Монтаж вакуумного уплотнения (увеличенный рисунок см. в инструкции по эксплуатации ротационного испарителя)
Установка вакуумного уплотнения
Вставьте вакуумное уплотнение в
крепление охладителя и смонтируйте
стеклянную посуду на приборе в
соответствии с ее инструкцией по
монтажу (рис. 11 a, b и c).
Примечание: вакуумное уплотнение
должно быть полностью вставлено
в крепление охладителя. Следите за
правильным положением вакуумного
уплотнения.
Первый ввод в эксплуатацию
Вставьте паропроводную трубку (1).
Вставьте вакуумное уплотнение (2). Следите
за положением уплотнения!
Открутите накидную гайку и круглую пружину
от приводной головки ротационного
испарителя и установите эти детали на
фланец охладителя (рис. 11d). Круглая
пружина входит в углубление фланца таким
образом, что накидная гайка фиксируется.
Смонтируйте мелкие детали на охладителе.
Зафиксируйте вертикальный охладитель на
штанге штатива с помощью липкой ленты.
Примечание: соблюдайте инструкцию по
эксплуатации ротационного испарителя!!
1
2
3a
3b
Рис. 11a
Рис. 11b
Рис. 11c
Рис. 11d
Уплотнение охладителя для стекла необходимо регулярно проверять и при необходимости заменять.
Для проведения чистки извлеките сетевой штекер из розетки.
Для чистки стеклянной посуды используйте исключительно воду, содержащую поверхностно-активные моющие вещества, или, при сильном
загрязнении, изопропиловый спирт.
Чистка
• Lisez intégralement l’instruction de montage avant la mise en service et respectez les consignes de sécurité.
• Respectez les conseils de sécurité du mode d’emploi d’evaporateur rotatif.
• Laissez la notice à portée de tous.
• Attention, seul le personnel formé est autorisé à utiliser l‘appareil.
• Respectez les consignes de sécurité, les directives, ainsi que les prescriptions pour la prévention des accidents du travail. En particulier lors des travaux
sous vide!
• Portez votre équipement de protection personnel selon la classe de danger du milieu à traiter. Sinon, vous vous exposez à des dangers:
- aspersion de liquides,
- happement de parties du corps, cheveux, habits et bijoux.
- bris de verre.
• Prévoyez un espace en hauteur suffisant, car la structure en verre peut dépasser la hauteur de l‘appareil.
• Avant chaque utilisation, contrôlez l‘état de l‘appareil, des accessoires et en particulier des pièces en verre. N‘utilisez pas les pièces endommagées.
• Veillez à obtenir une structure en verre libre de contrainte ! Risque d‘éclatement par :
- les tensions dues à un assemblage défectueux,
- les influences mécaniques externes,
- les pics de températures sur place.
•
Le fonctionnement avec une surpression est interdit (pression du réfrigérant 0,5 bar, débit minimum du réfrigérant 30 l/h, débit maximum du réfrigérant 100 l/h).
•
Lors des travaux sous pression normale, la structure en verre doit toujours être ventilée (par ex. sortie ouverte du refroidisseur) pour éviter la montée en pression.
• ELes récipients en verre sous vide ne doivent pas être chauffés d’un seul côté; le piston évaporateur doit tourner pendant la phase de chauffage.
• L’appareil est conçu pour fonctionner sur un vide de 1 mbar maximum. En cas de distillations à vide, les appareils doivent être évacués avant le début du
réchauffement (voir mode d’emploi d’evaporateur rotatif, chapitre ”Mise en service”). Ne ventilez à nouveau les appareils qu’après le refroidissement. En
cas de distillations à vide, les vapeurs non condensées doivent être condensées ou évacuées en évitant tout risque. S’il peut arriver que le résidu de distil-
lation se décompose en présence d’oxygène, seul du gaz inerte peut être autorisé pour décharger la pression.
• Risque de brûlure ! Le bain chauffant, l‘agent de mise à température, ainsi que le ballon d‘évaporation et la structure en verre peuvent chauffer
pendant l‘utilisation et rester chauds longtemps après! Avant de poursuivre sur l‘appareil, laissez les éléments refroidir.
• Dépression possible dans la verrerie après une panne de courant d’evaporateur rotatif.
• Les balourds peuvent causer un comportement à la résonance in contrôlé de l’entraînement de rotation et de la structure. La verrrerie peut être endom-
magée ou détruite. En cas de décentrage ou d’apparition de bruits inhabituels éteignez immédiatement l’entraînement de rotation ou reduisez la vitesse
de rotation.
• Attention! La surface du ballon d‘évaporation devient gluante si de l‘huile de silicone est utilisée comme milieu de mise en température dans le
bain chauffant!
Les verreries sont en verre borosilicaté 3.3.
Le revêtement des verreries verticales avec revêtement est SURLYN.
Les verreries verticales avec revêtement SURLYN sont appropriées pour l’application dans une plage de température de -30 à +60 °C.
Pos. Désignation Quantité verrerie diagonale Quantité verrerie verticale
1 Ballon récepteur 1 1
2 Pince NS 29, acier inoxydable 1 1
4 Robinet d‘arrêt 1 1
5 Tube - 1
6 Refroidisseur 1 Refroidisseur diagonal 1 Refroidisseur vertical
7 Raccord 1 Douille d‘emmanchement 1 Raccord de vide
8 Pince NS 29, matière plastique 1 1
10 Ballon d‘évaporation 1000 ml 1 1
11 Patte à rodage sphérique RV 05.10 1 1
12 Raccord vissé de capuchon 4 4
13 Raccord de flexible 4 4
18 Disque - 1
Consignes de sécurité
Information sur le produit
Volume de livraison
Montage du joint de vide (images agrandies voir mode d’emploi d‘évaporateur rotatif
Montez le joint de refroidisseur
Placez le joint de vide dans le logement
du condenseur et montez la verrerie sur
l‘appareil en suivant les instructions de
montage correspondantes (fig. 11 a,
b et c).
Remarque:Il faut placer le joint du vide
complètement dans le logement de con-
denseur. Veillez sur le placement correct
du joint de vide!
Avant la mise en service
Montez le conduit de vapour (1).
Montez le joint de vide (2). Veillez sur le place-
ment correct du joint de vide!
Deserrez l‘écrou d‘accouplement et le ressort-
bague de la tête d’entraînement d’evaporeur
de rotation et poussez cettes pièces sur la bri-
de du refroidisseur (Fig. 11d). Le ressort-bague
enclenche en la rainure de la bride, de sorte
que l‘écrou d‘accouplement est bloqué.
Montez les petites pièces au condenseur.
Bloquez la verrerie verticale avec la bande Vel-
cro®sur la tige du statif.
Remarque: Voir mode d‘emploi de l‘évaporateur
rotatif !
1
2
3a
3b
Fig. 11a
Fig. 11b
Fig. 11c
Fig. 11d
Le joint d‘étanchéité du condenseur en verre doit être contrôlé à intervalle régulier et remplacé si nécessaire.
Débranchez la prise secteur pour la nettoyage.
Pour nettoyer la verrrerie, il faut utiliser uniquement de l’eau avec un produit d’addition au détergent contenant un dérivé tensio-actif ou de l’alcool isopro-
pylique si l’encrassement est plus important.
Nettoyage
Montage Scheibe (vergrößerte Abbildung siehe Betriebsanleitung des Rotationsverampfers)
Tropfkante
Fig. 18b
Hinweis:
Achten Sie auf die korrekte Lage der Scheibe.
Das PTFE Rohr (5) mit der Scheibe (18) kann optinal bei den vertikalen
Glassätzen montiert werden.
Es dient zur Befüllung des Verdampferkolbens bei Unterdruck im Glas-
satz.
Durch das Öffnen des Absperrhahnes (4) kann Lösemittel über das PTFE
Rohr in den Verdampferkolben eingesaugt werden.
Монтаж шайба (увеличенный рисунок см. в инструкции по эксплуатации ротационного испарителя)
Дренаж
шайбы
Fig. 18b
Примечание:
Следите за правильным положением шайба.
Трубу из ПТФЭ (5) с шайбой (18) опционально можно смонтировать
с вертикальной стеклянной посудой.
Она предназначена для заполнения испарительной колбы при
разрежении в стеклянной посуде.
При открытии запорного крана (4) обеспечивается всасывание
растворителя через трубу из ПТФЭ в испарительную колбу.
Montage du disque (images agrandies voir mode d’emploi d‘évaporateur rotatif)
Larmier
Fig. 18b
Remarque:
Veillez sur le placement correct du disque!
Le tube en PTFE (5) avec la rondelle (18), en option, peut être monté sur
des verreries verticales.
Il sert à remplir le ballon d‘évaporation en cas de dépression dans la
verrerie.
L‘ouverture du robinet d‘arrêt (4) permet au solvant d‘être aspiré dans le
ballon d‘évaporation via le tube en PTFE.
18
5
4
Fig. 18a
18
5
4
Fig. 18a
18
5
4
Fig. 18a
