Questo prodotto è realizzato secondo le norme EN 60730-2-9, EN 60730-2-7 in conformità con le
direttive CE applicabili ed è interamente fabbricato in Italia.
Alimentazione: Batterie Alcaline 2x1,5V LR6 (Tipo AA)
Durata batterie: > 1 anno
Portata massima contatti: 5A(1A) 250VAC
Tipo di azione: 1B
Classe ErP I (+1%) - 811/2013 (regolazione ON/OFF)
Classe ErP IV (+2%) - 811/2013 (regolazione TPI)
Temperatura ambiente: 0°C ÷ 50°C
Campo di visualizzazione temperatura: 0°C ÷ 39°C
Campo di regolazione temperatura: 5°C ÷ 30°C
Risoluzione temperatura: 0,1°C
Differenziale temperatura (regolazione ON/OFF): da 0,1°C a 2,0°C (standard 0,2°C)
Sonda di temperatura: NTC 100KΩ@25°C
Grado di protezione: IP20
Classe di isolamento: Tipo II (doppio isolamento)
Grado d’inquinamento: 2
Software: classe A
Resistenza al calore ed al fuoco: Categoria D
Temperatura di stoccaggio: -25÷60°C
Tensione nominale di tenuta ad impulso: 2,5kV
Montaggio: a parete
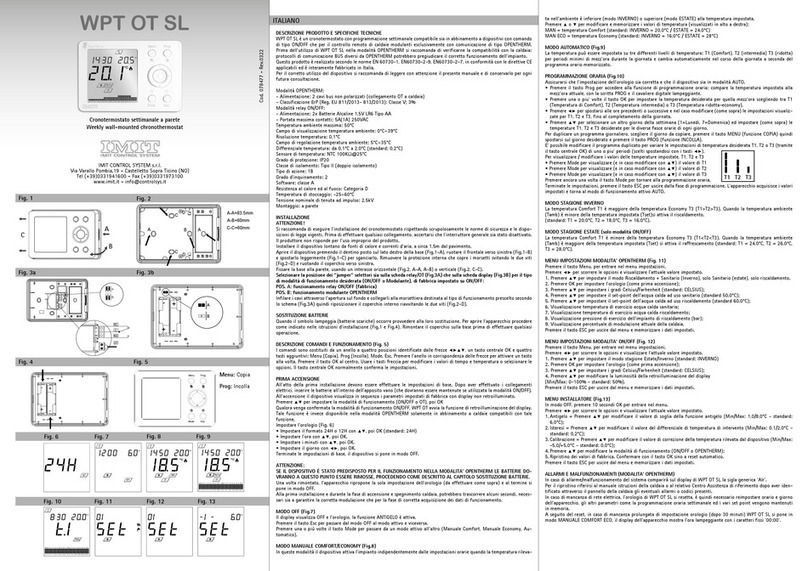
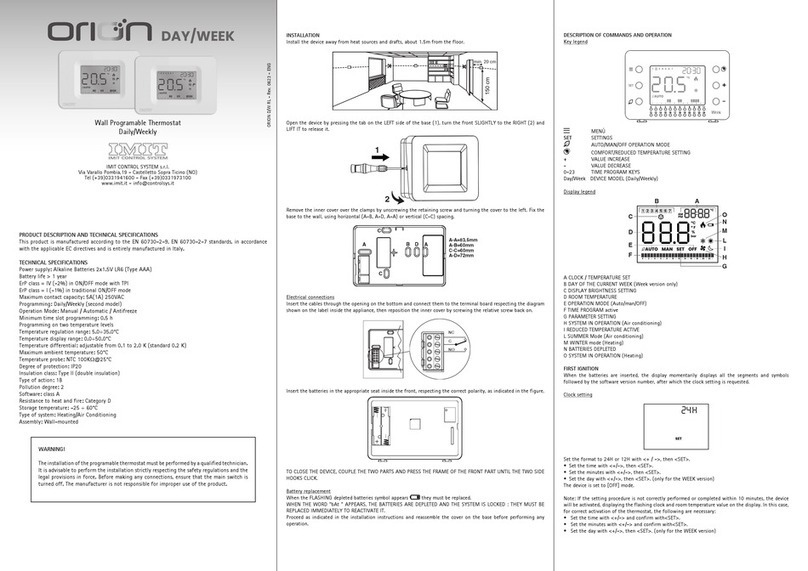
Installare il dispositivo lontano da fonti di calore e correnti d’aria, a circa 1,5m dal pavimento. Aprire
il dispositivo premendo il dentino posto sul lato destro della base (Fig.1-1), ruotare il frontale verso
sinistra (Fig.1-2) e spostarlo leggermente (Fig.1-3) per sganciarlo.
Rimuovere la protezione interna che copre i morsetti svitando le due viti (Fig.2-D) e ruotando il
coperchio verso sinistra. Fissare la base alla parete, usando un interasse orizzontale (Fig.2, A-A, A-B)
o verticale (Fig.2, C-C). Infilare i cavi attraverso l’apertura sul fondo e collegarli alla morsettiera
(Fig.3) quindi riposizionare il coperchio interno riavvitando le due viti (Fig.2-D). Tenere i cavi della
eventuale sonda esterna ben separati da quelli del contatto termostato. Inserire le batterie nell’apposita
sede all’interno del frontale, come indicato (Fig.4). Per richiudere il dispositivo procedere come nella
(Fig.1) invertendo la sequenza delle operazioni: accoppiare i lati sinistri delle due parti (Fig.1-3) quindi
ruotare il frontale verso destra (Fig.1-2) sino a far scattare il gancio laterale (Fig.1-1) sulla base.
Quando sul display appare il simbolo (batterie scariche) lampeggiante, è necessario sostituire le
batterie al più presto possibile.
In tale situazione l’apparecchio funzionerà ancora correttamente per un breve periodo dopodiché, con
l’energia residua delle batterie, l’impianto sarà definitivamente disattivato. Da questo momento in poi
sul display saranno visualizzati sia la scritta
bat
che il simbolo fisso .
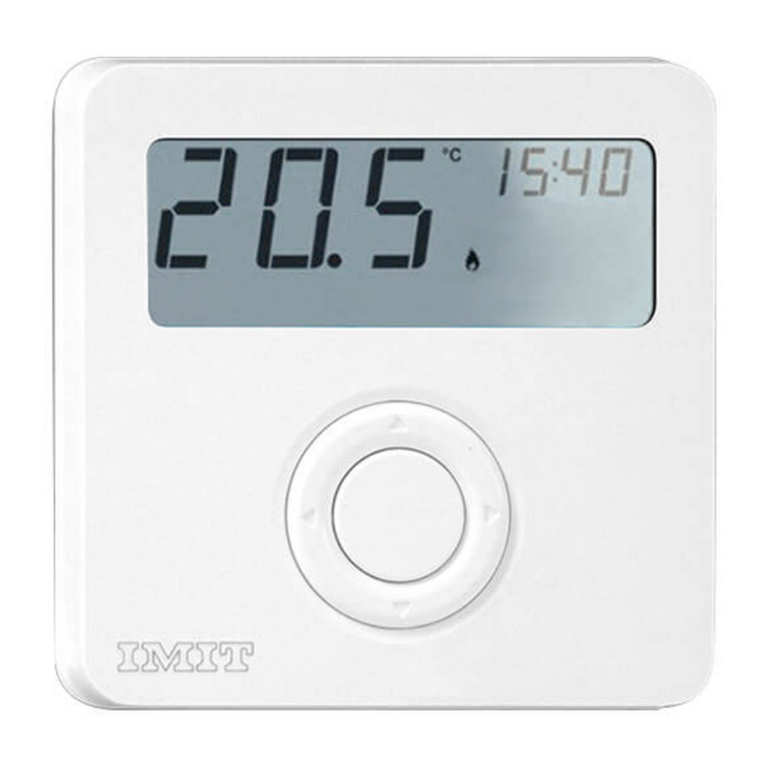
Indicatore a 4 digit multifunzione per visualizzazione temperatura,
Set Point ridotto, orologio e impostazioni utente/installatore.
Impostazione intensità retroilluminazione display
Visualizzazione o impostazione orologio
Indicatore modalità “Estate” (condizionamento)
Indicatore modalità “Inverno” (riscaldamento)
Impianto condizionamento in funzione (solo modalità “Estate”)
Impianto riscaldamento in funzione (solo modalità “Inverno”)
Visualizzazione o impostazione Set Point ridotto
Indicatore batterie esaurite
PRIMA ACCENSIONE
Impostare l’orologio
• Impostare l’ora con i tasti + e -, poi SET.
• Impostare i minuti con i tasti + e -, poi SET.
Il dispositivo si pone in modo OFF.
MODO OFF
Il display visualizza OFF e la funzione antigelo è attiva.
Premere Mode per passare da un modo attivo all’altro (Automatico, Manuale, OFF).
MODO AUTOMATICO
La temperatura impostata (Comfort, Ridotta T2) dipende dal programma orario impostato tramite
i microinterruttori e cambia automaticamente nel corso della giornata. La scritta AUTO sul display
identifica questa modalità di funzionamento.
IMPOSTAZIONE PROGRAMMA ORARIO
L’apparecchio è dotato di una fila di microinterruttori con 24 levette che corrispondono alle fasce
orarie della giornata. L’impostazione è semplicissima: basta spostare le levette verso l’alto (posizione
SOLE) per le ore nelle quali si desidera avere la temperatura di regime COMFORT e spostare invece le
levette verso il basso (posizione LUNA) per le ore della giornata in cui si desidera avere la temperatura
di regime RIDOTTA (T2).
IMPOSTAZIONE TEMPERATURA COMFORT
L’impostazione della temperatura COMFORT è sempre possibile ruotando la manopola centrale fino al
valore desiderato. È possibile variare la temperatura tra 5°C e 30°C sia in funzionamento invernale che
in funzionamento estivo.
IMPOSTAZIONE TEMPERATURA RIDOTTA (T2)
L’impostazione della temperatura RIDOTTA (T2) si effettua tramite i tasti + e -.
E’ possibile variare la temperatura tra 5°C e 30°C sia in funzionamento invernale che in funzionamento
estivo. Durante l’impostazione l’icona lampeggia fino alla memorizzazione del nuovo valore.
MODO MANUALE
In questa modalità, identificata dalla scritta MAN sul display, l’apparecchio regola la temperatura al
valore di COMFORT indipendentemente dalla programmazione dei microinterruttori.
MENU IMPOSTAZIONI
In modalità OFF, premere il tasto SET per entrare nel menu impostazioni. L’icona SET verrà visualizzata
a conferma dell’operazione. Premere nuovamente SET per scorrere le opzioni.
1. Impostazione funzionamento Estate/Inverno. Icona o lampeggiante.
Premere + o - per impostare la modalità Estate ( ) o Inverno ( ).
2. Impostazione orologio. Icona lampeggiante.
Premere + o - per impostare l’orologio.
3. Impostazione luminosità. Icona lampeggiante.
Premere + o - per impostare la luminosità.
MENU INSTALLATORE
In modo OFF, premere e contemporanemente tasti + e - per 10 secondi per entrare nel menu. Le icona
SET e MAN verranno visualizzate a conferma dell’operazione. Premere nuovamente SET per scorrere tra
i parametri.
1. Parametro P01 -> Impostazione antigelo (standard 6.0°C)
Premere + e - per modificare il valore. Premere SET per confermare.
2. Parametro P02 -> Isteresi di regolazione per modo ON/OFF (standard 0.2°C);
Premere + e - per modificare il valore. Premere SET per confermare.
3. Parametro P03 -> Correzione offset temperatura (standard 0.0°C);
Premere + e - per modificare il valore. Premere SET per confermare.
4. Parametro P04 -> Impostazione modo di regolazione.
Premere + e - per modificare il valore:
0) Regolazione ON/OFF a isteresi
1) Regolazione TPI per impianti a radiatori
2) Regolazione TPI per impianti a pavimento
Premere SET per confermare. Al termine delle impostazioni premere il tasto MODE per tornare allo
stato OFF.
DESCRIZIONE PRODOTTO E SPECIFICHE TECNICHE IT
INSTALLAZIONE
SOSTITUZIONE BATTERIE
LEGENDA VISUALIZZAZIONI
DESCRIZIONE COMANDI E FUNZIONAMENTO (FIG.5)
Fig. 1
Fig. 2
Fig. 3
Fig. 4 Fig. 5
6 /
Mode
Set /
5
15
10
20
25
30
10
0
5 7 9
6 8 11
14 18 22
16 20
13 17 21
15 19 23
12
5 /
12
12
8 /
12
7 /
12
1
D
AAA-A=83.5 mm
A-B=60 mm
C-C=60 mm
B
C
C
D
NC
NO
C
C
NC
NO
NC
NO
C
- +
+ -
6 /
Mode
Set /
5
15
10
20
25
30
10
0
5 7 9
6 8 11
14 18 22
16 20
13 17 21
15 19 23
12
5 /
12
12
8 /
12
7 /
12
6 /
Mode
Set /
5
15
10
20
25
30
10
0
5 7 9
6 8 11
14 18 22
16 20
13 17 21
15 19 23
12
5 /
12
12
8 /
12
7 /
12
2
3
07B106 Rev0617
IMIT CONTROL SYSTEM s.r.l.
Via Varallo Pombia,19 - Castelletto Sopra Ticino (NO)
Tel (+39)0331941600 - Fax (+39)0331973100
DUO
Cronotermostato elettronico giornaliero
Daily electronic chronothermostat
Manuale_TECHNO_DUO_ita_eng_420x285mm.indd 1 06/06/17 17:09


