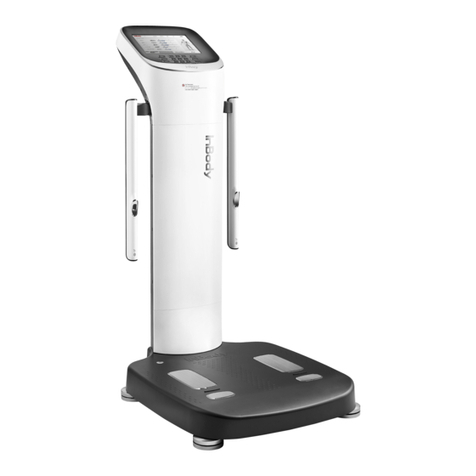
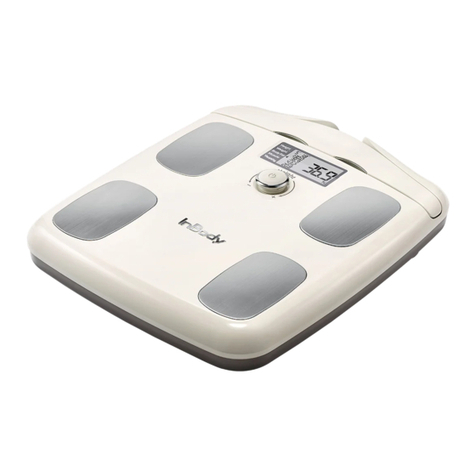
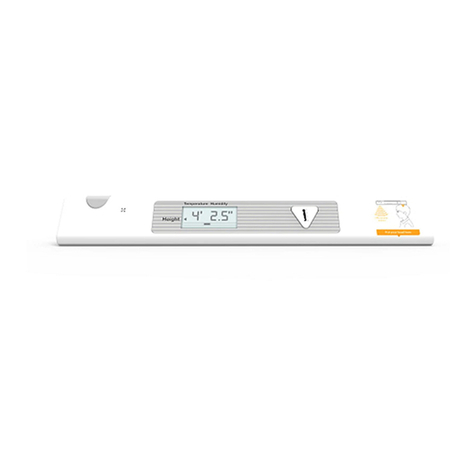
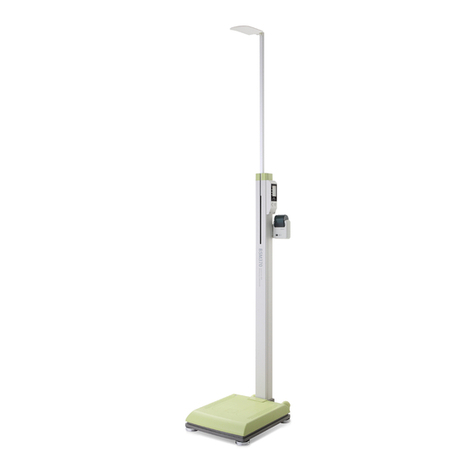
inbody BSM270 User manual

사용자 매뉴얼
BSM270/BSM270B
User’s Manual
BSM270/BSM270B User Manual for Measurement Guide and Setup
Thank you for purchasing the BSM270/BSM270B. This user’s manual describes all the features
of the BSM270/BSM270B. Please read before use and keep it in a safe place. By following the
manual instructions, you will be able to use the BSM270/BSM270B more safely and effectively.
BSM270/BSM270B 자세 안내 및 설치 사용자 설명서
BSM270/BSM270B를 구입해 주셔서 감사합니다. 본 사용자설명서는 BSM270/BSM270B의 모든 기능을 상세하고 알기 쉽게
설명하고 있습니다. BSM270/BSM270B의 안전한 사용을 위해서 사용 전에 꼭 읽어 보신 후 항상 볼 수 있는 장소에 보관하세요.
본 내용을 숙지 하시고 따르시면, 더욱 안전하고 효과적으로 BSM270/BSM270B를 이용 하실 수 있습니다.

©2021 InBody Co., Ltd. All rights reserved. IM-M2-E-210614
Please read the warning before using this User Manual.
Users may be injured or even killed if they do not correctly follow the instructions.
DANGER
NOTECAUTION
참 조 주 의참 고 주 의
WARNING:
Property may be damaged and users may be injured if they do not correctly follow the instructions.
DANGER
NOTECAUTION
참 조 주 의참 고 주 의
CAUTION:
Referring to notes can help improve equipment use.
NOTE
DANGER
NOTECAUTION
참 조 주 의참 고 주 의
DANGER
NOTECAUTION
참 조 주 의참 고 주 의
ATTENTION:
Remarque
Les utilisateurs pourraient subir des blessures pouvant même aller jusqu'au décès s’ils ne se
conforment pas aux directives d’utilisation.
Une mauvaise utilisation de cet appareil pourrait causer des dommages à la propriété, et des
blessures aux utilisateurs.
Se référer aux directives pourrait améliorer l’utilisation de l’appareil.
AVERTISSEMENT:
본 사용자 매뉴얼을 읽기 전 꼭 확인하세요.
안전 경고 및 규정을 준수하지 않으면 사용자가 사망하거나 중상을 입을 수 있습니다.
DANGER
NOTECAUTION
참 조 주 의참 고 주 의
경고
안전 주의 사항 및 규정을 준수하지 않으면 사용자가 부상을 당하거나 재산상의 손해를 입을 수 있습니다.
DANGER
NOTECAUTION
참 조 주 의참 고 주 의
주의
사용자의 이해를 돕기 위한 설명입니다.
참고


8
9
9
15
18
19
19
21
22
25
26
28
31
33
34
BSM270/BSM270B
I. Installation
A.Productconguration
B. Installation environment
C. How to install
D. settings
E. Maintenance precautions
II. Measurement
A. Precautions before measurement
B. Measurement method
C. Measuring posture
III. Transport and storage
A. How to repackage
B. Transport and storage environment
IV.
Troubleshooting
V. Other
A. Safety information and precautions
B. Appearance and function
C. Indication requirements
D.Productspecications
User's Manual Table of Contents

I. 설치
A. 제품 구성
B. 설치 환경
C. 설치 방법
D. 설정
E. 관리 시 주의 사항
II. 측정
A. 측정 전 주의사항
B. 측정 방법
C. 측정 자세
III. 운송 및 보관
A. 재포장 방법
B. 운송 및 보관 환경
IV.
자주 묻는 질문 및 답변
V. 기타
A. 안전을 위한 정보 및 주의사항
B. 외관 및 기능
C. 표시사항
D. 제품 사양
사용자 매뉴얼 목차
38
39
39
43
46
47
47
49
50
53
54
56
58
60
61


User’s Manual
English
BSM270/BSM270B

사용자 매뉴얼
BSM270/BSM270B
User’sManual
사용자 매뉴얼
BSM270
사용자 매뉴얼
BSM270
사용자 매뉴얼
BSM270

DANGER
NOTECAUTION
참 조 주 의참 고 주 의
DANGER
NOTECAUTION
참 조 주 의참 고 주 의
DANGER
NOTECAUTION
참 조 주 의참 고 주 의
DANGER
NOTECAUTION
참 조 주 의참 고 주 의

10
2. After opening the stand box, remove the packing material and take out the stand.
3. After removing the unit, put the packing material back into the stand box.
4.Foldinthebottomapsofthestandboxasshowninthegurebelow.
Bottomapsofthestandbox
Buffer material
5. Place the stand on the stand box so that the protruding screw head is positioned to the right.
Stand
DANGER
NOTECAUTION
참 조 주 의참 고 주 의
CAUTION
˙
Make sure the cable is properly connected.
DANGER
NOTECAUTION
참 조 주 의참 고 주 의
ATTENTION
˙
Assurez-vous que le cordon d’alimentation est bien branché.
6.Placethebaseonthenishingpartofthestandboxandconnectthebasecabletothestand.

11
DANGER
NOTECAUTION
참 조 주 의참 고 주 의
CAUTION
˙If the rubber finishing material is inserted with the stand, the measured value may be inaccurate.
Be careful when you insert it.
7. Hold the base securely and push the stand into the groove of the base.
Rubbernishingmaterial
8. Insert the base washer into the base screw.
Washer
DANGER
NOTECAUTION
참 조 주 의참 고 주 의
ATTENTION
˙Si le recouvrement de finition de caoutchouc est inséré avec le support, la valeur mesurée
pourrait être inexacte. Soyez prudent lorsque vous l’insérez.
9. Insert the four screws including the washers into the four screw grooves on the back of the base.
10. Using the hex key wrench, turn the base screw clockwise to secure it tightly.
11.Afterconrmingthatthebaseandthestandarexedsecurely,erectthexedbaseandthestand
to the upright position.
12. Tilt the assembled equipment sideways to align the head bar's groove with the stand, and then tilt the head bar
asshowninthegure.Insertituptothescrewgroovewhilecarefullyavoidingdamagetotheswitch.

12
DANGER
NOTECAUTION
참 조 주 의참 고 주 의
CAUTION
˙If the head bar is not tilted during the insertion, the product may be damaged and may not function.
Please be careful during this step.
˙Do not push the operating part forcefully, as this may cause a malfunction.
Beware of switch damage
13. Align the grooves in the stand screws to match the grooves in the head bar screws, then insert the
head screws. Use a Phillips screwdriver to turn the head screws clockwise to secure it tightly.
DANGER
NOTECAUTION
참 조 주 의참 고 주 의
CAUTION
˙
Using excessive force may damage the screws.
DANGER
NOTECAUTION
참 조 주 의참 고 주 의
ATTENTION
˙
Utiliser une force excessive lors de l'assemblage pourrait endommager les vis.
DANGER
NOTECAUTION
참 조 주 의참 고 주 의
ATTENTION
˙Si la pièce de tête n’est pas inclinée lorsqu’elle est insérée, l'appareil pourrait s’endommager et ne pas fonctionner.
Veuillez être attentif lors de l’exécution de cette étape.
˙N’exercez pas de pression excessive sur les parties fonctionnelles, cela pourrait causer un mauvais fonctionnement.

13
14. Connect the adapter and power cord to the power input terminal on the back of the base.
Power switch
DANGER
NOTECAUTION
참 조 주 의참 고 주 의
WARNING
•
Install the equipment where it is easy to unplug the power cord.
•
Do not plug or unplug the power cord with wet hands. It may cause electrical shock.
•
Use an outlet that is connected to a standard compliant power source (AC 100-240V).
Using a different outlet may cause fire or malfunction.
•
When using an outlet with multiple terminals, use an outlet or extension cable with sufficient power capacity.
•
Do not disassemble the product. Arbitrarily disassembling the operating unit can cause malfunctions,
breakdowns, or electrical shock. There are no serviceable parts inside. InBody Co., Ltd. is not responsible
for any damage caused by this action.
•
Do not allow the BSM270/BSM270B unit to come into contact with other electronic devices while connected
to the power source. It may cause electrical shock.
DANGER
NOTECAUTION
참 조 주 의참 고 주 의
AVERTISSEMENT
•
Installez l’appareil dans un endroit où on peut facilement débrancher le câble d’alimentation.
•
Ne pas brancher ou débrancher le câble d’alimentation si vos mains sont mouillées. Ce geste comporte
des risques d’électrocution.
•
UUtilisez toujours une prise reliée à un circuit électrique approprié; dans le cas contraire, un incendie ou
un mauvais fonctionnement pourraient se produire. Source de courant (AC 100-240V).
Utiliser une prise de courant différente pourrait causer un incendie ou un mauvais fonctionnement.
•
Lorsque vous utilisez une prise multiple, assurez-vous d'utiliser une prise ou un rallonge électrique qui
fournit suffisamment de puissance.
•
Ne démontez pas l'appareil. Démonter l’appareil de façon arbitraire pourrait provoquer un mauvais
fonctionnement, des défaillances, ou des électrocutions. L’appareil ne contient aucune pièce pouvant être
réparée. InBody Co., Ltée n’est en aucun cas responsable pour tout dommage causé par ce geste.
•
Évitez tout contact de l’unité BSM270/BSM270B avec tout autre appareil électronique alors qu’elle est
branchée à une source de courant électrique. Ce geste comporte des risques d’électrocution.

14
15. Turn on the power of the BSM270/BSM270B unit as shown in the image under step 14.
16. After the head operates once, the home screen changes to the screen shown below
and to standby mode for measuring.
<When Bluetooth communication is
not in use>
<When Bluetooth communication is
in use>
DANGER
NOTECAUTION
참 조 주 의참 고 주 의
CAUTION
˙
External device connections are located at the bottom rear part of the machine, which may allow liquids
or foreign objects to get inside. Please note that liquids or foreign objects can cause critical damage
to the electronic components of the BSM270/BSM270B unit.
˙
Be sure to only connect the adapter provided by InBody to the power input terminal.
˙
When connecting the adapter cable to the BSM270/BSM270B unit, insert the adapter cable completely
into the power input terminal.
˙
Be aware that the weight may vary when measuring at an altitude of 2,000 meters or higher.
DANGER
NOTECAUTION
참 조 주 의참 고 주 의
ATTENTION
˙
Des prises pour la connexion d’appareils externes sont situées au bas à l’arrière de l’appareil, ce qui pourrait
permettre aux liquides ou objets étrangers de s’y infiltrer. Veuillez noter que des liquides ou des objets
étrangers pourraient causer des dommages importants aux composantes électroniques de l’unité
BSM270/BSM270B.
˙
Assurez-vous de seulement brancher l’adaptateur fourni par InBody à la borne d’alimentation.
˙
Lorsque vous branchez le câble à l’unité BSM270/BSM270B, veillez à insérer l’adaptateur complètement
dans la borne d’alimentation.
˙
Prenez note que le poids peut varier lorsque la mesure est effectuée à une altitude de 2000m ou plus.

15
D. Settings
1. How to set up
In setup, you can set the measurement mode, offset, unit, head bar position, display orientation,
automatic height measurement, display time, weight measurement time, and equipment level check.
1) Press the Enter button on the base for more than three seconds, and the setting screen appears
as shown in the upper right.
2)Usetheupanddownbutton(▲,▼)tomovetotheitemyouwanttochange.
3) Press the Enter button to select the item.
4) If you have an item that you want to change further, use the direction button to move or select it.
If no more changes need to be made, press the Enter button for three seconds or more to save
the changes automatically and return to the standby screen.
Enter buttonUp and down button
2. Set Up Menu
1) (Mode)
The available measurement modes are:
❶ : Select when measuring both weight and height.
❷: Select when measuring weight only.
❸: Select when measuring height only.
NOTE
˙
The initial factory setting is ‘ ’.
REMARQUE
˙
Le réglage initial du fabriquant est « ».
2) (Offset)
If you need to adjust the added weight and height values due to clothing or accessories,
setthedesiredoffsetvaluetoreectitinthemeasurement.
❶:Adjusttheweightoffsetvalue.(Adjustmentrange:+5.0to-5.0kg,xedunit:0.1kg
/Adjustmentrange:+10.0lbto-10.0lb,xedunit:0.2lb)
❷:Adjusttheheightoffsetvalue.(Adjustmentrange:+50.0to-50.0cm,xedunit:0.1cm)

16
3) (Unit)
Select the units used for measurement. You can choose between kg/cm and lb/in.
4) (Head Position)
Set the head bar position. You may choose between and .
When you change the settings, - - - - displays and returns to after completion.
❶: Select for heights taller than 1m 60cm (5' 3.0").
❷: Select for heights 1m 60cm (5' 3.0") or shorter.
5) (Display)
Set the display orientation.
❶: Select if the subject is viewing the display.
❷: Select if the operator is viewing the display.
❸: Select if the subject and the operator are both viewing the display together.
6) (Head Mode)
Set whether or not to auto-measure the height.
❶: Select to automatically measure height after weighing.
❷: Select to measure height when the Enter button is pressed after weighing.
˙
The initial factory setting is ' '.
NOTE
˙The initial factory setting is ' '.
8) (Speed)
Set the stabilization time for weight measurement.
❶: Select to measure weight when there is no change in movement.
❷: Select to measure weight after two seconds even if there is a change in movement.
˙
Le réglage initial du fabriquant est « ».
˙
Le réglage initial du fabriquant est « ».
7) (Display Sec)
Set how long the display is on.
(Adjustment range: 5-60 seconds)
REMARQUE
REMARQUE
NOTE

17
NOTE
˙
If the small square direction is skewed because it is not level, you can level the machine
by raising the screw in the opposite direction.
DANGER
NOTECAUTION
참 조 주 의참 고 주 의
CAUTION
˙
Be careful not to get your fingers caught between the base and the screw.
<Up> <Down>
9) (Level Test)
The current level is represented by a small square position. If it is not level, use the height adjustment
base screw located under the base to make it level.
REMARQUE
˙
Si le petit carré est incliné parce qu’il n’est pas de niveau, vous pouvez mettre l’appareil de niveau en
tournant la vis d'ajustement dans la direction opposée..
DANGER
NOTECAUTION
참 조 주 의참 고 주 의
ATTENTION
˙
Attention à ne pas coincer vos doigts entre la base de l’appareil et la vis d'ajustement.

18
E.
Maintenance precautions
DANGER
NOTECAUTION
참 조 주 의참 고 주 의
CAUTION
˙
Do not disassemble the product. Arbitrarily disassembling the operating unit can cause malfunctions,
breakdowns, or electrical shock. There are no serviceable parts inside. InBody Co., Ltd. is not responsible
for any damage caused by this action.
˙
For long-term storage, unplug the unit from the outlet.
˙
Never move the device while the power is on.
˙
Be careful not to let foreign substances such as food and drinks fall inside the equipment.
Please note that liquids or foreign objects can cause critical damage to the electronic components of
the BSM270/BSM270B unit.
˙
Do not subject the measuring part (head bar) to strong impact. The measurement may not be accurate.
˙
Gently wipe the external surface of the machine once a week with a soft cloth that is clean and lint-free.
˙
Dispose of packaging and other waste according to applicable laws and regulations.
˙
Never forcefully lower or push the measuring part (head bar) or operating part. It may cause a malfunction.
DANGER
NOTECAUTION
참 조 주 의참 고 주 의
ATTENTION
˙
Ne démontez pas l'appareil. Démonter l’appareil de façon arbitraire pourrait provoquer un mauvais
fonctionnement, des défaillances, ou des électrocutions. L’appareil ne contient aucune pièce pouvant être réparée
Le cas échéant, InBody Co., Ltée n’est en aucun cas responsable de tout dommage qui pourrait se produire.
˙
Débranchez l’appareil lors d’un entreposage prolongé.
˙
Ne déplacez jamais l’appareil lorsqu’il est en fonction.
˙
Veillez à ne pas laisser de substances étrangères, comme des aliments et des boissons, tomber dans l’appareil.
˙
Ne soumettez pas le dispositif de mesure (tête) à un impact violent. La mesure pourrait être ne pas être précise.
˙
Une fois par semaine, essuyez doucement la surface extérieure de l’appareil avec un linge doux, propre, et
non pelucheux.
˙
Veuillez disposer des emballages et autres déchets conformément à la réglementation locale en vigueur.
˙
Ne jamais abaisser ou pousser avec force le dispositif de mesure (tête) ou la partie fonctionnelle. Cela
pourrait provoquer un mauvais fonctionnement.

19
II. Measurement
A. Precautions before measurement
B. Measurement method
To change the measurement mode setting, refer to 'I. Installation, D. Settings, 2. Set Up, 1)
and 6) .
1. Measure weight and height at the same time, and check BMI
When the subject is on the base, the weight appears on the display screen. Once the weight value
is stable, the signal sounds and the unit completes the weight measurement. Then, the height is measured.
If it is set to ‘ (automatic measurement)’ in the preferences, the height is automatically measured.
If it is set to ‘ (manual measurement)’, press the ‘Enter’ button to start the height measurement.
2. Measure weight only
When the subject is on the base, the weight appears on the display screen. Once the weight value
is stable, the signal sounds and the unit completes the weight measurements.
DANGER
NOTECAUTION
참 조 주 의참 고 주 의
CAUTION
˙
Be careful not to get your fingers caught between the measuring part and the stand.
˙
Children or people with reduced mobility can be tested with the help of a manager or assistant.
˙
If the equipment shakes, use the leveling screw to keep it level.
<When Bluetooth communication is
not in use>
<When Bluetooth communication is
in use>
<When Bluetooth communication is
not in use>
<When Bluetooth communication is
in use>
DANGER
NOTECAUTION
참 조 주 의참 고 주 의
ATTENTION
˙
Attention à ne pas coincer vos doigts entre le dispositif de mesure et le support.
˙
Les enfants et les personnes à mobilité réduite peuvent utiliser l'appareil seulement avec l’aide d’un
responsable ou d’un assistant.
˙
Si l’appareil semble instable, veuillez utiliser la vis d'ajustement à cet effet pour le garder de niveau.
여기에 텍스트 입력

20
3. Measure height only
Height measurement methods include ' (automatic measurement)' and ' (manual
measurement)'. If the Preferences are set to ‘ (automatic measurement)’, the height
measurement will start automatically. If set to ' (manual measurement)‘, press the 'Enter' button
to start the height measurement.
* The BSM270B unit can be connected to an InBody unit using built-in Bluetooth communication.
The connection method can be found in the applicable InBody User's Manual.
<When Bluetooth communication
is not in use>
<When Bluetooth communication
is in use>
This manual suits for next models
1
Table of contents
Languages:
Other inbody Measuring Instrument manuals
inbody
inbody BSM 370 User manual

inbody
inbody PUSH User manual

inbody
inbody InBody270 User manual

inbody
inbody InBody370S User manual

inbody
inbody H30NWi User manual
inbody
inbody S10 User manual

inbody
inbody 270 User manual

inbody
inbody 230 User manual
inbody
inbody 720 User manual

inbody
inbody InBody970 User manual