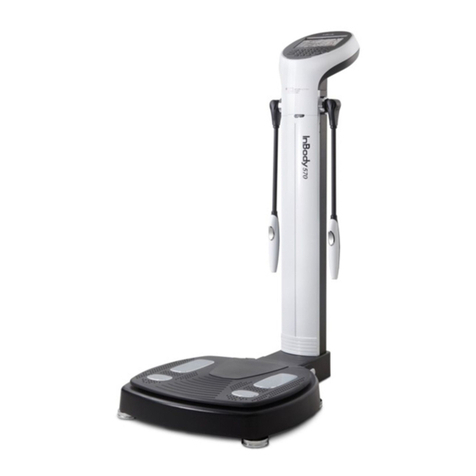
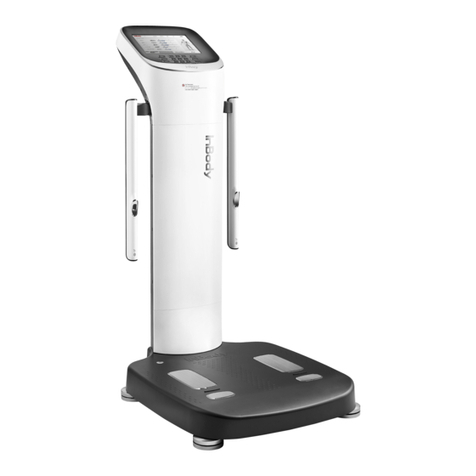
inbody InBody970 User manual

English
Nederlands
Deutsch
Français
Italiano
Español
3
41
81
121
161
201
Language Contents
©2021 InBody Co., Ltd. All rights reserved. IM-EU-C7-A-211025


User's Manual
InBody970 User's Manual for Measurement Guide and Setup
Thank you for purchasing the InBody970. This user's manual describes all the features of the InBody970.
Please read before use and keep it in a safe place. By following properly these instructions, you will be able to
use the InBody970 more safely and effectively.

Please note the important information below before reading this manual.
Failure to comply with safety warnings and regulations can cause serious injury or death.
Warning
Failure to comply with safety cautions and regulations can cause injury or property damage.
Caution
InBody Co., Ltd. [HEAD OFFICE]
625, InBody Bldg., Eonju-ro, Gangnam-gu, Seoul 06106 République de Corée
TEL: +82-2-501-3939 FAX: +82-2-578-5669 Website: inbody.com E-mail: info@inbody.com
InBody Co., Ltd. [MANUFACTURER]
15, Heugam-gil, Ipjang-myeon, Seobuk-gu, Cheonan-si, Chungcheongnam-do 31025 Republic of Korea
TEL: +82-41-581-3003 FAX: +82-41-581-3103 Website: inbody.com E-mail: info@inbody.com
©2021 InBody Co., Ltd. All rights reserved.
Reproduction, adaptation, or translation of this manual is prohibited without prior written consent from InBody Co., Ltd.
under the copyright laws. This manual may be printed incorrectly and subject to change without notice. InBody Co., Ltd.
shall not be liable for any errors, incidental, or consequential damages that occurred by not complying with the
content of the User᾽s Manual.
Visit our website (inbody.com) to view and download additional information about the InBody970. InBody Co., Ltd. reserves
the right to modify the appearance, specifications, etc. of this product to improve its quality, without prior notice.
Representative & Sponsor Information
InBody Europe B.V.
Gyroscoopweg 122, 1042 AZ, Amsterdam, The Netherlands
TEL: +31-20-238-6080 FAX: +31-6-5734-1858 Website: nl.inbody.com E-mail: info.eu@inbody.com
Australian Sponsor. [AUSTRALIA]
Emergo AUSTRALIA. Level 20, Tower II, Darling Park, 201 Sussex Street, Sydney, NSW 2000, AUSTRALIA
Customer Service Information
InBody USA [USA]
13850 Cerritos Corporate Dr. Unit C Cerritos, CA 90703 USA
TEL: +1-323-932-6503 FAX: +1-323-952-5009 Website: inbodyusa.com E-mail: info.us@inbody.com
InBody Japan [JAPAN]
Tani Bldg., 1-28-6, Kameido, Koto-ku, Tokyo 136-0071 Japan
TEL: +81-3-5875-5780 FAX: +81-3-5875-5781 Website: inbody.co.jp E-mail: inbody@inbody.co.jp
InBody China [CHINA]
904, XingDiPlaza, No.1698 YiShanRoad, Shanghai 201103 China
TEL: +86-21-64439705
FAX: +86-21-64439706
Website: inbodychina.com
E-mail: [email protected]
InBody Asia [ASIA]
Unit 3A-11, Oval Damansara, 685 Jalan Damansara Kuala Lumpur, WP KL 60000 Malaysia
InBody India [INDIA]
57/57 A,1st Floor, Raj Industrial Complex, Military Road, Marol, Andheri (East). Mumbai- 400059, Maharashtra, India
TEL : +91-22-6223-1911 Website: inbody.in E-mail: india@inbody.com

I. InBody Installation
A. Product Components
B. Installation Environment
C. Installation Instructions
D. Initial Setting
E. Connecting External device
F. Precautions for Maintenance
II. InBody Test
A. Precautions for Measurement
B. Test Instructions
C. Test Posture
III. Transportation and Storage
A. Cautions during Transportation
B. Repacking Instructions
C. Transportation and Storage Environment
IV.
Frequently Asked Qusetions (FAQ)
A. Regarding the Equipment
B. Regarding the Test
V. Others
A. Exterior and Functions
B. Safety Information
C. Product Classication
D. Specications
E. Functional Specications
F. Other Specications
4
5
5
9
13
20
21
22
25
26
26
27
28
30
31
34
35
35
37
38
User’s Manual Contents

4 5
I. InBody Installation
A. Product Components
InBody970 consists of the following components. Make sure all of the following components are present.
* Please check if the InBody970 has any damage prior to installation.
❶InBody970
❷Power Adapter
❸Power Cable
❹User's Manual
❺Hinge Cover
Hand Electrode
Input Button
Upper Section
Footplate Section
Foot Electrode
❶
❺
970
사용자매뉴얼
970
사용자매뉴얼
❷
❸
❹

4 5
EN
B. Installation Environment
Check the environment before installing the InBody970. This device is suitable for indoor use.
If installing this device outdoors, the following requirements must be fullled.
C. Installation Instructions
1. Open the InBody970 packing box and remove the packaging pad. Take the InBody970 out of the packing box.
* Refer to the figure below when transporting InBody970.
* Do not transport InBody970 by holding the head.
• When transporting the device, do not grab upper section (LCD) or hand electrode connection area.
• For repackaging InBody970 at a later time, the supplied packing materials must be kept. Other wastes should be disposed
according to relevant local laws and regulations.
• Be careful not to get your hands or feet caught by the packing box.
• Be careful for children not to enter the packing box.
• Do not put protective packaging vinyl on your face.
Caution
BoxCap
PackagingPad
ProtectivePackagingVinyl
I. InBody Installation
A. Product Components
InBody970 consists of the following components. Make sure all of the following components are present.
* Please check if the InBody970 has any damage prior to installation.
❶InBody970
❷Power Adapter
❸Power Cable
❹User's Manual
❺Hinge Cover
Temperature 10 ~ 40°C (50 ~ 104°F)
Relative humidity 30 ~ 75% RH
Atmospheric pressure 70 ~ 106kPa

6 7
• Using InBody970 in a dry environment or on a carpet may result in static electricity and damage to the device.
Use an antistatic mat if you need to install in an environment with static device.
• Install the InBody970 on the floor that is flat and vibration-free. If the equipment is installed where the floor is not flat, it may
topple during a test or the test results may be inaccurate.
• Do not clean the foot electrode and the hand electrode with detergent. If liquid cleaner flows into InBody970, it may cause
corrosion and malfunction. For cleaning the InBody970, use an InBody Tissue (wet tissue).
Caution
•Be careful not to get your hands hurt when handling the foot supporter adjustment screw.
Caution
2. Raise the InBody970 upper section to the end and then remove the protective packaging vinyl.
Remove the protective packaging material placed over the footplate.
3. When assembling the hinge cover, push it slightly in the vertical direction so that the spring ball is inserted in the stand end, and
push the hinge cover into the direction of the arrow.
*If the hinge cover is pressed strongly after the spring is inserted fully, or the stand is lowered with it attached, it may cause scratches.
*Be careful not to get your ngers caught when assembling the hinge.
4. Adjust the foot supporters to center the bubble in the level indicator and to level the device for accurate weight
measurement.
*For accurate weight measurement, the device should be leveled.
Protective
Packaging Material
Protective
Packaging Vinyl
FootSupporterAdjustmentScrew
LevelStatus(O) LevelStatus(X)
LevelIndicator
Spring Ball
❶
❷

6 7
EN
5. Connect the power adapter ❷to the power inlet on the rear of InBody970 ❶. Connect the power cable ❸to the connected
power adapter ❷. Connect the plug of the power cable ❸to a 3-terminal outlet with a ground terminal.
*The InBody970 can be connected to optional devices such as stadiometer, blood pressure monitor, and Yscope and PC program, LookinBody120.
Please refer to "E.Connecting Compatible Device" in "I.InBody Installation" in this User's Manual.
Warning
Power Inlet
Terminal Outlet
❸
❷
❶
Ground Terminal
•
Do not pull the power cord violently.
•
Do not plug in or pull out the power cord with wet hands. There is a risk of an electric shock.
•
Always use an outlet connected to the rated power (AC 100 - 240 V). Using other power rated outlets may result
in fire or malfunction.
•
When using a power surge protector, make sure that the outlet or the extension cable has adequate power capacity.
•
Do not disassemble or modify the device including internal parts without written consent from the
manufacturer. This may cause electric shock or injury, product malfunction, inaccurate results, and will void the
manufacturer’s warranty.
•
Do not directly contact the InBody970 with any other electronic devices when the InBody970 is on.
This may result in an electric shock.
•
If you are not using the InBody970 for a long time, unplug the power code.

8 9
• The device may get damaged or malfunctioned due to the electric if plugging into an ungrounded outlet.
Or the test results may be inaccurate.
• If InBody970 is subjected to electrical interference, the test results may be inaccurate. Do not install InBody970 in close
proximity with fluorescent lights, equipment with a large AC motor such as treadmills, vibrating platform refrigerators,
air conditioners, compressors, etc., high-frequency heat treatment devices, and heating devices that cause electrical
interference. Unplug and plug them into different power outlets when InBody970 and a device that causes electrical
interference are connected to the same power outlet.
• If you are connecting the InBody970 to other device then turn on the other device first.
On the contrary, turn off the power of InBody970 first, and then turn off the power of the other device when turning off
the power. This can minimize the electric shock to the InBody970.
• Use the adapter provided by InBody. The InBody970 may malfunction when using other adapters.
• If you are operating the device in a place where the altitude is 2,000m or higher, the weight measurement may be
affected.
• Do not use InBody970 near heat sources such as heating appliances. It may cause deformation, breakdown or fire by heat.
• Use InBody970 in a location where it is not exposed to direct sunlight. It may cause discoloration or damage of
device.
• Be careful not to pull the cables connected to the device. Otherwise, it may cause a weight measurement
error.
Caution
6. Press the power switch to turn it on.
Power Switch

8 9
EN
D. Initial Setup
1. The InBody970 automatically starts booting when it is turned on. While booting, it performs a self weight calibration.
(While booting (about 5 minutes), make sure there is nothing on top of the footplate. Please do not stand on the footplate, or
place objects on the footplate.)
2. Press the [Administrator Menu] on the test standby screen.
3. Enter the administrator password to set the password. This screen will appear only once for initial password setup.
*Be careful not to forget the password you set. If you have forgotten your password, please contact InBody Customer Service.
4. You will see ‘Setup' and ‘FAQ’ when you enter Administrator Menu.
Administrator Menu Button
Setup FAQ

10 11
1) Setup: Congure settings and manage data according to the test environment.
01. Date/Date Format/Time/Units/Password/Volume/Country/Language
: This option allows changing the basic settings of the InBody970.
02. Self Mode/Professional Mode
•Self Mode: The subject takes the InBody Test by entering only his/her height.
Throughout the test, instructions and the InBody Information will be shown on the screen.
•Professional Mode: An instructor is present and guides the subject throughout the InBody Test.
03. N/A
04. Cloud Service
: This is a service that can be used after agreeing to the privacy policy, and allows to send the results to
the cloud so that members can check and manage the InBody test results by themselves.
* Cloud service is a paid service.
05. Bypass Age/Gender
: The subject can bypass inputting their age or gender if the test environment is designed for testing
a specic age group or gender
06. View/Print/Delete Data
: This option allows checking, printing or deleting the test result stored in the InBody970 as a
membership number or mobile number.
07. Export Data as Excel
: This option allows copying the test result saved in the InBody970 to InBody USB as an Excel file
format.
08. Data Backup/Restore/Combine
: This option allows saving the test results to InBody USB for backup or restores the test results backed
up to the InBody970. If you are using multiple products, the data can be merged together.
09. Printer Setup
: This option allows setting the printer to connect to the InBody. Connect the printer to the InBody to
print your result sheet.
10. Result Sheet Types
: This option allows setting and selecting the Result Sheet to print among Result Sheets.
(Body Composition Result Sheet, Body Water Result Sheet, Evaluation Result Sheet, Research Result
Sheet, Comparison Result Sheet, Body Composition Result Sheet for Children, Visceral Fat Result
Sheet)
11. Automatic Printing Options
: This option allows setting the Result Sheet to be printed automatically after completing the test. You
can print up to two Result Sheets per each Result Sheet type at one time.
12. Paper Types
: Select the paper type for printed Result Sheet. Options include blank A4 paper or pre-printed InBody
Result Sheets provided by InBody.
13. Outputs/Interpretations for Result Sheet
: This option allows setting the parameters or explanations that appear on the right side of Body
Composition Result Sheet, Body Composition Result Sheet for Children, and Body Water Result Sheet.

10 11
EN
14. Result Sheet Custom Logo
: You can preview the logo printed on the upper right of the Result Sheet.
*Please contact Customer Service for help with uploading or modifying a logo.
15. Printing Alignment
: This option allows adjusting the position of the result to be printed on the Result Sheet.
16. Internet Options
: Connect the InBody970 to the Internet via Wi-Fi or LAN. Once the InBody970 is connected to the
Internet, the InBody970 test results can be sent to the cloud, or the LookinBody120 that can be
connected remotely.
17. Connecting Bluetooth
: This option allows setting up the Bluetooth so that the InBody970 can connect to LookinBody120,
or to other compatible devices such as BSM Stadiometer series, BPBIO Blood Pressure
Monitor series, or Yscope.
*For details to connect Bluetooth, please refer to "E Connecting Compatible Device" in "1. InBody Installation" in this User's Manual.
18. Manual/Automatic Weight
: Select whether to proceed testing by entering the subject's weight manually or by taking the
weight measurement automatically.
19. Adjust Weight
: Adjust measured weight by a xed value on the InBody. (Example: Workout clothes at the gym are
approximately 0.2kg; most people are assumed to be wearing workout clothes, so the instructor
may adjust the set value to -0.2kg.)
20. Normal Range
: This option allows setting the normal range of BMI, Percent Body Fat, and Waist-Hip Ratio.
*The ideal value of BMI may also be set.
21. N/A
22. Standard Child Growth Curve
: Set the type of standard child growth curve to use on the Body Composition Result Sheet for Children.
23. Touchscreen Alignment
: This option allows calibrating the accuracy of the touch screen.
24. Customer Service Information
: Save the Customer Service contact information. Please refer to the Customer Service information
if you have any inquiries regarding the InBody Test, or problems that cannot be resolved through the
‘FAQ’ menu.
25. Auto-Lock
: This option allows setting the time before the screen is locked and the corresponding password to
restrict using the InBody970.
26. Etc. Function Setup
: Set whether to use the ngerprint recognition function or the InBodyBAND recognition function.

12 13
2) FAQ: See additional information on how to use the InBody. Refer to FAQ checklist when there are problems
that occur while using the the InBody.
01. Customer Service Information
: This shows the information saved in the "Setup: 24. Customer Service Information". so that you can
use it when you have an inquiry about InBody or a problem occurs.
02. Result sheet does not print.
: View the FAQ checklist when the Result Sheet does not print.
03. Weight is not being measured.
: View the FAQ checklist when weight is not being measured.
04. Weight measurement seems to be inaccurate.
: View the FAQ checklist when the weight measurement seems to be inaccurate.
05. The InBody Test has stopped.
: View the FAQ checklist when the InBody Test has stopped.
06. Test results seem to be inaccurate.
: View the FAQ checklist when the test results seem to be inaccurate.

12 13
EN
E. Connecting Compatible Device
To connect an compatible device to InBody970, check the communication method of the compatible device. There are two
ways of communication; wired connection such as USB or RS232C (9-pin serial terminal, Female), and wireless connection
(Bluetooth).
1. Wired connection
1) Printer
The Result Sheet can be printed if the printer is connected to InBody970.
* Please visit the following website to nd out the compatible printers for InBody970 : https://www.inbodyservice.com
❶Turn off InBody970.
* When InBody970 is already turned on, the printer might not properly connect.
❷Connect the USB cable supplied with the printer to the USB HOST printer terminal on the rear of InBody970.
Connect the other end of the USB cable to the USB connection terminal of the printer.
❸Turn on the printer.
❹Connect the printer according to the instructions on "09. Printer Setup" in Setup in Administrator Menu.
❺You can set the options related printing from "10.Results Sheet Types" to "15.Printing Alignment" in Setup in
Administrator Menu.
2) Stadiometer
The height values measured by the stadiometer are sent to InBody970 when it is connected to InBody970.
* Please make sure to connect only BSM Stadiometer series provided by InBody.
❶Turn off InBody970.
* When InBody970 is already turned on, the stadiometer might not properly connect.
❷Connect the serial cable supplied with the stadiometer to the Stadiometer 9-pin serial terminal on the rear of
InBody970. Connect the other end of the cable to the serial terminal of the stadiometer.
❸Turn on the stadiometer.
❹Turn on InBody970. When the stadiometer is connected, ( ) icon will be displayed in the upper left of the test
standby screen.
USB HOST
Printer Port
Stadiometer 9-pin
Serial Terminal

14 15
3) Blood Pressure Monitor
The blood pressure values measured by the blood pressure monitor are sent to InBody970 when it is connected to
InBody970.
* Please make sure to connect only the BPBIO Blood Pressure Monitor series provided by InBody.
* If you select the type of Result Sheet at "13.Outputs/Interpretations for Result Sheet" in Setup in Administrator Menu and then select
blood pressure in the sub options, then you can print the blood pressure value on the InBody Result Sheet.
❶Turn off InBody970.
* When InBody970 is already turned on, the blood pressure monitor might not properly connect.
❷Connect the serial cable supplied with the blood pressure monitor to the Blood Pressure Monitor 9-pin serial
terminal on the rear of InBody970. Connect the other end of the cable to the serial terminal of the blood
pressure monitor.
❸Turn on the blood pressure monitor.
❹Turn on InBody970. When the blood pressure monitor is connected, ( ) icon will be displayed in the upper
left of the test standby screen.
4) Barcode Reader
The ID will be inputted automatically if a barcode reader is connected to the InBody970.
* If barcode reader is not recognized, please contact InBody Customer Service.
❶Turn off InBody970.
* When InBody970 is already turned on, the barcode reader might not properly connect.
❷Connect the USB cable of the barcode reader to the USB HOST port on the rear of the InBody970.
❸Turn on InBody970. When the barcode reader is connected, ( ) icon will be displayed in the upper left of the test
standby screen.
USBHOST
PrinterPort
BloodPressureMonitor9-pin
SerialTerminal

14 15
EN
5) LookinBody
By connecting LookinBody to InBody970, you can manage your InBody data.
* If LookinBody is not recognized, please contact InBody Customer Service.
❶Turn off InBody970.
* When InBody970 is already turned on, LookinBody might not properly connect.
❷If the PC has a serial port, connect the serial cable provided with LookinBody to the PC 9-pin serial terminal on the
rear of the InBody970, and connect the other end of the serial cable to your PC.
If there is no serial port on your PC, you can connect a normal USB-AB type cable to the USB SLAVE port
on the rear of InBody970 instead, and connect the other end of the USB cable to the USB port of the PC.
❸Turn on InBody970. Then launch LookinBody installed on your PC and follow its instructions to connect to
InBody970.
USBSlavePCPort
PC9-pinSerialTerminal
• When you are connecting the cable to the device, be careful not to move or pull the device. It may cause a weight
measurement error.
• Avoid laying cables connecting to compatible devices where people frequently pass. This may cause individuals to trip
over or become injured.
• Do not connect compatible devices that are not specified from InBody to the InBody970. Otherwise, it may cause

malfunction.
Caution

16 17
2. Connecting Bluetooth
1) Press the [Administrator Menu] on the test standby screen.
2) Enter the password to enter the Administrator Menu.
3) Go to the "17. Connecting Bluetooth" in Setup.
4) If "O" is selected on "Connect via Bluetooth?", you can select "LookinBody" or "Compatible device". Then, please select the
"Compatible device" for device connection..
* While InBody970 and LookinBody120 are already connected via Bluetooth, and if you are trying to connect other compatible
devices via Bluetooth, the original connect between InBody970 and LookinBody120 will stop.
5) Turn on one of the InBody recommended compatible device and check the product name and serial number on the name
plate attached to the compatible device.
6) Choose the compatible device to be connected and then press [Next]
7) The compatible device's Bluetooth ID consists of “Product Name-Serial Number”, and select the Bluetooth ID of the
device to be paired and press [Connect]
*If the Bluetooth ID does not appear or the connection is not good, please contact InBody Customer Service.

16 17
EN
8) If the compatible device is paired properly, the Bluetooth ID of the device connected to the InBody970 will appear
as shown below.
9) Press [Exit] to return to the test standby screen, and the Bluetooth icon and the corresponding device icon will be
displayed on the upper left corner screen.
*The screen below shows that InBody970 was connected with Yscope, stadiometer, blood pressure monitor, and barcode reader (USB).

18 19
3. Connecting Internet
Once InBody970 is connected to the Internet, you can use it to connect the Cloud Services or LookinBody Web
* If the Cloud Service does not work or if LookinBody Web is not recognized, please contact InBody Customer Service.
1) Connecting LAN
❶Press the [Administrator Menu] on the test standby screen.
❷Enter the password to enter the Administrator Menu.
❸Go to "16. Internet Options" in Setup.
❹Press LAN and then press [Next]
* You may need to enter the IP address or DNS address manually depending on the service area. In this case, press the corresponding
button to use.
❺Connect the LAN cable to ( ) shape port on the rear of InBody970.
* LAN cable should be connected to a device terminal with internet service or to a connector on the wall.
❻You can connect to LookinBody Web or use the Cloud Service through LAN after completing internet connection.
Table of contents
Languages:
Other inbody Measuring Instrument manuals

inbody
inbody BSM 370 User manual

inbody
inbody S10 User manual

inbody
inbody 970 User manual

inbody
inbody InBody270 User manual

inbody
inbody 230 User manual

inbody
inbody 270 User manual

inbody
inbody BPBIO320 User manual

inbody
inbody InBody370S User manual

inbody
inbody BPBIO210 User manual

inbody
inbody PUSH User manual
Popular Measuring Instrument manuals by other brands

Dwyer Instruments
Dwyer Instruments EMMA user manual

Sigma Metalytics
Sigma Metalytics Precious Metal Verifier quick start guide

GHM
GHM DeltaOHM LPPYRA-Lite operating manual

York Survey Supply
York Survey Supply 354420 operating instructions

Schaller Messtechnik
Schaller Messtechnik Humimeter BM1 user manual

Sealey
Sealey VS602 instructions