manuals.online logo
Brands
  1. Home
  2. •
  3. Brands
  4. •
  5. Indiana Line
  6. •
  7. Speakers
  8. •
  9. Indiana Line Luna Bianca User manual

Indiana Line Luna Bianca User manual

MANUALE D’ISTRUZIONI - OWNER’S MANUAL - INSTRUKCJA OBSŁUGI
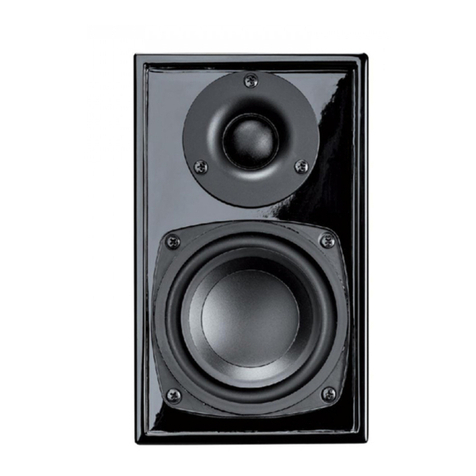
Luna Bianca
Luna Nera
Nie używaj głośników przez dłuższy czas przy
dużej mocy wyjściowej wzmacniacza. Pamiętaj,
że tylko nowoczesne wzmacniacze dobrej jakości
są wstanie odtworzyć dużą moc bliską mocy
nominalnej Twoich głośników, wpostaci niez-
niekształconego sygnału muzycznego.
Większość wzmacniaczy iamplitunerów A/V
generuje zniekształcenia przy dużej mocy
iwysokim poziomie głośności, zwłaszcza jeśli ich
moc wyjściowa jest niższa niż sugerowana moc
obsługiwana przez głośnik (przesterowanie). Może
to spowodować uszkodzenie głośników. Takie
uszkodzenie jest łatwe do wykrycia inie podlega
naprawie gwarancyjnej.
ATTENZIONE!!!
Non utilizzare altoparlanti ad alta potenza di
uscita dall’amplificatore per lungo tempo. Ricorda
che solo amplificatori da studio di riferimento
sono in grado di riprodurre un’elevata potenza
vicina alla potenza nominale dei tuoi altoparlanti
sotto forma di un segnale musicale non distorto.
La maggior parte degli amplificatori e dei ricevi-
tori A/V genera distorsione alivelli di potenza e
volume elevati, specialmente se la loro potenza
di uscita è inferiore aquella suggerita per il
diusore (clipping). Ciò potrebbe danneggiare gli
altoparlanti. Tali danni sono facilmente rilevabili
e non sono soggetti ariparazione in garanzia.
CAUTION!!!
Do not use loudspeakers at amplifier’s
high-power output for along time. Remember
that only reference studio amplifiers are able to
reproduce high power close to the nominal power
of your speakers, in the form of an undistorted
music signal. Most amplifiers and A/V receivers
generate distortion at high power and high-vo-
lume levels, especially if their power output is
lower than the suggested power handling of the
speaker (clipping). This may damage the loudspe-
akers. Such damage is easy to detect and is not
subject to warranty repair.
UWAGA!!!
3
Leggete attentamente
queste istruzioni prima
di installare idiusori: vi
aiuteranno ad ottenere le
migliori prestazioni.
IMPORTANTE
Please read carefully these
instructions before setting
up your loudspeakers: you
will be able to obtain the
best performances.
IMPORTANT
Przeczytaj uważnie po-
niższą instrukcję przed
skonfigurowaniem głoni-
kw. Będziesz mgł uzyska
najlepsze wyniki.
WAŻNE
POSIZIONAMENTO
La particolare forma dei diusori
Luna e la speciale staa in dota-
zione rendono agevole il fissaggio
aparete con diverse angolazioni.
Evitate di collocare idiusori
vicino afonti di calore, in zona
esposta apolvere oumidità.
Scegliendo la posizione, tenete
presente che le caratteristiche
acustiche del locale giocano un
ruolo importante nella riproduzio-
ne del suono:
• un ambiente con pochi mobili
e/ograndi superfici vetrate incre-
menta le alte frequenze;
• un ambiente con molti mobili
e/otappeti/ tendaggi assorbe le
alte frequenze;
• posizionando il diusore vicino
ad una parete oun angolo si
rinforzano le basse frequenze;
• non inserire idiusori all’interno
di nicchie, ciò potrebbe alterare la
risposta in frequenza; se ciò non
può essere evitato, posizionare la
parte anteriore del box fuori dalla
nicchia;
• idiusori Luna forniscono le
stesse prestazioni sia in posizione
verticale che orizzontale;
• quando idiusori sono po-
sizionati su una mensola osu
un mobile, è bene applicare sul
fondo del box igommini adesivi in
dotazione
POSITIONING
The shape of Luna loudspeakers
and the supplied special bracket
make easy the on-wall clamping
with several angulations.
Do not place the speakers near to
heat sources and away from dust
or moisture.
Choosing the position, remember
that the acoustical characteristics
of the listening room play an im-
portant role in the sound quality:
• aroom with not much furni-
ture and/or with large windows
increases the high frequencies;
• aroom with alot of furniture
and/or carpets and curtains de-
creases the high frequencies;
• placing the speaker close to
awall or acorner, the low fre-
quency level will increase;
• do not place the speaker in
aniche: the frequency response
can be changed; if this location
cannot be avoid, put the front
panel of the speaker outside the
niche;
• Luna speakers supply same
performances in both vertical and
horizontal positions;
• if the speakers are placed on
ashelf or furniture unit, the
supplied adhesive pads may be
attached to the underside of the
cabinet.
USTAWIENIE
Kształt głonikw Luna idostar-
czony specjalny uchwyt ułatwiają
mocowanie na cianie pod rżny-
mi kątami nachylenia.
Umie głoniki zdala od rdeł
ciepła, kurzu lub wilgoci.
Wybierając miejsce, należy pa-
mięta, że właciwoci akustyczne
pomieszczenia odsłuchowego
odgrywają ważną rolę wjakoci
dwięku:
• pomieszczenie zmałą ilocią me-
bli i/lub zdużymi oknami zwiększa
wysokie częstotliwoci;
• pokj zdużą ilocią mebli i/lub
dywanw izasłon obniża wysokie
częstotliwoci;
• umieszczenie głonika blisko
ciany lub rogu spowoduje wzrost
poziomu niskich częstotliwoci;
• nie ustawiaj głośników we
wnęce: może zmienić się od-
powiedź częstotliwościowa; jeśli
musisz ustawić głośniki we wnęce,
wysuń panele frontowe poza jej
obrys.
• Głoniki Luna zapewniają taką
samą wydajno wpozycji piono-
wej ipoziomej;
• jeli głoniki są umieszczone
na płce lub meblu, dostarczone
podkładki samoprzylepne mogą
by przymocowane do spodniej
strony obudowy.
4
COLLEGAMENTO
Verificate attentamente che
l’impedenza di carico non sia
inferiore aquella accettata
dall’amplificatore. Inoltre, è bene
che tutti icollegamenti siano fatti
con l’amplificatore spento.
Collegate idiusori all’amplifica-
tore con cavo di buona qualità.
La sezione del cavo deve essere
proporzionata alla lunghezza: 1,5
millimetri quadri sino asei metri,
a2,5 millimetri per lunghezze
superiori.
Rispettate le polarità: eventuali
errori di fase (inversione di polari-
tà) possono ridurre le prestazioni
del sistema audio. Abitualmente
il colore rosso e/oil segno “+”
indicano il positivo, il colore
nero e/oil segno “-” indicano il
negativo.
LINKING
Make sure that the load’s imped-
ance on each channel is not lower
then the accepted one from your
amplifier. As well, all connections
should be made with the amplifier
switched o.
Link the speakers by using good
quality cables. the cable cross
section have to be proportion-
ate to their length: 1,5 square
millimeters up to six metres, 2,5
millimeters for greater lengths.
Keep the polarities: in the event
of wrong phase (opposite polarity)
the performances of the audio
system can be reduced. Usually
the positive is marked with the
red color and/or the “+” sign, the
negative with the black and/or the
“-” sign.
PODŁĄCZANIE
Wszystkie podłączenia powinny
by wykonywane przy wyłączonym
wzmacniaczu. Sprawd, czy impe-
dancja obciążenia nie jest niższa
niż obsługiwana przez wzmacniacz.
Podłącz głoniki stosując przewo-
dy wysokiej jakoci; przekrj kabla
musi by proporcjonalny do dłu-
goci: 1,5 milimetra kwadratowego
do szeciu metrw; 2,5 milimetra
dla większych długoci.
Zwr uwagę na polaryzację:
wprzypadku niewłaciwej fazy
(przeciwna biegunowo) wydaj-
no systemu audio może zosta
zmniejszona. Zwykle dodatni jest
oznaczony kolorem czerwonym (+),
ujemny czarnym (-).
RODAGGIO
Il suono di tutti idiusori migliora
con il tempo: le prestazioni
ottimali si ottengono solo dopo
alcune decine di ore di ascolto.
RUNNING-IN
Time improves sound quality of all
speakers: the best performances
can be matched just ater several
hours of listening.
WYGRZEWANIE
Z czasem dwięk wszystkich
głonikw poprawia się: lepsze
brzmienie można odczu już po
kilku godzinach słuchania.
all’amplificatore
to the amplifier
do wzmacniacza
5
Con le viti in dotazione, fissate sul retro del box il bloc-
chetto in plastica. Con adeguati tasselli, fissate la staa
metallica alla parete. Inserite il blocchetto all’interno della
staa ed avvitate le relativi viti, scegliete la giusta posizio-
ne e serrate saldamente.
Using supplied screws, fix the plastic block to the back
side of the box. Using adequate fasteners, hang the metal
bracket to the wall. Put the block inside the bracket and
set the relating screws, than choose the right position and
lock them firmly.
Za pomocą dostarczonych rub przymocuj plastikowy
blok do tylnej strony obudowy. Za pomocą odpowiednich
łącznikw zawie metalowy wspornik na cianie. Umie
blok wuchwycie iustaw odpowiednie ruby, anastępnie
wybierz odpowiednią pozycję imocno je zablokuj.

Other manuals for Luna Bianca

2

This manual suits for next models

1

Other Indiana Line Speakers manuals

Indiana Line Arbour Series Quick start guide

Indiana Line

Indiana Line Arbour Series Quick start guide

Indiana Line DIVA User manual

Indiana Line

Indiana Line DIVA User manual

Indiana Line BASSO 840 User manual

Indiana Line

Indiana Line BASSO 840 User manual

Indiana Line TESI Q User manual

Indiana Line

Indiana Line TESI Q User manual

Indiana Line Diva 650 User manual

Indiana Line

Indiana Line Diva 650 User manual

Indiana Line TESI 241 User manual

Indiana Line

Indiana Line TESI 241 User manual

Indiana Line Zero User manual

Indiana Line

Indiana Line Zero User manual

Indiana Line Nota X User manual

Indiana Line

Indiana Line Nota X User manual

Indiana Line NANO User manual

Indiana Line

Indiana Line NANO User manual

Indiana Line DIVA 252 User manual

Indiana Line

Indiana Line DIVA 252 User manual

Indiana Line DIVA 252 User manual

Indiana Line

Indiana Line DIVA 252 User manual

Indiana Line TESI Q User manual

Indiana Line

Indiana Line TESI Q User manual

Indiana Line SQ 250 User manual

Indiana Line

Indiana Line SQ 250 User manual

Indiana Line Tesi Series User manual

Indiana Line

Indiana Line Tesi Series User manual

Indiana Line Tesi Series User manual

Indiana Line

Indiana Line Tesi Series User manual

Indiana Line Tesi Series User manual

Indiana Line

Indiana Line Tesi Series User manual

Indiana Line Luna Bianca User manual

Indiana Line

Indiana Line Luna Bianca User manual

Indiana Line DJ 808 User manual

Indiana Line

Indiana Line DJ 808 User manual

Indiana Line NANO User manual

Indiana Line

Indiana Line NANO User manual

Indiana Line DJ Series User manual

Indiana Line

Indiana Line DJ Series User manual

Indiana Line BASSO 880 User manual

Indiana Line

Indiana Line BASSO 880 User manual

Indiana Line TESI 240 User manual

Indiana Line

Indiana Line TESI 240 User manual

Indiana Line Nano User manual

Indiana Line

Indiana Line Nano User manual

Indiana Line TESI 241 User manual

Indiana Line

Indiana Line TESI 241 User manual

Popular Speakers manuals by other brands

Electro-Voice LR4S engineering data

Electro-Voice

Electro-Voice LR4S engineering data

Definitive Technology Sound Cylinder user guide

Definitive Technology

Definitive Technology Sound Cylinder user guide

AudioSource LS545 user manual

AudioSource

AudioSource LS545 user manual

Paso C402-T Instructions for use

Paso

Paso C402-T Instructions for use

Altec Lansing 416-8C LF SPEAKER manual

Altec Lansing

Altec Lansing 416-8C LF SPEAKER manual

Kenwood KFC-1072 Servise manual

Kenwood

Kenwood KFC-1072 Servise manual

Peavey ProSys 112 user guide

Peavey

Peavey ProSys 112 user guide

JBL Control Contractor 60 Series installation instructions

JBL

JBL Control Contractor 60 Series installation instructions

Aura STORM-8 owner's manual

Aura

Aura STORM-8 owner's manual

Oontz ANGLE 3 PLUS quick start guide

Oontz

Oontz ANGLE 3 PLUS quick start guide

Electro-Voice LR4A engineering data

Electro-Voice

Electro-Voice LR4A engineering data

Rave RK-650-ICA-B owner's manual

Rave

Rave RK-650-ICA-B owner's manual

Flux Reference Series installation manual

Flux

Flux Reference Series installation manual

Lanzar AQAWBS64BK installation manual

Lanzar

Lanzar AQAWBS64BK installation manual

DAPAudio DCS-6230 manual

DAPAudio

DAPAudio DCS-6230 manual

Aluratek ABS03F quick start guide

Aluratek

Aluratek ABS03F quick start guide

Kenwood KES-5A instruction manual

Kenwood

Kenwood KES-5A instruction manual

Sonance ORIGINAL SERIES instruction manual

Sonance

Sonance ORIGINAL SERIES instruction manual

manuals.online logo
manuals.online logoBrands
  • About & Mission
  • Contact us
  • Privacy Policy
  • Terms and Conditions

Copyright 2025 Manuals.Online. All Rights Reserved.