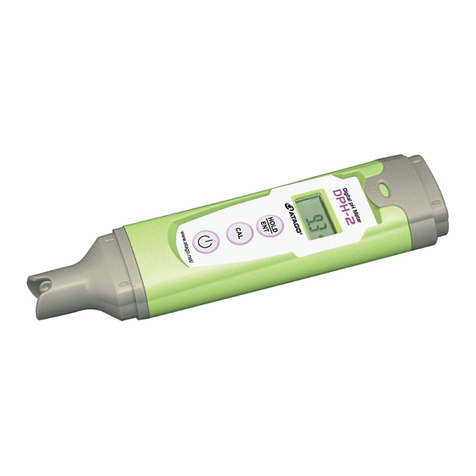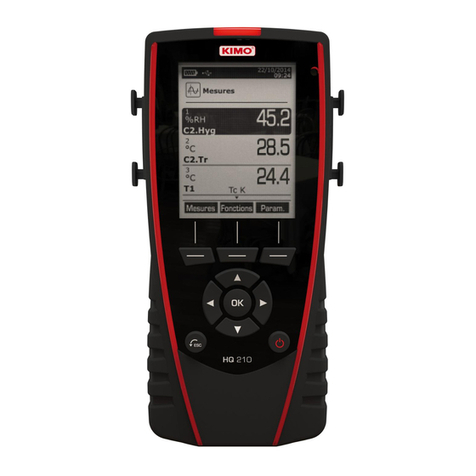
Pilot är en digital mätare som tagits fram för att göra exakta mätningar av vakuumnivåer vid
tömning av atmosfär i luftkonditionerings- och kylsystem ner till 1 mikron (0,01 mbar, 1 Pa).
I mätaren används INFICONs tillverkarspecifika “Pirani”-sensor, som är den mest exakta
vakuumsensorn i sin klass.
DRIFTSINSTRUKTIONER
1. Ta bort batteriluckan och sätt i 9-voltsbatteriet. En indikator i teckenfönstret kommer att
slås på när batteriet behöver bytas ut.
2. Anslut en härför avsedd eller ny laddningsslang till kylningsanslutningen på Pilot.
a. En tidigare använd slang kan innehålla olja som kan påverka sensorns prestanda.
b. Vanliga kylningsslangar avgasas (läcker), vilket kan göra det svårt att göra
mätningar under 0,33 mbar. Vi föreslår att en metallflätad slang används för att
noggrannheten skall bli större.
c. Vi rekommenderar att en slang som inte är längre än 1 m används. En längre
slang kan förorsaka att mätaren inte kan läsa av lägre vakuumnivåer på grund av
alltför stor avgasning.
3. Anslut slangens andra ände antingen direkt till systemets högre eller lägre sida för att
åstadkomma de mest exakta avläsningarna. Om du önskar kan du också ansluta slangen
till en av portarna på själva vakuumpumpen. Om du vill ansluta mätaren in-line till ett
förgreningsrör eller till vakuumpumpen, behöver du en särskild T-koppling med två
kvartstums hankopplingar och en kvartstums honkoppling som du kan köpa hos din
distributör.
Varning! Högre tryck än 10 bar kan skada sensorn. Se till att systemets kylmedel har
avlägsnats innan du ansluter Pilot.
4. Slå på Pilot genom att trycka på strömbrytaren (On/Off). Avläsningar som är större än
1500 visas med 3 siffror, följda av indikatorn X1000. En avläsning på till exempel
100,000 visas som 100 X1000.
5. Pilot stängs av automatiskt efter 15 minuters användning. När Pilot startas igen efter en
automatisk avstängning, kommer den sista avläsningen före avstängningen att blinka i
teckenfönstret i 5 sekunder innan de normala avläsningarna fortsätter.
OBS! Den sista avläsningen före avstängningen visas endast i 5 sekunder när enheten slås
på igen. Den kan inte hämtas efter denna tidpunkt.
VAL AV VAKUUMENHETER
Pilot kan ställas in så att den visar vakuum i enheterna mikron, mbar eller Pa. Slå på Pilot
genom att hålla nere strömbrytaren i 5 sekunder. Indikatorn för de aktiva enheterna blinkar.
Tryck lätt på strömbrytaren för att välja önskade enheter. Håll nere strömbrytaren i 5 sekunder
tills indikatorn lyser med fast sken.
RENGÖRING AV SENSORN
Om sensorn utsätts för alltför mycket olja kan driften av Pilot påverkas. Om du vill rengöra
sensorn häller du alkohol i hålet längst upp på anslutningen och skakar mätaren försiktigt. Slå
ut alkoholen och låt Pilot torka i minst 15 minuter med anslutningen riktad nedåt.
SPECIFIKATIONER
Användning ............... Inomhus eller utomhus Föroreningsgrad ............ 2
Luftfuktighet ........ Max 95 % RF ej kond. Överspänningskategori .... 2
Batteri: ........... Ett 9 volt alkaliskt Höjd över havet ....................... 2000 m
Batteriets anv.tid ...... 20 timmar Vikt ………………..0,22 kg
Driftstemperatur... 0°C till 50°C Förvaringstemperatur ... -10°C till +60°C
Tryckområde … atm till 0,01 mbar Precision ......................<2,66 mbar 5%
>2,66 mbar 10%
KONFORMITETSFÖRKLARING
Detta bekräftar att utrustningen, som konstruerats och tillverkats av INFICON Inc. 2
Technology Place, East Syracuse, NY 13057 USA, uppfyller väsentliga säkerhetskrav inom
EU och lanseras på marknaden i enlighet härmed. Utrustningen har konstruerats i enlighet med
lämpliga branschspecifika tekniktillämpningar avseende säkerhetsfrågor och äventyrar inte
säkerheten för människor, husdjur eller egendom när den installeras och underhålls på rätt sätt,
samt används i tillämpningar för vilka den är avsedd.
Beskrivning av utrustningen ..….. Pilot vakuummätare
Gällande regler....……................... 73/23/EEC enligt korrigeringar i 93/68/EEC
89/336/EEC enligt korrigeringar i 93/68 EEC
Gällande standarder ...….........… EN 61010-1: 1993
EN 61326: 2000-11, EMC Cl A, Immunitetskriterier B
CE-implementeringsdatum.…....... Januari 2002
Auktoriserad representant ............. Gary W. Lewis, Vice VD-Kvalitetsavdelningen
INFICON Inc.
Alla frågor som hänför sig till denna redogörelse eller till säkerheten hos produkter från
INFICON skall ställas skriftligt till kvalitetsavdelningen som finns på ovanstående adress
GARANTI
INFICON garanterar att din Pilot vakuummätare är fri från materialdefekter eller brister i
utförande under ett år från inköpsdatum. INFICON lämnar ingen garanti för detaljer som slits
vid normal användning, inklusive strömkällor och sensorer. INFICON lämnar ingen garanti
för utrustning som har utsatts för felaktig användning, oaktsamhet eller olyckshändelser, eller
som har reparerats eller modifierats av någon annan än INFICON.
Denna garanti är en ettårig utbytesgaranti. INFICON reparerar inte en enhet under
garantiperioden. Reparationer som inte omfattas av garantin utförs genom att du returnerar
enheten till en lokal distributör.
Har du frågor eller behöver hjälp? Besök oss på: www.inficon.com
Der Pilot ist ein digitales Messgerät zur Präzisionsmessung von Vakuumwerten während des
Abpumpens der Atmosphäre in Klima- und Kühlanlagen auf 1 Mikron (0,01 mbar, 1 Pa). Er
verwendet den INFICON-eigenen „Pirani“-Sensor - den genauesten Vakuumsensor in seiner Klasse.
BETRIEBSANLEITUNGEN
1. Nehmen Sie die Batterieabdeckung ab, und legen Sie die 9-Volt-Batterie ein. Wenn die
Batterie ausgetauscht werden muss, erscheint auf der Anzeige ein entsprechender Hinweis.
2. Verbinden Sie einen dedizierten oder neuen Füllschlauch mit dem konischen Kühlanschluss
am Pilot.
a. Ein zuvor verwendeter Schlauch kann Öl enthalten, das die Sensorleistung
beeinträchtigen könnte.
b. Bei normalen Kühlschläuchen kommt es zur Entgasung (Lecks), wodurch eine Messung
unter 0,33 mbar erschwert werden kann. Wir schlagen zur Erhöhung der Präzision die
Verwendung eines metallumklöppelten Schlauchs vor.
c. Wir empfehlen die Verwendung eines maximal 1 m langen Schlauchs. Mit einem
längeren Schlauch kann es vorkommen, dass das Messgerät auf Grund übermäßiger
Entgasung niedrigere Vakuumwerte nicht lesen kann.
3. Verbinden Sie das andere Ende des Schlauchs direkt mit der hohen oder niedrigen Seite der
Anlage, um äußerst präzise Werte zu erhalten. Sie können den Schlauch aber auch mit einem
der Anschlüsse auf der Vakuumpumpe selber anschließen. Um das Messgerät in einer Reihe
mit einem Verteilersatz oder der Vakuumpumpe anzuschließen, benötigen Sie einen
gesonderten ¼”-Außen-/¼”-Außen-/¼”-Innen-T-Anschluss, der über Ihren Distributor
erhältlich ist.
Achtung: Drücke über 10 Bar können den Sensor beschädigen. Achten Sie darauf, dass das
Kühlmittel entleert wurde, bevor der Pilot angeschlossen wird.
4. Schalten Sie den Pilot mit dem Ein-/Aus-Schalter ein. Werte über 1500 werden mit drei
Ziffern und der Anzeige X1000 angezeigt. Ein gemessener Wert von 100,000 wird beispielsweise
als 100 X1000 angezeigt.
5. Der Pilot wird 15 Minuten nach Einsatz automatisch ausgeschaltet. Wenn der Pilot nach dem
automatischen Abschalten wieder eingeschaltet wird, blinkt der letzte vor dem Abschalten
gemessene Wert fünf Sekunden lang auf der Anzeige, bevor wieder normale Werte angezeigt
werden.
Hinweis: Der vor dem Abschalten zuletzt gemessene Wert wird nur fünf Sekunden lang angezeigt,
wenn das Gerät wieder eingeschaltet wird. Danach kann der Wert nicht mehr abgerufen werden.
AUSWAHL DER VAKUUMEINHEITEN
Der Pilot kann so eingestellt werden, dass Vakuum in Mikron, mbar oder PA angezeigt wird. Schalten
Sie den Pilot ein, indem Sie den Netzschalter fünf Sekunden lang drücken. Die Anzeige für die
aktiven Einheiten blinkt. Drücken Sie den Netzschalter kurz, um die gewünschten Einheiten
auszuwählen. Halten Sie den Netzschalter fünf Sekunden lang gedrückt, bis die Einheitenanzeige
stetig leuchtet.
REINIGUNG DES SENSORS
Der Betrieb des Pilot kann beeinträchtigt werden, wenn dieser übermäßigem Öl ausgesetzt wird.
Gießen Sie zum Reinigen des Sensors Alkohol in die Öffnung an der Spitze des Anschlusses, und
schütteln Sie das Messgerät vorsichtig. Gießen Sie den Alkohol aus, und lassen Sie den Pilot
mindestens 15 Minuten lang mit dem Anschluss nach unten trocknen.
TECHNISCHE DATEN
Einsatz ........ Im Innern oder im Freien Verschmutzungsgrad .......... 2
Luftfeuchtigkeit ........ 95 % relative Luftfeuchtigkeit max., nicht kondensierend
Batterie: ........... Eine 9-Volt-Alkali-Batterie Überspannungskategorie ..... 2
Batterielebensdauer ...... 20 Stunden Höhe ..................... 2000 m
Betriebstemperatur... 0 °C bis 50 °C Gewicht ………… 0,22 kg
Druckbereich … Atmosphäre bis 0,01 mbar Lagertemperatur .. -10 °C bis +60 °C
Genauigkeit ...<2,66 mbar 5%, >2,66 mbar 10%
KONFORMITÄTSERKLÄRUNG
Hiermit wird bestätigt, dass dieses Gerät, das von INFICON Inc., 2 Technology Place, East Syracuse,
NY 13057, USA, entworfen wurde und hergestellt wird, den wesentlichen Sicherheitsanforderungen
der Europäischen Union entspricht und entsprechend auf dem Markt angeboten wird. Das Gerät
wurde in Übereinstimmung mit guten technischen Praktiken hinsichtlich Sicherheit gebaut, die in der
Europäischen Union in Kraft sind, und gefährdet die Sicherheit von Personen, Haustieren oder
Gegenständen nicht, wenn es ordnungsgemäß installiert und gewartet wird und in Anwendungen
eingesetzt wird, für die es vorgesehen ist.
Gerätebeschreibung ..…........... Vakuummeter Pilot
Zutreffende Richtlinien....…… 73/23/EEC in der Fassung von 93/68/EEC
89/336/EEC in der Fassung von 93/68 EEC
Zutreffende Normen ...……..... EN 61010-1: 1993
EN 61326: 2000-11, EMC Cl A, Störsicherheitskriterien B
CE-Implementierungsdatum .…. Januar 2002
Autorisierter Vertreter .. Gary W. Lewis, Vice President-Quality Assurance INFICON Inc.
Alle Fragen in Zusammenhang mit dieser Erklärung oder der Sicherheit von INFICON-Produkten
sind schriftlich an die Abteilung für Qualitätssicherung (Quality Assurance Department) unter der
obigen Adresse zu richten.
GARANTIE
INFICON garantiert, dass Ihr Vakuummeter Pilot für die Dauer eines Jahres ab Kaufdatum frei von
Material- oder Herstellungsfehlern ist. INFICON übernimmt keine Garantie für Teile, die bei
normaler Verwendung verschleißen, wie z. B. Batterien und Sensoren. INFICON übernimmt keine
Garantie für Geräte, die unsachgemäß oder fahrlässig verwendet wurden, einem Unfall ausgesetzt
waren oder von jemandem anders als INFICON repariert oder geändert wurden.
Diese Garantie ist eine Ersatzgarantie für ein Jahr. INFICON repariert während des
Garantiezeitraums kein Gerät. Reparaturen, die nicht unter die Garantie fallen, können veranlasst
werden, indem Sie das Gerät zum örtlichen Distributor bringen.
Haben Sie Fragen oder benötigen Sie Hilfe? Besuchen Sie unsere Website unter:
www.inficon.com
Le Pilot est un vacuomètre numérique conçu pour mesurer avec exactitude les niveaux de vide
(atmosphère à 1 micron [0,01 mbar, 1 Pa]) au cours de l’évacuation des installations
frigorifiques et de climatisation. Il utilise le capteur exclusif « Pirani » INFICON, qui est le
capteur de vide le plus précis de sa catégorie.
MODE D’EMPLOI
1. Retirez le couvercle d’accès à la pile et installez la pile de 9 volts. Un témoin s’allume
sur l’affichage lorsque la pile doit être remplacée.
2. Branchez un tuyau de charge spécial ou neuf sur le raccord de réfrigération situé sur le
Pilot.
a. Les tuyaux ayant été utilisés précédemment risquent de contenir de l’huile
pouvant nuire aux performances du capteur.
b. Les tuyaux de réfrigération normaux sont plus ou moins perméables (fuites)
rendant difficiles les mesures inférieures à 0,33 mbar. Nous suggérons d’utiliser
un tuyau métallique pour obtenir une meilleure précision.
c. Nous recommandons d’utiliser un tuyau d’une longueur maximum de 1 m. En
raison de leurs dégagements gazeux excessifs, les tuyaux plus longs empêchent le
vacuomètre de mesurer les niveaux inférieurs de vide.
3. Branchez l’autre extrémité du tuyau directement sur le côté supérieur ou inférieur de
l’installation pour obtenir les mesures les plus exactes. Il est parfois pratique de
brancher directement le tuyau sur l’un des orifices de la pompe à vide. Un raccord en T
(femelle ¼ pouce x mâle ¼ x mâle ¼ pouce) spécifique est nécessaire pour brancher le
vacuomètre en ligne avec un bypass ou la pompe à vide ; celui-ci peut être acheté par
l’intermédiaire de votre distributeur.
Avertissement : les pressions supérieures à 10 bars risquent d’endommager le capteur.
Veillez à ce que le fluide frigorigène du système ait été récupéré avant de brancher le Pilot.
4. Mettez le Pilot sous tension en appuyant sur le bouton On/Off (marche/arrêt). Les
mesures supérieures à 1500 sont affichées sous la forme de 3 chiffres suivis par
l’indicateur X1000. Par exemple, une mesure de 100,000 est affichée comme
suit : 100 X1000.
5. Le Pilot se met automatiquement hors tension après 15 minutes d’utilisation. Lorsque le
Pilot est redémarré après un arrêt automatique, la mesure affichée lors de l’arrêt
réapparaît en clignotant pendant 5 secondes avant que les mesures normales reprennent.
Remarque : la dernière mesure avant l’arrêt n’est affichée que pendant 5 secondes lors du
redémarrage. Elle ne peut pas être affichée à nouveau par la suite.
SÉLECTION DES UNITÉS DE VIDE
Le Pilot peut afficher les mesures en microns, mbars ou Pa. Mettez-le sous tension en
appuyant sur le bouton de marche/arrêt pendant 5 secondes. Le témoin des unités actives
clignote. Appuyez brièvement sur le bouton de marche/arrêt pour sélectionner les unités
désirées. Appuyez sur ce bouton et maintenez-le enfoncé pendant 5 secondes jusqu’à ce que le
témoin soit allumé en continu.
NETTOYAGE DU CAPTEUR
Les expositions excessives à de l’huile risquent de nuire au bon fonctionnement du capteur.
Pour le nettoyer, versez de l’alcool dans l’orifice situé au bout du raccord et secouez
doucement le vacuomètre. Retirez l’alcool et laissez le Pilot sécher pendant au moins
15 minutes en veillant à ce que le raccord soit dirigé vers le bas.
SPÉCIFICATIONS
Utilisation ............... intérieur ou extérieur Degré de pollution ............ 2
Humidité ....……... 95 % HR SC max. Catégorie de surtension ..... 2
Pile : ........………... une, alcaline de 9 V. Altitude ...............……....... 2000 m
Durée de la pile...... 20 heures Poids …………………..…..0,22 kg
Température de fonctionnement... 0 à 50°C Température de stockage .. -10 à +60°C
Gamme de pression … atm. à 0,01 mbar Précision…………….<2,66 mbar 5%
>2,66 mbar 10%
DÉCLARATION DE CONFORMITÉ
Le soussigné certifie que le présent équipement, conçu et fabriqué par INFICON Inc.,
2 Technology Place, East Syracuse, NY 13057 États-Unis, est conforme aux exigences
essentielles de l’Union Européenne en matière de sécurité et qu’il est commercialisé à ce titre.
Cet équipement a été construit conformément aux bonnes pratiques d’ingénierie appliquées au
sein de la Communauté en matière de sécurité et il ne met pas en danger la sécurité des
personnes, animaux domestiques ou propriétés lorsqu’il est installé et entretenu correctement
tout en étant utilisé dans les applications pour lesquelles il a été conçu.
Description de l’équipement ..….. Vacuomètre Pilot
Directives applicables....………… 73/23/CEE telle que modifiée par 93/68/CEE
89/336/CEE telle que modifiée par 93/68/CEE
Normes applicables ...…………….EN 61010-1: 1993
EN 61326: 2000-11, EMC Cl A, Critères d’immunité B
Date d’implantation CE.………….Janvier 2002
Représentant agréé ……………... Gary W. Lewis, Vice Président – Assurance Qualité,
INFICON Inc.
Toute question relative à cette déclaration ou à la sécurité des produits INFICON doit être
envoyée par écrit au service d’assurance qualité, à l’adresse susmentionnée.
GARANTIE
INFICON garantit votre jauge de vide Pilot contre tout vice de matériau ou de fabrication
pendant un an à compter de la date d’achat. INFICON ne garantit pas les éléments se
détériorant dans des conditions normales d’utilisation, dont les capteurs et cellules
d’alimentation. INFICON ne garantit aucun instrument ayant été soumis à une utilisation
inadaptée, une négligence, un accident ou encore ayant été réparé ou modifié par toute entité
autre que INFICON.
La présente garantie est une garantie de remplacement valide pendant un an. INFICON ne
réparera aucune unité durant la période de garantie. Les réparations peuvent être effectuées,
hors du cadre de la garantie, en rapportant l’unité à votre distributeur local.
Questions ou assistance ? Rendez-nous visite à : www.inficon.com
Il Pilot è un vacuometro digitale di precisione studiato per l’utilizzo sugli impianti di
climatizzazione e refrigerazione nelle fasi di evacuazione, dalla pressione atmosferiche fino a
1 micron (0,01 mbar, 1 Pa). Il vacuometro impiega il sensore brevettato INFICON “Pirani”, il
sensore di vuoto più preciso della sua classe.
ISTRUZIONI PER L’USO
1. Togliere il coperchio del vano portapila e inserire una pila da 9 volt. Quando la pila
deve essere sostituita si accende un indicatore sul display.
2. Collegare un flessibile di ricarica nuovo o dedicato all’attacco conico di refrigerazione
sul Pilot.
a. Un flessibile usato in precedenza potrebbe contenere olio; ciò può influire sui
risultati ottenuti con il sensore.
b. I normali flessibili di refrigerazione sono soggetti a fuoriuscite (perdite) di gas
che possono rendere difficile la misurazione di pressioni inferiori a 0,33 mbar. Si
suggerisce di adoperare un flessibile con treccia metallica per ottenere una
maggiore precisione.
c. Si suggerisce di usare un flessibile lungo non più di 1 m, altrimenti può risultare
impossibile misurare bassi livelli di vuoto a causa della fuoriuscita eccessiva di
gas.
3. Collegare l’altra estremità del flessibile direttamente al lato ad alta o bassa pressione
dell’impianto per ottenere letture della massima precisione. Per comodità si può anche
collegare il flessibile a uno degli attacchi sulla pompa del vuoto. Per collegare il
vacuometro in linea a un collettore o alla pompa del vuoto occorre un raccordo a T
maschio da ¼” - maschio da ¼” - femmina da ¼” separato,acquistabile presso il
distributore locale.
Avvertenza: le pressioni superiori a 10 bar possono danneggiare il sensore. Prima di
collegare il Pilot verificare che tutto il refrigerante dell’impianto sia stato recuperato.
4. Accendere il Pilot premendo il pulsante On/Off. Le letture superiori a 1500 vengono
visualizzate a 3 cifre seguite dall’indicazione X1000. Per esempio, una lettura di 100,000
si visualizza come 100 X1000.
5. Il Pilot si spegne automaticamente dopo 15 minuti d’uso. Quando lo si riavvia dopo lo
spegnimento automatico, l’ultima lettura prima dello spegnimento lampeggia sul display
per 5 secondi prima del ripristino delle normali letture.
Nota: l’ultima lettura prima dello spegnimento si visualizza solo per 5 secondi quando il
vacuometro viene riacceso. Dopo non può essere richiamata.
SELEZIONE DELLE UNITÀ DI MISURA DEL VUOTO
Il Pilot può essere impostato per visualizzare il vuoto in micron, mbar o Pa. Accendere il Pilot
tenendo premuto il pulsante di alimentazione per 5 secondi. L’indicatore delle unità di misura
attive lampeggia. Premere brevemente il pulsante di alimentazione per selezionare le unità
prescelte; tenerlo premuto per 5 secondi finché l’indicatore delle unità cessa di lampeggiare.
PULIZIA DEL SENSORE
L’esposizione del sensore a una quantità eccessiva di olio può influire sul funzionamento del
Pilot. Per pulire il sensore, versare alcool nel foro in cima all’attacco e scuotere delicatamente
il vacuometro. Svuotarlo dell’alcool e lasciarlo asciugare per almeno 15 minuti con il raccordo
rivolto verso il basso.
DATI TECNICI
Uso... ............... Interno o esterno Grado di inquinamento... 2
Umidità .......... 95% max. di umidità relativa senza condensa Categoria di sovratensione .. 2
Pila: ................ Una, alcalina, da 9 volt Altitudine ................... 2000 m
Durata della pila...... 20 ore Peso ………………..0,22 kg
Temperatura di funzionamento..... Da 0 a 50 °C Temperatura a magazzino..... Da -10 a +60 °C
Intervallo di pressioni… Da quella atmosferica a 0,01 mbar
Precisione........<2,66 mbar 5%, >2,66 mbar 10%
DICHIARAZIONE DI CONFORMITÀ
Si certifica che questo apparecchio, progettato e fabbricato dalla INFICON Inc., 2 Technology
Place, East Syracuse, NY 13057 USA, soddisfa i requisiti di sicurezza essenziali dell’Unione
Europea per la commercializzazione. L’apparecchio è stata costruito in conformità alle buone
prassi di ingegneria in materia di sicurezza in vigore nella Comunità Europea e non mette a
rischio l’incolumità di persone o animali domestici o la sicurezza delle cose se viene installato
e mantenuto in efficienza correttamente e se viene usato nelle applicazioni per le quali è stato
progettato.
Descrizione dell’apparecchio ..….. Vacuometro Pilot
Direttive pertinenti ....…............…73/23/CEE modificata dalla direttiva 93/68/CEE
89/336/CEE modificata dalla direttiva 93/68 CEE
Norme pertinenti ...…...............… EN 61010-1: 1993
EN 61326: 2000-11, EMC Cl A,
Criteri relativi all’immunità B
Data di implementazione CE .…... Gennaio 2002
Mandatario autorizzato ................. Gary W. Lewis, Vicepresidente - Assicurazione della
qualità presso INFICON Inc.
Qualsiasi richiesta di informazioni relativa alla presente dichiarazione o alla sicurezza dei
prodotti INFICON deve essere rivolta per iscritto al reparto di assicurazione della qualità
all’indirizzo sopra riportato
GARANZIA
INFICON garantisce che il vacuometro Pilot sarà esente da difetti di materiale e fabbricazione
per un anno a decorrere dalla data di acquisto. INFICON non garantisce le parti che si
deteriorano nel corso dell’uso normale, compresi sensori e celle di alimentazione. INFICON
non garantisce alcuno strumento che sia stato soggetto ad abuso, negligenza o incidente o che
sia stato riparato o modificato da personale non dipendente della INFICON.
Questa garanzia è una garanzia valevole per la sostituzione per un anno. INFICON non
riparerà un apparecchio durante il periodo di garanzia. Per eventuali riparazioni non in
garanzia, restituire l’apparecchio al distributore locale.
Per domande o richieste di assistenza, visitate il sito www.inficon.com


